At the conclusion of Part 2, we had panels mounted on the roof and wired up to the combiner box. We connected the 6 gauge wire to the combiner box and dropped it behind the fridge. The next phase of this project involved running the wire from behind the fridge to the forward compartment. In the forward compartment, I’ll wire it up to the solar charge controller. But first, we must get there.
I drilled a hole in the lower segment of fridge compartment side wall. The side wall there is plywood with a metal covering. I drilled through both the metal and the wood, enlarging the holes so it fit the 6 gauge wire. That hole places the wire in the utility space underneath the wardrobe. .jpg) In the utility space there is one side of a wire chase that runs side to side under the hallway down the middle of the Airstream. The other end of the wire chase comes up behind the electrical panel and underneath the pantry. I pulled the electrical panel out, which is pretty easy to do. I had done it several times before, most recently to upgrade the single stage converter to a multi-stage converter. Threading the wire through that wire chase was actually easier than I had imagined. After pushing the wire into one side, I was able to pull it out of the far end using my fingers. After I had a handle on both sides, I was able to thread the remaining wire pretty quickly.
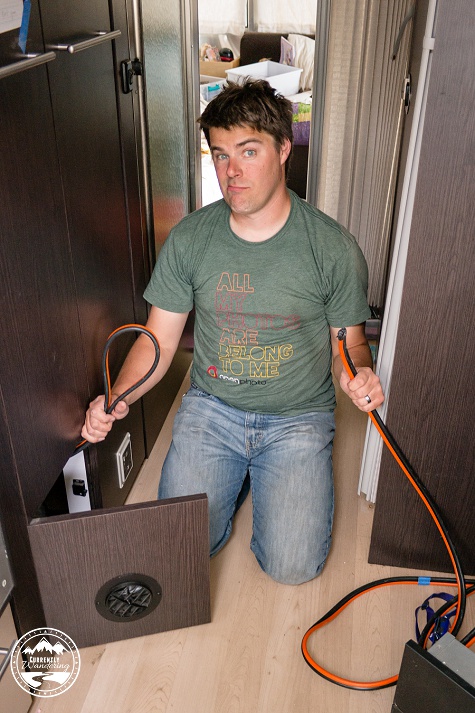
In the utility space there is one side of a wire chase that runs side to side under the hallway down the middle of the Airstream. The other end of the wire chase comes up behind the electrical panel and underneath the pantry. I pulled the electrical panel out, which is pretty easy to do. I had done it several times before, most recently to upgrade the single stage converter to a multi-stage converter. Threading the wire through that wire chase was actually easier than I had imagined. After pushing the wire into one side, I was able to pull it out of the far end using my fingers. After I had a handle on both sides, I was able to thread the remaining wire pretty quickly.

Me, looking both tired and surprised at how easy the wire chase was.
I paused my wire-running activities here to install the remote control panel for my Blue Sky solar charge controller. I measured and taped, and then drilled holes and used a small hand saw to cut the right hole for the controller in the upper kitchen cabinet. .jpg) We fed the wires through a new hole in the pantry panel, and down the back of the pantry to meet up with the 6 gauge wire from the roof. There were two wires connected to the remote control: the remote control wire for the charge controller, and the shunt wire that connects to the battery monitoring shunt that I would install. After joining the main 6 gauge solar wire, these wires followed the same route for the remainder of the trip.
We fed the wires through a new hole in the pantry panel, and down the back of the pantry to meet up with the 6 gauge wire from the roof. There were two wires connected to the remote control: the remote control wire for the charge controller, and the shunt wire that connects to the battery monitoring shunt that I would install. After joining the main 6 gauge solar wire, these wires followed the same route for the remainder of the trip.
I then ran the wire through the side wall and above the hot water heater under the bathroom sink, later securing them with zip ties to to the underside of the shelves. I then ran the wire behind the back of the bathroom cabinets, and through a hole I drilled in the bathroom wall and into the bedroom.
My wiring route at this point is very specific to my bedroom configuration. During the remodel last year, I removed the walk-around queen and installed two rv-twin sized beds along the side walls, and a toddler sized bed in the very end. This configuration means that the remainder of my wire run is hidden underneath one of the side beds..jpg)
If you have a walk around queen, the wire run would not be hidden. In this case, the best solution I have seen is to run the wires along the floor, have a metal wire cover made, and screw it down to cover the wires. This solution is very nice looking, and barely noticeable at all.
I should mention here that an alternative wire run is possible. I’ve seen several installations where they ran the wire out through the bottom of the Airstream, through some conduit, and back up into the forward compartment. I didn’t like this solution for several reasons, including durability and aesthetics, but it might be a viable option if none of the other wire route paths work.
To run the wire underneath the bed, I needed to cut a notch in the vertical supports of the bed. When my Father and I designed the beds, we designed them to be removable without full disassembly. I emptied the storage compartments, removed some trim, and pulled the bed outside to make the cuts..jpg)
In the corner underneath the kids’ bookcases between the side bed and the back bed is a bundle of wire. During the bed remodel, I had made a cover for that wire bundle, and the added 6 gauge wire fit in just fine. I ran the wire along the same path, which led it right into the wiring panel underneath the front bed compartment.
I put the side bed back into place, replaced the electrical panel, and sealed the wire path in the fridge compartment with some silicon.
The next step is the big electrical re-wire!


Alright, an update. This really is going to be good series. It is putting everything together, literally and figuratively, I have been reading about for my solar project.
Please, continue with all of the pictures. They’re great.
Glad we can be helpful!
[…] the solar mounted on top (part 1, part 2) and the wires run to the forward compartment (part 3), there was only one thing left to do. The next step in my project was to connect it all […]
[…] Power Install Part I – Panel Mounting Solar Install Part II – Self-Install Combiner Box Solar Power Install Part III – Self Install Running Wire Solar Install Part IV – The Wire Panel Adding Bigger Batteries Installing a 2000 Watt […]