Categories
Biking Driggs Outdoor Adventures Wyoming

Mountain Biking at Grand Targhee Resort with Kids

Its no secret we love to mountain bike. One of the reasons we love living in Teton Valley, Idaho is the plethora of outdoor activities and trails. Oh, and its not hot in the summer. That’s a huge plus.

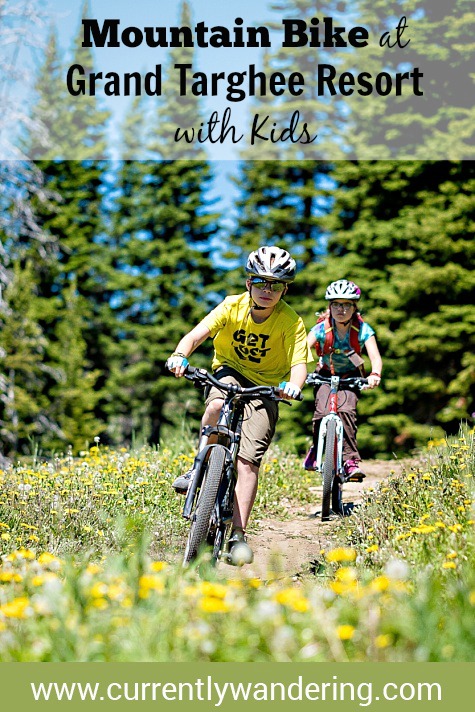
We spent the winter skiing at Grand Targhee Resort (and loved it!) so when I started talking to their marketing department about potential partnership opportunities we threw around the idea of bringing the family up during the summer to test out the new beginner mountain biking trails off their Shoshone lift.

Yes, please.

After a couple of days testing out the trails, Grand Targhee is now officially our favorite in the summer as well as the winter. Keep on reading to see the reasons why!

Beginner Lift Serviced Trails

For those that have never experienced mountain biking at a ski resort this could be an entirely new concept. Many resorts convert their facilities over to mountain biking trails in the summer and enable guests to take their bikes up to the top and then just ride down back to the base. Pretty sweet, right? All the fun of downhill without having to bust a lung climbing back up again.

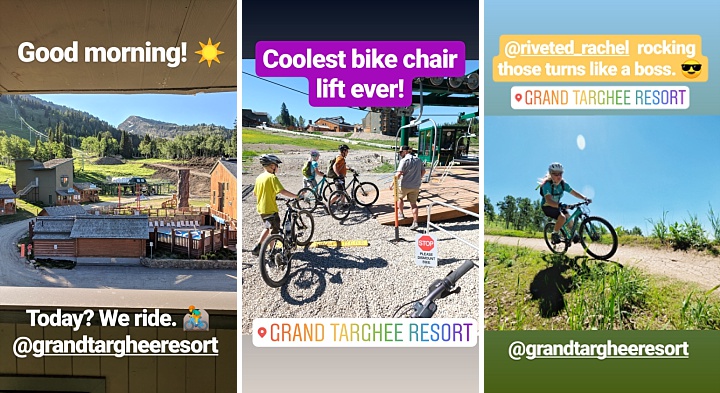
The lifts at Grand Targhee open for bikes at 10am as the staff needs to ride the trails early to make sure everything is clear and safe. This is great since I’m not a super morning person anyway. Plenty of time to sleep in, let the dew melt off the grass, and have the weather warm up just a smidge. Our kids were chomping at the bit to get going, so we were lined up ready to load at 10am sharp.

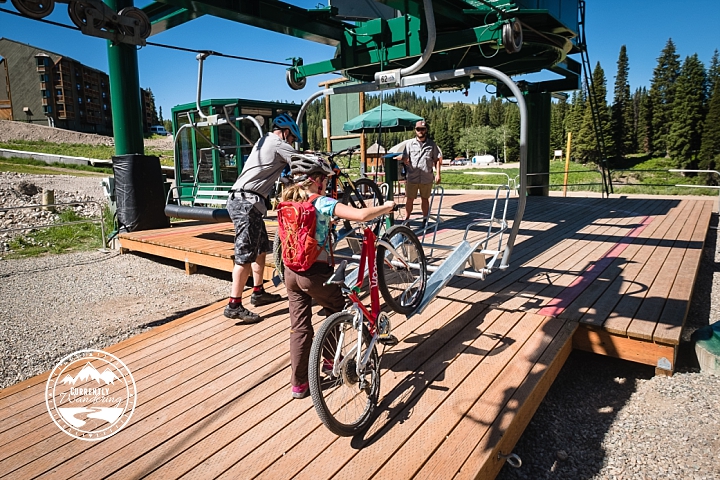
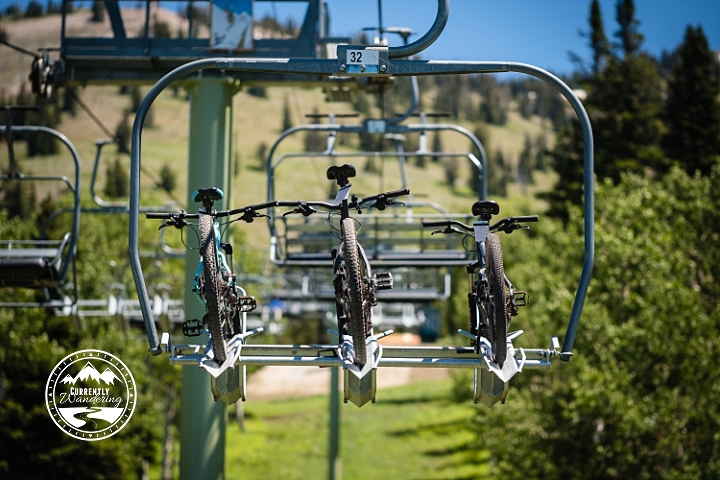
We dropped Cara off for her mountain biking lesson (more on that in a minute) and then Sam and I loaded up on the lift with the two older kids. The lift is slightly different in the summer as they have dedicated bike chairs – so you have to get your bike on and then you follow it around before being picked up by the next chair. The lift attendants were great, and totally helped my kids get their bikes on when needed.

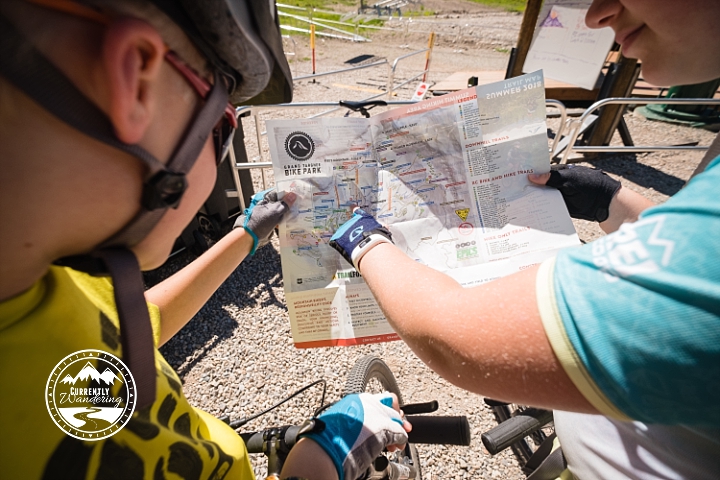
After a short 10 minute ride to the top we were ready to tackle the trails. We had picked out Bring it On Home as our first trail – the easiest green one down the mountain. It was fast, flowy, fun and my kids couldn’t wipe the grins off their faces.

We then spent the rest of the day alternating between riding, the swimming pool, riding, eating, and more riding.

The trails off Shoshone are great for beginners as they aren’t too technical. There are plenty of berms to practice cornering, while Chutes and Ladders has plenty of jumps for those looking for a challenge. The trails are smooth single track which helped our kids gain confidence along with speed.


Mountain Biking Lessons

I’ve talked quite a bit lately about our “divide and conquer” mode of operation when it comes to family mountain biking. Anything the older two kids can ride ends in tears for Cara, and anything she enjoys riding completely bores the others. Usually we’ll start together but then split as one adult rides faster with Rachel & Andrew, while the other lags behind with Cara.

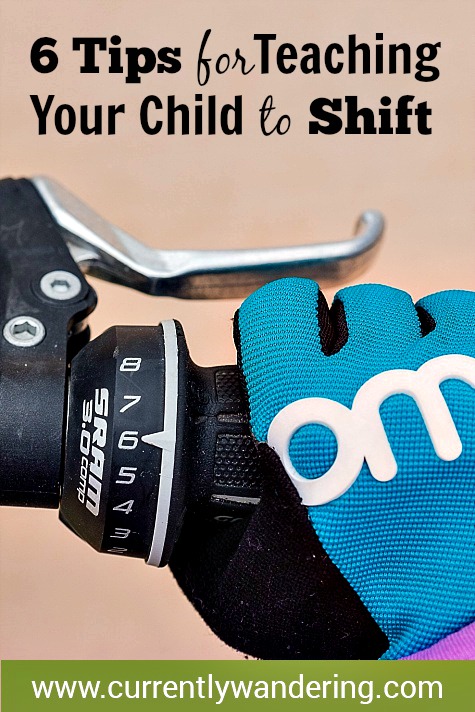
When we planned our trip up here, we decided that a lesson might be exactly what Cara needed to push to that next level. She struggles to take direction from us (Stop telling me when to shift, mom!), but as evidenced by skiing lessons, she’ll do anything for an instructor. Our Targhee contact scheduled a 1.5 hour intro to Targhee lesson first thing in the morning and we were set!

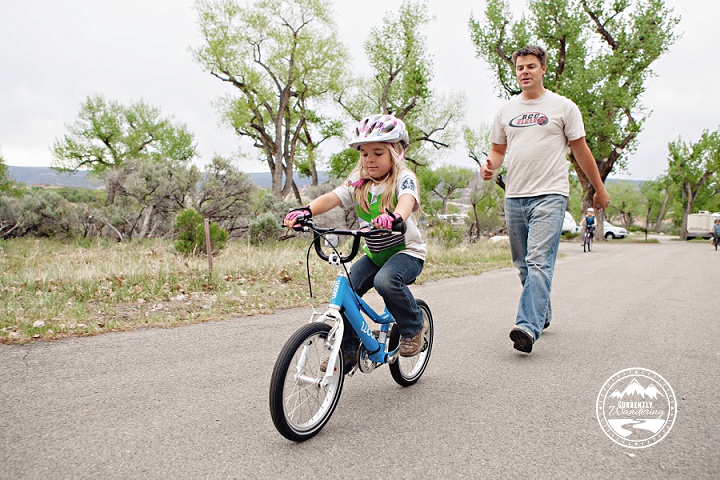
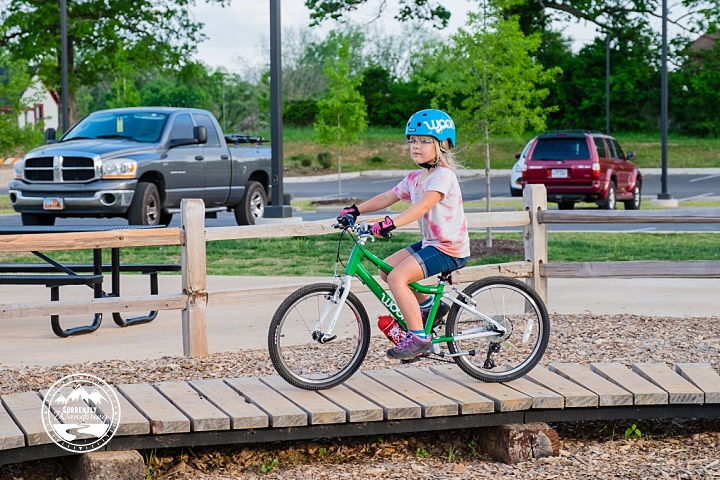
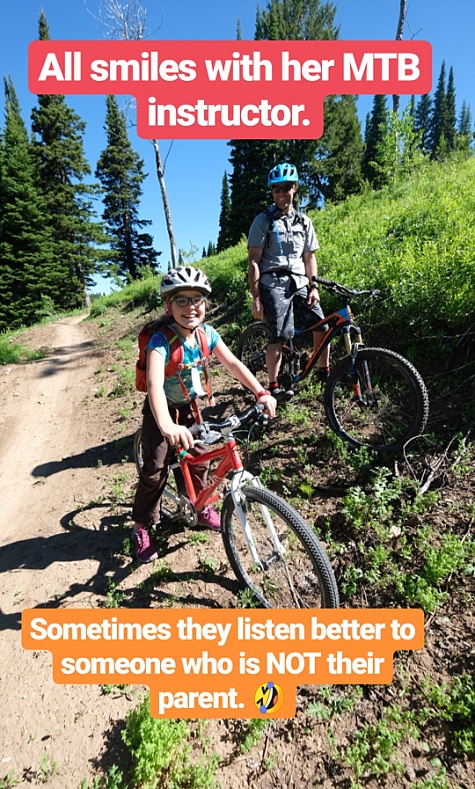
Cara was nervous to be by herself, but her instructor, Chris, immediately put her at ease. They started out in the parking lot going over basic skills, then moved to some of the easier cross country trails, and finally ended up on the lift practicing what she learned on the downhill.

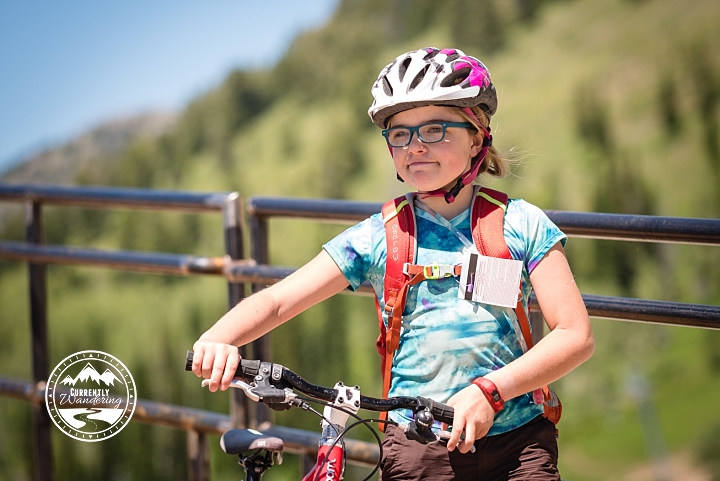
We met up with them in between runs and the girl was all smiles.

I followed behind the two of them for a bit to get a feel of how it was going, and listened as Chris called out “Ready position!” and “Get high on the berm” as they flew down the trail. Cara did awesome! She was full of confidence and couldn’t wait to show us all she had learned.

I feel like the mountain bike lessons at Targhee are affordable and a great way for kids (and adults!) to improve their skills. We’ve always been impressed with the instructors at the resort both in winter and a summer. They are patient, confident, and know how to work well with kids.

Targhee also offers a 3 hour lesson that I’ve got my eye on for next summer. You can do just a lesson or a combination of lesson, rental, and lift ticket. Plus, its a great way to help your kids improve (and be supervised – ahem) while you go out and tackle some of the bigger trails! Find out more information on their website here. 

Skills Park

New this year, Grand Targhee just added a small skills park to their trail network. While not expansive, its super fun and a great way to spin your tires at the end of a day. There’s a pump track around the outside, some plank walks in in the middle, a rock garden, and boulders to hop. Andrew had fun doing a few laps after dinner our last night there.

Cross Country Trails

In addition to the lift serviced downhill trails, Grand Targhee has miles of cross country trails that are free to ride. There are some easier ones west of the lodge (where Cara had part of her lesson), which Sam and Rachel did a lap or two on after some downhill riding.

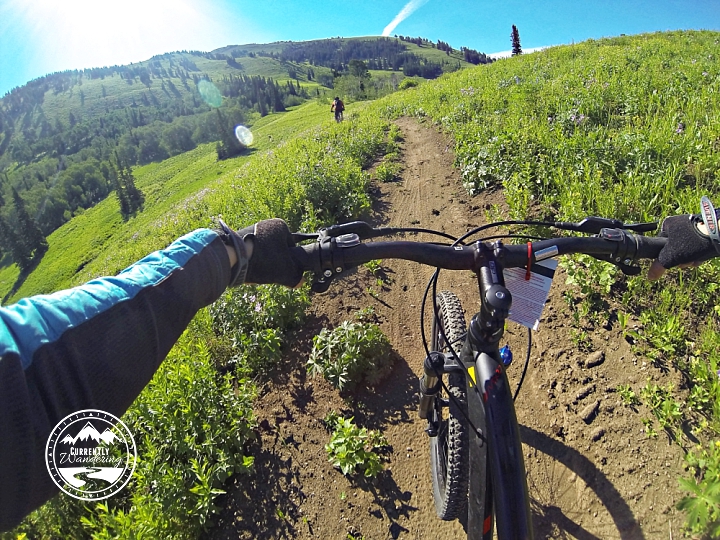
The rest of the cross country trails aren’t necessarily more technical (still pretty smooth) but have more elevation gain and loss. Sam and I had a biking date a few weeks earlier and rode out to Quakie Ridge. It was enough climbing to get my heart rate up with some flowy downhill and beautiful views mixed in.

Having both kinds of trails is great as they are different forms of exercise and use a variety of skills. We spent most of our time on the downhill trails since we had a lift ticket for the day, but living so close I can guarantee we’ll be back to tackle more of those trails with our kids.

We’ve been to a few other resorts that have downhill mountain biking (Steamboat Springs, CO, Sundance, UT, & Snowbird, UT) and really just love Grand Targhee – especially with kids. Having easier trails specifically designed for the beginner crowd is pretty unique and we felt we could enjoy the experience together as a family!

We are super grateful for Grand Targhee and their partnership with us! They provided the lift tickets, bike lesson, and accommodations but as always, all opinions are our own. We love the ‘Ghee!

Categories
Biking Hiking National Parks Utah WanderLog

Boondocking in Southern Utah, Hiking the Narrows & Mountain Biking

Southern Utah is one of my favorite places. Like ever. The red rocks are unreal and there are piles out of outdoor activities that could keep an sane person busy for a lifetime. Mountain biking runs a close competition to skiing as my favorite sport, so naturally as snow season wound down we started planning a spring trip to warmer, dryer climates.

To make re-entry in full travel a little easier, we decided to head right back to where we left off last spring: Hurricane, Utah. The camping is free, the trails are incredible, and if we get bored Zion National Park is a quick 30 minute drive. Not too shabby, right?

JEM Mountain Bike Trails

We were able to camp right along Sheep Bridge road (Campendium Link) in the middle of the JEM trail system. It was perfect for intermediate enthusiasts that we are. Enough uphill to give our lungs a work out, and some sweet rolling downhill to bring on the fun. Our oldest two kids had a blast, and we would switch up who rode with who. Andrew and I did a loop together up Dead Ringer to the top of the Mesa, Sam & Rachel took a spin, and Cara & and I had some one on one time on the easiest trail we could find. At one point Andrew said to me, “Mom, if we came here every year then I could see how much better I’m getting by the trails I ride.” Wise words, my boy, wise words.

For deets on the trails, we love the Trail Forks app (Apple, Google). I love the GPS dot that shows my location and its easy to plan a ride that loops back the way we want. My favorite loop was up Dead Ringer to More Cowbell, down JEM, down Goosebumps, and then back up Dead Ringer. Pretty sweet ride. Cara loved the little green loop we did on JEM from the Gould South parking lot.

Cool off in the Virgin River

Since the temps were flirting with the high 90’s (a little too hot for us actually!) we spent a great deal of time cooling off in the Virgin River. Our Airstream friends, the Ericksons, were camped inside Zion so one afternoon we drove in for a potluck and a swim.

Another evening we met up with Arika from Zion Adventure Photography (she took our photos back in December of 2016 and we LOVE them) and Shanti from Hike it Baby and their families for pizza and a dip in the secret spot with the swing. Totally fun meeting up with these ladies and the kids all had a blast swimming in the river. We ate at River Rock Roasting Company and I wish I could eat there everyday. We had an assortment of pizza, sandwiches, and salad and it was all delicious. Also ordered a cinnamon roll to go and secretly ate it with Sam after the kids were in bed so I didn’t have to share. 🙂

Hike the Narrows

We hiked a small portion of the Narrows back in 2015 when our kids were super little. Although we knew we didn’t have the gear (or the desire) to hike the entire thing this year either, we decided to hike up as far as we wanted and then turn around. We jumped on the shuttle around 3pm at the main Visitor Center and started hiking about 45 minutes later.

The water was cold, but not completely freezing, and we managed okay in just our Chaco sandals & swimsuits. The trail in from the shuttle stop is about a mile along a paved path, and then we hiked for about another mile through the water until we came to a swimming hole. The kids were brave and took turns jumping in, then we found a quiet spot to eat our picnic dinner and headed back.

Someday I think we’ll hike the distance (and rent dry suits!) but for now we just needed to cool off and this totally did the trick!

Relax

Most importantly we dove right back in to traveling life. There’s been some adjusting, but mostly I feel like we picked up right where we left off. The weather was a tad windy, but we did manage to have some good outside relax time while we were at it!

Categories
Biking Hawaii Hiking National Parks

5 Family Friendly Activities in Hawaii Volcanoes National Park

Our conversation about living in Hawaii went something like this:

Me: Okay, so Hawaii. If you kids could do anything you want while we are over there, what would it be?

All 3 Kids: See a volcano!

That settled it. We are huge National Park advocates and there are two in Hawaii – Haleakalā National Park on Maui, and Hawaii Volcanoes National Park on the Big Island. Since Hawaii Volcanoes has a currently active volcano, that hit the top of our list for this trip. We island hopped from Oahu for about a week an spent three days on the windward side of the island at the National Park.

  • When We Visited: Nov 24 – 26, 2017
  • Ages of Kids: 12, 10, 7

Where We Stayed

We had friends suggest staying in the park at the lodge, and I also looked into possibly camping or staying in one of the cabins in the park. Unfortunately by the time we nailed down our dates, there was no availability.

That actually turned out to be a good thing because we found the the most amazing AirBnb rental in the nearby town of Volcano. Only 15-20 minutes away from the entrance, it was the perfect home base for exploring the park. I loved that we weren’t camping in the rain (it rained a lot and was COLD), we had a full kitchen, a hammock, and a hot tub. Doesn’t get much better than that!

New to AirBnB? Use our link to sign up and get $40 of credit towards your first trip!

1. Visit the Kīlauea Caldera Overlook & Jaggar Museum at Night

We spent Friday the 24th driving over from Kona, and managed to stop by the Kīlauea Visitor Center on our way through to our rental. We talked with the rangers about hikes, picked up our Jr. Ranger Books and made plans to return in the evening to see the Caldera at night.

After dinner we drove back into the park and managed to snag one of the last parking spots at the Jaggar Museum. We could easily see the glow of the Kīlauea Caldera in the distance. The overlook has an amazing view, with plenty of information displays. Inside the museum the kids spent their time doing a photo scavenger hunt for their Jr. Ranger Books and learned all about Pele, the Hawaiian Goddess of Volcanoes.

It was cold – so definitely dress warm and bring layers! We never made it back to see the overlook during the day, but from photos I’ve seen the view during daylight is also quite spectacular.

2. Explore the Lava Tubes

We’ve visited multiple caves and lava tubes all over the country, but never in a forest jungle quite like this one. The lave tube trail is a short, 1/3 of mile hike and takes less than 20 minutes. In fact, we did it twice!

We easily tacked this on to our Kīlauea Iki Crater hike as we ascended out of the crater right at the entrance to the Lava Tubes. It was a great way to do both without having to move our car and try and get parking!

3. Hike Across a Crater

The Kīlauea Iki Trail was pretty spectacular! We knew we wanted a longer hike (more than just a 1/2 mile to an overlook) and this one came highly recommended by the ranger. What blew our minds was the change in geology from up on the rim to down in the crater.

We started at the trailhead along the Chain of Craters road in a lush jungle. Once we started the descent into the crater, the landscape quickly changed from tropical rain forest, to barren rock garden.

The trail across the crater felt like we could have been on the moon! The kids loved looking at all the cool rock formations, and we even found some of “Pele’s Hair” – fine threads of volcanic glass that are formed when a spray of lava droplets cools rapidly in the air.

Once across the bottom of the crater, we had to make the 400 ft hike back out and then it was a short walk along the rim back to our car.

  • Total Miles: 4
  • Time: 2-3 hours
  • Difficulty: Moderate to challenging – 400ft descent and ascent in and out of the crater. Trail is switch backed and you can just take your time.

4. Bike and Hike to See Surface Lava

Finding surface lava is a bit tricky. Sometimes the lava is pouring into the ocean (I’ve seen photos – so cool!) but other times its just slowly moving on the surface in different areas. Current conditions are available on the NPS Hawaii Volcanoes website, and you can also talk to a park ranger to find where the most recent lava flow is.

We drove out to the Lava Viewing Area (Google Maps) where there is a huge parking lot and a gazillion vendors that sell bikes and tours. We arrived around 3:30pm which was perfect as we wanted enough time to get out to the lava before it got dark – just check when your sunset time is (ours was about 5:45pm).  We spent about $65 for bikes for the 5 of us (2 adult bikes and 3 kid sized). Most rental companies included a headlamp (you’ll need it), a bottle of water, a bike lock and a fanny pack to put it all in.  We also saw vendors that had bike trailers for rent, and even ride along attachments for smaller kids. It can definitely be family friendly adventure!

We biked along the dirt/gravel road for 4 miles until we reached the National Park boundary. Here, everyone locks up their bikes and heads out on foot across the cooled igneous rock to find the good stuff. There were enough people out there we mostly just had to follow them towards the smoke. There are no trails, but the rock is uneven and in some places we were jumping across deep gaps. As we got closer, encouragement from others coming back was pretty awesome.

We crested a small hill and then in the distance we could see it – LAVA! Being up close to legit volcanic lava has been one of our favorite experiences to date. We found slow moving lava, but every once in awhile an entire shelf of rock would lift up and the molten stuff would just come pouring out. It was incredible. If you get too close I can imagine that your shoes would melt (we didn’t have that problem), and while it smelled bad, the stench was not overwhelming. There are no rangers out there, no guardrails, fences, or anything to protect you from doing something stupid. Just be aware that you are on you own. We saw at least 2 ambulances on their way out at the end of the night so injuries do happen, just be careful!

We stayed out there well past dark just waiting and watching and soaking it up. After a quick snack we turned on our headlamps and made the trek back to our bikes. The ride back was difficult. Cara was really tired, the road is NOT flat, and we had our share of tears and frustration over a bike that wouldn’t shift very well. She ended up walking most of the hills and then we’d ride as fast as we could downhill. We managed to get back close to the cut off time (all the bikes MUST be back on time).

Overall it was an amazing adventure! We’d do it again in heartbeat, but maybe just make sure all the bikes shifted a little easier. Dinner in Volcano afterwards was a definite treat!

5. Drive Chain of Craters Road

Sunday afternoon was a perfect time to drive the Chain of Craters Road. There are multiple pull offs to see varies craters, and the weather changed dramatically from up at the visitor center (lots of clouds & rain) down to the coast where we could see the sun! The road ends at the Hōlei Sea Arch which extends out into the ocean. Eventually it will collapse, but it was a beautiful view along the coast!

There’s plenty of other hiking trails, back country adventures, ranger led tours and activities we could have participate in, but overall we are happy with our time spent in the park. Seeing lava up close was definitely the highlight of our trip to the Big Island and we highly recommend it!

Categories
Arizona Biking WanderLog

Mountain Biking at McDowell Mountain Regional Park, Arizona

McDowell Mountain Regional Park as been on my “visit list” for at least 2 years. We even had reservations here two years ago, but it was too late in the spring and we cancelled in favor of higher elevation to escape the heat.

When we decided to spend winter 2017 in Arizona again, McDowell Mountain climbed immediately to the top of list. Originally we reserved 8 days thinking that would be long enough to explore the trails thoroughly. Then we actually arrived, and 8 days turned into 18. Even then we were all sad to leave, and are making plans to come back relatively soon.

Travel Dates: January 5 – 22, 2017

McDowell Mountain State Park is known for its trails. Specifically, its mountain biking trails. You can hike or ride horses on them as well, but the majority of users we’ve seen have been on bikes. They also have a competitive track and run races here on a regular basis.

Mountain biking in the desert is a completely different experience. We’ve biked in Utah, Minnesota, Florida, California and plenty of other states, but the Sonoran Desert is unique. Rolling, mildly sandy trails, Saguaro catcus, ocatillo, palo verde, and jagged mountains all make this landscape one of a kind. Throw in a few amazing Arizona sunsets (seriously they are not this good ANYWHERE else) and you can begin to understand our difficulty leaving.

The Campground

This campground fills up regularly. After our initial 8 day reservation, we spent a few days in the campground overflow (basically a parking lot), 2 days back in our original site, and then we managed to pick up a 5 day site that backed up to the playground. You can look online for sites, but once you are here you can avoid the reservation fee by just calling in or talking to the campground hosts in person at the nature center.

There is a 14 day stay limit in any one site, so even if you want to be here longer you’ll have to shuffle around. Sites are water/electric so unless you are camping solo and have large tanks, you’re going to need to take a trip to the dump station anyway.

Sites are level, spacious, and not too close together. They all have a picnic table (the sturdy stone kind), and a fire pit. We always find it amusing when the camp hosts rake the gravel nicely between campers, but it does make the site feel tidy and neat.

The Trails

Someone asked me on Instagram if all the trails we’ve encountered are this smooth and rolling. Nope. Don’t let the smoothness fool you though, from the campground headed north-west all the trails are uphill. We could easily get in a good 8 mile loop in an hour and feel like we got worked. Its nice to head uphill first and then have a nice, swift downhill on the return.

Some of our favorite loops:

For the Kids

Granite – Bluff – Granite (4 miles): Start at the campground and take the connector trail to Granite. Stay on Granite when it turns left and heads down into the wash. Climb back up and you’ll run into Bluff. Turn left and enjoy the ride down back to Granite. Turn right to head back to the campground. Granite is a nice, easy, rolling uphill, and Bluff is slightly more technical on the way down. The downhill is fun with some rollers but overall not technical (except for the waterbars).

Tortoise – Pemberton – Shallmo Wash – Escondido – Cinch – Scenic – Pemberton – Tortoise (4 miles): Feels like a lot of trails but many of them are short connectors. Start at the nature center and ride Tortoise down to the intersection. From here its an easy 0.1 miles on PB until you hit SH. SH is a great downhill – fast and furious until you hit the staging area. From here find the trail head for Escondido and follow it 0.2 miles up to the turn off for CI. 0.6 miles up CI you’ll continue on up Scenic. Its fairly smooth and not steep, just a gradual uphill the entire way. Turn left on PB and ride the short distance back to TO and then up to the nature center.

Rachel rode this one with Sam and I, but I’m not sure I’d take the other two. Cara and Andrew did ride with Sam from the campground down Tortoise and Shallmo Wash to the competitive track where I picked them up after we played around for a bit.

“Cara sometimes gets frustrated as she’s not as capable as the older kids. She was upset the other night because she was scared to ride the hills on the pump track. I assured her she didn’t have to ride, it was okay to be scared, and that we would keep practicing until she felt comfortable. Instead of quitting Cara put her intense game face on and rode the hills over and over until she smiled and laughed the whole way. I’ve never seen such fierce determination and desire to overcome an obstacle. I hope that’s a lesson she keeps with her for the rest of her life!” -@currentlywandering

North Trail (3 miles): We drove up McDowell Mountain Park Dr and Asher View Dr to park at the trail head for North Trail. Along Asher View Dr. there is an amazingly old and gnarly Saguaro cactus we had to get out and inspect – so don’t miss that on your way. North Trail is a fairly tame 3 mile loop. You can ride the trail in either direction and its pretty symmetrical. Gentle uphill and then back down on the return. Rachel found it almost too easy, while Cara was upset it was too sandy in spots to ride. Great recess break from school!

For the Adults

Granite – Delsie – Pemberton – Lariat – Granite (8 miles): Start from the campground and take the connector trail up to GR. About the same place GR splits off left and goes left down the wash, DL heads right and continues climbing. We felt this was one of the easier climbs but still managed to get a good work out. From there, this section of PB is super fun! A short sprint uphill and then its downhill, smooth, flowy and fun to Lariat. LR was a bit boring but you have to get back to camp somehow.

“First MTB ride is in the books with another scheduled for today. There are so many trails here and I intend to ride most of them over the next week. Not gonna lie – all of you and your snow photos are making me grateful for 70 degrees, sunshine, and cactus. 🌵☀” – @currentlywandering

Pemberton – Scenic – Cinch – Escondido – Pemberton (11 miles): This one starts at the trail head staging area which is also the campground overflow. This section of Pemberton is fairly smooth so its a nice ride up to Scenic. SN is definitely more rocky as it climbs up to and along the bluff. Definitely more technical and we do recommend riding it clockwise. Once we hit the bottom we turned onto Cinch which is a small connector to Escondido. ED is a nice rolling uphill all the way back to Pemberton. It is a good combination of technical and smooth rolling hills. I really liked it. Once you hit Pemberton again its downhill all the way back to the staging area.

Granite – Pemberton – Dixie Mine – Coachwhip – Pemberton – Bluff – Granite (14 miles): If you are looking for a rocky, technical trail than you’ll love this. Riding on a hardtail, I struggled over the rocks but it was still a really good loop. Granite is an easy fast couple of miles from the campground before your hit the turn off for Pemberton. From there follow the trail past the old Ranch homestead and then start climbing up towards Dixie Mine. This part of PB isn’t too rocky and traverses some really pretty landscapes. Once you hit Dixie, there’s a gradual, rocky downhill before hitting a gnarly, long technical climb. Summit is at the turn off for Coachwhip, which has a fun, rocky downhill before another long slog uphill. From there its mostly downhill or rolling all the back to Pemberton. We chose to turn left and end our ride down Bluff rather than doing a return up Granite the way we came. Definitely the better choice as downhill doesn’t  get much better than Bluff in this park!

A note about Tonto Trail, Granite & Delsie – These trails are super easy, gradual climbs. We came down Delsie once and it was actually quite boring, fast, but boring. Most of our trail rides including going up one of these trails and taking something a little more exciting on the return. Tonto is steeper than Delsie which is steeper than Granite.

Hanging Out With Friends & Regular Life

One of my favorite parts of our stay was hanging out with friends. @TheFamilyCan came up from Lost Dutchman to join us and we convinced them to hang out for more than a week (it wasn’t hard). Our kids played for HOURS at the playground, we enjoyed a few campfires, and the kids had some solid Minecraft time. We loved having other adult company!

“Our kids have spent hours at the playground with @thefamilycan this week. Mostly it’s been Harry Potter games and imagination central, but after they left today Andrew found a different use for the slide.” -@currentlywandering

The only downside to this park is that laundry is 45 minutes away no matter which way you drive. I paired our laundry trips with grocery shopping and other errands so it wasn’t too bad.

We have some college friends down in Gilbert, and they were gracious enough to watch our kids while Sam and I attended a session at the Gilbert, Arizona LDS temple. We loved catching up with them as they are nomads at heart and are still trying to figure out how to take their 5 kids on the road someday.

“Roughly three years ago we attended the Gilbert LDS Temple open house as we passed through Arizona heading West. This week we had a chance to attend a session as we pass through Arizona (slowly) headed East. I love the focus that the Temple brings, pointing us to the Gospel of Christ and His Atoning Sacrifice. Visiting so many different temples is one of the perks of a nomadic life.” -@telegramsam

“We visited some college friends yesterday and the the kids got a kick out of their indoor trampoline. Everybody needs awesome friends like this! This is not the only cool thing in their lives as @funawesomefamily has a fun YouTube channel with plenty of fun family stuff.” -@telegramsam

We were stationary long enough to get not 1, but 2 Amazon deliveries. We utilized the Amazon locker pick- up that is available in the Phoenix area and it worked like a charm. You send your package to a nearby locker and then use your phone or a code on the keypad and it pops open your locker with package(s) inside. Brilliant. Now we just need these in more remote areas.

One of Airstream’s marketing companies paid us a visit and we were privileged to be interviewed by their amazing team. They are rolling out a new “Home” campaign highlighting the various uses of full-time Airstreamers and we can’t wait to see how they edit our story together. Lisa gave us a preview of some of their previous shoots and they look top notch. Ours should be published in a few months and we’ll definitely let everyone know when it goes live!

“Fell in love with our tiny, shiny space all over again today. We spent a couple of hours cleaning yesterday in preparation for a video/photo project with @airstream_inc today. Our house looks amazing! If only the kids could keep it this clean all the time.” -@currentlywandering

We briefly went “ice skating” with @campytrails in Bakersfield a month ago and the kids have been begging to try it for real since then. With my ankle still not to full strength we determined I shouldn’t skate (not really my thing anyway) but I came along for moral support. Sam was amazingly patient with the kids and they learned to glide around the ice. I can definitely see more of this in our future!

One last errand to top off our stay was to replace our toilet. We weren’t really planning on it, but the darn thing sprung a leak (clean water thank goodness!) and we decided it was time. After some research Sam sent me to Camping World in Mesa, AZ where they had the correct toilet in stock. Really grateful this happened in civilization and not out boondocking in the desert!

We had a fabulous stay at McDowell Mountain and honestly can’t wait to go back. We attended a record three times at the same LDS ward in Fountain Hills, and there are plenty of hikes, museums and restaurants we weren’t able to check off our list. For now, however, its off to south eastern Arizona!


Categories
Biking Homeschool Outdoor Gear

Teach Your Child to Shift with a Woom4

Its no secret we are fans of Woombikes. We were introduced to them in 2014 as Cara was ready to leave training wheels behind. We had a fantastic experience as she basically just climbed on the bike and pedaled away (6 Reasons to Buy Your Child a Woombike).

We’ve now reached another milestone with Cara’s bike – that of upgrading to one with shifters. We reached the point where she was spinning her wheels as fast as humanly possible and still couldn’t keep up with the big kids. She had the muscle, the awareness and desire to be faster, better, and more in control – she just needed the tools.
We visited Woom headquarters in Austin, TX last spring and Mathias upgraded her Woom3 to a Woom4 with a rear derailleur and an 8- Speed SRAM X4 twister shifter. Since then, we’ve been working with her on when and how to shift her gears based on the terrain she’s riding. Its honestly been a bit of a fight. For awhile she wanted to leave her gear in the middle and pedal like she always has. Slowly, she’s come to the realization that she can go farther more quickly and with less effort if she utilizes the entire range of her gears.

Its slow progress, but progress nonetheless. We happened in to a tradition to have each of our kids complete a 25 mile bike ride by the time they turn 8 years old. Rachel did hers with Sam back in Lehi pre-travel, and Andrew completed his with the Watermelon 4th of July ride in Minneapolis. Cara is 6 so we have just two years to get her ride in. Time to get training and gears will be an essential part of completing that ride.
As our experience is one shared by many parents, I thought we could give some advice on how to ease the transition between bikes.  I talked with Mathias, the owner of Woombikes USA, and he helped me outline 6 suggestions to help your child transition more smoothly to a bike with shifting capabilities:

1. Prepare and Anticipate

Kids transition easier when they know what is coming so talk about shifting even while your child is on a single speed bike.  Most of us just get on our bikes and go, but talking with your child about the bike components and why they are useful can help anticipate the change.  Show your child how your bike shifts (simple as picking the back wheel off the ground while remaining stationary) so they have a visual concept as well.

Ever ahead of the game, Woom has introduced a SRAM Automatix 2 Hub on their Woom3 bikes which has an internal mechanism that automatically shifts into a higher gear once 6 or 7 mph is reached. Total genius! Mathias said, “The design is hands-free, keeping your child’s focus on the road. On top of that, the hub functions as a learning tool. The mechanism also teaches [kids] timing. When they feel the bike change gears, children are passively learning how to time their shifts. Without ever touching a shifter, they can go faster, ride smoother, and move up to their next bike with total confidence. By the time the controls are in their hands, they’ll be ready for any adventure!”

2. Have a Visual Classroom

Once you have a new bike with shifters, take the time to visual explain how the bike works.  Mathias suggests that, “It’s much easier to show them, rather than tell them.  If you tell them while they are on the bike, then they are too busy and can’t really focus on your words.  Visually explain the concept while one parent is holding the saddle, and the other is rotating the pedals and shifting.” Seeing an adult bike in action is one thing, but when its their bike the concept just might have a bit more traction.

3. Ride Alongside Them

Kids love spending time with their parents, and we find many teaching moments as we hike, bike, or paddle alongside our kids. As we ride with Cara, we can coach her along the trail. “There’s a big hill coming up – shift now down to a 2,” we’ll tell her. Or, “Cara you are spinning your pedals, try shifting up to a 6.” We can judge the terrain we are riding and coach her as we go. She loves spending time with us, an we’ve been able to make more progress than if we just sent her off on her own.

4. Have Older Children Help Teach

Whether its a sibling or a friend, other children can definitely have an impact on your child. Mathias noticed that, “Parents sometimes have trouble using the right words  to communicate the concepts.  Other children who already know how to shift could use their skills and way of explaining so that the other child learns it more easily.  I saw this at a biking event, where one 5 year old explained another 5 yo how to use [their bike] in a fun an easy way.” We’ve definitely noticed this as Rachel and Andrew encourage and instruct Cara as she learns.

5. Bike in Familiar Territory

Mathias recommends to “Choose a place where your child feels most comfortable, i.e. playgrounds, parks, running tracks, safe neighborhood streets.” Cara feels most comfortable on paved pathways so that’s where we try to have most of our teaching moments. Mountain biking is great, but trails can be unpredictable and rocky. Riding the same section of trail or path over and over can also be beneficial. Kids will get used to the trail and can anticipate shifting patterns, which will also build their confidence.

6. Be Patient

Just as teaching a child to ride a bike can take time, the complicated act of shifting will take time for your child to master. I get impatient and frustrated more easily than I’d like, and have to consciously tell myself to chill out.  There are hills I know Cara can climb, but she choose not to. There are times where she is whining and frustrated and wants to give up.  The long term benefits and learning will be worth it. We believe that as our kids learn skills through outdoor activities they will be more confident and capable in all areas of their lives. Perseverance, determination, and not quitting are qualities  we would love our children to develop!