Categories
Night Photography

Night Photography Beginner Basics: Light Painting

Night Photography Beginner Basics! How to Use Light to Make Your Images Even Better!

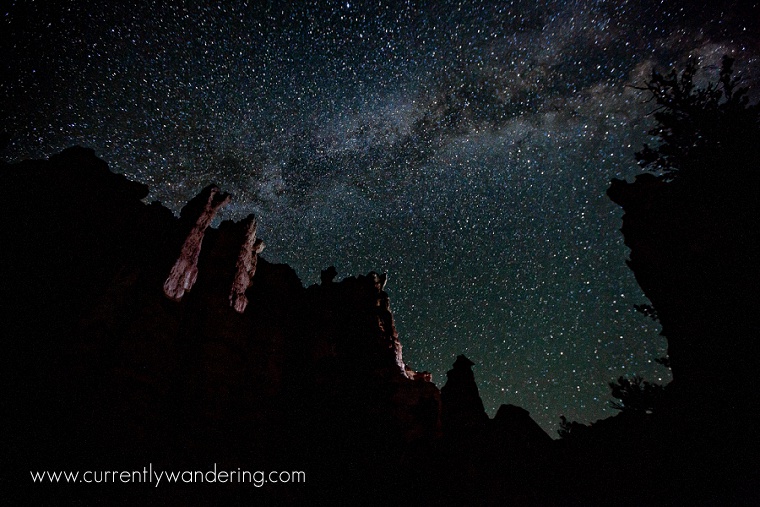
Beautiful Nightscapes usually have some foreground elements. This can often be a silhouette, but being able to see elements in the foreground can be very helpful as well. One of our favorite images capture in Bryce National Park was enhanced with some light painting. Consider both images, and see which you like more.

IMG_7735-Edit

Foreground Subject

You’ll need to choose what you want to light in the foreground of your image. In this image, we lit the rocks, but dead trees, barns, or even people can make interesting foreground subjects. You will want to compose your image so that your main feature of the foreground (rocks, trees) doesn’t block the main feature you are capturing in the sky. If you are including the Milky Way, make sure the foreground works well with the sky for a great image. It will frequently be impossible to re-arrange your foreground objects (if they are rocks and trees), so you’ll end up moving your camera to change your composition.

Light Source

The light source you use doesn’t have to be large. Remember that you’ll be doing a long exposure. The light you cast on an object has time to accumulate. You can use nearly any flashlight, light panel, or even a strobe or speedlight triggered manually. The key is that you want the light to diffuse and spread. A tightly focused circle of light can be difficult to paint with, as some areas will be too bright and others too dark. Our favorite light source (and the one used for this particular image) is a rather cheap LED panel light. We have two of the NEEWER panel lights (though only one was used for painting), though I might buy some YONGNUO LED panel lights if these die. Both lights are in the $30 range, and include some diffusion filters to change the color cast.

We used these lights handheld and hand operated for painting. They cast a bright light when all the way on, and have a variable output.

Painting Time

The painting on this image was actually done in two separate pieces. The right side of the photo was painted first, at a length of about 7 seconds. Then I turned off the light, and moved further up the trail and painted the left side of the image from the side, for a length of about 2 seconds. During my time painting, I usually move the light around to create softer edges and wrapped lighting. For the left side of the image, I didn’t have much time to move it around because of the short time it was on.

When you light paint by hand, you can control how bright your light painted objects are by leaving the light on for longer or shorter, and also by changing the intensity of the light source. This takes some experimentation, and review of the image. First, figure out what length of exposure you need for your night sky, (see our Camera Settings post), and then try different light painting times and techniques to achieve what you want. You might often want to paint from a different location then the camera rests, which is best done with a friend. For this image, I was running the light around, and Jess was behind the camera. The distance between us was a good 100 yards or so, which made communication difficult. We were far out of cell range, but a couple of handheld radios would have worked well. We forgot ours, but won’t in the future. There was a bit of yelling into darkness (and echoing around the canyon) as we did our best to communicate.

Direct Painting VS Reflected Painting

There are two main methods of painting your foreground: direct or reflected. Direct lighting is accomplished by pointing your light directly at your subject. If you use direct light, try to diffuse your light source through a piece of plastic. Moving your light source around during your lighting time can also help to soften the light. When moving your light source, consider changing both the angle of the light AND the position. By moving the light from side to side and up and down, you can ‘wrap’ the light more softly around the edges of your foreground. Review your images to see how best to modify your technique.

The best lighting is often reflected lighting. In this technique, you will shine the light at a different surface, causing the light to reflect onto the subject you wish to paint. Reflected light is much softer, having been scattered by the imperfect surface. You will want to make sure that both your light and the reflection surface are NOT visible in your final image. This works best when you can position yourself behind a small hill or rock. You might even be able to stand behind the camera, directing your light at an out of frame surface to reflect onto your main subject. Be creative here! Every location and subject will require a new way of lighting.

In our image, we used both direct and reflected light. I first spent about 7 seconds reflecting light against rocks behind a small hill. That light reflected onto the rock formations opposite. The reflection both softened the light and helped it spread out over a large area.  During the reflected light portion of my antics, I was waving the LED light panel around quite fiercely.

The left portion of the foreground received no light from my first paint, being closer to the camera then the other rocks. After my first paint, I turned off the light and (carefully!) ran around the corner in the dark. I then turned the light on for about 2 seconds to light that section. Reflected light will always require more time for a similar exposure, being more diffused and usually further from the subject.

Color Cast

Both of the lights linked above come with white and tinted diffusers. The white light is a bit brighter, but is quite cool. We actually used no diffuser for our first paint, and then attached the tinted diffuser for the second paint. The reflected light was bouncing off rocks that were brown and cream colored, and the light adopted the same tone via reflection. In our first attempts, the second paint cast a very cool light on the left side of the image. Adding the tinted diffuser to the second paint brought the color temperature much closer to that of the first. (We did further correct the color temperature in post-processing.)

Color casts can also be added by just about anything translucent and colored. Cheap kitchenware lids and plastic grocery bags are two commonly available items you can experiment with.

Wash, Rinse, and Repeat

I can promise you that you won’t get it right the first time. Light painting is an imprecise technique, and you will need multiple tries to get it right. Patience and good communication will yield some excellent pictures, and quite a few that are not quite right. Celebrate your successes, and continue shooting!
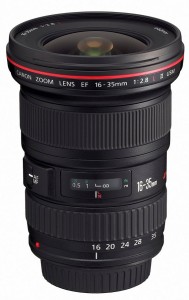
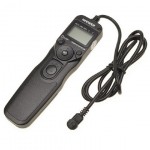
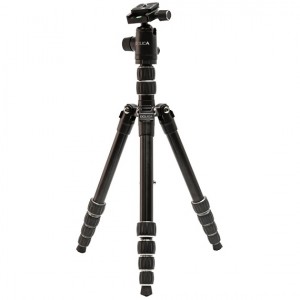
Categories
Night Photography

Night Photography Beginner Basics: Dark Composure

Night Photography Beginner Basics! We explain how to get the best compusure even when its pitch black outside!

We’ve gone over basic gear and camera settings, and now its time to start talking about what you are shooting.

Composure in night photography is made more difficult by the darkness of it all. Your foreground is made up mostly of silhouettes (unless you are light painting, more on that in a future post), which means you are using the ‘shadows’ of earthly elements  to provide interest in the picture. These elements are commonly trees and rocks, depending on your environment.

Choosing your composure is often best done during the day, or using a bright flashlight at night. Your lens selection will matter here, as you can include a larger slice of the sky with a wide angle lens, or a smaller with a longer lens.  Your lens will typically be pointed high in the sky. Moving the tripod around on the ground will allow you to place your foreground silhouettes in your frame, leaving the sky open for your celestial capture.

Celestial Objects

Shooting any portion of the sky can return great results particularly with an interesting foreground. If you want to add a little sizzle, try including the Milky Way or Polaris (the North Star) in your image. The North Star will only have interest in a time-lapse or a long exposure, where you can see the rotation of the stars in a circle.

The Milky Way

The Milky Way is a great subject in the sky, and can add beauty to nearly any foreground. Capturing the Milky Way will constrain your shooting time, as you will have to shoot when it is in the right position. Old-school star charts or new-fangled apps can help with this, allowing you to see when during the night it will be in position. When you find your ideal time, make sure you show up 45 minutes or an hour ahead of time. Start shooting immediately, and by the time the position is right, you will be all set up and getting great images.

Try It Again

Undoubtedly, your first attempt will have some issues. You may want to fix composure, exposure length, or subject. Plan (if you can) a few hours or nights in a row to shoot. Time-lapse projects are very time consuming, so save those for later. Many still shots of the night sky have an exposure of under a minute, so you have plenty of time for adjustments and new shots. Change your angle, move your camera, and adjust exposure settings, and then hit it again. If you have multiple nights, you have a great opportunity to spend some daytime editing and evaluating the work of the previous night. Evaluate your images, and plan your adjustments for your next night.

Night photography can definitely be photos of just the stars, but adding in some interesting foreground objects as silhouettes or highlighting some obvious star patterns can help the photo be much more dynamic!

Categories
Night Photography

Night Photography Beginner Basics: Camera Settings

Last post, we talked about basic gear. This post, we’ll talk about camera settings. But first, lets talk about star movement.

Star Movement

Stars move across the sky. This isn’t actually true, as this movement is caused by the earth’s rotation, but we’ll ignore that for now. For our purposes, the stars move, and we may or may not want to capture that movement.

Celestial Photography falls into two main capture goals: Star Trails, and Still Shots. Star Trails are accomplished by leaving your camera’s shutter open for a long period of time. The longer the time open, the longer the arcs of the stars appear in your image. Star Trails are awesome, but I want to focus on Still Shots in this post.

For Still Shots, you actually want to PREVENT any star trails from happening. An exposure that is too long will only cause the stars to look smudged, and you will lose the sharp image you are looking for. Your savior here is The Rule of 600.

The Rule of 600

To find out our maximum exposure length without capturing star movement, you can use the rule of 600:

600 / (Lens Focal Length * Sensor multiplier) = Maximum Exposure Length in Seconds

Your Lens Focal Length is just what it sounds like. We used a 16mm lens for many of our shots, so 16 is our number in the formula. If you have a zoom lens, you will need to estimate where you are in the range of the lens’ zoom capability.

Your sensor multiplier is the effect that your sensor has on the effective focal length of your lens. For a camera with a full sensor, this value is 1. Many SLR cameras have a sensor that is smaller than full size, and will have a multiplier of 1.5 or 1.6. Research your camera ahead of time to find out what this value is. We used a Canon 5D mkII, which has a full frame sensor and a multiplier of 1.

Plugging those in:

600 / (16 * 1) / = 37.5 seconds

With a 16mm lens on a full frame sensor, we can take an image up to 37.5 seconds long, and not capture star movement.

Consider a few other lenses:

200 mm lens on a full frame sensor: 600 / (200 * 1) = 3 seconds 

100 mm lens on a crop sensor: 600 / (100 * 1.5) = 4 seconds

You can see why wide angle lenses are popular here: the longer the exposure, the lower the camera ISO can be, resulting in less image noise.

The Rule of 450?

Many photographers find that staying away from the boundary of star movement capture helps them capture more vivid images. The Rule of 450 is useful here: Use 450 instead of 600 in the same equation, and you give yourself a margin of safety.

450 / (16 * 1) = 28.125 seconds

Shooting at 28 seconds gave us a clearer image.

Aperture

To capture a Still Shot, you want to use a large aperture. Our images were captured at f 2.8. A wide open aperture will allow capturing as much light as possible in the short time allowed. This setting is often confusing, because star trails are usually captured with a much higher aperture value.

ISO

With your aperture all the way open, and your shutter speed limited by the star movement, ISO is the main thing you will adjust to set exposure. The goal is to get a good image with the lowest ISO possible. Higher ISO values will introduce sensor noise into the capture, and this will degrade the quality of your image. To get the ISO set correctly first make sure your aperture and exposure length are set properly. Take a test image, and view it on the camera. Experiment with ISO settings till you get a good image and then leave it there. Typically, you’ll do this at the start of the evening, and will leave the exposure settings alone as you capture different scenes. Most of our images were taken at ISO 1600 and 3200.

Focus

Images should be captured with the lens focused to infinity, but this is trickier than you might think. Most lenses will allow you to focus a little past infinity to allow for temperature and pressure variations in the operating conditions of the lens. To find your ‘true’ infinity, you can use one of two methods.

First, plan ahead and find the infinity point during daylight. This is best done by focusing on a far off object, like a mountain top or the far side of a valley. Allow autofocus to pick the focal point, and then look at where it set it. You can either remember this point, or mark it. You can scratch a line in the focal ring and body of your lens, but my personal favorite involves blue painters tape or similar. Simply focus your lens to infinity, then place a piece of blue painters tape across the focus ring and the body of the camera. Using a sharp knife, slice the tape so that the focal ring can still move. To focus back to infinity, just put the lens in manual focus and align the pieces of tape.

The second method of infinity focusing involves using the live view feature of your camera. You will need to find a bright star in the sky, and zoom in using the camera’s back screen. When it is as large as possible, fine tune your focus with the focus ring. This will be much easier if the camera is on a tripod, which you’ll need for the shot anyway.

This should be obvious, but I’ll make it clear anyway: You will focus to infinity with the lens in manual focus mode. Someday, cameras may be able to autofocus on stars, but it isn’t this day.

Mirror Pre-Lockup

Many SLRs have a setting that allows the mirror to move and lock prior to the image capture. If you can find this setting on your camera, activate it. Under normal operation, the mirror moves out of the way just prior to opening the shutter, and this movement can make the camera vibrate just slightly. Under normal use, you’ll never notice this movement, but it can prevent sharp images when taking long-exposures. This mode moves the camera out of the way prior to opening the shutter. It’s a small thing, but it’s the small things that get a great sharp image.

There you go. Those basic settings will get you shooting what you need. Check out our other posts on our Night Photography series to learn about Gear, Light Painting and Composure!

Night Photography Beginner Basics: Dark Sky Composure

Night Photographer Beginner Basics: The Gear

Night Photography Beginner Basics: Light Painting


Categories
Most Popular Posts Night Photography

Night Photography Beginner Basics: The Gear

The Night Sky can be a beautiful thing, and long exposure nighttime photography can expose that beauty to anyone with the right (affordable) equipment. As complete beginners in this area, we thought we could share what we have learned as we enjoyed a week in Bryce Canyon recently and spent a few of our nights there capturing the beautiful Milky Way. What started as one post on the topic became very long, and so this is the first post in a series about celestial photography. We’ll include tips and information, mixed with the beautiful pictures that we captured during our visit.

To get the topic going, let’s talk about the gear that you’ll need to get started.

Camera

You’ll need a camera that allows you to set manual settings, and ideally has a connection for a cable release. Most Canon / Nikon SLRs work, and you may find plenty of others that do as well. Check out the Canon 5D Mark III or the Fuji X-T10.

16-35mm lens

Wide angle lens

You can use a longer lens for shooting stars, but you will be happier with a lens in the 16 to 32mm range. This is particularly true if you have a cropped sensor on your camera. In general the wider the better. This Canon 16-35 mm f/2.8L II USM on Amazon is a great one!


Cable ReleaseCable Release on Amazon

A cable release isn’t strictly required if your camera allows you to set a long exposure in the 12 to 30 seconds range. I’ve found that a cable release is still useful for a few reasons, and they are not very expensive. A cable release can minimize camera shake, can offer more settings options then the camera itself, and can often serve as an intervalometer for time-lapse photography work. The cable release that we use cost less than $20 and runs on two AAA batteries.

7155unjkrBL._SL1500_Tripod

You need a good tripod. It must be sturdy and allow you to point the camera in all sorts of odd angles. A ball-head on top of the tripod is common, and allows plenty of high angles. Some tripods allow setup very close to the ground. This can be very useful when composing an image with trees or rocks in the foreground of the image. As you might be hiking to your photography spot, a reasonably light tripod is nice as well. We use a Dolica tripod purchased from Costco, very similar to this one available on Amazon.

Something Heavy

Most tripods have a hook directly under the center column that allows you to hook a weight to add to the tripod stability. In most cases, your camera bag or a backpack can serve nicely in this function. A stable tripod will minimize any camera movement that will blur a long exposure.

Clothing, Food, and a Friend

Since you’ll be going out at night, I’ll also mention that you’ll need good temperature appropriate clothing, good shoes, a few flashlights, and some food and drink. Having a friend along is both fun and can help you get some amazing pictures with their help.

In our next post in this series, we’ll talk about camera settings so stay tuned!


The Milky Way really does look like this! Check out our basic beginner tips for capturing the night sky. 01