Categories
Backpacking Biking Hiking Rock Climbing

The Truth About Our Outdoor, Adventure-Focused Family

Death Valley_29

During our recent trip to Utah we had a surprising conversation with my family when I mentioned I was past ready to go on a hike but my kids weren’t going to like it.

“They aren’t going to like it?” my dad asked.

“Oh no,” I said. “They are going to whine and complain.”

I received looks of skepticism from all the adults in the room. After seeing picture after picture of our outdoor adventures, my family had apparently reached the conclusion that our kids never resisted our activities.

Let me clear this up: Our kids whine ALL the time about going outside to hike or bike or just even a walk. “Mom! This is NOT a short walk”, or “I’m tired” and even “I don’t want to go” are very common phrases in our household. Many days the kids would rather stay inside reading books (Rachel and Andrew), playing Lego’s (Cara), or sitting in front of a device playing Minecraft (all three).

The thing that makes the difference is that we go anyway, even when it’s hard. 90% of the difficulty is getting out the door and not giving up when ten things go wrong in the five minutes before you turn on the car and drive away. We’ve tested this theory over and over again throughout the last two years and every single time we all come home in a better mood. Every. Single. Time. With that kind of a track record, how can we not go?

I admitted in a past blog post that we are cheaters. Suburbia IS hard to get away from. Outdoor sports are less conveniently located, and its difficult to find wilderness (or even something resembling wilderness) in many places. In that sense, we have it easy because often just the act of getting OUT of the trailer is enough. There’s usually a bike path, or trails, or something in every state park we’ve stayed at so proximity is not the problem. We just have to overcome our mental laziness, which can sometimes be extremely difficult to do.

Just yesterday, our experience proved true yet again. After hearing complaints from ALL three children, we all went mountain biking as a family. It was chilly, difficult, and long. Cara even fell off her bike three times during the ride. It was very dark when we finished, and everyone was tired. But we were happy. We had accomplished something difficult together and all three children had smiles on their faces.

Categories
Backpacking Hiking Outdoor Gear Photo Gear

Gear Review: MindShift 180 Bag Rigged as a Backcountry Backpack

IMG_7026-Edit

While we would have loved to receive this item for free to review, we actually spent money to purchase it. This post contains Amazon affiliate links which help to fund the blog in a small, small way. Thanks for helping us out!

I’ve been on a quest to find the perfect bag. When you don’t have a lot of space to store equipment, each piece of gear needs to have multiple functions. I have a great over the shoulder camera bag (see that post here) but for longer hikes it just wasn’t cutting it. Plus, I wanted to be able to tote multiple lenses in a safe and easy to access manner.

Enter the Mind Shift Gear Rotation 180.

We ran into this bag at a camera shop downtown in Petaluma, CA. It piqued my interest as a solid, hiking/camera bag and even better when I found out they are made by Think Tank Photo who are leaders in the camera bag space.

The Mind Shift 180’s star feature is the accessible waist belt pack that swings around from inside the main bag. Hard to visualize? Here’s some photos to help out. The whole waist belt slides around and its super easy to get in and out which gives me access to extra lenses or even my camera if I’m not carrying it with the Capture Pro on a strap.
IMG_7029-Edit IMG_7032-Edit

The clip is easy to slip in and out without looking at it, but is also secure. There’s also a tether just in case the waist belt somehow comes undone so my gear won’t hit the dirt.

IMG_7045-Edit

Unfortunately, when we were planning our first backpacking trip in the Apostle Islands we just didn’t have enough room for all the gear. Sam has a huge regular backpack, but even with that we were having to give the kids too much weight. The Mind Shift 180 has a fairly large top storage compartment which is great for jackets, or food (which is heavier and better for an adult to carry), but it still wasn’t enough space.

Our solution? A dry bag roped to the outside. Fancy, right? We picked up this dry bag at Walmart for like $6. Its pretty heavy, but also durable which made it great for being on the outside. We stuffed a sleeping bag, everyone’s pajamas, and all the electronics in it and then tied it on to the Mind Shift 180 with these Sea to Summit Accessory Cords.

It worked surprisingly well. Because the Mind Shift is rather small, the pack overall wasn’t too heavy (my total pack weight for the Apostle Islands was 31 lbs) and I had no problems with unbalanced weight.

IMG_7049-Edit

It may not be the prettiest solution, but it totally worked! I would love for Mind Shift to come up with a legit attachment to the outside of this bag. They make a larger camera bag, but on shorter day hikes it would just be overkill and we don’t have the space anyway! This guy fits perfectly under the dinette seat for easy access and safe storage.

When I have easy access to lenses and even my camera, I am more likely to take photos along the way. Its also important for me to have my (fairly expensive) gear safe and I feel like the padding in this is definitely adequate. If you are looking for a bag to take out hiking, I definitely recommend this one!

61zidITJilL._SL1000_
Photo Credit: Amazon


Categories
Backpacking Featured Destination Minnesota State Parks

The Camping Spot We Almost Didn’t Find – George H. Crosby Manitou State Park, Minnesota

Backpacking George H Crosby Manitou State Park with Kids

I’m pretty sure we are the only people that leave our Airstream travel trailer in one state park to back country camp in a completely different one. I suppose that doubles up on fees for the night, but if you think about the fact that when a “normal’ person goes camping they are also paying a mortgage (or rent) on a house, our situation sounds a bit more reasonable. Right? Right.

When I spent a few hours planning our trip up Minnesota’s North Shore, I knew we wanted to do some more serious hiking. Inland from the lake are some pretty serious hills (not quite sure this Utah girl can use the term “mountains” out here) with great views and at least some elevation. I picked out a couple of possibilities, but mostly we just left this option open as we weren’t sure when or where we’d have the opportunity.

After leaving Gooseberry Falls State Park, we headed north to Tettegouche, the next park on our list. True to form, the first thing we did was take a trip to the visitor center to check out our options. I talked to the ranger and when I mentioned we were thinking of a serious hike or possibly backpacking in the area, he highly recommended George H. Crosby Manitou State Park. There is no front-country campground, so the park is quiet, peaceful, and relatively unknown.

Just the way we like it.

When We Visited: September 8, 2015

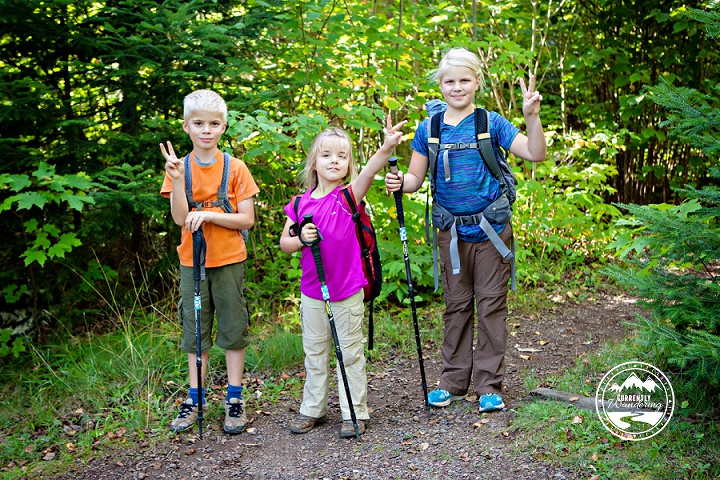
Ages of Kids: 9, 8, 5

Total Mileage: 3.2 miles in, 3.5 miles out, 1 night.

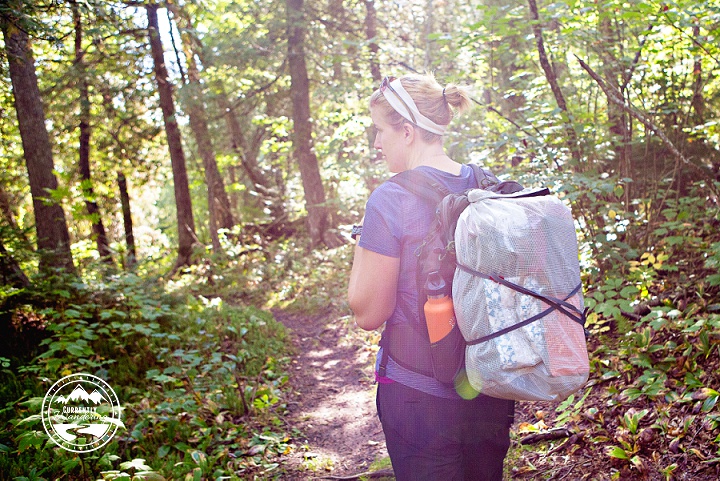
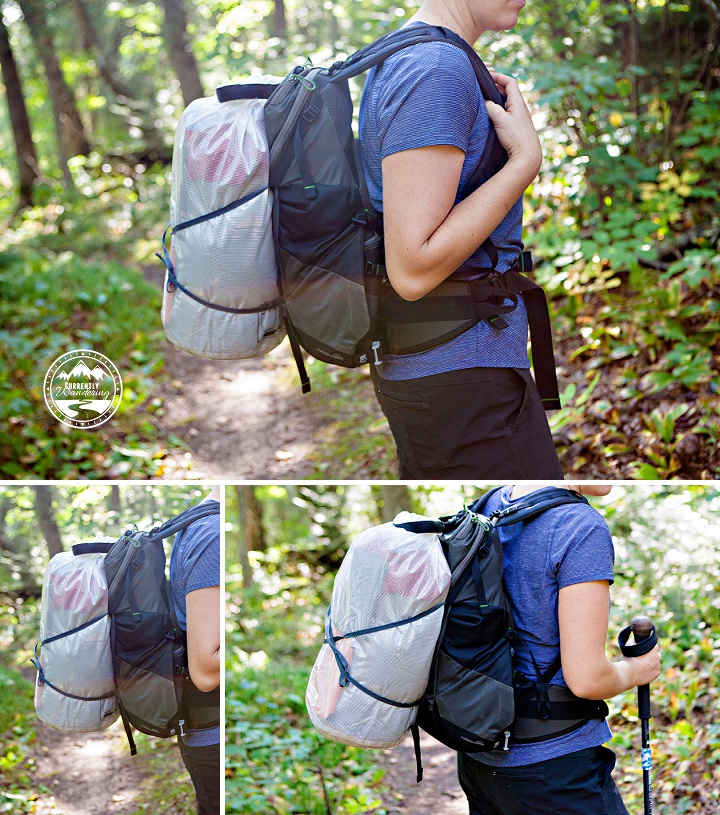
Packing for this one was quick. Sam worked and the kids did school in the morning, and then around 1pm we started pulling out all the gear. Rachel and I threw together some quick Freezer Bag meals, and by 3pm we were headed out. It was only a 30 minute drive to the trail head and we were all feeling pretty good getting started along the trail.

Backpacking trip #2!
Backpacking George H Crosby Manitou State Park with Kids

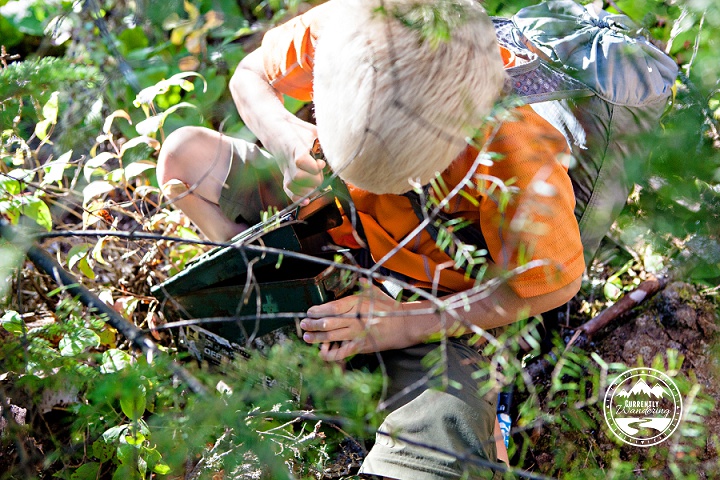
Within the first 1/2 mile or so we found one of the markers for Minnesota’s Wildflower geocaching program. So, we took a short detour to find it.

Backpacking George H Crosby Manitou State Park with Kids

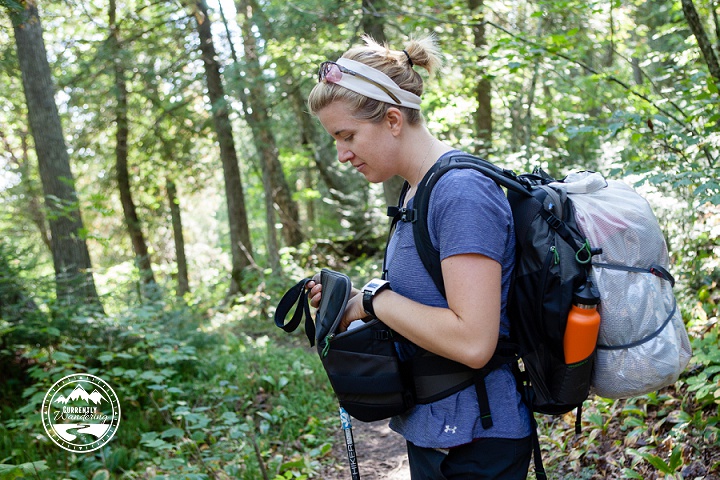
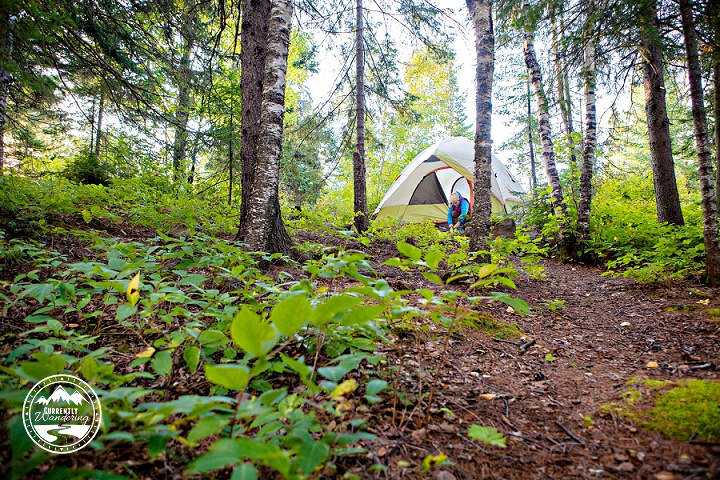
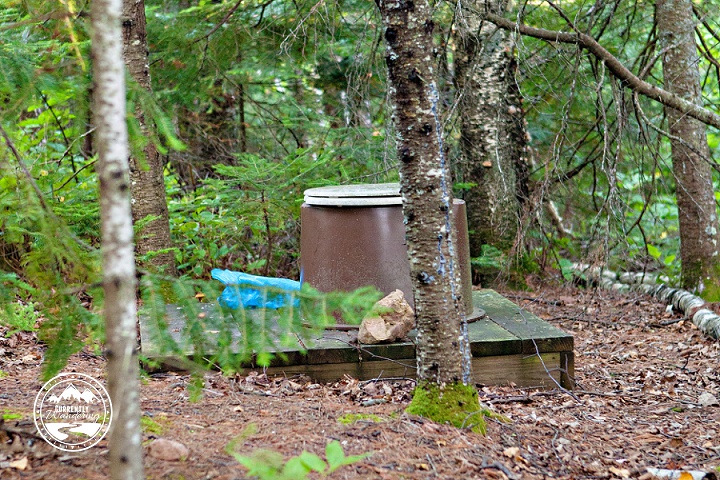
This hike was a little longer than our first on the Apostle Islands, and there was definitely more elevation involved. We started around 3:30pm and hiked in about 2.3 miles. We started passing campsites and were counting up to #6 when suddenly, at the top of a small hill we were there! Or so we thought. The campsite marker was along the trail, and we could see where previous campers had a fire ring and stacked logs around it to sit on. Upon further inspection of the area, there wasn’t really a flat spot sans roots for the tent, and no where was the pit toilet or bear pole that had been promised in the site description.

Backpacking George H Crosby Manitou State Park with Kids

I seriously almost cried. There had been some frustration all around getting going on this trip and to have a completely non-epic site was not helping. We collectively took a deep breath, dropped our packs, and set out to explore a bit more and see what we could find. Sam continued on the trail to possibly see if sites 7 or 8 were available, and the kids and I climbed the hill to the “overlook” to see if there was anything up there.

We found a large, flat rock with the remains of more than one campfire (and one amazing view!) and then just back into the trees a bit we found it! An official, metal fire ring. We kept exploring and found a flat spot for the tent, and even the toilet! Hooray! We wouldn’t be sleeping on roots or digging holes.

Backpacking George Manitou SP_15

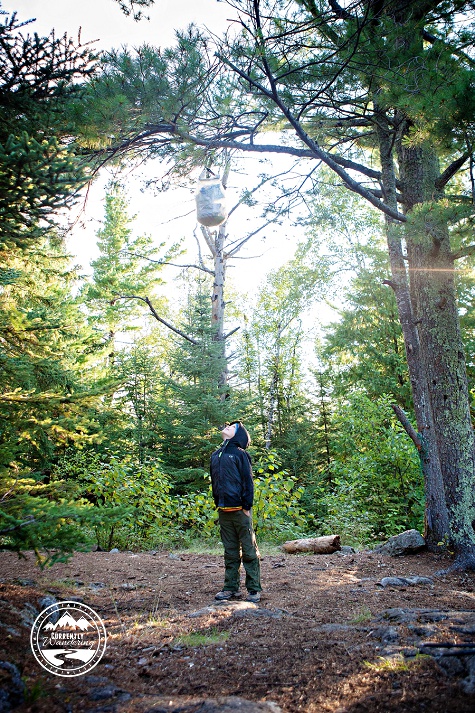
We never found the bear pole, but we easily found a decent tree to bear bag our food. The kids thought it was fun and we figured it was a good teaching moment anyway. Not every site we camp at will have a bear box.

Backpacking George Manitou SP_13

Our evening was pretty chill. After setting up the tent, we brought our food down to the “dining room” and the kids played cards while Sam and I cooked up some dinner. We tried two new meals on this trip and both were great! We had mashed potato, stuffing, chicken with cranberries (tasted like Thanksgiving dinner!), and then for breakfast we did chocolate banana oatmeal.

Backpacking George H Crosby Manitou State Park with Kids

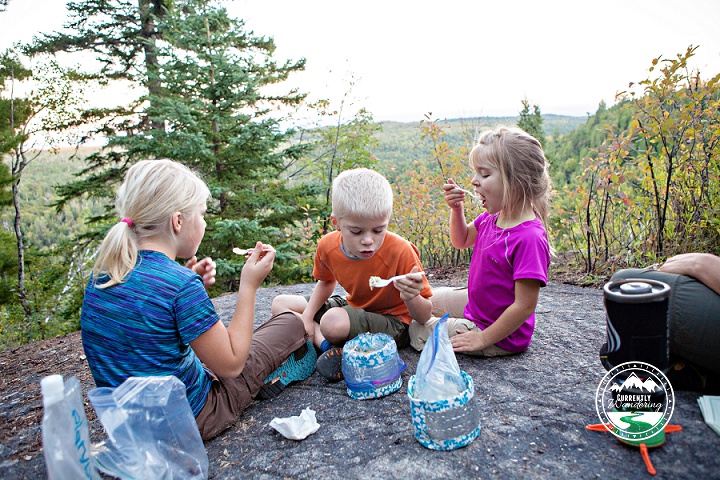
The weather was a bit chilly in the morning, but dressing in layers makes the temperature manageable. From the dining room we could see Lake Superior off in the distance which reminded us we were still along the “coast”.
Backpacking George H Crosby Manitou State Park with Kids

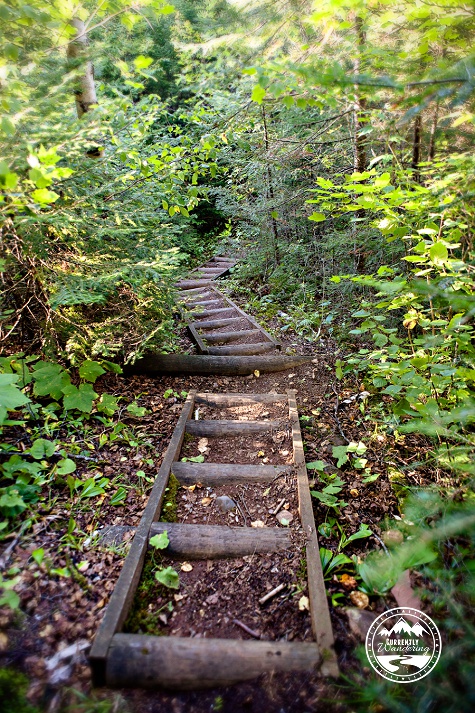
After breakfast and packing up, we opted to hike the “long” way out and add in the loop around Bensen Lake. It was flat with boardwalk the entire way around the lake and a super fun way to end the hike! We stopped at the picnic area and ate lunch before hiking the short distance out to the car and back to the Airstream at Tettegouche State Park.

Backpacking George H Crosby Manitou State Park with Kids

This park is definitely doable with young kids! We checked out some of the sites around Bensen Lake (Sites 20, 21, & 22) and they were beautiful and not that far from the parking lot. As parents, you could even take a couple of trips lugging gear if you didn’t have packs.

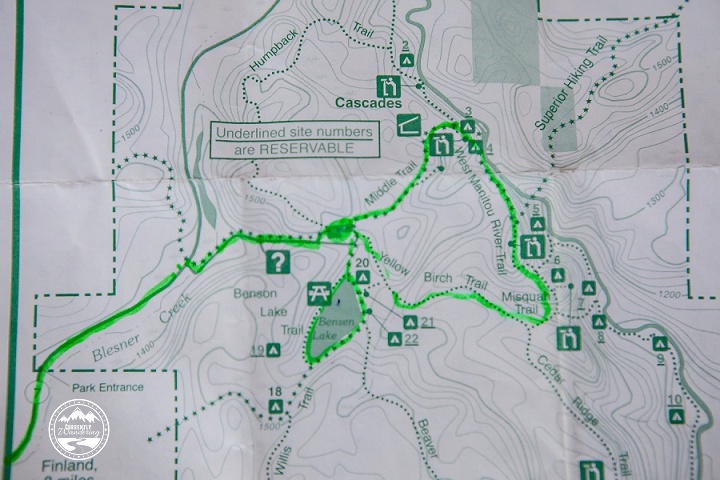
Highlighted in green below is the route we took. We started on Middle Trail, turned off onto West Manitou River Trail, and camped one night at site #6. On the way out we followed Misquah to Yellow Birch, cut through next to campsite 20, around the lake, and then back to the parking lot.

IMG_7066-Edit

While a bit logistically strange, we really enjoyed the peace and solitude at this park! The kids now had another solid over nighter under their belts, while Sam and I were gaining confidence spontaneously camping in the back country with kids. Definitely a win-win situation!

Categories
Backpacking Fitness & Recipes

Airstream Kitchen: Whole Grain Chocolate Chip Cookie Bars

Apostle Islands National Lakeshore_66

We discovered these delectable treats as I was looking for a way to pack a dessert in to the Apostle Islands for Andrew’s birthday.  Made with whole wheat flour & ground flaxseed, I can at least pretend they are more healthy than regular chocolate chip cookies, right? At least until we add the marshmallow.

Whole Grain Chocolate Chip Cookie Bars

1 cup whole wheat flour
1 1/4 cups white flour
1 1/2 Tbsp ground flaxseed
1 tsp baking soda
1 tsp sea salt
1 cup unsalted butter, softened
3/4 cup packed brown sugar
2 eggs
1 tbsp vanilla
1 cups semi-sweet or dark chocolate chips
Large, toasted marshmallows (optional)
Hershey’s chocolate bars

Preheat oven to 375 degrees, and spray or grease a 9×13 pan.

In a medium bowl, cream butter, then add sugars and mix until creamy. Mix in eggs and vanilla. Gradually stir in flours, baking soda, and salt until completely mixed. Really you should mix these all separately first, but I always just mix the soda and salt in the measuring cup with the flour after dumping a little in the bowl to make room. Call me lazy. Or just efficient.

Add chocolate chips until just mixed in.

Spread mixture evenly in prepared pan. Bake for 20-25 minutes or until golden brown. Cool in pan, cut into bars.

These are easy to wrap individually and take hiking or backpacking, or cover and store in a cool, dry place.

We roasted marshmallows over the fire, stuck a piece of Hershey chocolate inside, and then smashed them on top of the cookie bars.

I don’t think we’ll ever eat a regular S’more again.

Whole Grain Chocolate Chip Cookie Bars with Marshmallows. Delicious and slightly healthier than regular cookies!

Categories
Backpacking Outdoor Gear

Gear Review: Sawyer Mini – Cheap and Easy Water Filter for Backpacking or Emergencies

While we would have loved to receive this item for free to review, we actually spent money to purchase it. This post contains Amazon affiliate links which help to fund the blog in a small, small way. Thanks for helping us out!

Most backpacking requires a way to filter water. Despite looking clean and clear, most water contains bacteria that will make you pretty sick. The problem is easily remedied by a few methods. Water treatment drops will kill bacteria, but they don’t remove them and can leave a bad taste in the water. My favorite method is the use of a water filter.

Most of the water filters I’ve used in the past have been great, but fairly bulky and expensive. On our recent trip backpacking in the Apostle Islands, we tried a new water filter that is both cheaper and lighter than any I’ve tried before.

We used the Sawyer Mini water filter, which can be bought for $20 to $25 either online or in many outdoor stores. The filter is small and lightweight. It does sacrifice some ease of use, but for the weight and cost savings, the tradeoffs are worth it for most purposes.

SAM_4350-Edit

The filter unit itself is easy to understand. Dirty water goes in one end, and clean water comes out the other. With the filter comes a small, lightweight bag to use as a ‘dirty’ bag. The connector is a standard bottle thread though, so you can replace the included bag with anything from a cheap water bottle to a full sized two liter bottle.

IMG_20150824_185331

You filter water by filling the included bag (or replacement bottle) from a lake or a river and screwing it on to the filter. you then squeeze water through the filter and into your clean water bottle. The process is quick and easy. You do need to make sure you don’t get dirty water on the clean end of the filter, but that really is the only thing to pay attention to.

In addition to using a different bottle, there are other upgrades you can make as well, including quick attachment connectors to common water bladder systems. In a genius way, this filter system is perfect. It provides just the bare necessities, and allows expansion and customization as desired.

This filter performed wonderfully during our backpacking trip. It will also make an excellent addition to our emergency supplies, allowing us to filter water in circumstances where we cannot find clean water.

There are instructions right on the dirty bag for how to backwash the filter (when it starts slowing down or gets clogged) as well as how to clean for long term storage. Spoiler- you just use a little bit of bleach water and squeeze through the filter, drain it, and let it air dry.

Pros: lightweight, small, easy to use, screws onto any top of regular bottle.

Cons: Included bag is a little small for a family of 5. It just takes a little longer to filter enough water.

We are definitely glad we have this, and plan to upgrade to a larger dirty water bag in the future. We’ll buy one of Sawyer’s, or most likely just get another Platypus Platy Bottle and write “Dirty” on it with a sharpie.