Categories
Camping Outdoor Gear

Easy Camping Meals with Legacy Premium Food Storage

We haven’t done a whole lot of car camping in the last few years. Understandable as we have the Airstream and just take our whole house with us wherever we go. “Camping” meant throwing on our packs and heading out into a back country site. Since we’ve been in the condo for the last two months, however, I’ve made a considerable effort to get the family out tent camping in some of the front country sites  in Grand Teton National Park where we wouldn’t take our trailer.

One of the biggest struggles for me is figuring out what to eat while camping, and then getting it all packed in the cooler. We love tin foil dinners, dutch oven meals, and roasting hot dogs over the fire, but those take quite a bit of prep and feel overwhelming when we just want to head out for the night.

Enter: Legacy Premium Food Storage.

They contacted us a few months ago about trying out their meals, and I immediately agreed. We are always looking for good alternatives to Mountain House or homemade camping meals and although these guys seem like they make only emergency food storage items, their meals are actually quite handy for outdoor adventure! Legacy Foods sent us quite a few meals and its been fun to try them all out and see which ones we like best over two different camping trips.

Jenny Lake Camping Menu

Sam surprised me just before Mother’s Day with the suggestion to head out camping overnight midweek. I jumped on it and within a few hours we were packed and ready to go! It was so easy to toss in the Legacy Pouches and not stress about food. For dinner we tried out the Enchilada Beans & Rice in tortillas. We kept it pretty simple, but it would be easy to add cheese, lettuce, and tomatoes to really round out the meal next time.  We chopped up some carrots & cucumber for veggies and called it a meal!

Breakfast the next morning was hot chocolate, and Strawberry Creamy Wheat with fresh strawberries, and brown sugar on top. It had been a long time since a cooked Cream of Wheat and I totally forgot I needed to stir it continuously. Oops. We ended up with slightly lumpy cereal, but it tasted good just the same. The strawberry flavor is subtle, but adds some nice flavor.

Both meals were delicious and we had leftovers with just one pouch! Sam and I were both seriously impressed. We’ve always found food storage, or even other freeze-dried meals to be completely inadequate as far as serving size goes. There never seems to be enough to go around. Just one Legacy pouch makes about 6 cups of prepared food which was plenty for our family of 5.  Each serving is roughly 400 calories, with all non-GMO ingredients; perfect for after a day of hiking and exploring.

Colter Bay Camping Menu

Our friends from over at Kidproject.org drove up to hang out last weekend. The problem with getting two, outdoor adventure families together is we want to do ALL the things. We finally settled on camping at Colter Bay in Grand Teton, taking the bikes to ride the paved trail from Taggart to Jenny Lake, hiking, and possibly getting the canoes out on Two Ocean Lake. See? We can’t ever decide.

Once again it was super easy to toss in Legacy Food pouches for meals, and it was fun as we shared meals so everyone got to try them! We decided on 2 pouches of Pasta Primavera as well as 1 pouch of  Macaroni and Cheese for dinner. Alyssa also threw in a veggie tray and hot dogs for the kids to roast over the fire. The kids gobbled up the Mac & Cheese, and we ate almost all of the Pasta Primavera. Quite a lot of food, but after an 8 mile hike everyone was hungry. We did sprinkle salt over the top of the pasta which helped bring out the flavor. Definitely make sure you have some on hand.

The following morning was cold. Everyone layered up once we convinced ourselves to climb out of our warm sleeping bags, and we sipped on hot chocolate while we waited for the Maple Oatmeal with Brown Sugar to cook. We cooked two pouches of oatmeal, and I probably should have split it into to pots because boiling that much water at high elevation takes awhile.

Having something warm to fill our tummies was fabulous. We ate ALL the oatmeal even though I think everyone was full before it was officially gone. It did need a little salt to bring out the flavor (should have added some to the water), and we topped with fresh blueberries. Loved that the brown sugar was already in the mix so we didn’t have to bring extra.  Pretty delicious.

Overall we’ve been super impressed with Legacy Premium Foods. Their serving sizes are the largest we’ve seen and I love that one pouch can feed our entire family. On average, each meal takes between 12-20 minutes to cook and we found that at high elevation (7000+ feet) they took longer than the package stated. Pretty typical for cooking in general, but handy to know when all the kids are hungry!

We wouldn’t take these backpacking with us as we are more of the pour-hot-water-in-the-pouch type people (less dishes to wash!) in the back country. For car camping, however, Legacy meals were perfect. I loved not stressing about food and being able to just throw them in and head out was awesome. We have a few more flavors to try (pancakes, potato soup & stroganoff!) which makes me even more excited to head out camping again this summer.

Disclosure: We were sent product and compensated by Legacy Premium Foods for our blog post. All opinions are our own, and we are totally happy they contacted us to work with them! We’d never blog about anything we didn’t absolutely love. 

Categories
On the Water Utah

Paddle Labyrinth Canyon on the Green River – Utah

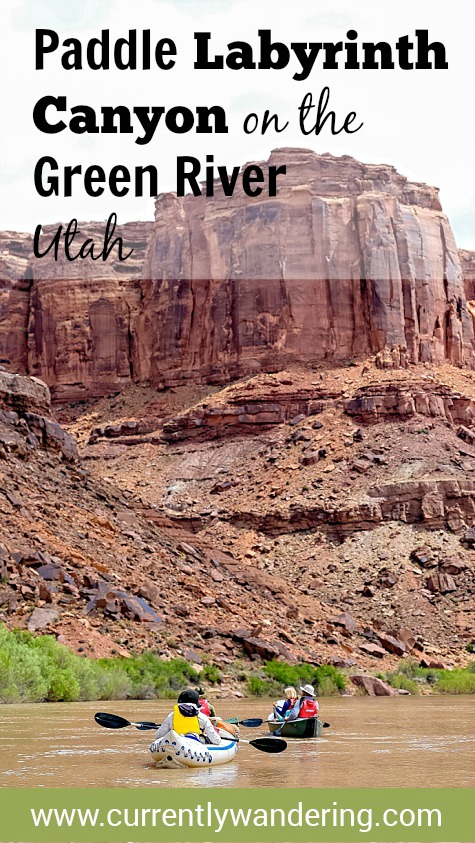
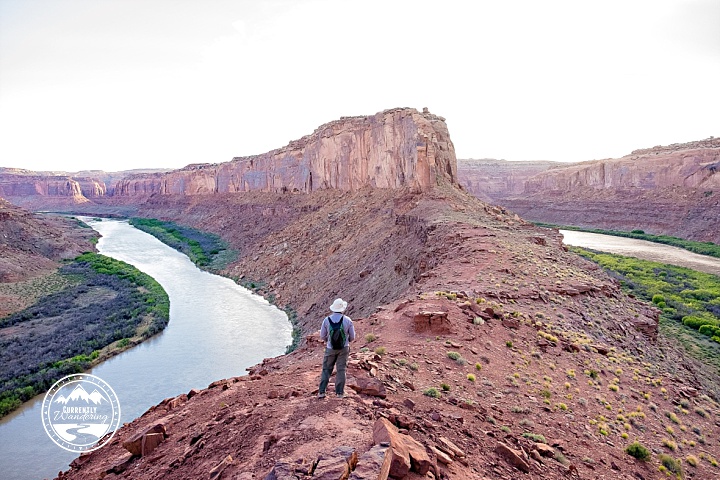
Located just north of Canyonlands National Park, Labyrinth Canyon is a flatwater stretch of the Green River. Completely remote and isolated, this float trip boasts towering, sandstone mesas, side canyons, lush vegetation, peace, and solitude.

When We Went: April 27 – 29, 2017

Ages of Kids: 11, 9, 6

Stretch of River: Ruby Ranch to Mineral Bottom

Having just completed our overnight trip on the Rio Grande down in Texas we were falling hard for flat water canoe trips. After meeting up with Steve & Tess from The More We Explore in Moab, we decided to jump on their planned 3 day trip through Labyrinth Canyon. Paddling a three day trip down a swift moving, large river was a bit intimidating but knowing we would be with others helped boost our confidence levels.

Don’t forget your map! Get it here on Amazon: Belknap’s Waterproof Canyonlands River Guide

Boat Choice

While the rest of the group decided to single kayak, we choose canoes for a few specific reasons. From previous experience, we knew we could fit all our gear. Utah had an abnormal amount of snow over the winter and the river was running fairly swift. While our kids do great kayaking small streams and lakes, paddling a big, fast, river by themselves was outside their skill set. With canoes, we could always have one adult in each boat and the kids could switch out.

Rafts were out due to the flat water nature of the river. When there are no rapids, a sizable raft is hard to paddle and steer while being completely overkill.

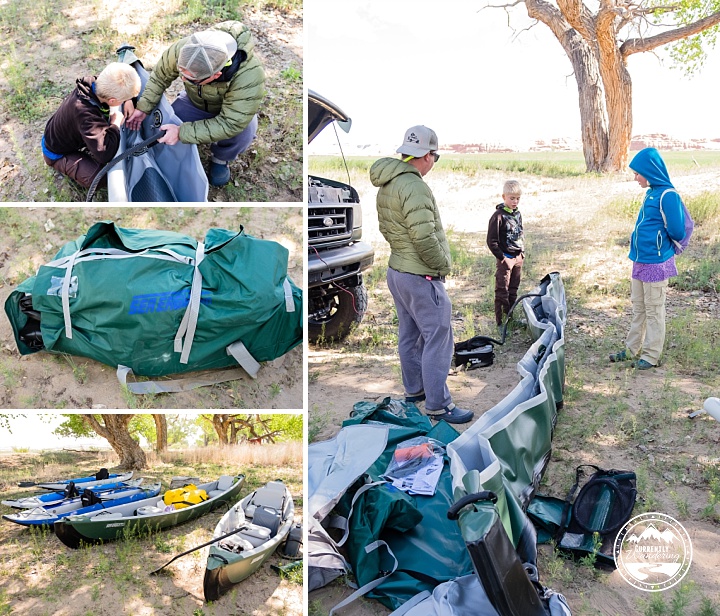
Steve introduced us to Sea Eagle Boats, and after some conversation they agreed to send us two of their T16 Inflatable Travel Canoes to test out in exchange for some drone footage of the trip. We were stoked. With our traveling lifestyle, there’s no way we could ever buy canoes, but these seemed like a viable option and we couldn’t wait to try them out.

Packing the Gear

We mostly just brought our backpacking gear. Sam’s dad has been unloading gear for years, and we managed to recently snag his two large, bright yellow, dry bags. We put tents, sleeping bags and pads in one, and then packed our clothes in color coordinated e-cubes and threw those in the other one with our two REI camp chairs.

Specific to this trip we also needed to bring our own water as the river can’t be filtered. We brought our two two 5 gallon Rhino water jugs for fresh water. The recommendation is 2 gallons per person per day but that also depends on what you plan to cook. We ended up with quite a bit extra, but I like to err on the side of too much water.

We also needed a toilet system as we had to pack out all human waste. For the Rio Grande trip we rented a system, but this time we bought a folding toilet seat on Amazon (threw away the plastic bag and just kept the seat and legs). We combined it with a 2 gallon, Leaktite bucket, a seal tight lid, and a lid tool to pry it off. Worked great and we just found an RV dump after the trip to depose of the contents.

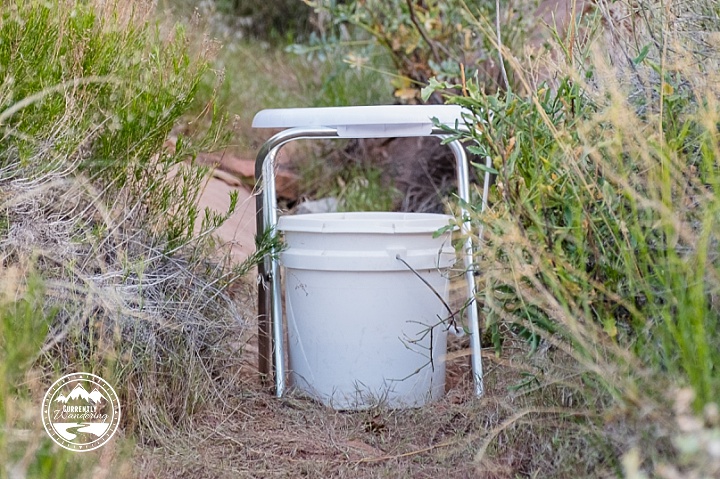
Sam has been bugging me for awhile to try out a pStyle for our back country trips. I was never really on board, but for some reason this time I pulled the plug. Serious life changer! The pStyle basically lets us girls pee standing up which is especially useful on cold mornings. It also helped to not fill the bucket up with pee and we used less toilet paper. Both Rachel & Cara used it like champs, so its going to be a staple in our backpacking gear from now on! Plus, there are a ton of cute covers available so we can be styling while we are at it.

Meals & Food

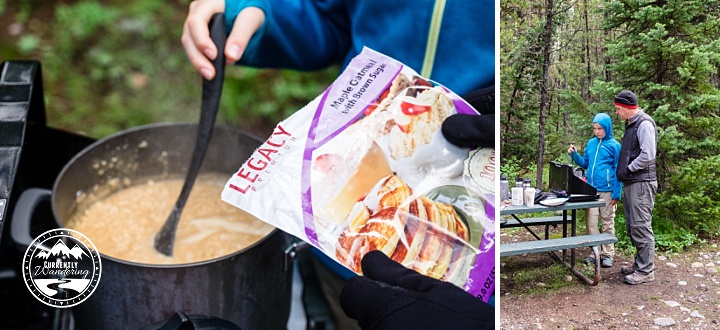
We packed our typical Freezer-Bag cooking meals. This trip we also tried out a new flavor from Mountain House. They sent us their new Chicken Fajita Dinner Bowl and a Spicy Southwest Breakfast Hash to try out. Love that they are adding some Mexican inspired dishes to their product offerings! Inspired, I also dug up our own recipe for chicken fajitas and we had fun comparing the two. The Mountain House version definitely had more kick, but we liked them both! We also pulled a Mountain House Breakfast Skillet out of our emergency supply (time to rotate it anyway!).

With our REI member dividend a few weeks earlier, I bought a Classic IceMule Cooler & a couple of Coleman Chillers Hard Ice Substitutes to go with it. I figured that we could have some refrigerated meals our first day while the ice was still cold.

Day 1: Breakfast – bagels, cream cheese, Naked Juice smoothies; Lunch – Hard boiled egg sandwiches on pitas, carrot sticks; Dinner – Thai Noodles; Dessert – Cookies Rachel made pre-trip

Day 2: Breakfast – Strawberry chocolate oatmeal, and hot chocolate; Lunch – BBQ Chicken Wraps; Dinner – Chicken Fajita Bowl on tortillas with leftover cheddar cheese from lunch; Dessert- Mountain House Apple Crisp (not my favorite).

Day 3: Breakfast- Mountain House Breakfast Hash & Skillet (was going to be in tortillas but we ate them all the night before); Lunch – Tuna & crackers, cucumber; Dinner – Hamburgers at Groggs Pinnacle Brewery in Price, Utah. Seriously the best burgers ever!

Snacks: I thought we had totally over packed on snacks, but then the shuttle took so long and we didn’t get to dinner until around 8:00pm Saturday night. Between the take out and dinner we seriously snarfed the rest of what I packed. We took Fig Bars, Perky Jerky, Bare Snacks, fruit snacks, Go-Go Squeeze, peanut & skittle mix, and Twizzlers. Yum.

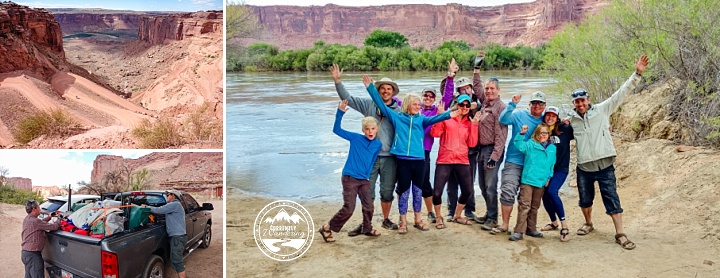
Shuttling the Vehicles

A major portion of river logistics is running a vehicle shuttle. Its not like a backpacking trip where we can plan a loop, ending up back at our car. There’s no way we are paddling back UP the river, so we needed to get our vehicles down to the take out.

The night before put in, we tent camped near Moab on some BLM land. I’ll admit the drive down from Salt Lake was not my finest hour. Packing for a trip is always stressful, plus we added a dentist appointment & stormy weather to our afternoon and I was literally thinking, “What on Earth are we doing?!” as we drove south.

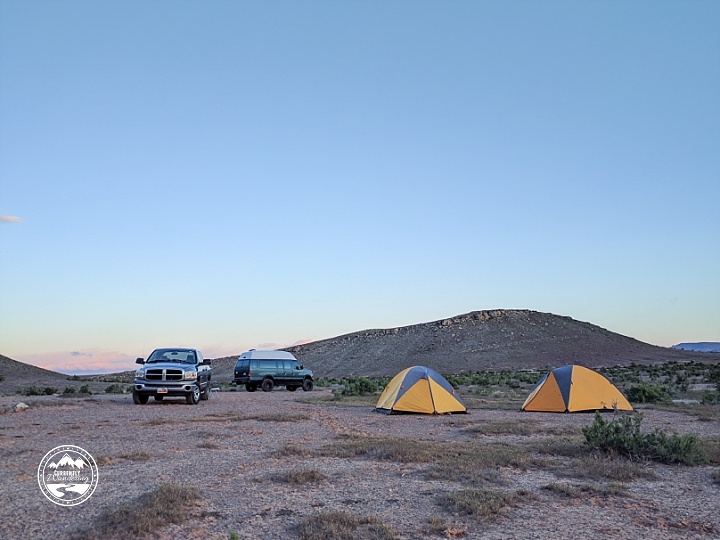
Luckily the rain blew over, we woke up dry and excited and met our group at the dinosaur museum near the turnoff to Canyonlands National Park. From there we sent three cars and drivers down to the take out at Mineral Bottom (about 45 minutes), while the rest of us piled into Fred the Van along with the boats and made for the put it at Ruby Ranch (1.5 hours or so northwest).

This is where its convenient to have multiple cars and a large group. We left one car and our truck at the take out which was enough to fit all 11 of us and our gear at the end of the trip, and the third car drove all the drivers up to Ruby Ranch where we had been inflating boats and getting the gear ready.

There are companies you can pay to shuttle your car for you, and depending on your group size and budget can be a good option. The post-river shuttle took a good 5 hours once we had loaded the boats, driven back up to Ruby Ranch, grabbed the other cards, and reshuffled gear. It was a lot of driving. For our family of 5, though, having a company shuttle us would have been cost prohibitive. Grateful we had friends to go with!

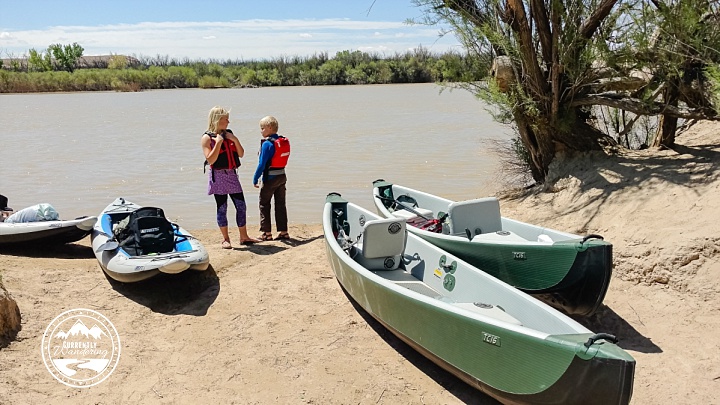
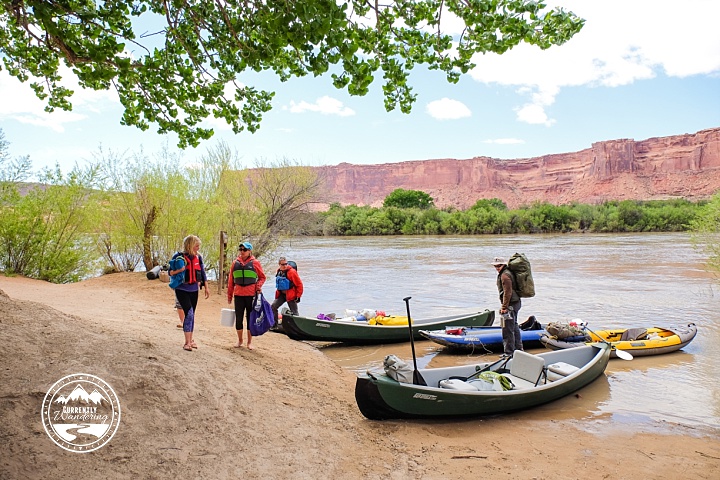
Put In at Ruby Ranch

The boat launch at Ruby Ranch is on private land. They are gracious enough to allow boaters access but do charge a $10/boat AND $5/person fee. Exact amount in cash is required.

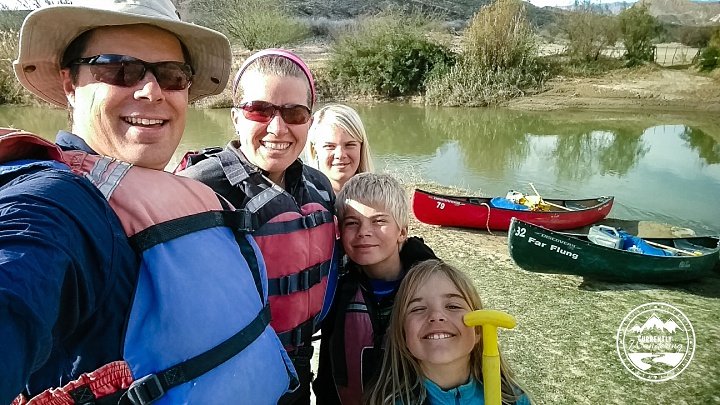
The put it was easy enough to find and we were the only group headed out that morning. Our three kids were a huge help inflating canoes and kayaks and we had everything just about done by the time our shuttlers showed up. We ate a quick lunch and then were off!

Floating the River

We needed to cover 45 miles in just three days. The plan was to evenly split and cover about 15 miles per day. The river was moving at a pretty good pace, and I think we mostly expected to leisurely float down the river. I also expected our canoes to be the slowest. Not so much. I think our kayaking friends were slightly annoyed at how much paddling they had to do to keep up!

In order to keep our boats pointed downriver we needed to steer, and in order to steer there had to be a bit of paddling. When they were behaving, our canoes literally sliced through the water. At one point, Sam and Rachel pulled out their ‘A’ game and took off outpacing the kayaks by quite a bit just trying to see how fast they could go.

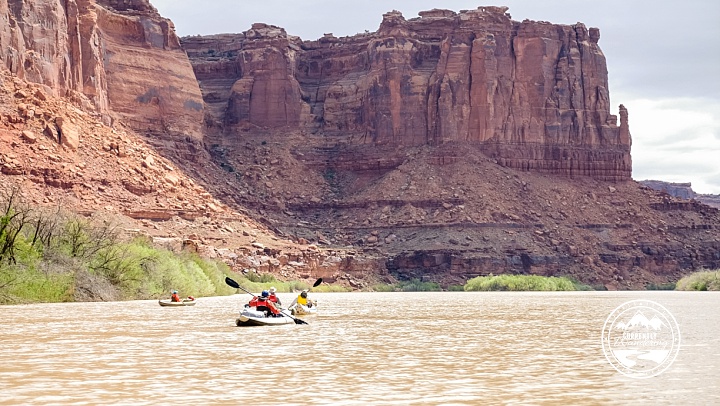
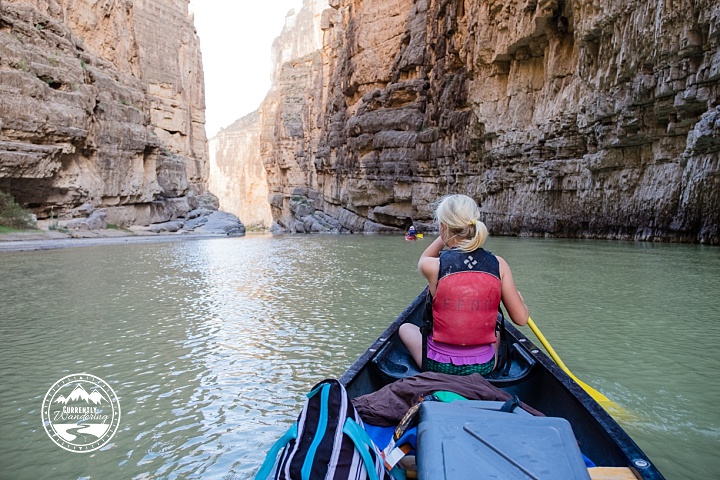
We were the first to push off (I think everyone thought we’d be slow) so we tried to keep it casual while waiting for everyone to catch up. Just a few miles downstream we started encountering sandstone walls. While the Green is at least 4 times as wide as the Rio Grande, both Rachel & I started getting fidgety as memories of crashing into rocks and getting dumped in the river came flooding back.

We also learned our canoe was imbalanced. I had put the heavy water jugs behind my seat in the back and we kept getting turned around. Once we were exactly backwards, our canoe did just fine floating in a straight line. Rachel was frustrated at my lack of control and may have burst into tears and quit paddling right then and there. I think one of my better parenting moments was to let her cry it out. I knew why she was frustrated and scared, and we weren’t in any danger.

Steve came to our rescue and helped us transfer our heavy, 5 gallon water jug to the front of the canoe instead. Not an easy task while both still floating downstream and trying to not to tip in. It totally worked though! With the heavy weight in the front, we were more prone to stay pointed the right direction. What a relief!

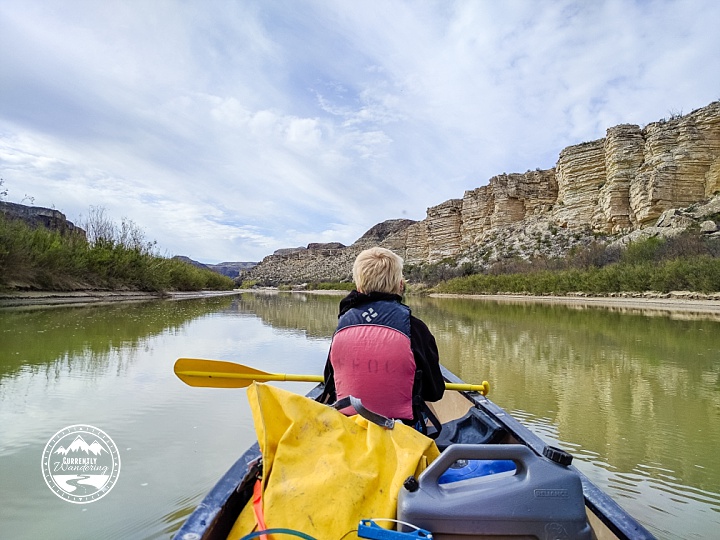
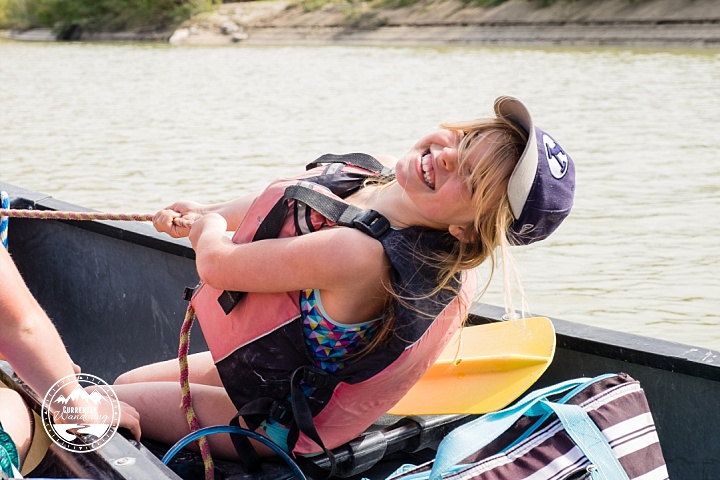
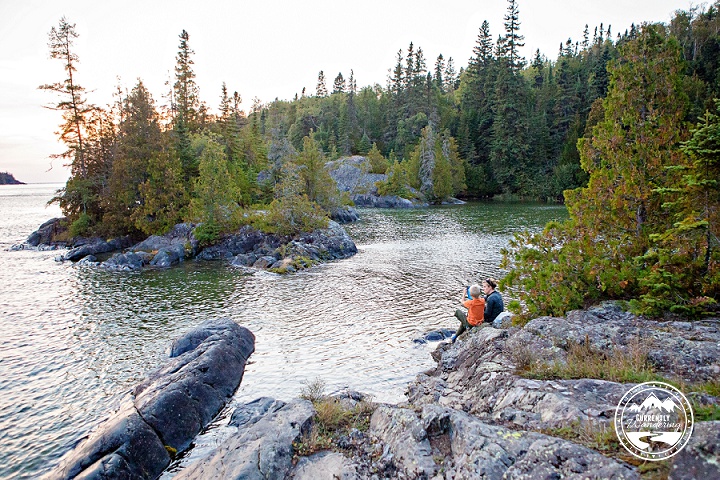
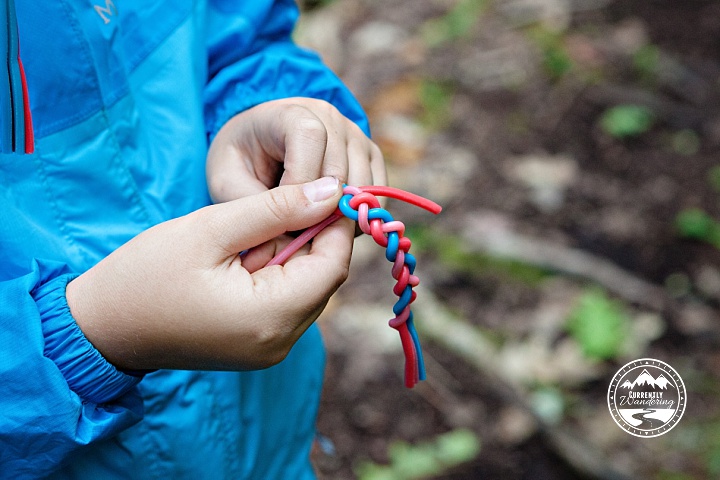
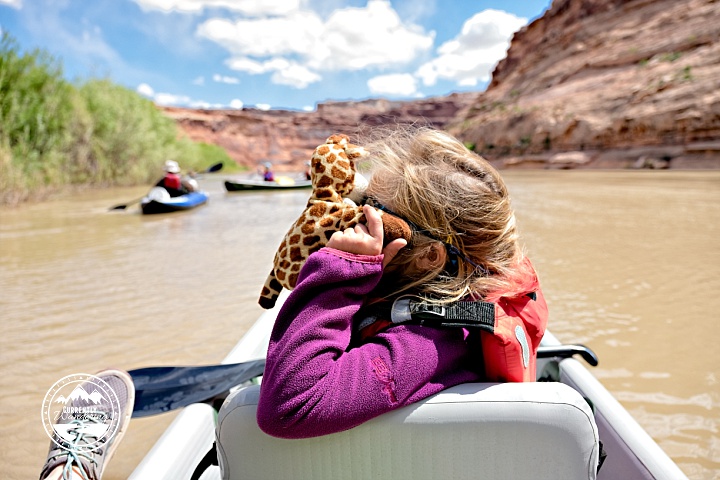
Most of the paddling was easy and enjoyable. The scenery is gorgeous and once my brain finally settled, I was utterly at peace. We had quite a bit of sun our first day, but the following two days were colder and we kept our jackets on. I joked over on Instagram that life on the river can be tedious for young kids. Good thing we brought some stuffy friends along to keep us company!

Fighting the Wind

The biggest challenge was the wind. At one point, Andrew, Cara, and I had drifted to the far side of the river and we needed to make it all the way across for a take out. With a strong headwind pushing us backwards, we gave it everything we had. I was so proud of my kids at that moment for digging in and as we neared the far side we could hear everyone cheering us on! Definitely one of my favorite moments, and also one of the most exhausting.

On Day 2 we headed into Bow Knot Bend. This section of the river literally looks like half of a bow tie while the river bends back on itself. Between the changing river current, and wind coming up over the saddle there was some crazy strong, unpredictable wind. We cut our miles short on Day 2 so we could hit the majority of the Bend with fresh arms and spirits the morning of Day 3.

We set off early and right out of the gate were fighting the wind. I was still having trouble keeping the boat straight, and both Rachel and I were extremely frustrated with our situation. Not a good way to start the day. We rounded the mushroom side of Bow Knot and received a welcome relief from the wind. The sun came out, and we mostly just rested as our boats continued downstream.

As we rounded the corner, I braced myself for the wind I knew was coming. It came HARD. We tried to keep about 20-30 feet away from the bank as one of our biggest frustrations was being blown into the Tamarisk plants along the edges. Not our favorite place to be. The current seemed to moving slightly slower out there as well, although with the strong wind pushing back at us we literally were seeing white capped waves. It was insane.

Rachel and I finally got into a rhythm where I would provide driving force from the back, and she would do a reaching stroke from the front to keep us pointed downstream. We realized later that our skeg (small fin in the back of the canoe) was severely limiting my ability to steer from the back. I could be back paddling extremely hard and go absolutely nowhere. Rachel’s strokes in the front helped pull us to one side or the other and I battled against the wind from the back.

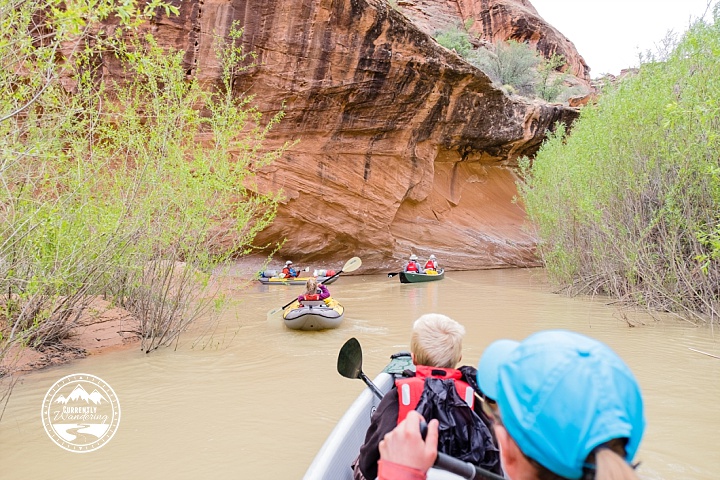
“After battling up a long section of river, Andrew and I ducked under this tree for a brief break before heading on. A few minutes later we were joined by the others as we rafted up briefly before continuing downstream.

We headed back out and battled onward into the wind and spray. As it intensified, Andrew joyfully yelled “THIS IS THE LIFE!” Yes it is, Andrew, yes it is.” – @telegramsam

It was amazing to me that we could literally see the line where the wind stopped. Something about the shape of the canyon, but once we crossed that line just below Bow Knot saddle the wind reversed into a tailwind, the sun broke through the clouds and the kids and I happily sang, “There is Sunshine in My Soul Today” at the top of our lungs.

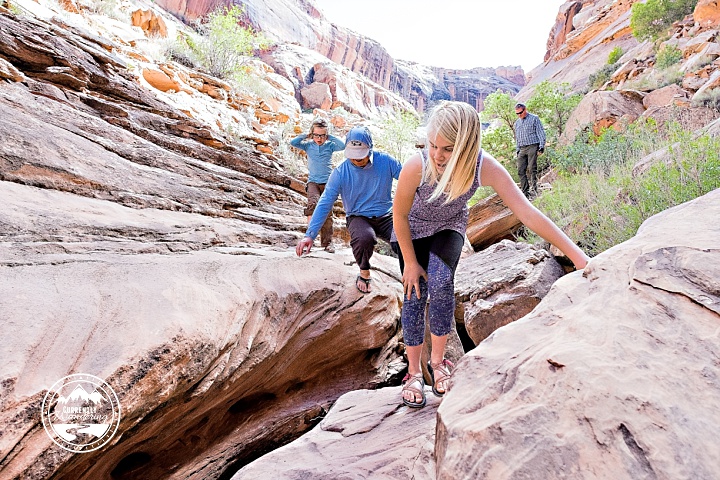
Exploring Side Canyons

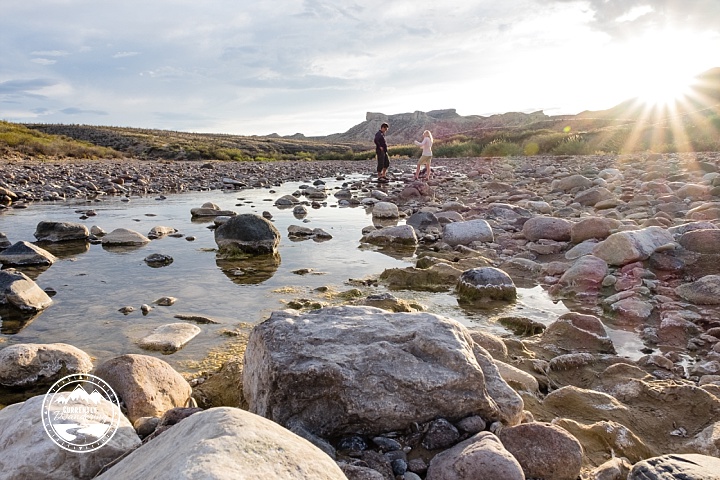
One of my favorite parts about this trip was all the side canyon exploring. It was fun to get out and hike. Standing up and stretching our legs always felt great!

Day 1 we stopped at Three Canyon & Trin-Alcove Bend near river mile 90 and parked the boats for some land exploring. There was a social trail leading up into the canyons, but mostly we just picked our way over boulders until we reached the end.

Morning of Day 2 we hit Ten Mile Canyon. We could’ve paddled a ways, but mostly just went until we felt like turning around. These side canyons were a great time to switch things up, and my kids were given the opportunity to kayak for a bit. They loved it!

A little later in the day we stopped at Hey Joe Canyon to stretch our legs. There is a Uranium mine up the canyon a bit, but we realized it was getting late, we still had miles to paddle, and we wanted to save time for the saddle hike.

Evening of Day 2 we camped near, and then hiked to the top of BowKnot Saddle. Don’t miss this! There’s a legit trail headed to the top and the view up there was unbelievable! Just watch out for the wind.

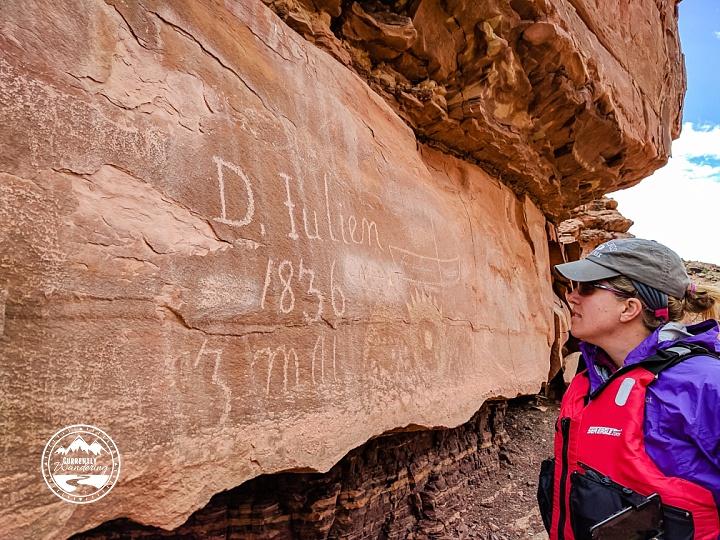
Day 3 we intended to paddle up Horseshoe Canyon, but never quite find out. We found a bank for lunch instead and just enjoyed the break. Before taking out our last stop was Hell Roaring Canyon where the D. Julie Inscription is located. Super cool history – just don’t carve your name into the rock!

Finding a Campsite

Part of the stress of river running is finding a campsite. We joked that often it is too early, too early, and then suddenly its two hours past dinner and everyone is starving.  @themorewexplore did a ton of research on possible campsites, but with changing river levels and overgrown tamarisk we didn’t know what we’d find.

We had to make sure that our group stayed together when we were hunting along the banks. If someone drifted too far downriver it was almost impossible to get back upstream.

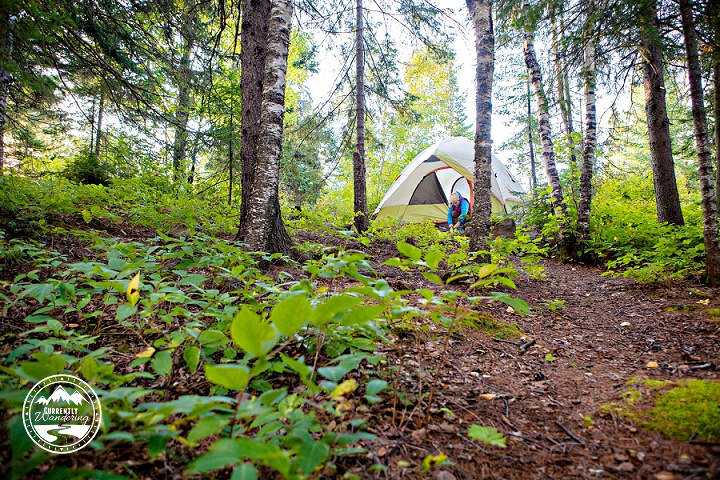
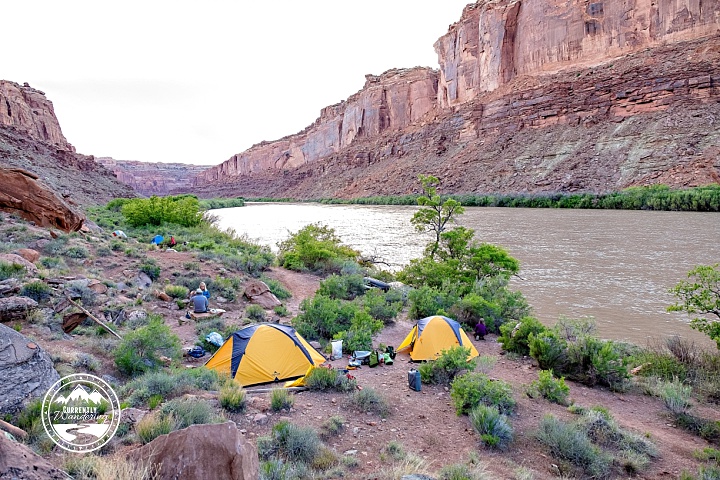
Our first night, Mariana darted across the entire river and found the BEST campsite we could have asked for near mile 84 on river left. The bank was steep due to the river levels, but we managed to bring all the boats up and there was plenty of room to spread out.

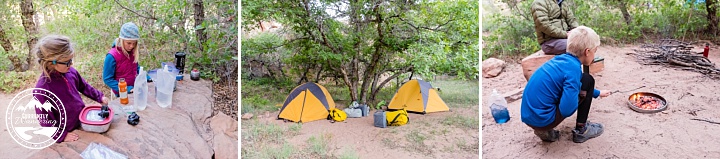
We hung out in the “kitchen” area while everyone prepared their dinner, and afterwards had a roaring fire (well, as good as we can get while using a firepan!). This spot was pretty sheltered from the wind and we all had a great night’s sleep!

Day 2 was a bit more of a scramble. Tess knew of some sites past BowKnot, but by the time we got to the saddle take out between miles 70 & 69 on river right I was tired. I could also tell the kids were also pretty done. There was no way we were hiking to the top and then paddling another 5 miles into the wind to find a site. After inspecting the bank for a few dozen yards, we found a spot to beach the boats and haul our gear up on the bank. It wasn’t the “perfect” spot, and meant we needed to cover more miles the following day but we were able to set up camp and then hike to the saddle.

“We found this campsite just when we needed it. Unfortunately it was a bit windy (sand everywhere!) and there were pack rats (everyone survived), but we did get our hike up to the saddle and were able to sleep close to the river. We’ll call it a win. ” -@currentlywandering

Most of the magic of finding campsites is knowing what to look for. At lower river levels, sandbars are a great option.  Unfortunately, the river was so high we were reaching for banks and hanging onto tamarisk to keep from floating downstream. Most often people have carved paths through the vegetation to spots where it opens up for enough space to pitch a tent. You just have to look.

Take Out at Mineral Bottom

We made it to Mineral Bottom in the early afternoon on Day 3. This is one pull out you don’t want to miss!! The next take out is a good 6 days down river and involves getting a jet boat to shuttle you back up the Colorado. Kind of a big deal if you miss it!

Mineral Bottom is on river left, and at the time had a great big eddy we could pull in to with a nice beach. We pulled all the boats out of the water and then came the task of folding them up and cramming everyone’s gear into the back of our truck and a small, 4 door sedan. Good times.

There is an outhouse at the take out but its pretty nasty so don’t plan on using it.

Once we loaded everything, we then had the pleasure of driving out the windy, steep road. I’m just glad I wasn’t one of the drivers on the way IN. I think I would have passed out as I don’t do well on narrow roads with steep drop offs. Also note this road is absolutely impassable after a large rainstorm as it can easily get washed out.

Once we got back to the main road, we drove up to Ruby Ranch for our other vehicles and a reshuffling of gear. From there it was on to a celebratory hamburger dinner in Price!

Would We Do It Again?

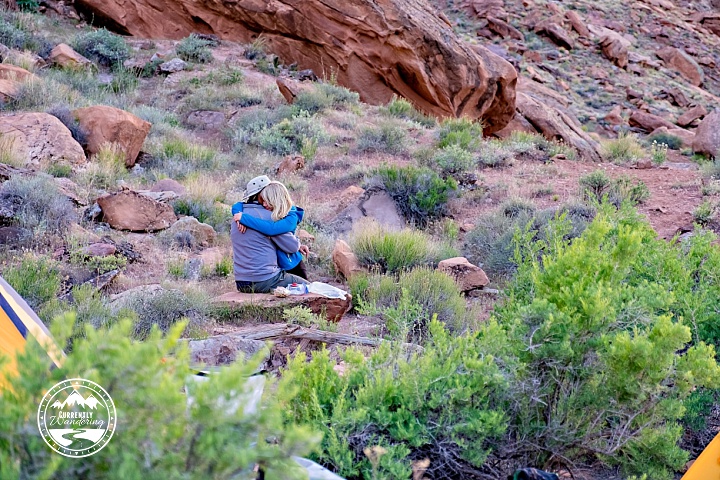
I would do this trip again in a heartbeat. It definitely takes planning and coordination, but spending time with our kids on the river is one of my favorite things! We had our ups and downs, moments where things didn’t go exactly as planned, but that’s what life in the back country is like. Most importantly we had moments where we could really connect with our kids, and that’s what matters in the end.

HUGE thanks to Sea Eagle for providing our boats for this trip. As always, any opinions expressed are completely our own. This post also includes affiliate links.  Purchases made through our unique links will provide us with a small commission that will go toward keeping the blog running.  Thank you for your help!
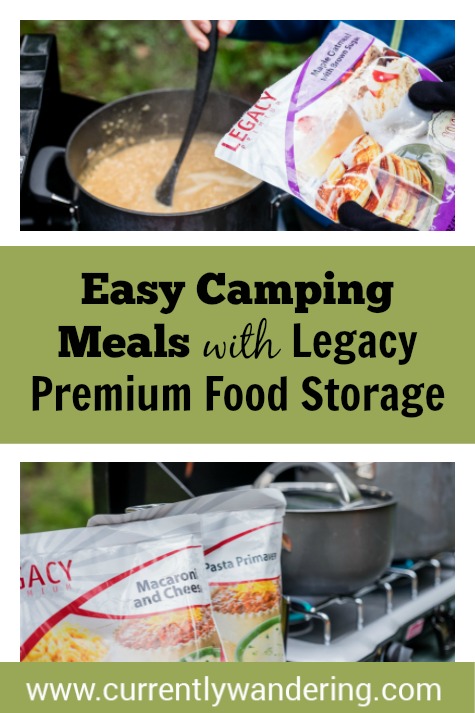
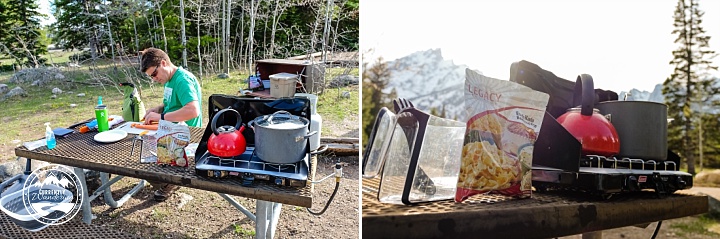
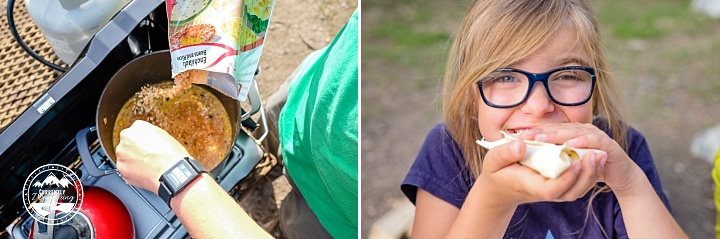
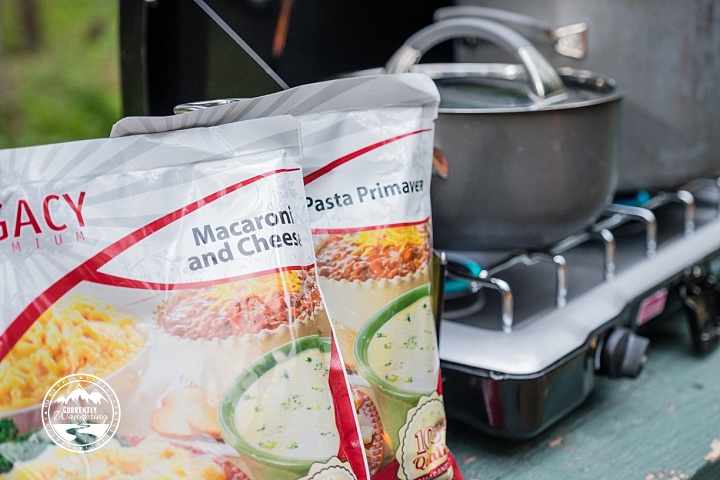
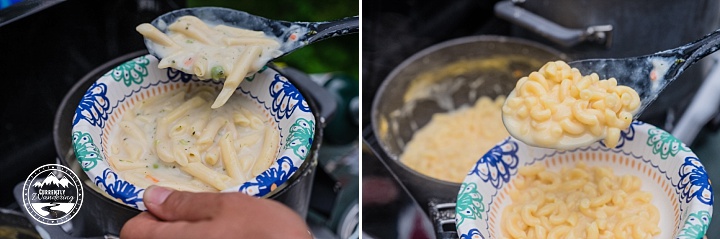
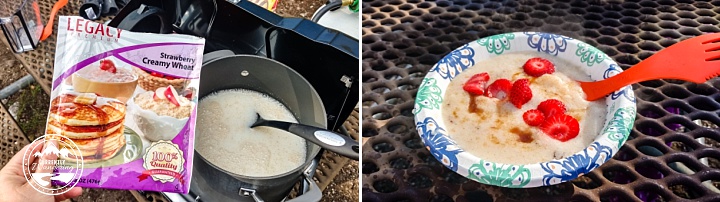
Categories
Backpacking Michigan Minnesota National Parks State Parks Wisconsin

Best Summer Road Trips: Lake Superior Circle Tour

Loading up the kids in a minivan and hitting the road over summer break is a rite of passage. I figure if you can all survive being crammed together for days or weeks on end, you can do anything, right? Traveling in the Airstream is a bit different, since we mix in school & work year round but occasionally we hit upon just the right schedule to create an epic road trip.

We visited my brother and his family in Minnesota one summer, and after taking a look at our schedule and the time available we decided drive around Lake Superior. Turns out its a thing. There are patches, stickers, maps, and even a website for that, something we didn’t realize until we started seeing the street signs pop up. The aptly named Lake Superior Circle Tour is a 1,300-mile drive that completely circumnavigates the lake, including the North East shore in Canada.

You can start the tour anywhere and travel in either direction. Most people take about a week, we just happened to stretch it out into 42 days. Our tour started at Pictured Rocks National Lakeshore in Michigan and traveled clockwise. While our adventures on the shores of this great lake could fill a book, we’ve picked out a few of our favorite destinations to get you started.

Stop 1: Michigan’s Upper Peninsula

We spent 10 days exploring the “UP” as the locals call it. We started in Pictured Rocks National Lakeshore, ate a lot of pasties, learned about mining on the Keewinaw Peninsula, and hiked  in the Porcupine Mountains. There’s definitely something for everyone!

Stop 2: The Apostle Islands National Lakeshore

The Apostles are a beautiful cluster of islands that sit just off the coast of Wisconsin’s section of Lake Superior. You can learn about the islands from visitors centers on the shore, but a rich experience awaits those willing to board a ferry. We opted for a two-night backpacking trip on Stockton Island. A ferry trip from Bayfield let us off onto the docks. We explored, hiked, and even celebrated Andrew’s birthday there! Other popular activities include kayaking to the sea caves, and lighthouse tours.

Stop 3: The City of Duluth

Duluth has a rich history in shipping activities, and you can watch huge cargo ships navigate in and out of port. Check the schedule before you arrive, and you can get an up close look as they come and go. There’s also some great mountain biking in the hills, a decent children’s museum, and a cute downtown with great food.

Stop 4: The North Shore

There are numerous spots along Minnesota’s North Shore worth stopping for, but Gooseberry Falls State Park was a favorite. We enjoyed our time on the shore here, appreciating the magnitude of this lake we were driving around. Split Rock Lighthouse is just a short drive away and don’t miss Betty’s Pies located to the south. We ordered the Pig Trough to share, complete with three slices of pie, four scoops of ice cream, a banana, and whipped cream and toppings. We liked it so much we returned a few days later and had the same thing again!


Other stops along the shore included Tettegouche State Park, Grand Marais, and Grand Portage. Check out our post here for more details.

Stop 5: Sleeping Giant Provincial Park

We had heard amazing things about Sleeping Giant Provincial Park and knew we wanted to spend at least one night there. It was mid-September so fairly off season for this part of Canada and the campground was not busy. The park hosts amazing hikes and beautiful views. We also enjoyed our lakeside campsite on the smaller Marie Louise Lake.

Stop 6: Sault Ste Marie

Our visit to Sault Ste Marie was punctuated by two things: Poutine (on the Canada side) and the boat locks (on the US side). Watching the huge lake boats move through the locks was enthralling, and everybody’s bellies were fat and happy after we ordered (and ate) far too much from Smoke’s Poutinerie.

Even having driven around it, I still don’t think I full appreciate the vastness of Lake Superior. It literally looks and feels like you are standing on the edge of the ocean, but there’s no salt smell. Something about it just drew us in and we were smitten from day 1. It was hard to narrow it down to just a few places on our journey! Maybe we will write that book….

What to Wear:

The weather around the lake is constantly changing. There’s sunshine and warmth, then there’s fog & rain. We had crazy wind and were wearing all our layers on the Apostles, and then up along the north shore it was t-shirts and shorts.  Its best to plan on layering your wardrobe and taking pieces that are versatile! Check out some of my favorites from Aventura’s spring line:


Other Road Trips:

Check out these other favorite road trips from fellow Aventura Ambassadors:

Trans-Canada Highway & Icefields Parkway from Alyssa from Kidproject.org


Grand Teton National Park & Colter Bay from Kathy from GoAdventureMom


Hit 5 National Parks in Southern Utah by Alyssa from Kidproject.org


Glamping at Westgate River Ranch Resort/Central Florida by 365 Atlanta Family


Categories
National Parks On the Water Texas

Overnight Canoe Trip in Santa Elena Canyon – Big Bend National Park

When researching Big Bend National Park, we picked out a few things that were on our “must-do” list, and a few for the “would be great if we had time” list. Canoeing Santa Elena Canyon was at the top of the “must-do” list for sure! We’d seen some friends do a boomerang trip where you put in below the canyon, paddle upstream, and then turn around and go back. They had mentioned there were great campsites which got us thinking about how to extend our paddle to an overnight trip. After a lot of research and plenty of stress we pulled it off and we are so glad we did. This trip was definitely the highlight of our visit to Big Bend!

For the rest of trip see our Ultimate Guide for Big Bend National Park – Texas.

The Gear & Planning

We travel with backpacking gear & bikes, but we don’t have our own boats. We rented two regular canoes and related river gear from Far Flung Outdoor Center in Terlingua. There are other rental shops in town, but we felt these guys had the most extensive equipment for an overnight trip vs. just a day trip. We also paid them for a private shuttle at both ends of the trip. The shuttle was expensive (several hundred dollars) but going just as a family instead of a fully guided trip saved us about a thousand dollars.

Far Flung also has a great mileage chart for the river and shuttle fee estimator. Seriously tons of great info right on their website. We knew we wanted to take out at Santa Elena Canyon so the best spot for us to put in for roughly a two day paddle was Lajitas. Total river miles between the two is 18. Definitely the longest paddle we’ve done, but we knew we were up for it!

After we figured out our camping situation in Big Bend, we were able to call and reserve our canoes ahead of time. We were definitely there in the off season, so reservations were not a problem. We did get our desired dates, but Far Flung does run their own trips so coordinating a shuttle could have been difficult. Best to reserve everything as far in advance as possible.

One of the hardest things for us when we head to the back country is what to do with the Airstream? Many times we’ve been able to leave it in visitor center parking lots, but that wasn’t going to work here. The day before our trip, we moved the house to Cottonwood Campground in Big Bend which was the closest to Terlingua. It was cheaper than staying in an RV park in town ($15/night vs closer to $30) and we knew it would be safe. We unloaded and locked all our bikes next to the trailer and spent the afternoon packing and getting our food ready.

Equipment We Rented for 2 Days:

Fire Pan (required by the NPS whether you plan to have a fire or not): $10.78

Canoe (x 2): $340.48

Toilet System (we went with a groover, basically a plastic box inside an ammo can + a seat): $38.80

Larger Waterproof Bags (x 2): $32.32

Shuttle Fee: $80.81 drop off + $202.03 pick up = $294.84

Lost Paddle (oops): $30.17

Backcountry permit (required by NPS): $12

Total equipment rental: $747.39

Equipment We Brought:

Basically we took all our backpacking gear. We’ve worked hard to make sure its small and lightweight (not really a concern in a canoe though) and it was easy to just throw it all in the dry bags. We did pack everyone’s clothes, pajamas, kindles, headlamp, earphones, in individual packing cubes to keep things organized. I feel like it worked really well!

We then had our Freezer Bag cooking meals (We did a Thai noodle dinner this time and it was delicious!), Jet boil, and extra canister.

Just because we could, we packed our two REI camp chairs. They were awesome to have around at camp and the kids were jealous we wouldn’t share. I think next time we might need to pack a few more.

We had a small cooler bag for some lunch items (everything in it got totally soaked so I’m not sure I’d recommend it), and two 5 gallon Rhino water jugs for fresh water. The Rio Grande is a pretty nasty river and we were advised against filtering it, but 10 gallons was plenty for overnight.

Day One – Putting in at Lajitas

We arrived at Far Flung Outdoors by about 8am on Thursday morning. We needed to sign paperwork, double check equipment, and our shuttle timer started promptly at 9am so we wanted to be ready to go.  Everything went smoothly, and just before 9am we loaded up in the company van and our driver set out for Lajitas. Our driver was chatty and told us a little about the history of the ghost town and the area. Before we knew it, we made it to the put in, quickly unloaded, and then we were on our own!

The Rio Grande was running fairly low and slow, and took a great deal of effort to paddle. It was definitely not a float trip! We traded up canoe crews several times each day. Rachel and Andrew are both excellent paddlers, and Jess and I manned the rear seat. The blue bags you see are large dry bags that contain our gear. Yellow bags and ammo cans contain the required ‘groover’ toilet system. We used straps to tie the gear in the boat just in case we all spilled out!

The first day we covered 10 miles of river with open views and an occasional minor rapid. For our only real rapid of the day, Jess and I paddled each canoe through while the kids walked down the bank. The kids kept themselves entertained by singing songs, telling stories, and just talking. We counted all the turtles we saw, and broke into song whenever we saw one.

“These kids. I’m so grateful to be their mom. Cara is an excellent paddler but with 21 miles to go on our overnight trip we didn’t want to push her. Instead, anytime she wasn’t paddling, she happily took on the task of being our figurehead. Most of the time with kids and the outdoors it’s a “whatever it takes” mentality. 😂” – @currentlywandering

We stopped for lunch about mid-day by just pulling off the river. We had made sandwiches early that morning and paired with veggies and chips it was the perfect lunch!

We reached our overnight spot earlier than expected. It was chosen with two goals in mind: a non-muddy landing and non-rocky tent sites. Our camp was of questionable nationality: a river island at higher water levels, this piece of land was divided from the south by only a small trickle and was clearly frequented by Mexican cattle. One of our maps placed the border across the middle of the island, and the other map only showed a border where the middle of the river was clear and no border across the island at all.

Once we got our tents set up we had a few hours to kill until dinner. The kids all brought both audio books and kindles, and spent quite a bit of time relaxing in their tent. We also managed to play a game of Ticket to Ride on my phone. This is the hardest part for me about back country trips – dealing with bored kids once we get to camp! There was a little exploring we could do, and Cara had fun shoveling cow pies with our oars, but mostly it was just time to relax. We had forgotten our card games or even our backpacking bocce set (unfortunately) but we all survived!

The only person we saw this first day was a Mexican cowboy on the opposite bank. We figured he was out checking his herds, and just waved as he trotted past. There’s definitely something to be said for the isolation and peace found in our country’s wilderness places!

“As a family, we are constantly seeking to push ourselves outside our comfort zone. Although I’ve rafted plenty of rivers, planning this overnight canoe trip was extremely uncomfortable. Canoeing has never been my strength, and we were planning to be in very remote areas of Big Bend National Park.

Thursday night after a long day of paddling I stood on the shore of the Rio Grande and watched the sun set over our little campsite. Later, we sat by our fire, gazed at the most stars I have ever seen, drank herbal tea and for the first time in months I felt incredibly at peace. I am content. Happy with our choices, proud of my kids, and in awe at the path @telegramsam and I have traveled to get here.” -@currentlywandering

Day 2 – Paddling Through the Canyon

After a peaceful first day and a good night’s sleep, we felt prepared for day two. Within just the first few river miles, however, we fought with vegetation along a bank, high centered and tipped our first canoe of the day, and Jess hit a rock hard at Entrance Rapid near the mouth of Santa Elena Canyon. Needless to say, we were already pretty rattled.

Most of the paddling trip was fairly flat, boring water. We were warned sufficiently about Rock Slide, however, as its a boulder maze with no good way to portage around it. Sam had stressed the night before about our ability to make it through, but I had adopted a fairly “we’ll make it work” attitude. Fairly normal for both of us. Far Flung had given us a detailed map of this section and the various routes we could take to make it through.

“Rock Slide is rated a Class IV at much higher water levels, this is a Class III at current flow (284 CFS) mostly due to tight navigation. If we had a guide with us, I wouldn’t have been worried about this rapid at all. Because we were on our own, Jess and I felt the direct responsibility for the safety of our kids. We studied maps and guides, and we scouted the rapid in advance. Frankly, it was out of our comfort zone. We reminded the kids of some river safety practices, and made an appeal for divine guidance and strength.

Our courage gathered, we headed in. Rachel and I went first with an attempt at the fast moving Texan Gate, and spilled into the river as we were unable to keep their balance against a large boulder. After draining the canoe on a small sand bar mid-rapid, we managed to nail the small rock you see here in the center of the channel and dumped in again.  Luckily, we were able to drain enough water out to make the canoe workable in this tight spot, and then more fully drained the rest of the water out below the rapid. We lost both the toilet seat and a paddle in the process, but luckily picked the seat out of an eddy later on that day. A paddle was a small price to pay to make it through safely!” – @telegramsam

“My track record so far that morning was not great. I paddled Rachel through scraggly brush, dumped both girls in the water after siding on a mostly submerged rock, and ran straight into a large boulder after missing a turn – smacking my shins on the canoe bar and instantly developing large welts and bruises. As I watched the water rush towards yet another large rock I knew there was no way I could make that sharp turn and keep everyone safe and in the boat.

I could also tell the kids were scared. So much of parenting is protecting our children both physically and mentally and I was doing a poor job at both. After scouting the rapid we determined that Sam and Rachel would run the Texan gate first and I watched as they launched, turned, side hit the rock and promptly were dumped in the river. Luckily there was a sand bar and they were able to beach the canoe, dump it out and reset, but if Sam couldn’t do it, how on earth was I to? Fortunately there was another option. The Mexican gate had more turns but the river was moving much slower. Andrew and I dragged our canoe upriver and headed for the right side instead and we made it with only a few minor bumps.

After an entire day of paddling and honing my rudder skills, I look back and think, “Well, shoot. I could do that NOW.” Isn’t that a lot like life? We bumper our way through collecting bruises, get dumped in the water, and at the end of it are so much stronger and capable than when we began. Luckily along the way there’s also calm water and incredible views. We are all stronger from our experience, and Rachel will tell you Slide Rock was her favorite part of the trip.” -@currentlywandering

With Rock Slide behind us, we began to relax and enjoy the rest of the day. The walls of Santa Elena Canyon rose high around us, and the views were spectacular! The Canyon was pleasantly warm, and we paddled easily. We counted turtles, watched birds fly through the canyon high above or heads, and snacked on Perky Jerky and Starburst. We had a few more tight turns to paddle, but by this time we were all definitely in a rhythm and much more confident of our skills. After executing one rather well-time turn, Rachel looked back at me and exclaimed, “Mom! That was graceful!” High compliments from a girl who doubted all of my skills just a few hours earlier!

“Somewhere in the midst of overturned canoes, shin bashing, and bumper boats my Enso ring slipped off my finger and disappeared into the murky depths of the Rio Grande. Or more likely it floated downstream, got caught in an eddy, and now a Mexican Señora is in awe at the incredible comfortableness of this amazing piece of silicon wrapped around her finger.” -@currentlywandering

As we neared the mouth of Santa Elena Canyon we saw hikers on the same path we had walked just two days before. It was a surreal experience, remembering back to our limited view of this magnificent stretch of river. The view at the end is beautiful but insufficiently captures the adventure, the challenge, and the beauty of the 20 miles we paddled to get there.

We made it to the take out spot 20 minutes early, which gave us enough time to haul our boats out of the water, change our clothes, and grab a snack. Once our shuttle arrived, we piled everyone in and set out for the hour drive through Big Bend back to Terlingua.

We celebrated our successful trip with coin operated, hot showers and dinner out at a local Mexican restaurant. It was the perfect end to a fabulous trip! We don’t often push ourselves this far outside our comfort zone, but I’m so glad we did. There are so many ways our trip could have ended badly, and I’m grateful for the protection we believe the Lord gave us on our journey. I’m pretty sure we will all remember this trip for years to come!

Categories
Backpacking Tips & Tricks

8 Tips For Taking Your Kids on Their First Backpacking Trip


My husband, Sam, and I completed our first backpacking trip together in New Zealand’s rugged mountains four months after we were married. Actually, it was my first backpacking trip ever. While he grew up with parents who frequently went into the back country, we were more front country, car camping kind of people. Despite the flies, the rain, and the incredibly steep trails, I was hooked after that one experience.

Knowing how incredible it feels to wake up in a tent on top of a mountain, we agreed that we would love to share that experience someday with our kids. This last year we finally reached our goal, completing four separate excursions in various states across the U.S. We watched our kids struggle up steep trails and bundle up against cold, windy weather but then also lift their faces in awe as they soaked up an early morning sunrise.

So, how did we do it? How did we go from tent for two, to trailside with five? Here are eight tips for taking your kids into the backcountry for the first time:

Plan Carefully.

There are many questions to consider when planning your child’s first backpacking trip. What are your goals? How many nights do you want to do? How far can your kids hike? What is there to do once you get there? Are you going to start after dinner? Early in the morning? How steep is the trail? Is it a long drive to the trailhead? Knowing your kids and their limits (generally speaking) can give you a good idea of where to start.

Many of our overnight hikes leave around 2pm, hike five miles to the campsite, eat dinner, have a lazy morning and hike back out around lunchtime. Simple, easy, yet a great way to unplug and be together as a family. Other families I know grab Subway after work on the way to the trailhead and hike a mere mile or two in before setting up camp for the night. Know your goals and then research the best way to accomplish them.

Start Simple.

Long before we loaded our kids up with a pack we hit the trails. We hiked short trails, long trails, hikes in the mountains, and hikes in the desert. Our kids could hike up to ten miles, which we did repeatedly over the course of a year. Our first backpacking trip, however, was a short 3.5 miles. We’ve gradually increased the distance over time, but we’ve found that hiking with a pack is a different experience for a kid. My husband has memories growing up of even shorter, one mile hikes to backcountry sites shouldering his small backpack and water bottle. The idea is to get your kids used to hiking in to their campsite wearing a pack whether it’s one or ten miles in.

Take Your Time.

On multi-day trips, my husband and I often remind ourselves we have ALL DAY to hike with the kids. The beautiful part of backpacking is that often there’s not much to do besides hike, so taking all day to hike that 3.5 miles not going to crimp anyone’s schedule. Smell the flowers, throw rocks in the stream, take a longer snack break and don’t push too hard.

Pack Plenty of Treats.

Well-thought out and distributed candy, snacks, and gummies can help motivate even the most reluctant hiker. Quick carbohydrates and sugar are often the perfect pick-me-up. We often have a mile limit or a goal to reach before we sit down to pull out the treats, which keeps the kids from asking every five minutes if they can have skittles. A special treat for reaching the “top” is also a welcome bonus. Our kids love Australian licorice, skittles mixed with toffee covered peanuts, mini M&M’s, and Pull-and-Peel Twizzlers.

Simple Meals.

While you may enjoy a gourmet backcountry dinner, chances are your kids are just hungry. In addition to plenty of snacks and treats, we do Freezer Bag Cooking for dinner and breakfast. All dry ingredients are prepared beforehand at home and then sealed in a freezer bag before getting tossed in our packs. Once mealtime rolls around, we boil water, add to our freezer bag, stir, let it sit in a cozy for 10 minutes, and voila! Dinner is served. Our three kids typically share a meal, while Sam and I eat a second. Our favorites so far are Cheesy Bacon Onion Mashers, Chocolate Protein Oatmeal, and Chicken Thanksgiving Dinner.

Be Prepared for Boredom.

Let’s face it. Most kids are addicted to screen time and even when they are conditioned to get outside often there’s still going to be whining about being bored. At camp, my older two kids will happily read on a Kindle for an hour or two, but after ten minutes my five year old is complaining because no one will play with her. We’ve learned to be strategic about how much time we will have at camp, whether or not there is anything nearby to explore, and to bring card games and even toys to play with once we get there. Packing a compass for scavenger hunts, a GPS unit for Geocaching, or a pocket knife for whittling sticks are all fun ways to spend time together once camp is set up.

Ultralight is Best, but Don’t Stress About Gear.

Between the two of us, we carry most of the gear. From the tent to the sleeping bags, cooking gear, and the food, most of it is packed into our two larger bags. Over time we’ve been able to make adjustments and swap not-so-light gear out for less weight as we gradually increase our distance, but start with what you have. At short distances, ultra-light gear is not as important. Let your four year old wear her Winnie-the-Pooh backpack and bring her stuffed animal. You can see our gear list here.

Have a Good Attitude.

The best thing you can do to help your kids have a good attitude and appreciation of the experience is to have a good attitude yourself. If your kids hear you talk about how much you enjoy the view, how much you appreciate the challenge of that ridge in front of you, and the good memories you have of other backpacking trips, your kids are likely to adopt a similar attitude. If they hear you complain about how dirty you are, how much you miss your bed at home, and the pains you feel, they will likely adopt those feelings too. Having a good attitude can be a challenge, but the payoff is worth it!

While we introduced our kids to backcountry camping fairly spectacularly manner, camping for two nights on an island in Lake Superior is not feasible for everyone. Our main goal, however was to have the experience end solidly with a “backpacking is really awesome” mindset for the kids no matter where we went. We feel it was a success since the kids happily followed that up with three more trips over the next few months.

Backpacking, or doing anything outdoors, with kids involves a different mindset. Suddenly we weren’t doing this for us, we were doing it for them. The miles are shorter, the terrain a little easier, the views maybe not quite as majestic, but the time spent together hiking, setting up camp, and snuggling in our sleeping bags while the stars wink overhead is irreplaceable.