Categories
Arizona Biking WanderLog

Mountain Biking at McDowell Mountain Regional Park, Arizona

McDowell Mountain Regional Park as been on my “visit list” for at least 2 years. We even had reservations here two years ago, but it was too late in the spring and we cancelled in favor of higher elevation to escape the heat.

When we decided to spend winter 2017 in Arizona again, McDowell Mountain climbed immediately to the top of list. Originally we reserved 8 days thinking that would be long enough to explore the trails thoroughly. Then we actually arrived, and 8 days turned into 18. Even then we were all sad to leave, and are making plans to come back relatively soon.

Travel Dates: January 5 – 22, 2017

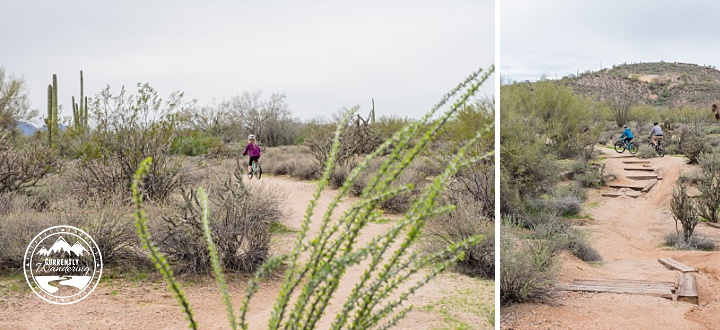
McDowell Mountain State Park is known for its trails. Specifically, its mountain biking trails. You can hike or ride horses on them as well, but the majority of users we’ve seen have been on bikes. They also have a competitive track and run races here on a regular basis.

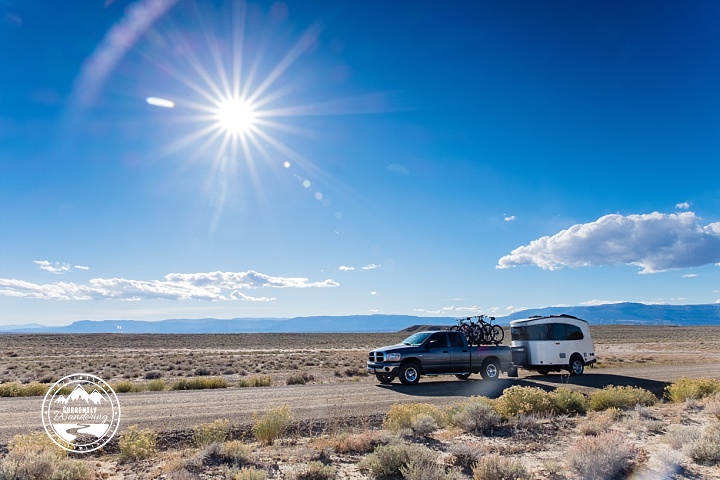
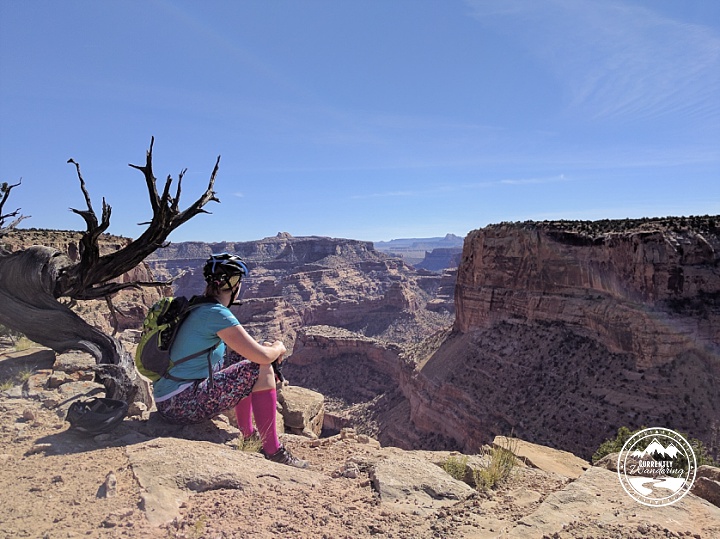
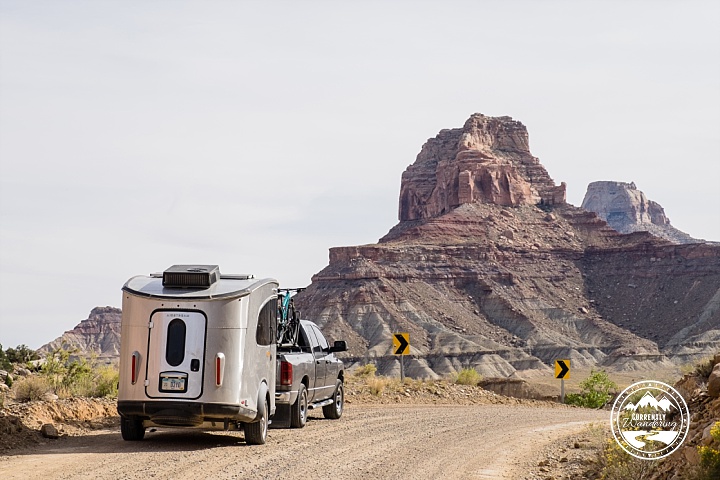
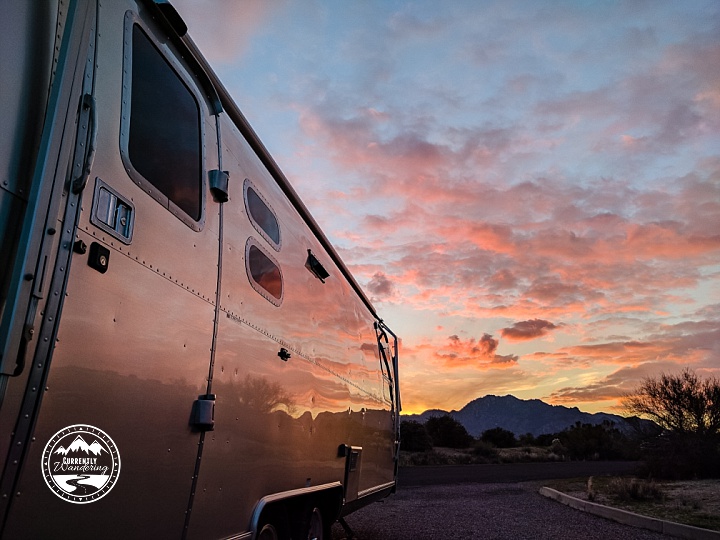
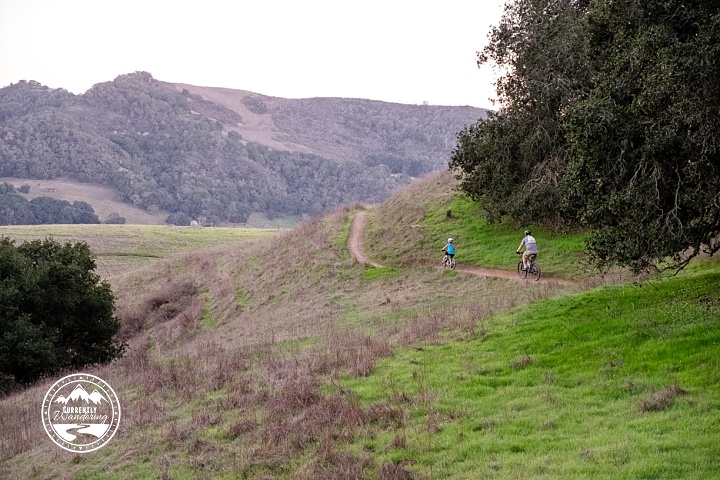
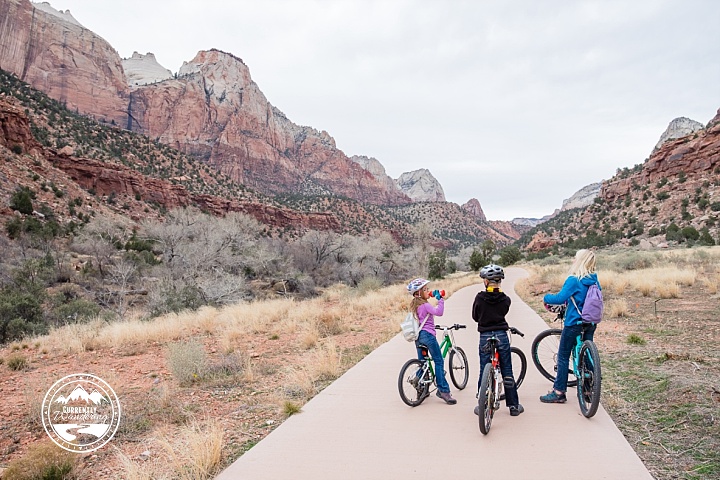
Mountain biking in the desert is a completely different experience. We’ve biked in Utah, Minnesota, Florida, California and plenty of other states, but the Sonoran Desert is unique. Rolling, mildly sandy trails, Saguaro catcus, ocatillo, palo verde, and jagged mountains all make this landscape one of a kind. Throw in a few amazing Arizona sunsets (seriously they are not this good ANYWHERE else) and you can begin to understand our difficulty leaving.
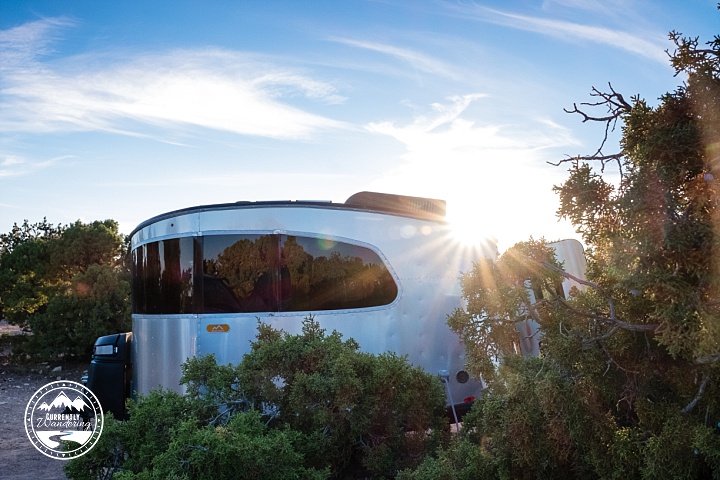
The Campground

This campground fills up regularly. After our initial 8 day reservation, we spent a few days in the campground overflow (basically a parking lot), 2 days back in our original site, and then we managed to pick up a 5 day site that backed up to the playground. You can look online for sites, but once you are here you can avoid the reservation fee by just calling in or talking to the campground hosts in person at the nature center.

There is a 14 day stay limit in any one site, so even if you want to be here longer you’ll have to shuffle around. Sites are water/electric so unless you are camping solo and have large tanks, you’re going to need to take a trip to the dump station anyway.

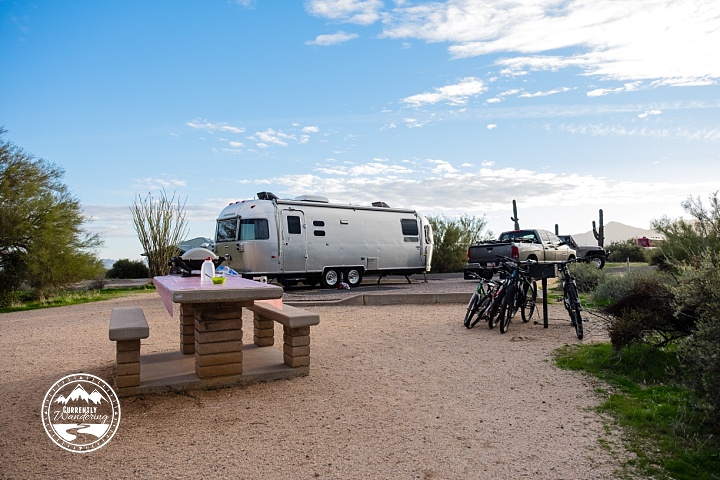
Sites are level, spacious, and not too close together. They all have a picnic table (the sturdy stone kind), and a fire pit. We always find it amusing when the camp hosts rake the gravel nicely between campers, but it does make the site feel tidy and neat.
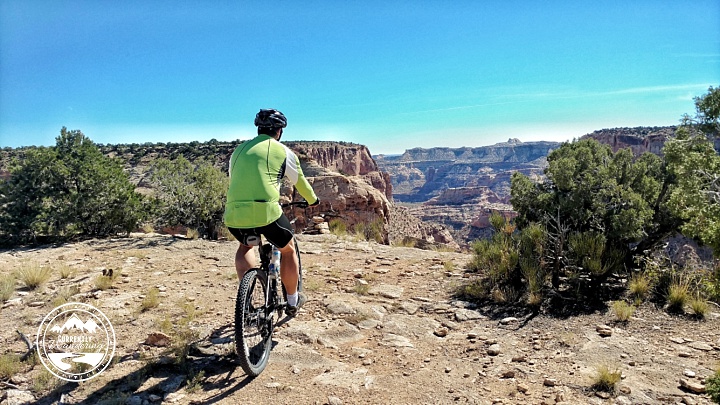
The Trails

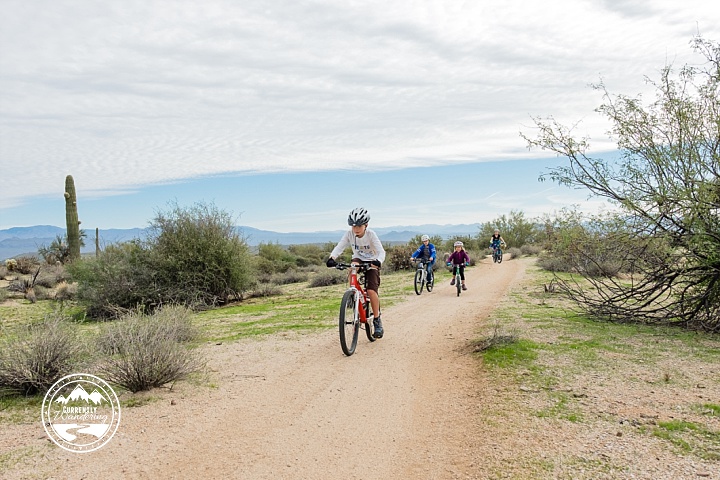
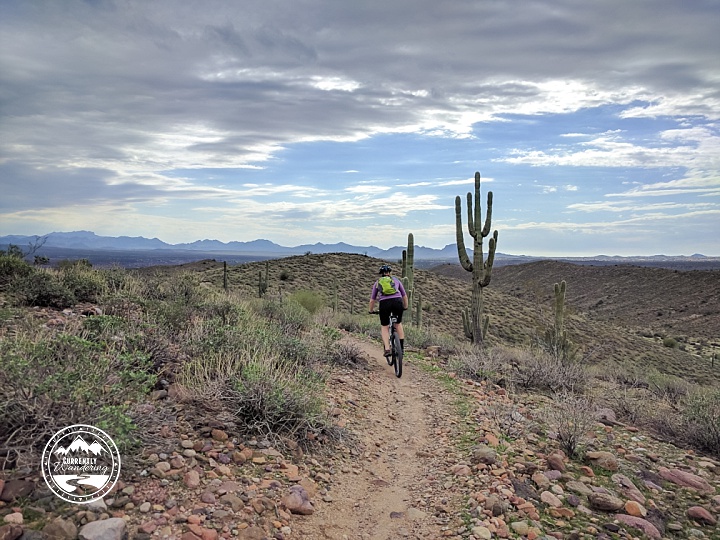
Someone asked me on Instagram if all the trails we’ve encountered are this smooth and rolling. Nope. Don’t let the smoothness fool you though, from the campground headed north-west all the trails are uphill. We could easily get in a good 8 mile loop in an hour and feel like we got worked. Its nice to head uphill first and then have a nice, swift downhill on the return.

Some of our favorite loops:
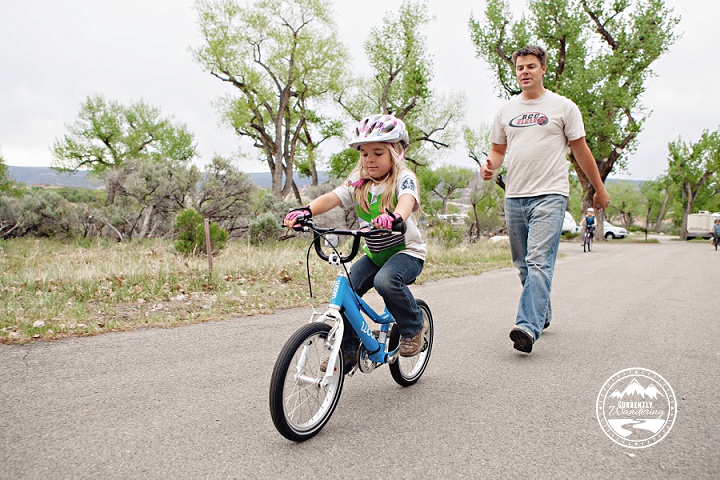
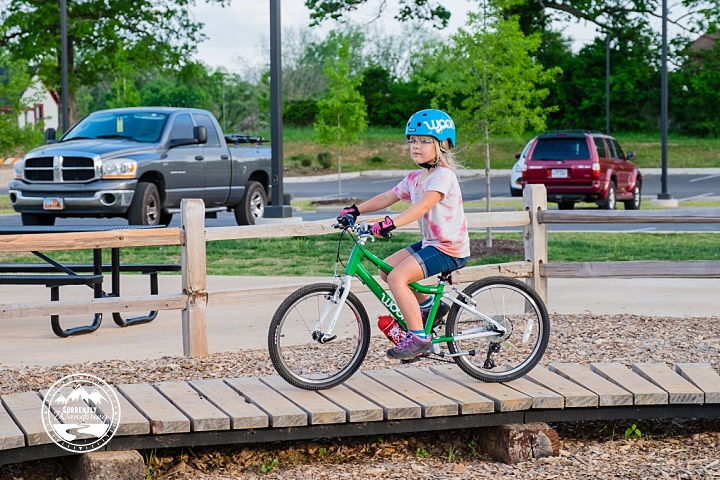
For the Kids

Granite – Bluff – Granite (4 miles): Start at the campground and take the connector trail to Granite. Stay on Granite when it turns left and heads down into the wash. Climb back up and you’ll run into Bluff. Turn left and enjoy the ride down back to Granite. Turn right to head back to the campground. Granite is a nice, easy, rolling uphill, and Bluff is slightly more technical on the way down. The downhill is fun with some rollers but overall not technical (except for the waterbars).

Tortoise – Pemberton – Shallmo Wash – Escondido – Cinch – Scenic – Pemberton – Tortoise (4 miles): Feels like a lot of trails but many of them are short connectors. Start at the nature center and ride Tortoise down to the intersection. From here its an easy 0.1 miles on PB until you hit SH. SH is a great downhill – fast and furious until you hit the staging area. From here find the trail head for Escondido and follow it 0.2 miles up to the turn off for CI. 0.6 miles up CI you’ll continue on up Scenic. Its fairly smooth and not steep, just a gradual uphill the entire way. Turn left on PB and ride the short distance back to TO and then up to the nature center.

Rachel rode this one with Sam and I, but I’m not sure I’d take the other two. Cara and Andrew did ride with Sam from the campground down Tortoise and Shallmo Wash to the competitive track where I picked them up after we played around for a bit.

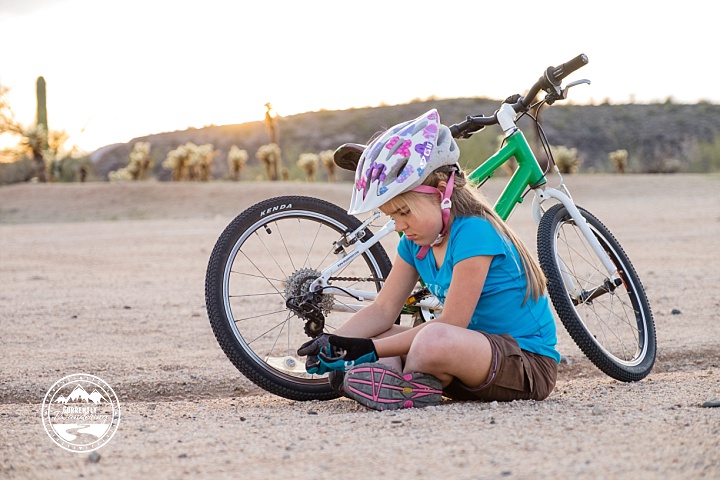
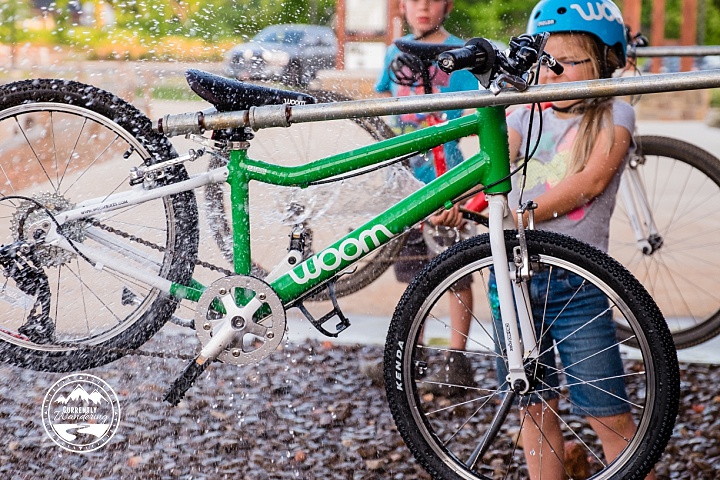
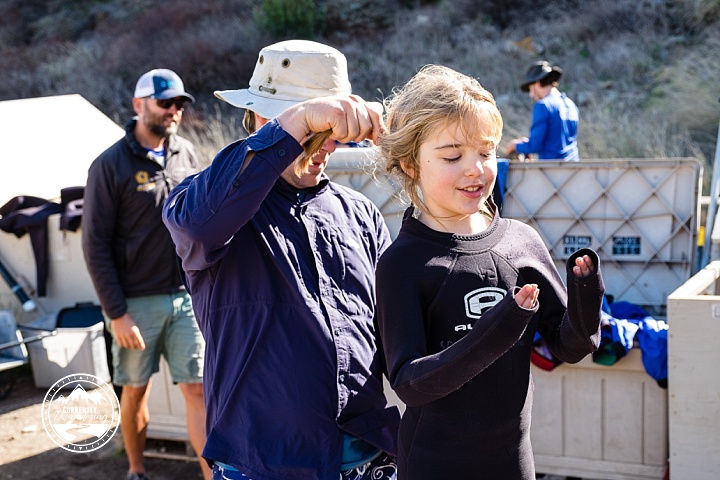
“Cara sometimes gets frustrated as she’s not as capable as the older kids. She was upset the other night because she was scared to ride the hills on the pump track. I assured her she didn’t have to ride, it was okay to be scared, and that we would keep practicing until she felt comfortable. Instead of quitting Cara put her intense game face on and rode the hills over and over until she smiled and laughed the whole way. I’ve never seen such fierce determination and desire to overcome an obstacle. I hope that’s a lesson she keeps with her for the rest of her life!” -@currentlywandering

North Trail (3 miles): We drove up McDowell Mountain Park Dr and Asher View Dr to park at the trail head for North Trail. Along Asher View Dr. there is an amazingly old and gnarly Saguaro cactus we had to get out and inspect – so don’t miss that on your way. North Trail is a fairly tame 3 mile loop. You can ride the trail in either direction and its pretty symmetrical. Gentle uphill and then back down on the return. Rachel found it almost too easy, while Cara was upset it was too sandy in spots to ride. Great recess break from school!

For the Adults

Granite – Delsie – Pemberton – Lariat – Granite (8 miles): Start from the campground and take the connector trail up to GR. About the same place GR splits off left and goes left down the wash, DL heads right and continues climbing. We felt this was one of the easier climbs but still managed to get a good work out. From there, this section of PB is super fun! A short sprint uphill and then its downhill, smooth, flowy and fun to Lariat. LR was a bit boring but you have to get back to camp somehow.

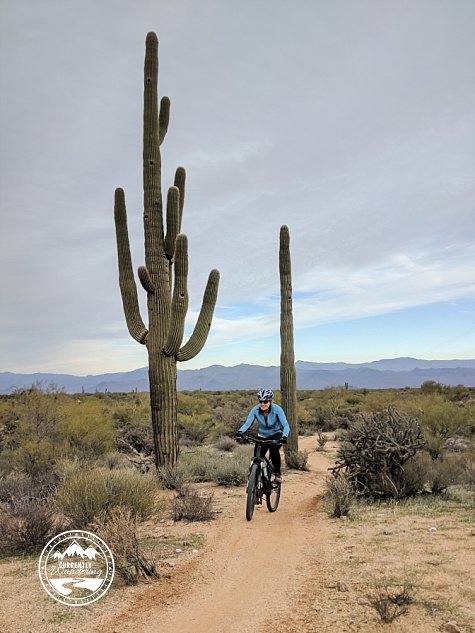
“First MTB ride is in the books with another scheduled for today. There are so many trails here and I intend to ride most of them over the next week. Not gonna lie – all of you and your snow photos are making me grateful for 70 degrees, sunshine, and cactus. 🌵☀” – @currentlywandering

Pemberton – Scenic – Cinch – Escondido – Pemberton (11 miles): This one starts at the trail head staging area which is also the campground overflow. This section of Pemberton is fairly smooth so its a nice ride up to Scenic. SN is definitely more rocky as it climbs up to and along the bluff. Definitely more technical and we do recommend riding it clockwise. Once we hit the bottom we turned onto Cinch which is a small connector to Escondido. ED is a nice rolling uphill all the way back to Pemberton. It is a good combination of technical and smooth rolling hills. I really liked it. Once you hit Pemberton again its downhill all the way back to the staging area.

Granite – Pemberton – Dixie Mine – Coachwhip – Pemberton – Bluff – Granite (14 miles): If you are looking for a rocky, technical trail than you’ll love this. Riding on a hardtail, I struggled over the rocks but it was still a really good loop. Granite is an easy fast couple of miles from the campground before your hit the turn off for Pemberton. From there follow the trail past the old Ranch homestead and then start climbing up towards Dixie Mine. This part of PB isn’t too rocky and traverses some really pretty landscapes. Once you hit Dixie, there’s a gradual, rocky downhill before hitting a gnarly, long technical climb. Summit is at the turn off for Coachwhip, which has a fun, rocky downhill before another long slog uphill. From there its mostly downhill or rolling all the back to Pemberton. We chose to turn left and end our ride down Bluff rather than doing a return up Granite the way we came. Definitely the better choice as downhill doesn’t  get much better than Bluff in this park!

A note about Tonto Trail, Granite & Delsie – These trails are super easy, gradual climbs. We came down Delsie once and it was actually quite boring, fast, but boring. Most of our trail rides including going up one of these trails and taking something a little more exciting on the return. Tonto is steeper than Delsie which is steeper than Granite.

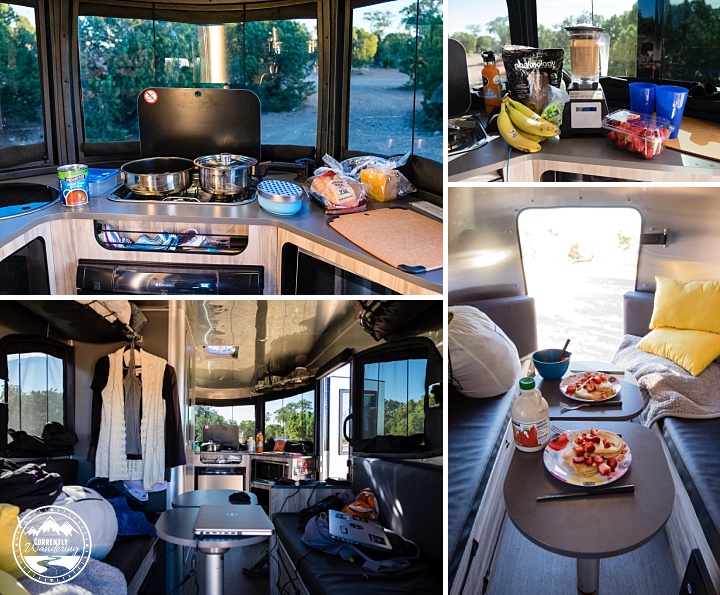
Hanging Out With Friends & Regular Life

One of my favorite parts of our stay was hanging out with friends. @TheFamilyCan came up from Lost Dutchman to join us and we convinced them to hang out for more than a week (it wasn’t hard). Our kids played for HOURS at the playground, we enjoyed a few campfires, and the kids had some solid Minecraft time. We loved having other adult company!

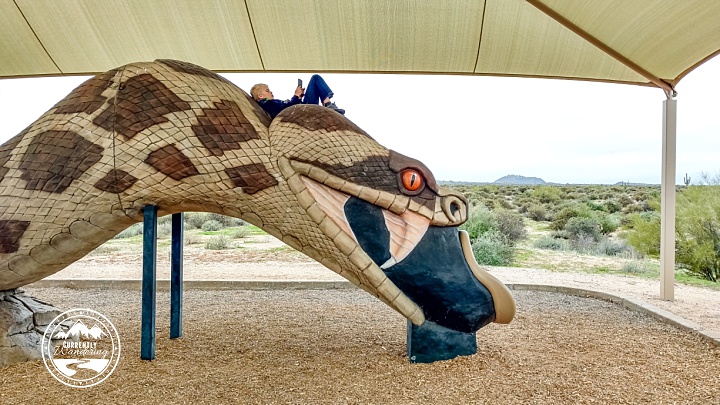
“Our kids have spent hours at the playground with @thefamilycan this week. Mostly it’s been Harry Potter games and imagination central, but after they left today Andrew found a different use for the slide.” -@currentlywandering

The only downside to this park is that laundry is 45 minutes away no matter which way you drive. I paired our laundry trips with grocery shopping and other errands so it wasn’t too bad.

We have some college friends down in Gilbert, and they were gracious enough to watch our kids while Sam and I attended a session at the Gilbert, Arizona LDS temple. We loved catching up with them as they are nomads at heart and are still trying to figure out how to take their 5 kids on the road someday.

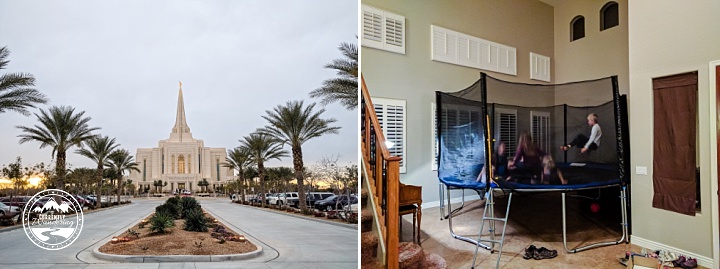
“Roughly three years ago we attended the Gilbert LDS Temple open house as we passed through Arizona heading West. This week we had a chance to attend a session as we pass through Arizona (slowly) headed East. I love the focus that the Temple brings, pointing us to the Gospel of Christ and His Atoning Sacrifice. Visiting so many different temples is one of the perks of a nomadic life.” -@telegramsam

“We visited some college friends yesterday and the the kids got a kick out of their indoor trampoline. Everybody needs awesome friends like this! This is not the only cool thing in their lives as @funawesomefamily has a fun YouTube channel with plenty of fun family stuff.” -@telegramsam

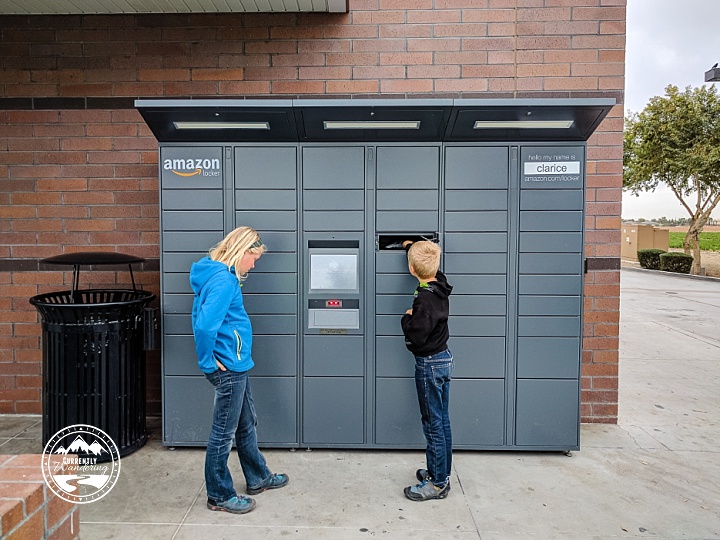
We were stationary long enough to get not 1, but 2 Amazon deliveries. We utilized the Amazon locker pick- up that is available in the Phoenix area and it worked like a charm. You send your package to a nearby locker and then use your phone or a code on the keypad and it pops open your locker with package(s) inside. Brilliant. Now we just need these in more remote areas.

One of Airstream’s marketing companies paid us a visit and we were privileged to be interviewed by their amazing team. They are rolling out a new “Home” campaign highlighting the various uses of full-time Airstreamers and we can’t wait to see how they edit our story together. Lisa gave us a preview of some of their previous shoots and they look top notch. Ours should be published in a few months and we’ll definitely let everyone know when it goes live!

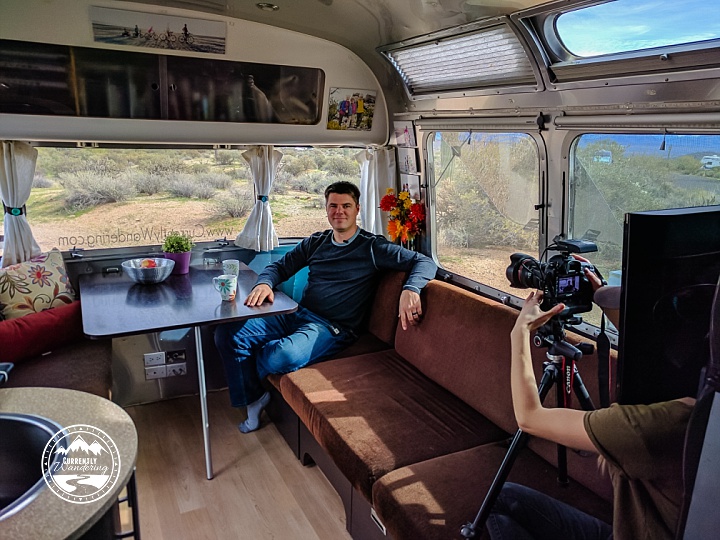
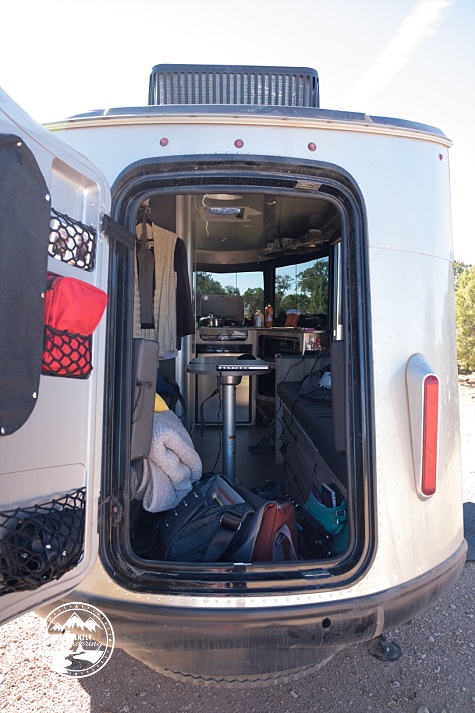
“Fell in love with our tiny, shiny space all over again today. We spent a couple of hours cleaning yesterday in preparation for a video/photo project with @airstream_inc today. Our house looks amazing! If only the kids could keep it this clean all the time.” -@currentlywandering

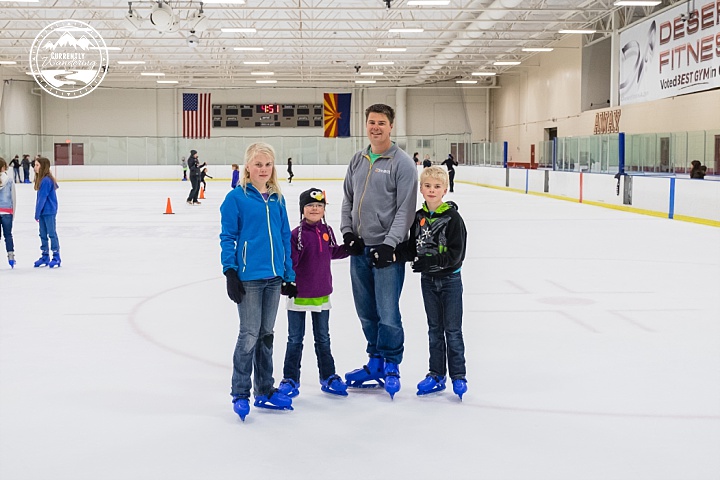
We briefly went “ice skating” with @campytrails in Bakersfield a month ago and the kids have been begging to try it for real since then. With my ankle still not to full strength we determined I shouldn’t skate (not really my thing anyway) but I came along for moral support. Sam was amazingly patient with the kids and they learned to glide around the ice. I can definitely see more of this in our future!

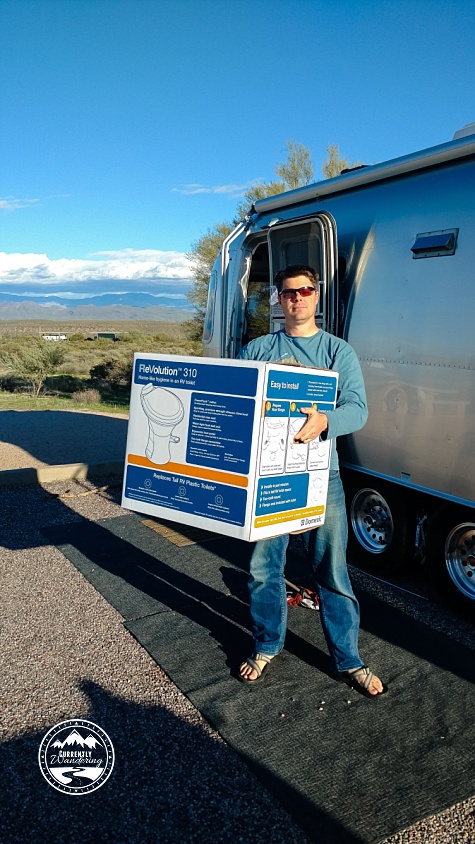
One last errand to top off our stay was to replace our toilet. We weren’t really planning on it, but the darn thing sprung a leak (clean water thank goodness!) and we decided it was time. After some research Sam sent me to Camping World in Mesa, AZ where they had the correct toilet in stock. Really grateful this happened in civilization and not out boondocking in the desert!

We had a fabulous stay at McDowell Mountain and honestly can’t wait to go back. We attended a record three times at the same LDS ward in Fountain Hills, and there are plenty of hikes, museums and restaurants we weren’t able to check off our list. For now, however, its off to south eastern Arizona!


Categories
Backpacking Outdoor Gear

Gear Review: Deuter Fox 30 Backpack for Kids

We started backpacking with our kids in 2015 with a fun 2 night, 3 day trip to the Apostle Islands National Lakeshore. We used the packs we had on hand, which included small, and slightly uncomfortable day packs for both Andrew and Cara. They weren’t designed to hold much weight (which was fine) but also were a bit bulky and pulled on their shoulders more than we wanted.

After completing two more backpack trips as we traveled around Lake Superior we decided it was time to upgrade. As we looked around at pack companies , the clear winner was Deuter – the same German company that we had bought our Kid Comfort III carrier from we were still hauling toddlers around on our backs.

I contacted Deuter hoping to get in on their family ambassador program, but alas. They currently had all the ambassadors they needed. Instead, their representative graciously sent us the Deuter Fox 30 Kid’s pack to review.

Santa Cruz Island – Channel Islands National Park

I had originally planned for the pack to fit Rachel (age 10) but after trying it on we felt the bag was slightly small for her as she’s pretty tall. Luckily, it fit Andrew (age 8) perfectly.

Testing Duration: 3 days, 2 nights on Cumberland Island National Seashore; 4 days, 3 nights on Channel Islands National Park

Best Uses: Short backpacking trips, or longer day hikes.

Quick Specs: 2.6 pounds, 30 liters, 60/23/22 (H x W X D) cm

MSRP: $99

Find it: Fox 30 on Amazon, Fox30 at REI

Vari Quick Adjustable Shoulders Straps:

One of my favorite features of many of the Deuter backpacks are the adjustable shoulder straps. There’s nothing worse than buying expensive gear only to have your child grow out of it within a few months. With their Vari Quick system, the shoulder straps are easily adjustable and can grow with your child.

To size the pack, we adjusted the hip belt so the pack sat firmly on his hips. Next we determined how far above his shoulders the straps were and adjusted them up or down as needed. The straps shouldn’t sit right on shoulders, but are more for balance. Most of the pack weight should be on the hips.

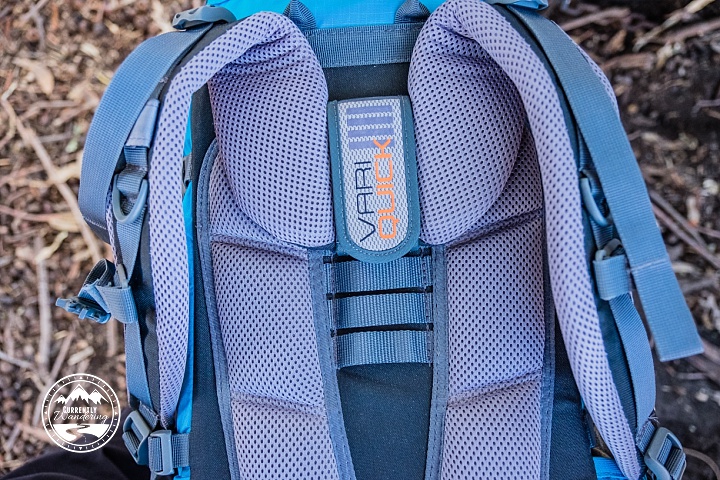
Padded Shoulders & Hip Belt

The Fox 30 also has plenty of padding on both the shoulder straps and the hip belts. One reason day packs are so light is either the lack of a waist belt, or a simple buckle to keep the bag from swinging around. Totally fine if you are doing a quick day hike, but for multi-days the straps start to wear on your shoulders. I’ve also had plenty of bruised and sore hips from carrying my pack on a multi day trip and didn’t want that for my kids.

I do wish the pack had pockets on the hip belt. We call this our “garbage” pockets and its easy for kids to stash small candy wrappers (hiking incentives) or even to stow away trash they find along the trail as we are hiking.

Hydration Compatible

This pack is hydration compatible – although you wouldn’t know from my picture! Ha! Not sure why we just stashed the bladder on top, but the pack does have a zippered pocket to slide water into. I love it when our kids carry their own water and can sip as we hike. It definitely keeps them more hydrated!

Compression Straps & Outside Pockets

I love the stretchy pockets on either side of the bag. Its super easy to shove a puffy vest, or stuffed animal in those and I don’t have to worry about anything falling out. Andrew loves hooking his pocket knife to the daisy chain, and there are bungee cords to strap on a hiking pole if needed.

Overall I feel like there are possibly too many straps. Sometimes we don’t hook them all together and they dangle, or we get them mixed up. It is nice to have a tightly cinched pack, but I’m not sure this one needs two on each side.

Bottom Access

Many packs have both top down and bottom access. This makes packing the bag, and getting things out a bit easier as you can separate your gear more nicely. Its easy to stuff his sleeping bag and pad down in the bottom and then pile everything else in through the top. This doesn’t have a divider though which I actually prefer to keep weight higher up, but it works just fine.

Cumberland Island National Seashore – Georgia

This pack is the perfect size for Andrew to carry just his stuff without being overly heavy. We’ve tried to accumulate light weight gear so he can take his sleeping bag, pad, clothes, animals, water, and kindle while still being able to hike 4 or 5 miles.

The Fox 30 is basically an adult back shrunk down to fit a child roughly ages 7 – 10 years old. It has many of the features I like in my own bag and helps Andrew to feel capable while carrying his own gear on a hike. If you are looking for a starting backpack for your child, we definitely recommend getting one of these!

Categories
Biking Homeschool Outdoor Gear

Teach Your Child to Shift with a Woom4

Its no secret we are fans of Woombikes. We were introduced to them in 2014 as Cara was ready to leave training wheels behind. We had a fantastic experience as she basically just climbed on the bike and pedaled away (6 Reasons to Buy Your Child a Woombike).

We’ve now reached another milestone with Cara’s bike – that of upgrading to one with shifters. We reached the point where she was spinning her wheels as fast as humanly possible and still couldn’t keep up with the big kids. She had the muscle, the awareness and desire to be faster, better, and more in control – she just needed the tools.
We visited Woom headquarters in Austin, TX last spring and Mathias upgraded her Woom3 to a Woom4 with a rear derailleur and an 8- Speed SRAM X4 twister shifter. Since then, we’ve been working with her on when and how to shift her gears based on the terrain she’s riding. Its honestly been a bit of a fight. For awhile she wanted to leave her gear in the middle and pedal like she always has. Slowly, she’s come to the realization that she can go farther more quickly and with less effort if she utilizes the entire range of her gears.

Its slow progress, but progress nonetheless. We happened in to a tradition to have each of our kids complete a 25 mile bike ride by the time they turn 8 years old. Rachel did hers with Sam back in Lehi pre-travel, and Andrew completed his with the Watermelon 4th of July ride in Minneapolis. Cara is 6 so we have just two years to get her ride in. Time to get training and gears will be an essential part of completing that ride.
As our experience is one shared by many parents, I thought we could give some advice on how to ease the transition between bikes.  I talked with Mathias, the owner of Woombikes USA, and he helped me outline 6 suggestions to help your child transition more smoothly to a bike with shifting capabilities:

1. Prepare and Anticipate

Kids transition easier when they know what is coming so talk about shifting even while your child is on a single speed bike.  Most of us just get on our bikes and go, but talking with your child about the bike components and why they are useful can help anticipate the change.  Show your child how your bike shifts (simple as picking the back wheel off the ground while remaining stationary) so they have a visual concept as well.

Ever ahead of the game, Woom has introduced a SRAM Automatix 2 Hub on their Woom3 bikes which has an internal mechanism that automatically shifts into a higher gear once 6 or 7 mph is reached. Total genius! Mathias said, “The design is hands-free, keeping your child’s focus on the road. On top of that, the hub functions as a learning tool. The mechanism also teaches [kids] timing. When they feel the bike change gears, children are passively learning how to time their shifts. Without ever touching a shifter, they can go faster, ride smoother, and move up to their next bike with total confidence. By the time the controls are in their hands, they’ll be ready for any adventure!”

2. Have a Visual Classroom

Once you have a new bike with shifters, take the time to visual explain how the bike works.  Mathias suggests that, “It’s much easier to show them, rather than tell them.  If you tell them while they are on the bike, then they are too busy and can’t really focus on your words.  Visually explain the concept while one parent is holding the saddle, and the other is rotating the pedals and shifting.” Seeing an adult bike in action is one thing, but when its their bike the concept just might have a bit more traction.

3. Ride Alongside Them

Kids love spending time with their parents, and we find many teaching moments as we hike, bike, or paddle alongside our kids. As we ride with Cara, we can coach her along the trail. “There’s a big hill coming up – shift now down to a 2,” we’ll tell her. Or, “Cara you are spinning your pedals, try shifting up to a 6.” We can judge the terrain we are riding and coach her as we go. She loves spending time with us, an we’ve been able to make more progress than if we just sent her off on her own.

4. Have Older Children Help Teach

Whether its a sibling or a friend, other children can definitely have an impact on your child. Mathias noticed that, “Parents sometimes have trouble using the right words  to communicate the concepts.  Other children who already know how to shift could use their skills and way of explaining so that the other child learns it more easily.  I saw this at a biking event, where one 5 year old explained another 5 yo how to use [their bike] in a fun an easy way.” We’ve definitely noticed this as Rachel and Andrew encourage and instruct Cara as she learns.

5. Bike in Familiar Territory

Mathias recommends to “Choose a place where your child feels most comfortable, i.e. playgrounds, parks, running tracks, safe neighborhood streets.” Cara feels most comfortable on paved pathways so that’s where we try to have most of our teaching moments. Mountain biking is great, but trails can be unpredictable and rocky. Riding the same section of trail or path over and over can also be beneficial. Kids will get used to the trail and can anticipate shifting patterns, which will also build their confidence.

6. Be Patient

Just as teaching a child to ride a bike can take time, the complicated act of shifting will take time for your child to master. I get impatient and frustrated more easily than I’d like, and have to consciously tell myself to chill out.  There are hills I know Cara can climb, but she choose not to. There are times where she is whining and frustrated and wants to give up.  The long term benefits and learning will be worth it. We believe that as our kids learn skills through outdoor activities they will be more confident and capable in all areas of their lives. Perseverance, determination, and not quitting are qualities  we would love our children to develop!


Categories
California National Parks On the Water

Kayaking on Santa Cruz Island, California

kayaking-santa-cruz

This last Thanksgiving weekend, we spent 3 days out in Channel Islands National Park. The park consists of 5 islands located off the coast of southern California.

While doing research prior to the trip, I discovered one of the attractions for Santa Cruz Island is the sea caves. We have enjoyed paddling in lakes, streams, and rivers so adding some pacific sea cave kayaking to our resumes sounded like fun!

When We Visited: November 22-25, 2016

Ages of Kids: 11, 9, 6

channel-islands-2016_33
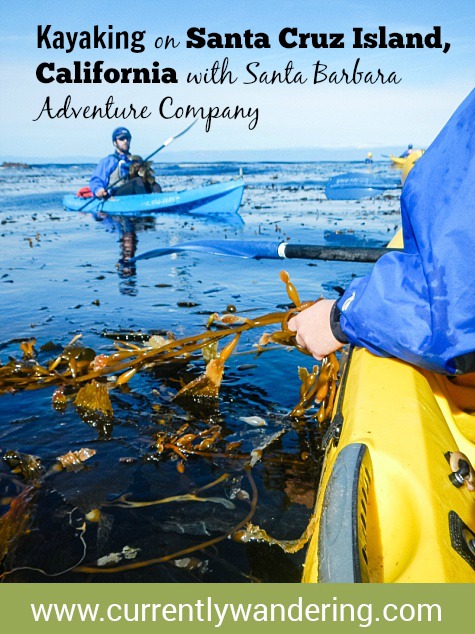
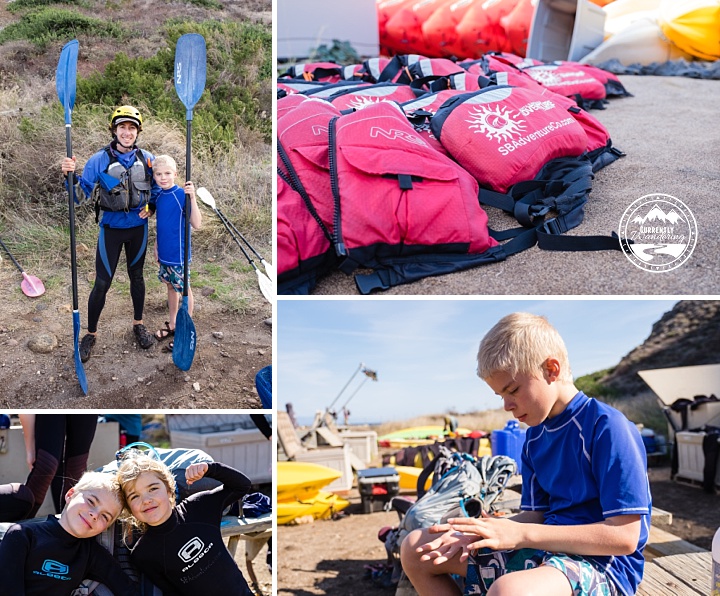
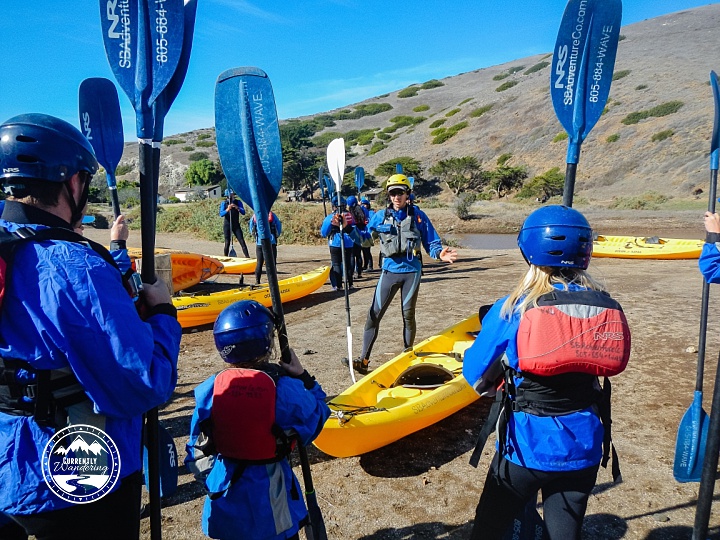
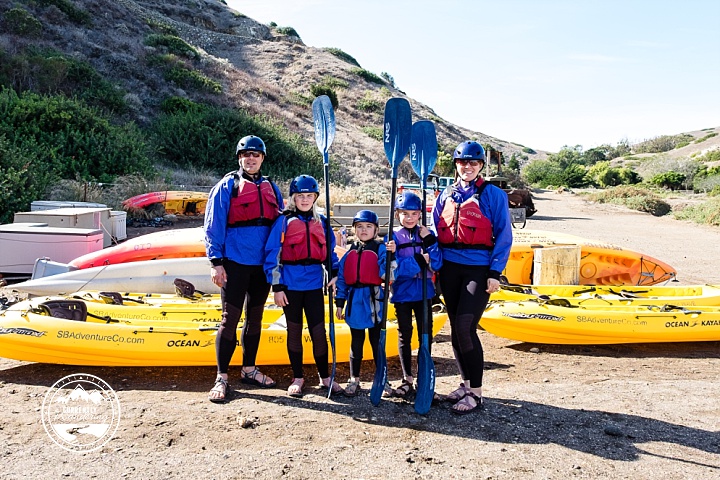
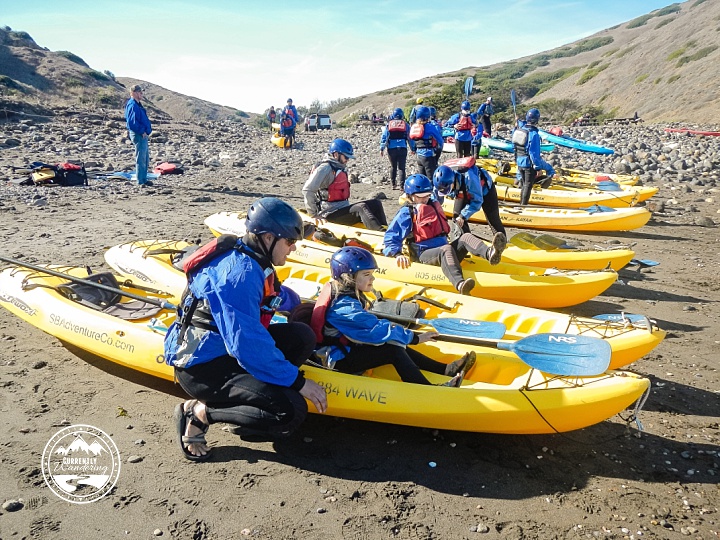
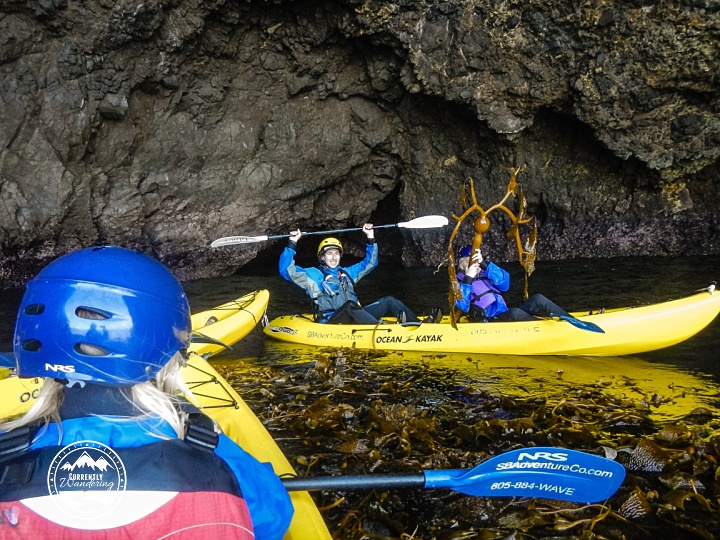
We have a reasonable amount of paddling experience, and toyed with the idea of renting kayaks and bringing them on the ferry. After some research and discussion, however, both Sam and I agreed this adventure was out of our comfort zone. Instead we contacted Santa Barbara Adventure Company, who graciously agreed to comp both Sam & my fees on a media/press/blogger expedition. They are one of a few outfitters serving the Channel Islands and came highly recommended by some outdoor friends. They provided the kayaks, gear, and guides for our experience even going above and beyond with an extra guide to paddle with Andrew as all kids under 12 are required to paddle with an adult.

We walked down from the campground on Wednesday morning, and met our group near their equipment on the beach. Starting times vary as the ferry arrival isn’t super consistent. Many of the participants were coming over for just the day so we had to wait until everyone was unloaded. Totally not a problem.

Before we hit the water, we outfitted in our suits, PFDs, and a good application of sunscreen. Wrestling kids into wet suits was a bit of a challenge for both them and us, but we all made it work. Our last major experience in the ocean was in Florida over Christmas, and water there was quite warm. Here in the Pacific the water is significantly colder so we opted for both wet suits and paddle jackets!

channel-islands-2016_40

After gearing up, we had a quick safety talk. Our guides instructed us on paddle handling, how to get in the boat (rear end first, then swing your legs over!), and safety measures should someone fall out. The weather that morning was fairly windy, and I was grateful for our choice to work with an outfitter and for their attention to our safety. Our guides reiterated that if we weren’t comfortable we wouldn’t have fun and to let them know if we experienced difficulties!

channel-islands-2016_19

channel-islands-2016_38

Our guides specifically advised paying attention to our seat adjustment in the kayak. There are a set of straps that adjust the sitting position, and getting it right made a huge difference. Most of us got adjusted properly before launch, but Rachel needed some adjustment during our paddle. She was really struggle with leg cramps (and attitude!) and came close to the edge of a total meltdown. Our super attentive guide recognized her discomfort and managed her straps while on the water. While it wasn’t a fix for her attitude problems, we definitely solved the leg cramping and her spirits improved considerably!

channel-islands-2016_21

The kayaks are tandem kayaks and for good reason. During difficult wind or swell conditions it can take all the effort of two good paddlers to fight the waves. Sam is our strongest paddler, so he paired with 6-year-old Cara. I’m not the most amazing paddler myself, so Rachel came with me. Andrew joined a guide in a double kayak. He can be seen in the picture below, holding up a Giant Antler Kelp we found floating on the surface.

The main attraction to see around the islands are the sea caves at the bottom of the cliffs. We were able to paddle into and through several caves during our tour, and it was a great experience. We paddled along the edge of the cliffs to visit each spot, pausing in small coves to rest. On the first half of the trip, we were paddling against both the wind and the swell, and it was really challenging. Turns out you can also get a little motion sick while paddling a kayak through the ocean!

During our breaks, we listened to the now obvious advice from our guides and anchored ourselves to the kelp beds during our rests. By grabbing a handful of kelp, your kayak would not drift away, yet required no paddling to keep in place. Seriously genius.

Our guides talked to us about the island, the wildlife, how the caves were formed and other interesting facts about the area. I loved that our tour was not only physical exercise, it was informative as well. Two of the caves we visited were pretty large, but the last and smallest had fairly tight quarters. We entered one at a time and had just enough room to spin around and head back out. Only open at certain tide levels, the cave is called “Shark’s Teeth” and was definitely everyone’s favorite!

channel-islands-2016_36

It isn’t very obvious in the picture below, but the seas were pretty rough at points of our trip. At one point Jess and Rachel needed some help and accepted a temporary tow from one of the guides. Little Cara tried hard, but Sam was clearly doing most of the difficult work. At the halfway point of our trip, we had an opportunity to paddle past the point of the island to look down its length. This put us in full exposure to the stiff wind and oncoming swell

With guides present, we were able to be a little more adventurous. Sam and Cara paddled hard out beyond the point into the big swells, knowing that if they had some trouble guides were not far away. We also appreciated their knowledge of the sea caves, and which were safe to enter given the sea conditions and the current level of the water.

channel-islands-2016_22

We turned around and made it back across from the beach with about an hour and a half left in our time. Here we had the option to beach our kayaks, or to continue south and explore the other end of the island. We knew our kids were tired and it would be a paddle upwind to return, so we opted out. The rest of our group continued on but we were definitely happy with what we had accomplished.

After stowing our kayak gear, Cara surprised us by insisting she wanted to go snorkeling. For no additional charge Santa Barbara Adventure Co will also provide snorkel gear. While Sam and I added a wet suit jacket to our sleeveless suits, our guide fitted the three of us with fins & masks. Rachel and Andrew, however, walked back to the tents for a rest claiming they were too tired for a swim. Apparently kayaking totally wore them out!

Cara didn’t last long, but watching her excitedly point out fish and swim through tall kelp was adorable! She seemed excited to have mom and dad all to herself and dove in like a champ. The kids all learned to snorkel on the Dry Tortugas last year, and apparently Cara liked it enough to go again. This time we had kelp beds instead of coral and it was fun to experience something completely different.

channel-islands-2016_39
channel-islands-2016_68

As a family we participate in a lot of outdoor adventure. From backpacking to mountain biking, or simple nature walks we regularly push our physical and mental boundaries. This kayak trip was definitely one of the hardest outdoor experiences we’ve had. That said, I’m so glad we did it! We felt completely safe and taken care of by our guides – which is honestly one of the best ways to push your limits.

If you head to Santa Cruz Islands in the Channel Islands National Park, definitely make the time for some sea kayaking while you are there. It’ll be worth it!

Categories
Outdoor Gear The Airstream

Gear Review: Taking the Airstream Basecamp to the Wedge Overlook

Thinking about buying an Airstream camper? Check out the interior and size of the Basecamp model! Ideal for weekend adventure trips with room for all your gear. #sp
Its no secret we love our Airstream Travel trailer (see our reasons for choosing Airstream in this post).  3 years in and we still are happy with our purchase, and fully support the brand.

Recently, Airstream launched a new style of trailer: The Basecamp. Its different from their regular travel trailers in a few fundamental ways:

  1. Towable with a variety of mid-size SUVs.
  2. Totally compact & small making it incredibly easy and aerodynamic to tow.
  3. Departure angle helps with high clearance (aka adventurous) roads.
  4. Rear hatch for loading & unloading larger gear.
  5. Attachable screen tents to expand living area.

I was able to see the Basecamp first hand while at Outessa (on launch day no less!) and casually mentioned it’d be fun to take it out for a spin. Airstream jumped at the idea for us to test it out in exchange for a blog post & some social media bragging rights. We managed to talk grandma into watching the kids so we could have an adventure date in southern Utah.

Travel Dates: October 6-8, 2016

“Built for adventure, it’s tough enough to go anywhere your wanderlust takes you, and comfortable enough to help you really enjoy the time you spend there.” -Airstream

Sam and I set off on a Thursday afternoon to drive the three hours down to the Wedge Overlook near Castle Dale, Utah. This spot has been on our list for at least a year, but we were unsure of cell signal so it needed to be off grid time. The Wedge is also known as “Utah’s Little Grand Canyon” for good reason.

As we left civilization and entered the southern Utah desert, I was reminded why I love it there so much. Wide, open, rugged spaces with large sandstone cliffs. It might not be for everyone, but I definitely appreciate the landscape!

dscf7659

Campground at the Wedge

All sites at the Wedge are first-come, first-served, so we snagged an area in group site #9  near the bathroom and the overlook. My parents were bringing the kids down for a night the following day (that’s really how I sold it to my mom so she’d watch the kids for us!) in the pop-up trailer so we needed some extra space & a toilet nearby.

The campground is basically a lot of scrub oak, red sand, and beautiful blue skies! Many of the sites would have worked for us, and there were some closer to the rim but nothing we could have fit two trailers in.

dscf7675

Basecamp Functionality

The Basecamp has a pretty simple layout: Kitchen in the front with panoramic windows, wet bath across from the door, and then the couch/sleeping area in the back with a hatch at the rear end. At 16’3″ long, the Basecamp is pretty small (similar to the Airstream Sport 16′ model), but they’ve done incredibly different things with the space. I loved the panoramic windows in the kitchen. They help the whole trailer feel so much more open! We often also opened up the hatch (there is a screen you can attach) to let some light and air back there as well.

Cooking was a breeze. I’m pretty sure the Basecamp has more cupboard space in the kitchen than our 27 International model! I felt the fridge was totally adequate in size for a weekend trip, and loved that there is even a small freezer section. Two burner stove, and plenty of counter space also made food prep smooth sailing.

The only con of the kitchen for me was the sink, and I talk about that in our video review below.

We didn’t get super organized (as you can see in the bottom left photo below) but we did feel there was enough storage space for everything. We took our laptops  and they floated around a bit, and there’s no hanging storage for any clothes. More often than not though, I imagine weekend warriors will leave laptops and church clothes at home so its probably not generally an issue.

dscf7682

The Big Dipper even cooperated with our night time photography shoot!

dscf7690-edit

The Basecamp is marketed as an adventure mobile, and we definitely agree! We brought our mountain bikes to tackle the 21 mile mountain bike trail around the rim. Coming back to smoothies & a shower instead of a tent was definitely a perk of having a small trailer along with us! Kayaks, bikes, SUP boards or other large gear could easily fit through the rear hatch and be tied down.

Can I just take a minute and reminisce how fun it was to do a long, mountain bike ride together without kids? I was seriously giddy the entire time. Especially because the views were amazing around almost every corner.

img_20161007_135138437-01img_20161007_142957

View looking into the trailer through the back hatch.

dscf7694

Taking the Road Less Traveled

On our way to drop the trailer off, we decided to take the long way to Green River, Utah through Buckhorn Wash. We had heard the roads can get pretty dicey down through there, but felt we were equipped to handle it. Luckily for us, the road had been recently graded and the Basecamp towed like a champ over the dirt roads!dscf7750

dscf7752

Overall we were fairly impressed with the Airstream Basecamp model. Nimble, easy to tow, and great for outdoor adventures this definitely fills a need for many weekend warriors!

Video Review