Categories
Backpacking Tips & Tricks

8 Tips For Taking Your Kids on Their First Backpacking Trip


My husband, Sam, and I completed our first backpacking trip together in New Zealand’s rugged mountains four months after we were married. Actually, it was my first backpacking trip ever. While he grew up with parents who frequently went into the back country, we were more front country, car camping kind of people. Despite the flies, the rain, and the incredibly steep trails, I was hooked after that one experience.

Knowing how incredible it feels to wake up in a tent on top of a mountain, we agreed that we would love to share that experience someday with our kids. This last year we finally reached our goal, completing four separate excursions in various states across the U.S. We watched our kids struggle up steep trails and bundle up against cold, windy weather but then also lift their faces in awe as they soaked up an early morning sunrise.

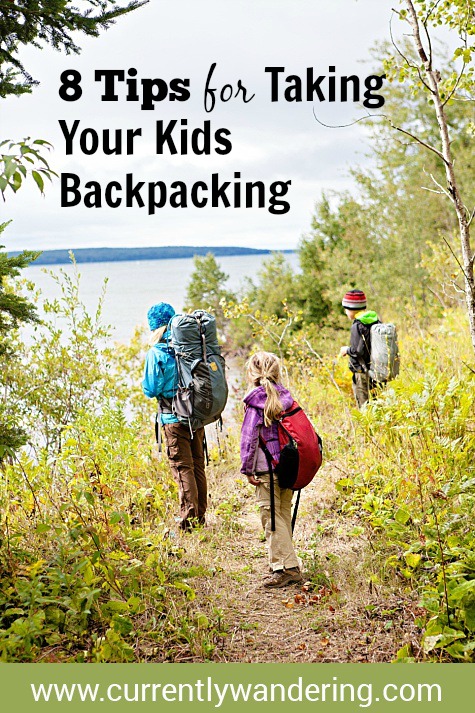
So, how did we do it? How did we go from tent for two, to trailside with five? Here are eight tips for taking your kids into the backcountry for the first time:

Plan Carefully.

There are many questions to consider when planning your child’s first backpacking trip. What are your goals? How many nights do you want to do? How far can your kids hike? What is there to do once you get there? Are you going to start after dinner? Early in the morning? How steep is the trail? Is it a long drive to the trailhead? Knowing your kids and their limits (generally speaking) can give you a good idea of where to start.

Many of our overnight hikes leave around 2pm, hike five miles to the campsite, eat dinner, have a lazy morning and hike back out around lunchtime. Simple, easy, yet a great way to unplug and be together as a family. Other families I know grab Subway after work on the way to the trailhead and hike a mere mile or two in before setting up camp for the night. Know your goals and then research the best way to accomplish them.

Start Simple.

Long before we loaded our kids up with a pack we hit the trails. We hiked short trails, long trails, hikes in the mountains, and hikes in the desert. Our kids could hike up to ten miles, which we did repeatedly over the course of a year. Our first backpacking trip, however, was a short 3.5 miles. We’ve gradually increased the distance over time, but we’ve found that hiking with a pack is a different experience for a kid. My husband has memories growing up of even shorter, one mile hikes to backcountry sites shouldering his small backpack and water bottle. The idea is to get your kids used to hiking in to their campsite wearing a pack whether it’s one or ten miles in.

Take Your Time.

On multi-day trips, my husband and I often remind ourselves we have ALL DAY to hike with the kids. The beautiful part of backpacking is that often there’s not much to do besides hike, so taking all day to hike that 3.5 miles not going to crimp anyone’s schedule. Smell the flowers, throw rocks in the stream, take a longer snack break and don’t push too hard.

Pack Plenty of Treats.

Well-thought out and distributed candy, snacks, and gummies can help motivate even the most reluctant hiker. Quick carbohydrates and sugar are often the perfect pick-me-up. We often have a mile limit or a goal to reach before we sit down to pull out the treats, which keeps the kids from asking every five minutes if they can have skittles. A special treat for reaching the “top” is also a welcome bonus. Our kids love Australian licorice, skittles mixed with toffee covered peanuts, mini M&M’s, and Pull-and-Peel Twizzlers.

Simple Meals.

While you may enjoy a gourmet backcountry dinner, chances are your kids are just hungry. In addition to plenty of snacks and treats, we do Freezer Bag Cooking for dinner and breakfast. All dry ingredients are prepared beforehand at home and then sealed in a freezer bag before getting tossed in our packs. Once mealtime rolls around, we boil water, add to our freezer bag, stir, let it sit in a cozy for 10 minutes, and voila! Dinner is served. Our three kids typically share a meal, while Sam and I eat a second. Our favorites so far are Cheesy Bacon Onion Mashers, Chocolate Protein Oatmeal, and Chicken Thanksgiving Dinner.

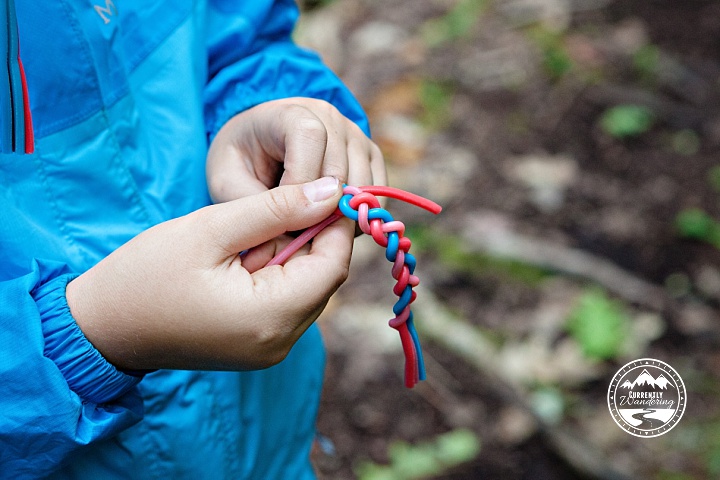
Be Prepared for Boredom.

Let’s face it. Most kids are addicted to screen time and even when they are conditioned to get outside often there’s still going to be whining about being bored. At camp, my older two kids will happily read on a Kindle for an hour or two, but after ten minutes my five year old is complaining because no one will play with her. We’ve learned to be strategic about how much time we will have at camp, whether or not there is anything nearby to explore, and to bring card games and even toys to play with once we get there. Packing a compass for scavenger hunts, a GPS unit for Geocaching, or a pocket knife for whittling sticks are all fun ways to spend time together once camp is set up.

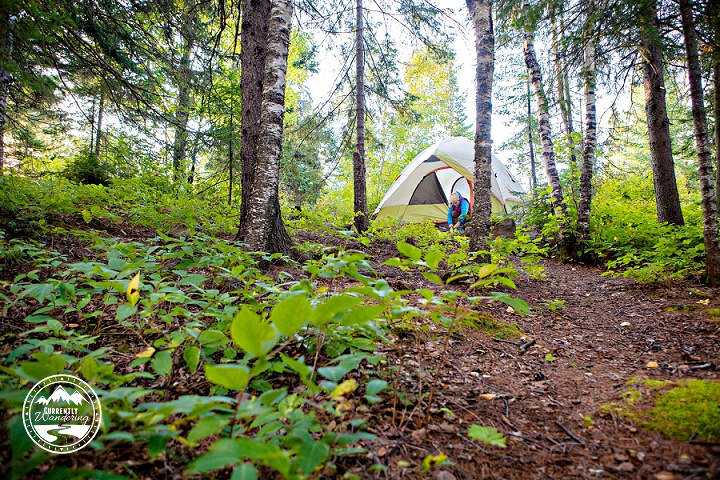
Ultralight is Best, but Don’t Stress About Gear.

Between the two of us, we carry most of the gear. From the tent to the sleeping bags, cooking gear, and the food, most of it is packed into our two larger bags. Over time we’ve been able to make adjustments and swap not-so-light gear out for less weight as we gradually increase our distance, but start with what you have. At short distances, ultra-light gear is not as important. Let your four year old wear her Winnie-the-Pooh backpack and bring her stuffed animal. You can see our gear list here.

Have a Good Attitude.

The best thing you can do to help your kids have a good attitude and appreciation of the experience is to have a good attitude yourself. If your kids hear you talk about how much you enjoy the view, how much you appreciate the challenge of that ridge in front of you, and the good memories you have of other backpacking trips, your kids are likely to adopt a similar attitude. If they hear you complain about how dirty you are, how much you miss your bed at home, and the pains you feel, they will likely adopt those feelings too. Having a good attitude can be a challenge, but the payoff is worth it!

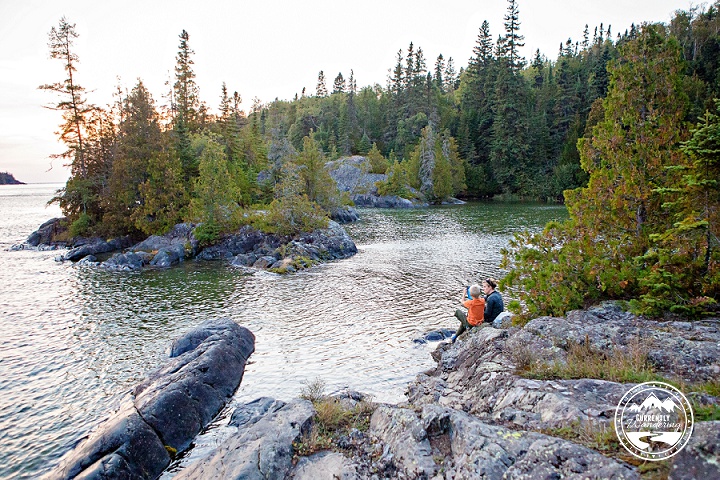
While we introduced our kids to backcountry camping fairly spectacularly manner, camping for two nights on an island in Lake Superior is not feasible for everyone. Our main goal, however was to have the experience end solidly with a “backpacking is really awesome” mindset for the kids no matter where we went. We feel it was a success since the kids happily followed that up with three more trips over the next few months.

Backpacking, or doing anything outdoors, with kids involves a different mindset. Suddenly we weren’t doing this for us, we were doing it for them. The miles are shorter, the terrain a little easier, the views maybe not quite as majestic, but the time spent together hiking, setting up camp, and snuggling in our sleeping bags while the stars wink overhead is irreplaceable.

Categories
Airstream Accessories General Information The Airstream Tips & Tricks Tow Vehicle Travel

Gear Review: EEZTire Tire Pressure Monitoring System

Worried about your RV or Airstream tire blowing out? The EezTire Pressure Monitoring system is easy to install and use. Check out our post for details!My first experience with a tire blowout on the Airstream was only the second time I towed it. We were headed back to Virginia after picking up the Airstream in Carlyle, IL. (This was back in the fall of 2013.) Our second tow was from Louisville, heading East. Our destination was Lake Vesuvius, right at the southern tip of Ohio. Just miles away from our destination we passed through Ashland, Kentucky. Before we made it through town, we were flagged down by an angel in the form of a middle aged man, who informed us that we had blown a tire on the Airstream. We immediately pulled off the road into a church parking lot, then moved just down the street to have a tire place help us replace the blown tire with the spare.

We were incredibly lucky: no damage was done at all due to the warning and help we received from those blessed folks of Ashland. I felt a little dumb, as the previous owner had included a PressurePro TPMS (similar, but not exact, product link) when we purchased the Airstream. I hadn’t yet taken the time to figure it out yet, so it was not hooked up at all.

I quickly did figure it out, and we have used a Tire Pressure Monitor ever since. These systems consist of a monitor that you place in the cab of your truck, and a sensor that screws onto the outside of the tire valve stem of each tire. The Pressure Pro system I inherited had 6 sensors: all 4 Airstream tires and two for the back tires of the truck. I loved the assurance that came with having monitoring pressure on the tires, and I loved having an alarm sound when pressure dropped on any of the tires.

After a year or so, I began to have a few issues with a few of the tire sensors. Pressure readings were intermittent, and replacement was expensive. My search for new sensors also revealed newer (and cheaper) systems that not only monitored pressure, but tire temperature as well.  After some research I decided upon the EEZTire system, complete with 8 tire sensors.

Monitor

The difference between the PressurePro system and the EEZTire system was profound. The EEZTire monitor has an internal battery, which made setup fast and easy. After mounting the sensor on each tire, you program it to the monitor by entering setup mode, selecting the appropriate tire on the display, and holding it next to the sensor. The monitor does have a DC power cord that we use in the cab, but more than once I’ve used the portable monitor to make my life easier. (More on that later…)

DSCF3294

Sensor Types

There are two types of sensors offered by these systems: Regular and flow-through. They both report the same information, but the flow-through sensors have an air port you can use to add air to the tire without removing the sensor. I have found that feature to be useful, though it does seem to restrict the airflow a bit. I suspect the regular sensors are slightly simpler inside, which may turn out to be more reliable in the long run.

DSCF3285

Proper Sensor Installation

The absolute most important thing about installing your TPMS sensors is getting the sensor on tight enough. If the sensor is improperly installed, then air will leak out of the valve stem, giving you a flat tire. If you read reviews of every after-market TPMS, this will be the top complaint. I myself struggled with this after I installed my new sensors. The best way to ensure good mounting is to take the portable monitor into the Airstream with you, and watch the pressures. As the tires cool down they will drop a few PSI, but any more than that, and you’ll want to check on the tire. Watching the monitor closely your first few days can help you avoid finding only 10PSI in your tire minutes before checkout time at the campground. In extreme cases, a valve tool (available at any auto-parts store) can be used to adjust the inside seal of the EEZTire sensors.

The good news is that after proper mounting and installation, I have had very little issue with my sensors. They have already come in handy, alerting me to a flat tire that resulted from a metal pin in my tire.

Repeaters

Most TPMS makers sell a signal repeater that can be used on very long rigs. In my case, a 27 foot Airstream and a Dodge Ram extended cab short bed truck, no repeater has been necessary.

Benefits of my upgrade:

  • Internal battery allows mobile monitor use and easy setup.
  • Pressure AND temperature monitoring.
  • Cheaper price.
  • Easy (but slightly futzy) self-install.
  • User-replaceable sensor batteries.

If you are towing an Airstream or other travel trailer, I highly recommend a TPMS. It pays for itself in a single blowout by limiting damage. With multiple-axle rigs, it can be very difficult to tell that a tire has blown, leaving the tire to come apart and tear out the wheel-well and rv internals along with it.

Worried about a tire blowing out? The EezTire Pressure Monitoring system is easy to install and use. Check out our post for details!
Categories
Hiking Outdoor Adventures Tips & Tricks

8 Tips For Choosing the Right Hiking Shoes for Your Kids

All Hiking Shoes_03

With all the outdoor activities in our life, clothes take it pretty hard. For example, we went through cheap Payless tennis shoes in about 2 months. I no longer think that if I buy something for Rachel it’ll last long enough for Cara to be able to wear it. Usually the article of clothing (pants, shoes, socks, whatever!)  wears out before even Rachel outgrows it.

Add to that our crazy, awesome hiking adventures and we spend a lot of time on our feet. One thing that has really helped my kids go the distance is their footwear. Good shoes really do make a difference when you are conditioning your . I figured that Sam and I were pretty picky about a footwear, why should our kids be any different?

The best part? It doesn’t have to be expensive!

When hunting for kid’s shoes here are a couple of ideas to help:

1. Make Sure They Are Lightweight: Heavier shoes tend to weigh us down. Every step you take has to move those shoes, and the repetitive motion of walking really adds up. Your kids don’t need high top, ankle support shoes (unless they’ve also got a heavy pack for overnighting and maybe not even then). Find something that’s low cut and lightweight!

2. Shop Clearance Sales, But Be Careful: All of our kid’s shoes come from REI. It’s actually my favorite place to buy clothes as they have some amazing clearance sales, and shoes top that list! They usually have a rack or two of clearance shoes, and if nothing fits make sure to ask as they’ll often have extra in the back. Rachel’s shoes (purple ones) were on sale for $35, and we got both Andrew & Cara’s for around $20 each. I did a quick search for “Kid’s Hiking Shoes” and came back with a great list of both regular priced and clearance shoes!

The second part of this, is that usually these shoes are on clearance for a reason. Be careful and take a good look at the shoes before you buy. With Cara’s the toggles didn’t stay on super well (probably why they were discontinuing selling them) but we stuck the toggles back on and tied a knot in the laces instead. Works like a charm and we didn’t pay full price!

All Hiking Shoes_01

3. Make Sure Your Kids Walk Around in Them: Most stores will let you wear shoes inside and still return them. REI also has a synthetic rock our kids ran up and down to simulate hiking on a “hill”. Shoes will break in and get more comfortable over time, but you do want them to be comfortable from the get go. And don’t give up!! Cara tried hers on twice and ran around the entire store before she deemed them wearable. Now she loves them.

4. Look for Soles with Good Traction: You don’t want something with little to no tread, as your kids will slip and slide all over the trail. Having great shoes has really boosted Rachel’s confidence on the trails, especially when we are hiking over rocks.

5. Decide Whether or Not They Should Have Tie Laces: This a toss up for me. For younger kids its definitely best to have shoes with bungee laces or the toggles. Quick and easy to put on and you aren’t going to constantly be re-tying them. For older kids that can manage on their own its really a personal preference. Both my older kids actually prefer to have laces (especially when they are orange!)

6. Reinforced Rubber Toes Are Awesome: The toes get the brunt of the wear on shoes. Kids tend to kick things and drag their toes so naturally this area wears out quickly. Finding shoes with reinforced rubber toes are best. Rachel’s don’t have them and we’ve noticed the front lip thing has already started peeling off. It’s annoying. Next time we’ll be more choosy.

IMG_3238-Edit copy

7. Don’t forget about the socks! Just as shoes are important, so are socks! Once again, Sam and I like to wear good hiking socks, so why shouldn’t my kids? When we expect them to hike 5-10 miles we want to give them the tools to do it. Our favorites (so far) are these SmartWool Striped Like Hike Crew Socks from REI. Lightweight with a little bit of cushion, these are perfect for little hikers. My kids have commented often on how comfortable they are!

8. Brands to Look For: We aren’t usually brand shoppers, but there are a couple to look for that we feel make good, quality shoes. Solomon, Keen, Merrill, Chaco, and North Face are usually winners. I love my Solomon shoes, Sam prefers Merrill, Rachel’s are North Face, Andrew’s are Merrill and Cara has a lesser known brand, Hi-Tec, but they are awesome. The nice part about buying from REI is they don’t keep items (or brands) in stock that don’t hold up.

Hiking Shoes

If you really want your kids to go the distance and ENJOY doing it, investing in good equipment is important! Good socks and shoes can give them the confidence they need to push past their mental limits. Who knows? Maybe YOU’LL be struggling to keep up with THEM before long!

Categories
Homeschool Tips & Tricks

How to Mail In Jr. Ranger Booklets to Get Your Badge

We have earned quite a few Jr. Ranger Badges in our travels, but sometimes they aren’t easy to turn in after we’ve visited different areas of some of the larger parks. Luckily, the NPS plans for this as also has the option to mail in your booklets when you get home.

When we showed up at the Hoh Visitor Center in Olympic National Park to find it closed (so annoying) we decided to test out that theory.

Surprisingly, mailing in our booklets was quick, easy, and actually quite fun!

First things first, I called the main visitor center in both Olympic National Park, and Mt. Rainier National Park (where we had picked up our Wilderness Explore 50th Anniversary booklets) to get an address to mail in. I figure I could dig around on the their websites, or just call and get the exact address from a ranger. I had to leave a message at one of them, but they were quick to call me back.

IMG_20141104_160954-Edit

Next up, we took the booklets to the nearest post office. By this time we were in Eastern Oregon, so the closest town was Mount Vernon. Super cute, small town post office. We used Sam’s parent’s address in Petaluma, CA as a return mailing address (indicated on a post-it note inside the envelope) since we knew we’d be there for Thanksgiving and it would give the NPS a few weeks to send us the patches.


IMG_20141104_161223-Edit

And send them, they did! About a week and a half later, we got a call from Sam’s mom to say we had two envelopes from the National Park Service. The rangers wrote super awesome notes for the kids, including the patches as well as our booklets to keep!

SAMSUNG CSCSAMSUNG CSC

Easy enough, right? It was *almost* easier than taking the books in to be inspected by the rangers. Almost. It would definitely be worth mailing in if you’ve got a younger child that doesn’t make the age cut and you have a stickler of a ranger that refuses to give them a badge. Its never happened to us, but I’ve heard stories!

Short story is that if you don’t have enough time to return to the visitor center (or you are out on an amazing hike and are racing against the clock to get back in time and only just barely make it as the rangers are stepping out of the door for the night – not that we’d know anything about that), there definitely is another option to still get your badges!

Categories
Daily Life Fitness & Recipes Tips & Tricks

It Feels Good to Break a Sweat: My Newest Workout Routine

Mobile Gym

Trying to exercise with our unpredictable schedule has been one of the biggest challenges for me of our full time travel. I posted back in January about my failure of an attempt at working out, and although things aren’t much better, I feel like I have a few more tricks up my sleeve.

We have some smaller equipment that we keep on hand – most of them purchased through Amazon at some point:

Jump Rope
5 lb weights
12 lb weights
Exercise Mat
Arm band for my phone
Exercise head phones
Foam Roller

I will still occasionally get on a road ride (like this short one back in Oregon near John Day), but in reality I have 30 minutes or less to get my workout in. So, I get creative. Most weeks I manage to get in 2-3 workouts, but when we are slammed busy driving, or hanging around friends/family, or just plain BUSY (lame excuse) that number dwindles significantly.

I find that when I do make time to regularly exercise I’m much happier and even eat healthier. Balancing travel planning, home schooling, grocery shopping, hiking, and everything else does present its challenges, but before we are done traveling I’m going to make it work! Here’s what I’m currently doing:

Workout DVD’s

I have a friend who is a Beach Body consultant (check out her Instagram feed for awesome tips & recipes!), and she introduced me to Shaun T’s Focus T25 series. I have both the Alpha & Beta and I really like them. I feel like I get a great workout in, and it just doesn’t take very long. Yes, I’m typically outside in the campground where everyone can see me, but I’ve just developed a thick skin. I’ll try and find some privacy, but its usually me, half of our outdoor mat, and my computer. Good times.

Since then, I’ve also purchased the PiYo series which I like, but not quite as much. I’ve just never been into Yoga, but its a good mix of Pilates and Yoga and I don’t get quite as sweaty while still working on muscle development.

Smart Phone Apps

When we hike, bike, or walk (and even sometimes when weight lifting) I’ll track with Endomondo (Android, iPhone). I know there are others out there, we just invested in a Pro account years ago and I love it so I haven’t found a reason to change.

Nike Training Club (iPhone, Android) – this one has its pros and some serious cons. Its a little confusing at first and I hate that once I start a 4 week program I’m stuck to it. It gets depressing when I want to do a workout on Tuesday instead of Sunday and it won’t count towards my total minutes.

To compensate I just pick workouts and fit them in when I can. Maybe it’s not “ideal” but at least its something. I also hate that if your phone crashes you can’t start back in the middle of a workout. Or maybe that’s a plus… “Look! I’m done 15 minutes early!” 🙂 I do like the workouts I’ve have completed and definitely feel sore the next day!

Better Diet

I loved it when my friend posted a Clean Eating Challenge on Instagram a few months ago. It was awesome! We’ve been really trying to eat simpler, healthy meals. Lots of fruits, veggies, and ditch the processed stuff. I no longer buy crackers, or processed snacks (except Z bars & ropes from Costco, but those are for hiking or driving days) and we stick to carrots, cucumber, broccoli and hummus. Yes, we still eat ice cream, candy, and other not good for you items, but we eat them LESS. It’s a start.

Shakeology is seriously my favorite meal replacement drink. We’ve done a lot of Costco Protein powder, but this stuff just works. I’m the only one that drinks it (because its so darn expensive) and I can tell when I’m not consistent. I find it even more important at helping me maintain my weight because my workouts are so inconsistent. If I just got on the ball, maybe my numbers would actually start to go down…. wouldn’t that be nice?

The Ideal Schedule

In an ideal world, I’d have an actual workout schedule instead of trying to fit it in whenever. I was thinking this last week it would go something like this:

Monday: Nike Training Club 30 minutes
Tuesday: T25
Wednesday: Run (even though I still HATE it)
Thursday: Nike Training Club
Friday: PiYo

Sounds good, right? We’ll see…. What’s your favorite way to work out?