Categories
Giveaways

Countdown to Summer Instagram Gear Giveaway

I’m starting to see signs of summer plans popping up all over social media. The snow photos are decreasing and people are looking forward to sunshine and warm weather.

We are excited for our summer plans too! This year will be different for us, but so far we have a month scheduled through Glacier, Waterton, Banff, Jasper, and Yoho National Parks in July. Super stoked to get up into some of the most beautiful parts of Canada.

To get you guys pumped for summer we reached out to our favorite gear companies and put together our biggest giveaway yet! I’ve been working on this for weeks and seriously can’t wait.

Details:

Everything is going down over on Instagram this week so make sure you are following us over there to be eligible to win awesome adventure gear:

Currently Wandering on Instagram

The contest begins on March 20, 2017. We will post giveaways Monday through Friday in the morning and evenings and leave the weekends for adventuring!

Here’s How This Works:

[1]  make sure you are following us (@currentlywandering) and whichever brands are involved.

[2] We want to hear your stories! Start thinking of your favorite adventures, family moments, or plans for this summer because we’ll be asking you to comment and like the photos.

[3] You can always tag ONE friend for an additional entry.

We have so much gear to hand out that we’ll be doing 2 giveaways per day for the next week and a half. Each contest will be open for 72 hours so make sure you are checking back every day. After each contest closes we will randomly choose a winner from the comments.

Super easy! See you on Instagram this week!

This contest is in no way sponsored, endorsed, administered by, or associated with, Instagram.

Here are our awesome sponsors – make sure you check out their websites and give them a huge thank you!

Nuu-Muu
Teton Sports
Eagle Nest Outfitters
Haiku Bags
Power Practical
Woombikes
KEEN Kids
Aventura & Ecoths Clothing
Wilde Nomad
Trail Foody
Liberty Sport
Enso Rings
Deuter
Peak Design
Nite Ize
GCI Oudoor
Hydro Flask
Tiny Big Adventure
Bug Protector – all Natural Bug Repellent
Bare Snacks
Leatherman
Mamoo Kids
Darn Tough Socks
Perky Jerky
Action Wipes
Granite Gear
Post for the Parks

Categories
National Parks Texas

Ultimate Guide for Big Bend National Park – Texas

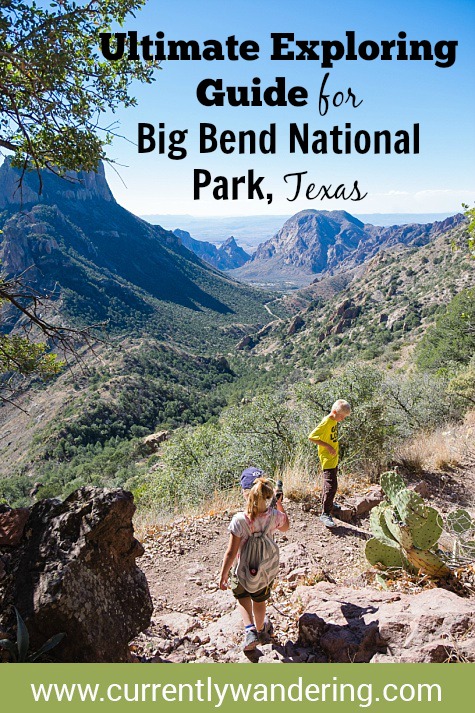
Big Bend National Park has been on our “must see” list for quite sometime. Unfortunately, Big Bend is on the way to exactly nowhere and we hadn’t been able to carve out the time to get down there before now.

The park sits on the border of Mexico and Texas where the Rio Grande takes a large bend and gives Texas part of its unique shape. There’s also not a whole lot nearby. The small ghost town of Terlingua, TX and the slightly more lively town of Study Butte are to the west, and Marathon, TX is an hour north of the Persimmon Gap Visitor Center.

We set our sights to visit this winter and were able to spend 12 days exploring Big Bend and while we were initially overwhelmed and frustrated the park definitely has become one of our favorites!

Travel Dates: March 12 -23, 2017

Ages of Kids: 11, 9, 6

Since we know a lot of people that are interested in this park, we thought we’d give a run down of our experience and what we learned along the way!

Layout of the Park

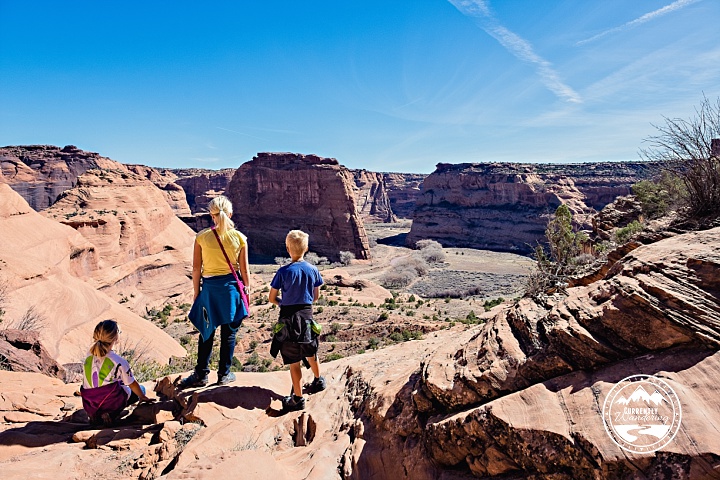
Big Bend has three distinct areas: the river, the desert, and the mountains. I was amazed that we could have summer down by the river, yet need jackets and beanies up in the mountains. The temperature difference is about 10 degrees between areas so just be prepared with all sorts of clothing.

There are four Visitor Centers but Panther Junction is the central hub in the center of the park. Persimmon Gap is at the north entrance, the Rio Grande Village is in the southeast, and Castolon Historic District is near Santa Elena Canyon in the southwest.  Chisos Basin is in the middle up a windy road into the mountains.

Also, the park is BIG. It takes about an hour to get almost anywhere and sometimes even longer. From Terlingua to the Rio Grande campground is about an hour, and its 45 minutes from Persimmon Gap down to Panther. Just be prepared to drive. There are gas stations at Rio Grande and Panther Junction and it wasn’t crazy awful expensive when we were there.

Where to Stay

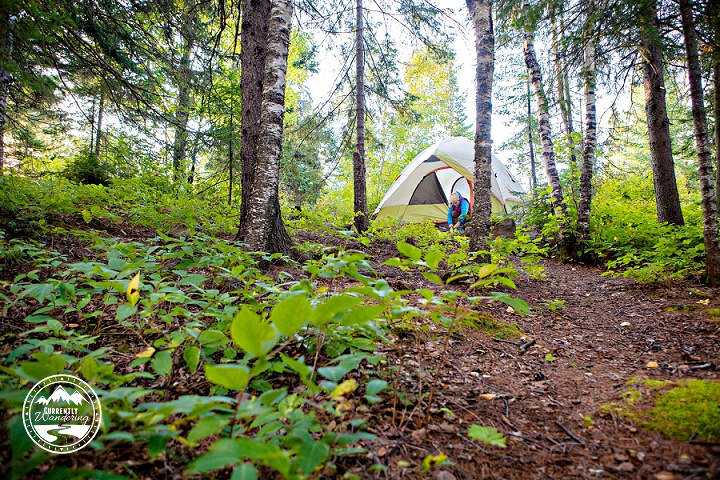
I can’t even begin to describe the stress that is camping in Big Bend. It’s worth it though. Most of the camping is first come, first served and the campgrounds very often fill up during the spring.

Your best bet for a FCFS site in any of the campgrounds is to get there before 10am. We suggest camping outside the park at Stillwell store or in Terlingua (or even Alpine) and then drive in early the next morning.

Each of the visitor centers has the latest report on campground availability and can reserve the backcountry sites so you don’t have to drive all the way into Panther Junction for that.

Ideally you could snag a FCFS site at Rio Grande Campground, hike to the hot springs, or maybe even go over into Mexico. From there try and get a backcountry site or  move to a different section of the park.

Backcountry Sites – Trailers

The biggest attraction at Big Bend National Park is the back country camping. There are dozens of 4 wheel drive roads with designated camping spots. We saw so many over lander vehicles, truck campers, and even a decked out pop up trailer.

While it feels like boondocking, you do have to get a permit from one of the visitors centers and each spot has a bear box. So not totally primitive, but definitely solitary. It was awesome.

“Spending a few days in the Big Bend back country is exactly what we needed after a packed week of adventure.” -@telegramsam

You can only get a permit 24 hours before you plan to occupy the site, but the catch is that people can switch sites during their stay. So even if you go in on a Monday to get a spot for Tuesday it could already be taken by someone from last week. Totally confusing, right? A 14 day permit only costs $12 though so once you can snag a backcountry site staying is really, really cheap.

While they are plenty of roads we wouldn’t take the trailer down, there are a few that fit a 27′ trailer (or even slightly larger). Campendium has a great blog post on the different sites and which ones would work for trailers: What You Need to Know about Backcountry Camping in Big Bend National Park.

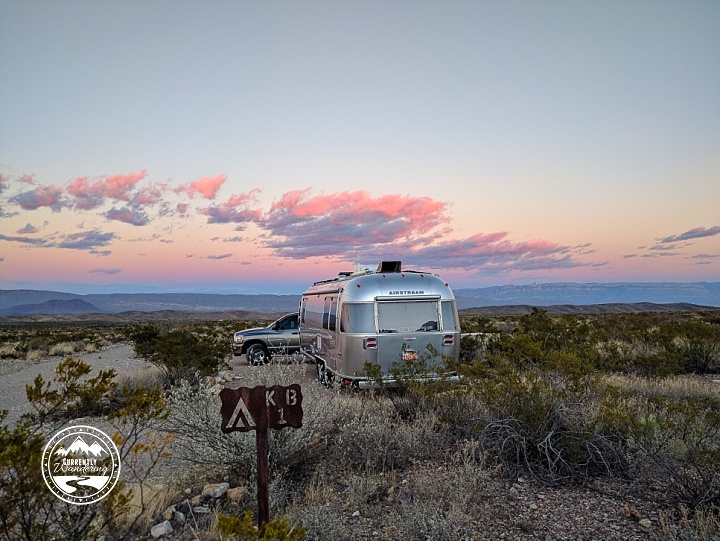
We ended up at K Bar 1 for 6 nights at the end of our 12 days. It was awesome. There was one ranger that wouldn’t let us camp there due to being visible from the road (and people came here to see wilderness not an RV park). So…. we found someone else that was a little more helpful. Maybe it is policy and the volunteers just didn’t agree with it? I don’t know. All the other volunteers we talked to all mentioned KBar as a place they send campers with trailers.

Our friends the Hendricks stayed at Croton Springs with their 30′ Airstream and absolutely loved it. He has a blog post on that here.

Rio Grande & Cottonwood Campgrounds

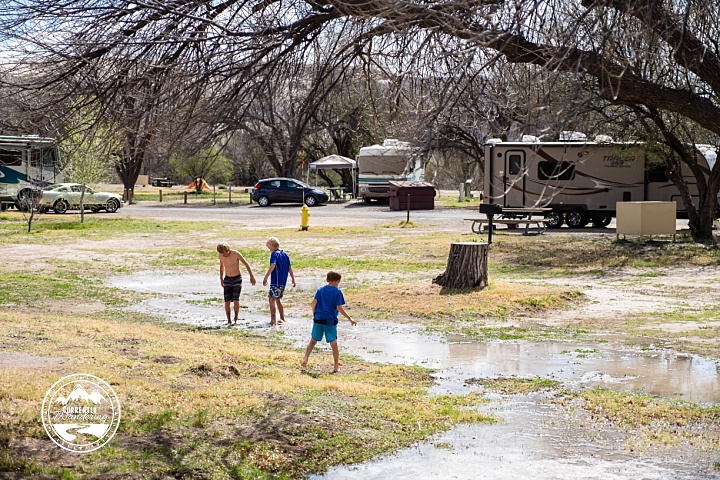
We stayed 2 nights at Rio Grande Campground and it was a great base for exploring the southeast corner of the park. We visited the hot springs twice, and the kids enjoyed playing the water and mud when they flooded the campground for irrigation purposes. We also ended up here over Valentine’s Day with our friends @thefamilycan. We had a little dinner celebration and the kids made each other Valentine cards. It was adorable.

There are showers at the store, which also has basic groceries (eggs, milk, hot dogs, etc.) laundry, and gas.  There is a “no generator” loop but you can use them in the remaining sites during limited hours. This is also the only NPS campground that takes reservations for some of the sites. The rest are first come, first serve.

We moved over to Cottonwood Campground early on day 4 to use it as a base for our overnight canoe trip. There’s absolutely no signal down there, but since our purpose was canoeing it wasn’t really a big deal. Cottonwood doesn’t allow generators, so its very quiet. The sites are not as large as Rio Grande and aren’t recommended for large trailers. Supposedly the javelina frequent Cottonwood, but unfortunately we didn’t see any.

We visited the Castolon Historic District while we were down there mostly to complete pages in our Jr. Ranger Books. They did have a really interesting (okay, boring for Cara) exhibit on the Mexican/US border and the Texas rangers. Apparently early settlers also grew cotton in the area. Who knew?

WiFi & Verizon

Naturally we wanted to be able to work while we were in the park, as taking 12 days of vacation just isn’t feasible for us. We also love to spend longer in our National Parks and spread out the exploring a bit while still getting some school, work, and regular life in.

We stayed our first night in Terlingua at Retro Rents because we arrived later in the evening and the campgrounds were all full. We had heard it was cheap but we found it that’s only if you stay a week. Otherwise I think we would have picked one of the RV parks closer to the west entrance. The Wifi at Retro Rents was just okay not great. I’ve heard good things about the wifi at BJ’s RV park and there are a few others in Study Butte that could work. Staying out there just means a long drive to get into the park to see anything.

There’s fairly decent wifi at Panther Junction & Chisos Basin Visitor Centers and the Rio Grande store. Sam “commuted” to work while we camped at Rio Grande and although it was annoying it allowed us to stay down there for a few days.

After a few days off signal at Cottonwood, we managed to snag 6 days at KBar 1 (back country site) and had decent enough Verizon to work. Unfortunately for the children it wasn’t fast enough to stream Netflix. Darn. Time to go hiking instead.

There’s no T-mobile in the park, but our phones did roam to AT&T and we were able to get cell service in some parts of the park (but no data).

Things to Do

We kept ourselves fairly busy! There’s so much to do in the park and it just takes time to check them off the list especially if you don’t want to drive yourself crazy in the process. We did plenty of hiking, soaked in the hot springs, canoed the Rio Grande, sat out at night and looked at the stars and earned our Jr. Ranger Badges.

Hiking

There are quite a few hiking trails in Big Bend and we slowly made our way through some of the more popular ones.

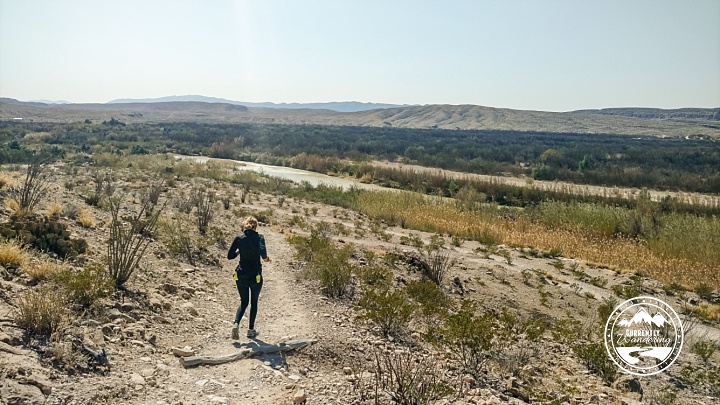
Nature Trail (Rio Grande Village area, .75 miles round trip). This is a great little trail with pretty views of the Rio Grande river and campground. The kids never made it out here, but I ran it a couple of times.

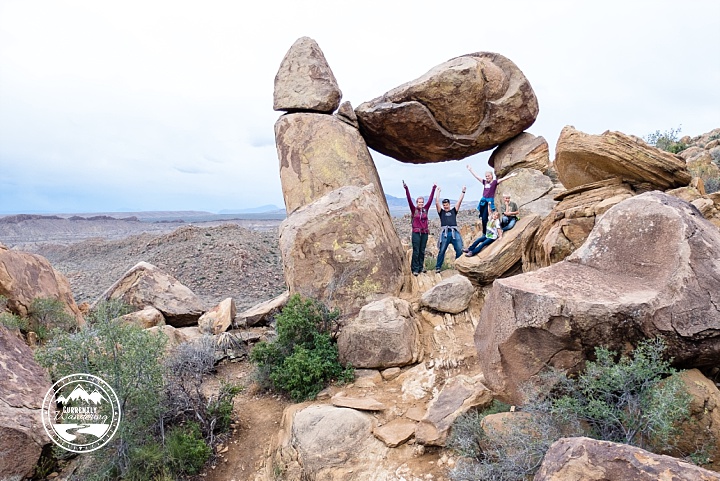
Balanced Rock (Panther Junction area, 2 miles round trip). This short hike was perfect for a Sunday evening wander with the whole family. My kids have learned that when I say we are going on a “short hike” to still lace up their hiking boots. Apparently nothing counts as short around here anymore! The trail wanders along a flat wash, and then there’s some serious scrambling/elevation to get up to the formation. It was a great warm up for Emery Peak.

Emery Peak (Chisos Mountain Basin area, 10.5 miles round trip). We went from hiking in the desert one day to mountains & trees the next. The Chisos mountains are over 7000 feet tall and it tripped our minds to be hiking with oak trees, cactus, and even some snow! Out kids rocked the 10.5 mile round trip hike up to Emery Peak – the highest point in the park. The views were absolutely incredible the entire way up.

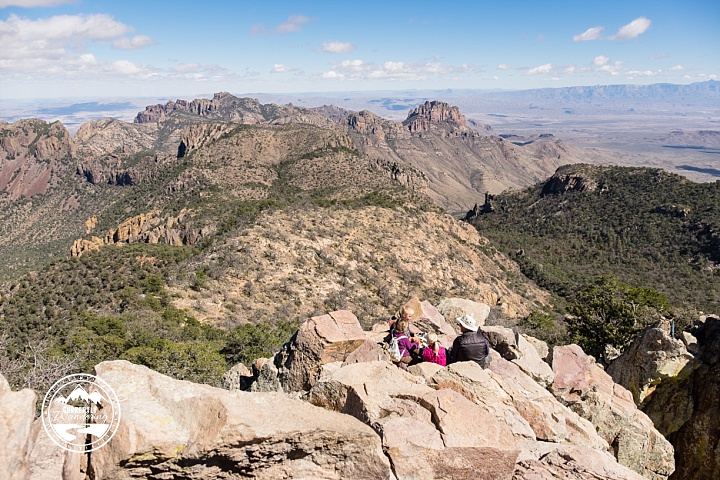
“Sitting on top of the world! Emery Peak sits at 7832 feet above sea level. So crazy that a mountain that tall is in Texas smack next to the desert. There’s quite a rock scramble up the last bit and Rachel mustered up so much courage but ultimately the sheer height did her in. Not a bad lunch spot though, eh? This was our first peak summit and I’m thinking we have more to come!” – @currentlywandering

Hot Springs Trail (Rio Grande Village area, 6 miles round trip). While you can drive to the Hot Springs, the hike was quite beautiful. My friend Charlene, and I set out to hike the 3 mile trail with 6 kids in tow. The trail actually had quite a bit more elevation gain than I had anticipated, but the views were stunning! After work the dads drove our trucks over to meet us so we didn’t have to hike back as well. I think the kids would have rebelled if we had made them! Even I wouldn’t have enjoyed a wet, 3 mile hike back to our trailer.

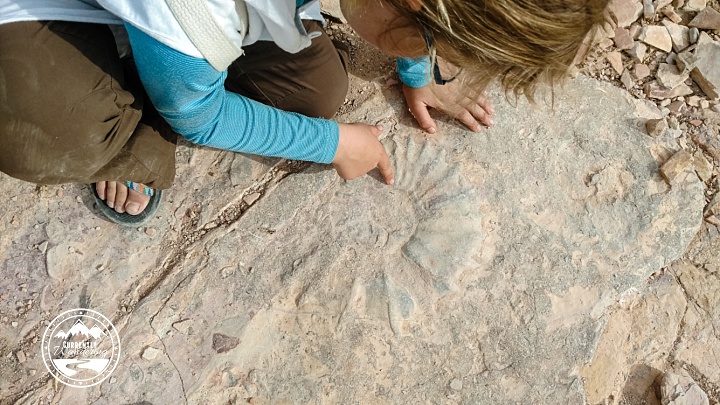
“It’s so amazing to me that much of our deserts were once lush, tropical forests and huge seas. We found this fossil on our hike from Rio Grande to the Hot Springs in Big Bend National Park. The older kids were hiking fast and completely missed it, but Cara’s sharp eyes picked it out of the surrounding stone. Not too shabby.” -@currentlywandering

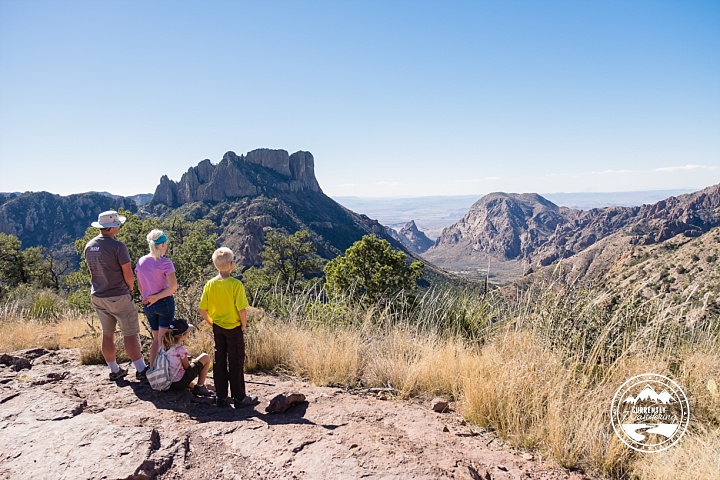
Lost Mine Trail (Chisos Mountain Basin area, 5 miles round trip). We had heard this was the best trail in the park, so naturally we had to fit it in. We hiked this only 2 days after Emery Peak so we were all a little tired. It gains some pretty steady elevation, with a lot of switchbacks up the ridge. If you can’t get up to the south rim, then this is definitely a good one for the view!

Santa Elena Canyon (Castolon Historic District, 2 miles round trip).  This was a great evening walk! The trail was fairly flat except for the nice switchbacks up the steep canyon. We hiked this the night before our canoe trip and it got us all excited for getting on the river.

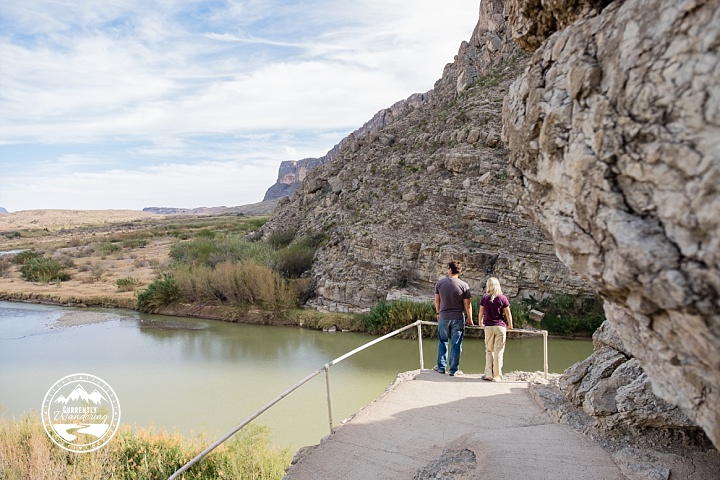
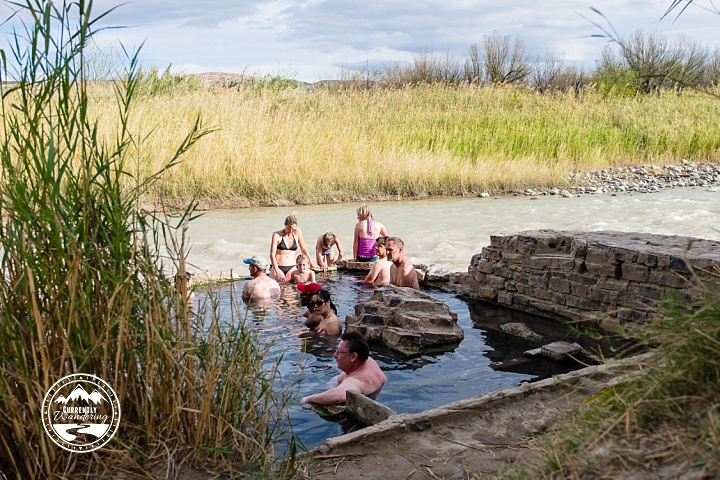
Soak in the Hot Springs

After driving to the parking lot, the springs are only a short .5 mile walk away. We managed to visit three times and each was different! We noticed many people stayed for just a few minutes, but our kids had fun jumping and swimming down the river for hours. The water is a consistent 110 degrees and was absolutely lovely, if a bit on the sediment-y side.

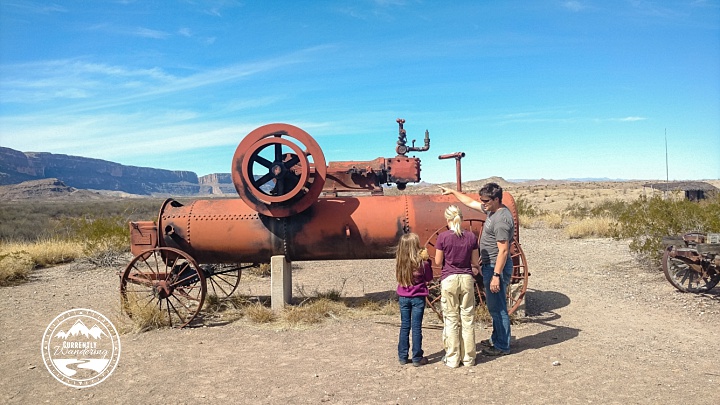
Along the trail are remnants of an old hotel that would house tourists visiting the springs. It was a really neat historic area and I love that the buildings are still there!

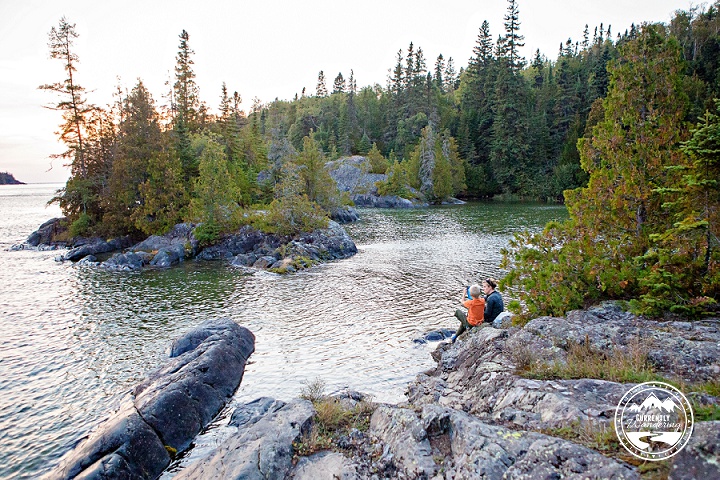
Canoe the Rio Grande

When we researched activities in Big Bend, canoeing in Santa Elena Canyon was at the top of our list. We had never attempted an overnight canoe trip with our kids (I did a multi-day rafting trip as a teenager) and it sounded like a challenge. We could have just done a day trip – or a boomerang as they call it – but that just didn’t sound as appealing.

This trip took a lot of research and planning so I put together an entire blog post just for our canoe trip. You are welcome.

Stargazing

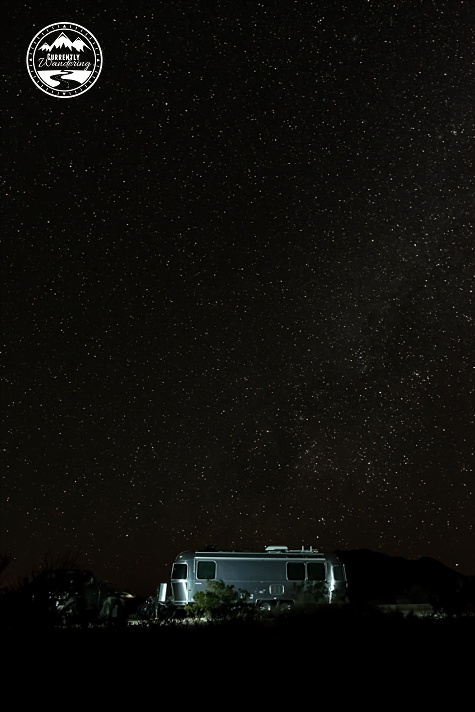
We’ve been to quite a few “dark sky” National Parks but Big Bend blew them all away. There were So. Many. Stars! I seriously couldn’t believe it. Another perk is that we had some pretty warm nights. We were out shooting star photography at 11:30pm and it was about 70 degrees with a nice warm breeze. 

Dining and Food

There aren’t a lot of places to eat in the park. The Chisos Basin has a lodge with a restaraunt, but that’s the only one. After our hike to Emery Peak we treated the kids to dinner at the lodge. Sam and I were hoping for a hamburger, but unfortunately the only one on the menu was a vegetarian bean burger. That just wasn’t going to cut it.  Instead we opted for the all you can eat salad & soup bar and it really  hit the spot! They also had a pretty decent kids’ menu (which actually had a hamburger) and we felt the food was good for the money we spent.

There are convenience stores in most of the areas, and we may or may not have grabbed ice cream bars at 10am one day.

The only “real” grocery store is in Study Butte and we were surprised at the variety and quality of the food. After our canoe trip we stayed in town long enough to grab Mexican food for dinner, a coin operated shower, and a trip to the grocery store.  It says something about our travels when we can shrug and say, “Well, its not the most expensive bread we’ve ever bought.”

Earn a Jr. Ranger Badge

Naturally we had to earn our Jr. Ranger Badges while we there. The nice part about a 12 day stay was that we could stretch it out a little. There are pages to complete in each section of the park, but the kids don’t have to complete all of them to earn the badge.

They also had centennial hiking patches we could earn and since I figured we’d never get down there again we were going to earn all the things! There were patches for hiking the Panther Path Nature Trail (easy), the Hot Springs Trail (medium), and Emery Peak (hard). Super proud of my kids for snagging all three!

If I’m honest, planning and visiting Big Bend took about everything we had. Canoe trip, hikes, hot springs, campground jockeying, plus all the driving completely wore us out. Kids and parents alike. It took us quite awhile to recover!

Even though we were in this park for 12 days, I feel like we only grazed the surface. They have some great scenic drives, you can mountain bike on all the back country roads (and cycle the paved ones!), and the backpacking in the Chisos Mountains looked top notch! I feel like we did a great job with the time we had though and we always try to save something for next time!

Categories
Daily Life Finances & Money

Items We Still Buy at Costco & Our Costco Connection Magazine Cover

People seem surprised that we have kept our Costco membership even while living in such a tiny space. Either we are crazy, or there is more to Costco items than large, bulk purchases. I prefer the latter explanation.

Truth is, we are probably addicted to some of the items they carry, and even though the packages may be larger than a regular grocery store, its worth squeezing them in for the cost savings in the long run. In addition, sometimes it really just is convenient. If you follow me on Instagram, you’ll notice my occasional rant about loathing grocery shopping. I really do. Its very difficult to price shop, build up a pantry, coupon or any other cost saving techniques. When I buy in bulk from Costco, I feel that I’m getting at least a marginally better deal than the grocery store.

Costco is also predictable. While we sometimes can’t find an item (e.g. Dave’s Killer Bread), its usually not difficult to stock up on our regular items. The layouts of the stores are all the same and we know right where to find everything.

We also have a Visa card through Costco. We get 3% back on gas, 2% back on restaurants, and 2% back on travel expenses. We make enough back between the Executive Membership and the Visa to more than pay for the Costco Membership (hello? Have you SEEN our gas bill every month?). Plus, we usually have quite a bit leftover that lends itself to a spending spree sometime in April. I’m sure they planned it that way.

The food court. Seriously one of the cheapest meals for a family of 5 (even if its not exactly healthy).

In celebration of our recent appearance on the cover of Costco Connection magazine, I thought I’d revise and republish our 2014 list of items we typically purchase. Its actually changed quite a bit in that we’ve added a few things we simply can’t live without. Somehow we always find room.

Items We Buy A Lot

Frozen Strawberries (for smoothies, pancakes, and muffins)
Multigrain Tortilla Chips
Cherry Tomatoes
Grapefruit
Cara Cara Oranges
English Cucumbers
Bananas
Organic Spinach
Rotisserie Chicken
Frozen Chicken Breasts
Chicken Apple Sausages
Cheddar Cheese
Greek Yogurt
Kodiak Cakes Flapjacks
Real Maple Syrup
Love Crunch Chocolate Granola
Cereal (Oatmeal Squares, Frosted Mini-Wheats, Cinnamon Toast Crust)
Mixed Nuts
Dave’s Killer Bread when I can find it, Sprouted Honey Wheat Bread when I can’t

Items That Last Us Quite Awhile
Quaker Old Fashioned Oats
Natural Turkey Lunch Meat
Ground Flaxseed
Chia Seeds
Organic Chicken Bullion Base
Butter Quarters (freeze most of these as well)
Honey (the 3 bears one)
Gummy Vitamins
Dove Body Soap
Kirkland Shampoo & Conditioner
Vegan Protein Powder (for everyone but me, I use Shakeology)
Johnny’s Garlic Seasoning Spread
Quinoa and Brown Rice Packets
Fig Bars
Cliff Z Bars
Stretch Island Fruit Strips
Triscuits
Almond Butter
Nutella
Sweet Baby Ray’s BBQ Sauce
Kirkland Signature Salsa
Coconut Milk
Paper Towels
Single Serving Hummus (I usually freeze more than half of them)
Laughing Cow Cheese Wedges

When We Have Room or Just Occasionally For Fun:
Potstickers
Orange Chicken
Canned Chicken Breast Chunks
Papa Pita’s Greek Pita Flat Bread (found in *almost* every Costco we’ve been to. Except Nevada.)
Cheese Tortellini
Pesto Sauce
Bagels
Coastal Aged Cheddar Cheese (this stuff is seriously AMAZING)
Broccoli Florets (if I plan a whole week’s worth of dinners with broccoli in them)
Skinny Cow Ice Cream Sandwiches
GoGurt (then we freeze a lot of them)

Items We’ve Given Up on Buying
Avocados (I just can’t nail the ripeness and they usually go to waste)
Toilet Paper
Cheese Sticks (my kids won’t eat them all)
Eggs (as much as we eat them, I can’t fit it in my fridge!)
Milk (only room in the fridge for 1 gallon)
Fruit Snacks (I just don’t like my kids eating them)
Carrots (once again not enough room for such a large bag)
Oatmeal Packets (much to the dismay of my children)

Wow. That is quite the list. I’m sure I forgot a few, but I’ll add more in as I think of them. What are your favorite items to buy at Costco? Anything you can’t live without? Personally, I still jump for joy anytime we can leave the building with a purchase under $100. Tell me I’m not alone?

Categories
National Parks New Mexico

Backpacking & Sledding in White Sands National Monument, New Mexico

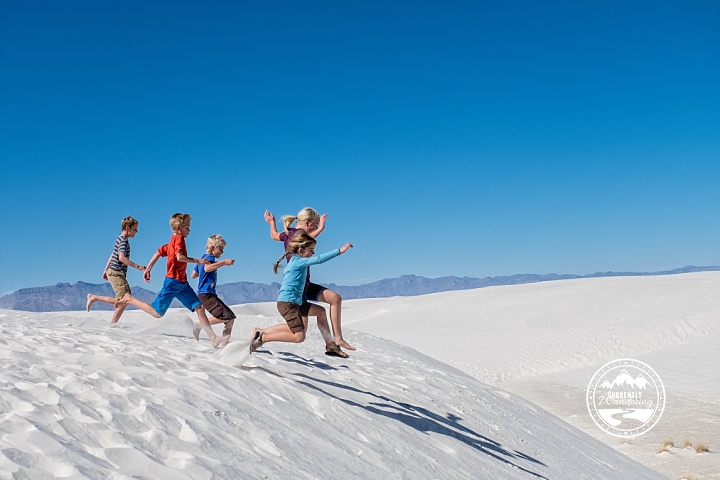
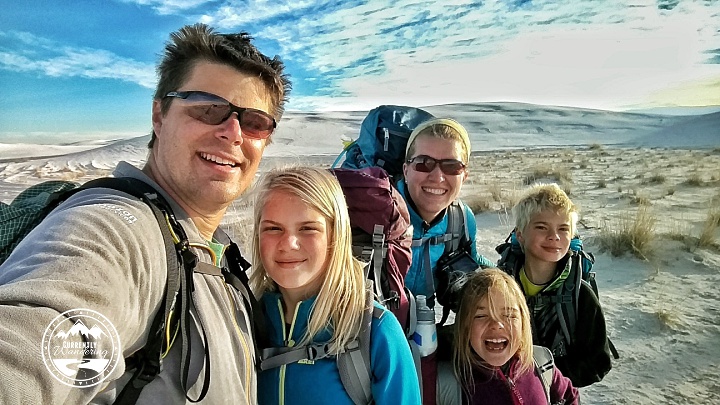
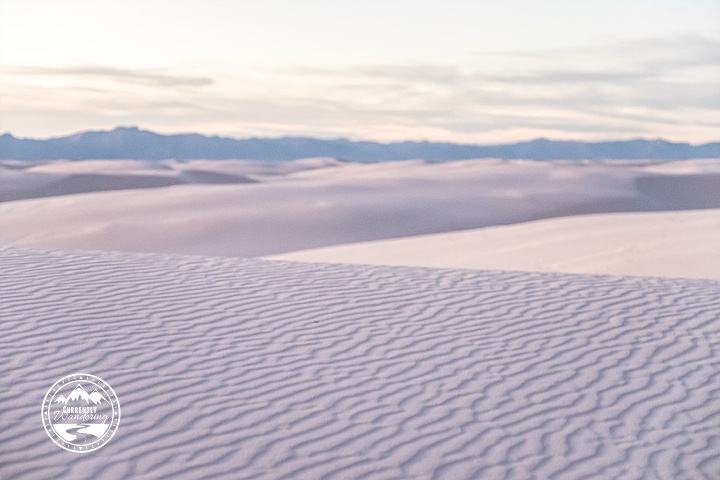
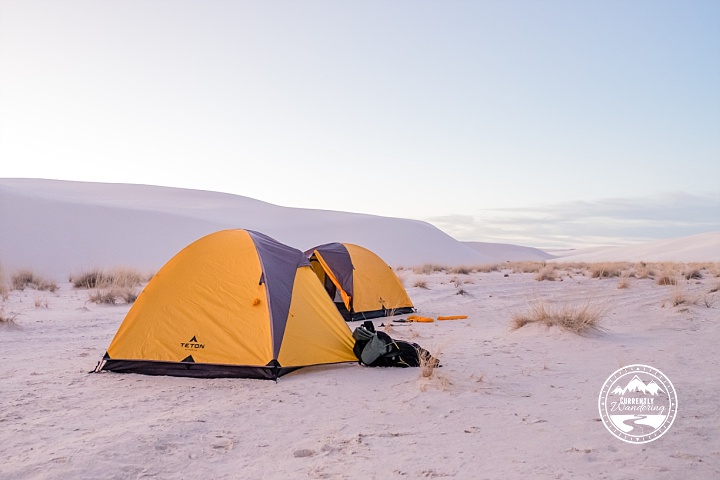
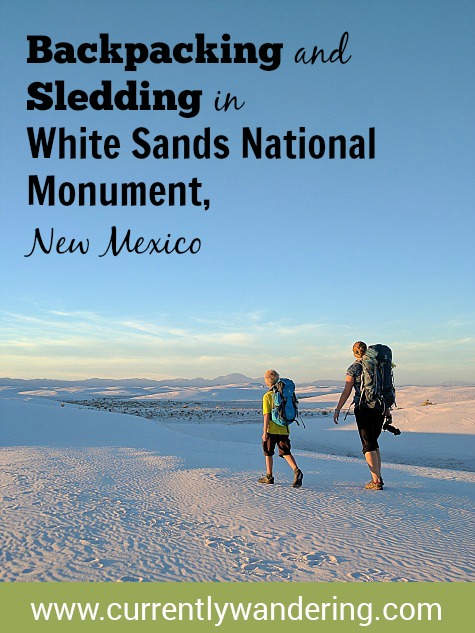
"White Sands National Monument is one of those other-worldly places. Located in southern New Mexico this park is truly one of a kind. We visited three years ago on our initial trip from Virginia to Utah and the kids have been begging to go back. When we decided to stay west this winter they unanimously voted White Sands as the one place they wanted to visit for sure.

Travel Dates: February 17-18, 2017

Ages of Kids: 11, 9, 6

Where to Stay: There is no campground for trailers in White Sands National Monument. However, Lake Holloman is a free option about 5 minutes from the entrance, or Oliver Lee Memorial State Park is about 30 minutes away.

Where to Get Sleds: The Albertson’s in Alamagordo sells sleds (usually) but you can also get them from the Gift Shop through the courtyard and past the Visitor Center desk. At the time new disks were $16 and used were $10. They will also buy them back once you are done ($7 new and $3 used I believe).

We arrived Airstream in tow and parked in the Visitor Center lot where they have ample room for bigger vehicles. We went inside, grabbed our Junior Ranger books and headed to watch the video about the park. Unfortunately about this time a school group came through so we didn’t explore the exhibits further. After about 15 or 20 minutes of working distractedly on their books, the kids looked up at me and said, “Mom? Can we just go sledding?”

I realized we weren’t going to get anything else done before we hit the slopes as it were, so we bought used sleds from the Gift Shop for $10 each, some wax, and loaded up for the drive into the park.

I love that the parking lots are HUGE and we can just drive our entire Airstream into the park. The best dunes are located near the end of the one way, teardrop shaped loop. We parked near the Alkali Flat Trailhead where there were multiple large dunes to choose from.

We also met up with both @liddleadventures and @thefamilycan so it was a full day of friends and sun! We couldn’t have asked for a more perfect day.

With cloudless blue skies, and warm temperatures, our visit this time was totally different. We basked in the sun wearing shorts and short sleeves, and even had to apply sunscreen in order to not be burnt. It felt like the perfect beach day and we were up and down the dunes for hours.

At one point in a conversation with another family, we were musing about the back country camping in the park. There is a loop for tenters and we joked about pulling out our tents and just staying the night.

And then we totally did.

Sam drove back to the Visitor Center to grab a permit (first come, first served) and I double checked to make sure we had enough food to pack in for dinner and then breakfast the next morning. Around 3pm our friends both took off for their next destinations and we set about packing up our overnight gear and prepping food.

Once we were ready, we drove to the backpacker trail head, parked the trailer and set of into the sunset for our short one mile hike to campsite #2. Cara insisted on bringing a sled and pulled it behind her as we followed the orange markers out over the dunes.

We got to camp and hurriedly set up our tents before it got dark. In hindsight, we could have timed things to arrive just a little bit sooner, but honestly the kids were having so much fun sledding with their friends that I’m not sure we would change anything.

Have you ever had a random idea to turn a one day visit into a backcountry overnight trip? Me eithe…. Yeah. That happened. In our travels, we have learned to say Yes when adventure calls. That is how we ended up hiking into the otherworldly scene displayed here. We found our campsite amidst the dunes just before nightfall. Staying overnight allowed us to experience not only the late evening and early morning unavailable to daytime visitors, but also a brilliantly bright full moon. -@telegramsam

Hooray for a spontaneous backpacking trip! While sledding yesterday in White Sands National Park we decided to grab a back country permit and stay the night. With a full moon, plenty of stars, and a gorgeous sunrise we definitely made the right decision! -@currentlywandering

Camping on the dunes is prohibited so all of the camp sites are nestled in valleys between dunes. We settled into our little spot, made dinner, and the kids managed a final sled before bed.

One of the perks of staying the night was the ability to see both sunset and sunrise in the park. Sunset over the gypsum sand was pure magic. Depending on the time of year, the park can close before sunset actually occurs which I think is totally sad. The rangers drive through the park at closing announcing over a loudspeaker that everyone needs to leave. I’m grateful we were able to just stand and enjoy it.

At first we were excited there was a full moon and then we realized that its really hard to sleep when its so bright outside! Sam, Rachel, and I went for a walk at 10pm with no headlamp (and no shoes honestly) to try and bring on some sleep. I didn’t even try to capture any star photos as the moon would have just washed them out.

“The moon was full last night, and as it shone upon the brilliant white sand around us, it lit up the night in a way I have never seen before. It was bright enough to allow a late night wander without any light at all. It was so bright that we had moon shadows. It was so bright that we had trouble falling asleep. It was indeed otherworldly.” -@telegramsam

We had plans to be 5 hours south of White Sands by Saturday night, so were were up and out of camp early the following morning. We had a quick breakfast of Cliff Bars, fruit strips, and hot chocolate before making our way back to the trailer. Halfway there we realized the Visitor Center didn’t open until 9am (we needed to turn in our Jr. Ranger books) so we slowed down a bit and got some more sledding in.

Backpacking trips that involve sand dunes and sledding are much more fun. -@currentlywandering

I love that we could revisit one of our favorite places and the experience was so different than last time. White Sands is definitely a unique visit and camping in the back country made the visit even more special.

Categories
Backpacking Tips & Tricks

8 Tips For Taking Your Kids on Their First Backpacking Trip


My husband, Sam, and I completed our first backpacking trip together in New Zealand’s rugged mountains four months after we were married. Actually, it was my first backpacking trip ever. While he grew up with parents who frequently went into the back country, we were more front country, car camping kind of people. Despite the flies, the rain, and the incredibly steep trails, I was hooked after that one experience.

Knowing how incredible it feels to wake up in a tent on top of a mountain, we agreed that we would love to share that experience someday with our kids. This last year we finally reached our goal, completing four separate excursions in various states across the U.S. We watched our kids struggle up steep trails and bundle up against cold, windy weather but then also lift their faces in awe as they soaked up an early morning sunrise.

So, how did we do it? How did we go from tent for two, to trailside with five? Here are eight tips for taking your kids into the backcountry for the first time:

Plan Carefully.

There are many questions to consider when planning your child’s first backpacking trip. What are your goals? How many nights do you want to do? How far can your kids hike? What is there to do once you get there? Are you going to start after dinner? Early in the morning? How steep is the trail? Is it a long drive to the trailhead? Knowing your kids and their limits (generally speaking) can give you a good idea of where to start.

Many of our overnight hikes leave around 2pm, hike five miles to the campsite, eat dinner, have a lazy morning and hike back out around lunchtime. Simple, easy, yet a great way to unplug and be together as a family. Other families I know grab Subway after work on the way to the trailhead and hike a mere mile or two in before setting up camp for the night. Know your goals and then research the best way to accomplish them.

Start Simple.

Long before we loaded our kids up with a pack we hit the trails. We hiked short trails, long trails, hikes in the mountains, and hikes in the desert. Our kids could hike up to ten miles, which we did repeatedly over the course of a year. Our first backpacking trip, however, was a short 3.5 miles. We’ve gradually increased the distance over time, but we’ve found that hiking with a pack is a different experience for a kid. My husband has memories growing up of even shorter, one mile hikes to backcountry sites shouldering his small backpack and water bottle. The idea is to get your kids used to hiking in to their campsite wearing a pack whether it’s one or ten miles in.

Take Your Time.

On multi-day trips, my husband and I often remind ourselves we have ALL DAY to hike with the kids. The beautiful part of backpacking is that often there’s not much to do besides hike, so taking all day to hike that 3.5 miles not going to crimp anyone’s schedule. Smell the flowers, throw rocks in the stream, take a longer snack break and don’t push too hard.

Pack Plenty of Treats.

Well-thought out and distributed candy, snacks, and gummies can help motivate even the most reluctant hiker. Quick carbohydrates and sugar are often the perfect pick-me-up. We often have a mile limit or a goal to reach before we sit down to pull out the treats, which keeps the kids from asking every five minutes if they can have skittles. A special treat for reaching the “top” is also a welcome bonus. Our kids love Australian licorice, skittles mixed with toffee covered peanuts, mini M&M’s, and Pull-and-Peel Twizzlers.

Simple Meals.

While you may enjoy a gourmet backcountry dinner, chances are your kids are just hungry. In addition to plenty of snacks and treats, we do Freezer Bag Cooking for dinner and breakfast. All dry ingredients are prepared beforehand at home and then sealed in a freezer bag before getting tossed in our packs. Once mealtime rolls around, we boil water, add to our freezer bag, stir, let it sit in a cozy for 10 minutes, and voila! Dinner is served. Our three kids typically share a meal, while Sam and I eat a second. Our favorites so far are Cheesy Bacon Onion Mashers, Chocolate Protein Oatmeal, and Chicken Thanksgiving Dinner.

Be Prepared for Boredom.

Let’s face it. Most kids are addicted to screen time and even when they are conditioned to get outside often there’s still going to be whining about being bored. At camp, my older two kids will happily read on a Kindle for an hour or two, but after ten minutes my five year old is complaining because no one will play with her. We’ve learned to be strategic about how much time we will have at camp, whether or not there is anything nearby to explore, and to bring card games and even toys to play with once we get there. Packing a compass for scavenger hunts, a GPS unit for Geocaching, or a pocket knife for whittling sticks are all fun ways to spend time together once camp is set up.

Ultralight is Best, but Don’t Stress About Gear.

Between the two of us, we carry most of the gear. From the tent to the sleeping bags, cooking gear, and the food, most of it is packed into our two larger bags. Over time we’ve been able to make adjustments and swap not-so-light gear out for less weight as we gradually increase our distance, but start with what you have. At short distances, ultra-light gear is not as important. Let your four year old wear her Winnie-the-Pooh backpack and bring her stuffed animal. You can see our gear list here.

Have a Good Attitude.

The best thing you can do to help your kids have a good attitude and appreciation of the experience is to have a good attitude yourself. If your kids hear you talk about how much you enjoy the view, how much you appreciate the challenge of that ridge in front of you, and the good memories you have of other backpacking trips, your kids are likely to adopt a similar attitude. If they hear you complain about how dirty you are, how much you miss your bed at home, and the pains you feel, they will likely adopt those feelings too. Having a good attitude can be a challenge, but the payoff is worth it!

While we introduced our kids to backcountry camping fairly spectacularly manner, camping for two nights on an island in Lake Superior is not feasible for everyone. Our main goal, however was to have the experience end solidly with a “backpacking is really awesome” mindset for the kids no matter where we went. We feel it was a success since the kids happily followed that up with three more trips over the next few months.

Backpacking, or doing anything outdoors, with kids involves a different mindset. Suddenly we weren’t doing this for us, we were doing it for them. The miles are shorter, the terrain a little easier, the views maybe not quite as majestic, but the time spent together hiking, setting up camp, and snuggling in our sleeping bags while the stars wink overhead is irreplaceable.