Categories
California

Webelos Weekend at Camp Noyo, California

Camp Noyo 2014_100

Webelos Weekend is an awesome overnight camp for Cub Scouts and their parents available in Northern California. It is offered only two weekends per year. If you have a kid the right age, you don’t want to miss it.

Camp History

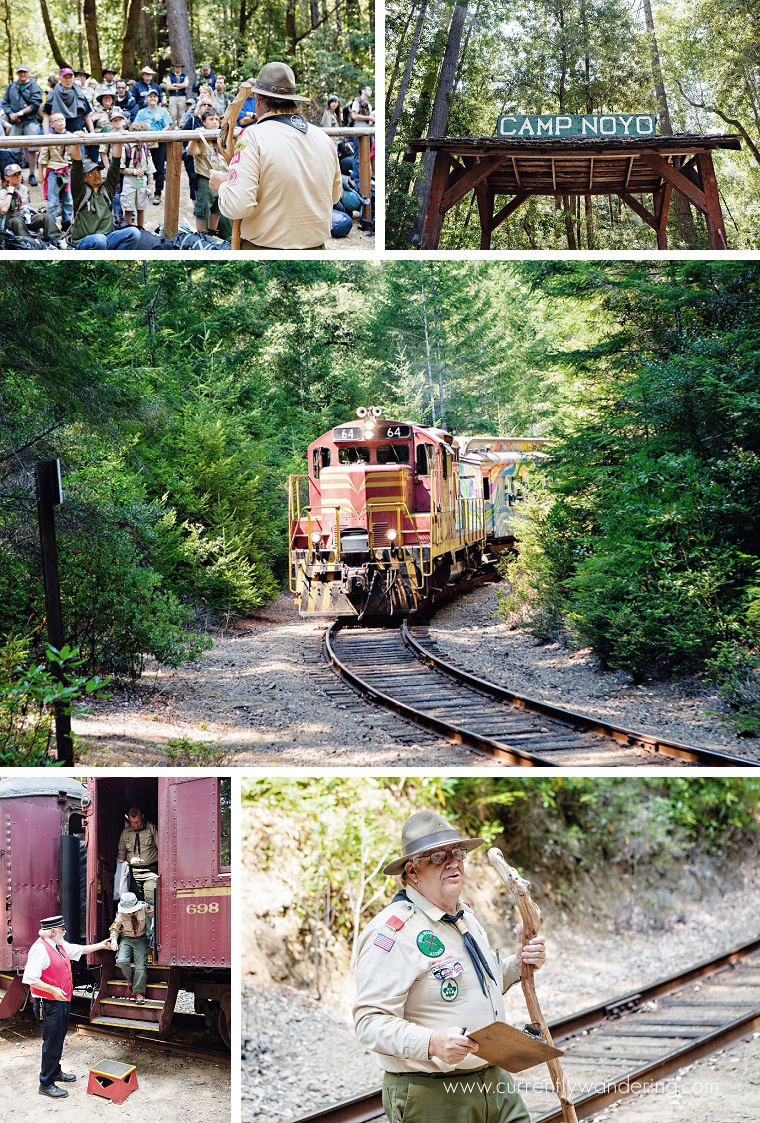
In 1933, an old logging camp along the Noyo River known as Camp 4 was purchased from the Union Lumber Company by the local Boy Scouts of America council. Camp Noyo was born, and has served many generations of Scouts.

My first visit to Camp Noyo was as a Cub Scout, when my father and I attended Webelos Weekend as participants. Since that first visit 24 years ago, I have been back many times to serve as staff for various programs.

The camp is maintained entirely by volunteer efforts, the bulk of which is performed by the Hemphill family.
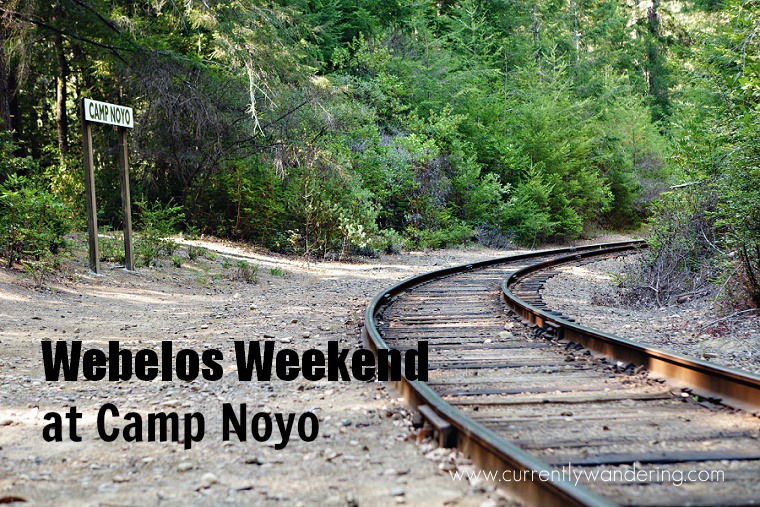
The Train

One of the amazing experiences of Webelos Weekend is your arrival in camp by train. Leaving from Fort Bragg, the Skunk Train is your way into camp. After boarding and a little over an hour of train ride, the train will pull to a stop at the Camp Noyo Train Depot, where you (and your gear) will pile off the train and walk right into camp.

The return trip is also by train, picked up at the same train depot and delivering you back to Fort Bragg. The train route travels along track and across trestles previously used for logging operations, and travels through beautiful forest land inward from the coast.

Camp Noyo 2014_127

The Activities

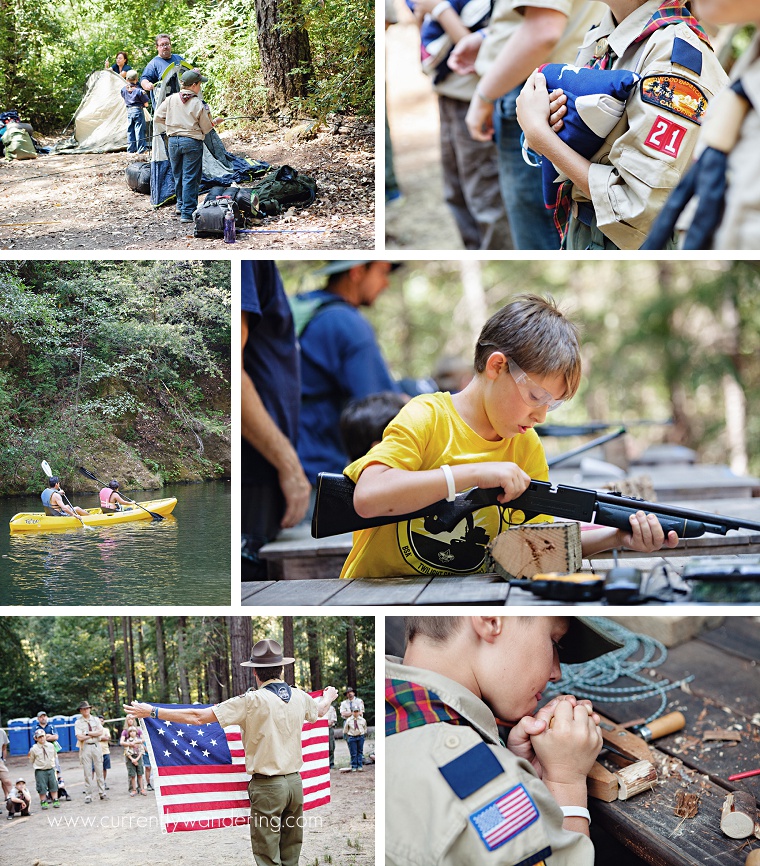
Webelos Weekend is a relationship camp, not an advancement camp. The boys don’t earn any merit badges, but instead get to spend time with their “buddy”. In fact, the boys are required at all times to be with their attending adult (parent, grandparent, etc.). As such, the camp provides many activities for the pair to do together.

After a brisk swim check with the lifeguards, the river offers an amazing paddle space with canoes and kayaks available. The waterfront is a popular activity in camp, particularly warm afternoons.

Shooting sports include BB gun shooting and archery, and this year they even had a slingshot/wrist rocket station. A variety of games are available, including badminton, volleyball, disc golf, crosscut saws, and handicraft.

In the evening, the staff and volunteers from the group put together a rousing campfire to complete the evening.

Camp Noyo 2014_133

The Food

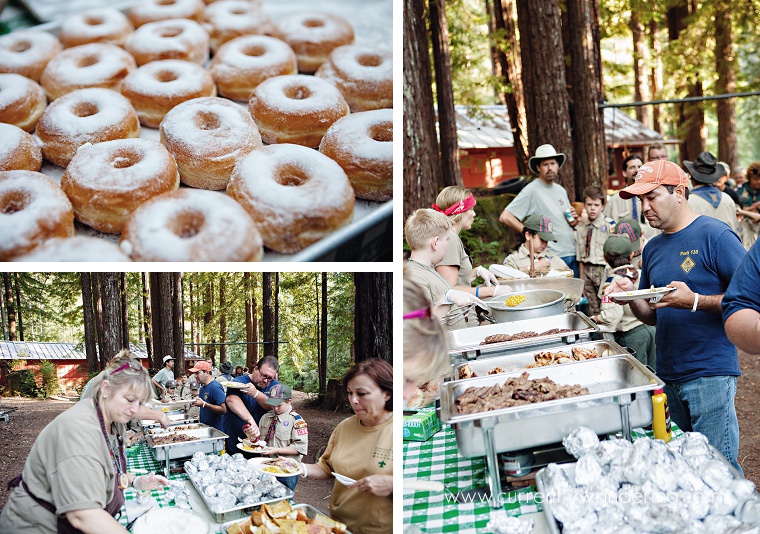
Every weekend, we get compliments about the food. We have an amazing kitchen staff/cook that does a top notch job. Hamburgers & hot dogs when everyone gets off the train and settled.  Dinner is grilled chicken and steak. Hash browns, eggs, and sausage for breakfast, and sandwiches for lunch before boarding the train home. And the doughnuts. Don’t even get Jess started on the doughnuts. She may have eaten more than her fair share. A cracker barrel after the campfire rounds out the snacks for the camp.


Camp Noyo 2014_198

Our Involvement

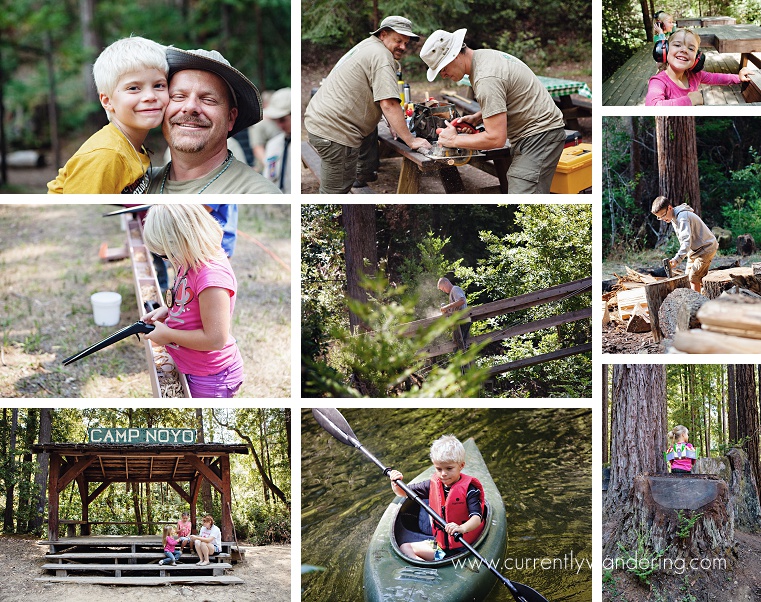
On and off over the last few years, our family has had the opportunity to volunteer and serve both in camp maintenance and as staff for Webelos Weekend. My dad has been been acting Camp Director for years, and takes advantage of our skills when we can make it. My older brother attends both weekends with his family as the camp paramedic, so its fun that we get to spend time with them as well.

Between the two weekends, we usually have the camp to ourselves. We always work on a project or two – this year we repaired water pipes and performed some light maintenance on the bridge spanning the river. There’s also plenty of time for play, swimming every afternoon, outdoor movies at night, and for our kids to enjoy the activities while they boys aren’t present. Thursday nights the rest of the staff rolls in and we get prepared for the weekend.

As staff for Webelos Weekend, we hauled and chopped wood, helped with meals (Rachel loved serving food!), and taught basic woodcarving and knot tying for the scouts and their parents. Jess was in charge of promotional photos, and I managed to take quite a bit of video this year as well. It was a wonderful time, and I’m grateful for the opportunity we had to serve there. Our kids are already asking when we get to go back.

Camp Noyo 2014_195

Categories
Tow Vehicle

New Brakes – A worthy purchase

As we traveled north of Crescent City and across the border into southern Oregon, I began to notice some odd sounds from the front brakes. I knew the brakes were probably due for replacement, and I arranged for some work in Grants Pass, OR.

Finding a place for vehicle repairs is something I do very different on the road. At home, I had a regular mechanic, whom I trusted and did great work. If I needed specific work, he was able to refer me to someone he trusted. On the road, I have tended to visit and use larger chain suppliers for routine work. They are much easier to find, and I can return to any location for any warranty issues. My choice for the brakes was Les Schwab. As usual, the minor signs of wear belied the damage done, and the I needed new rotors in addition to the usual replacement parts. All told, I was just under $900 out the door for the work.

Did I overpay? Probably. But hunting down a mechanic or comparison shopping would have cost me time that I would have otherwise spent working. As I have no end to my current list of my projects, time spent working is worth preserving, even at a little cost.

Mostly, I’m grateful.

Brake problems are very serious when your rig weighs 15 thousand pounds, and we have driven our share of hills recently. Sometimes I catch a brief glimpse of the protection sent from on high to guide us and protect us in our travels, and this is definitely one of those times.

I’m sure that the increased hilliness of our travel accelerated the wear on the brakes, and I was unprepared and not careful enough to watch them. In particular, the wear on the front and rear brakes was about even, no doubt to the additional load on the truck while towing the Airstream. Regular vehicles usually need the front brakes replaced twice as often as the rear, but I suspect towing we will see more even wear.

In the future, I’ll be more careful and more watchful of my brakes.

Categories
Night Photography

Night Photography Beginner Basics: Dark Composure

Night Photography Beginner Basics! We explain how to get the best compusure even when its pitch black outside!

We’ve gone over basic gear and camera settings, and now its time to start talking about what you are shooting.

Composure in night photography is made more difficult by the darkness of it all. Your foreground is made up mostly of silhouettes (unless you are light painting, more on that in a future post), which means you are using the ‘shadows’ of earthly elements  to provide interest in the picture. These elements are commonly trees and rocks, depending on your environment.

Choosing your composure is often best done during the day, or using a bright flashlight at night. Your lens selection will matter here, as you can include a larger slice of the sky with a wide angle lens, or a smaller with a longer lens.  Your lens will typically be pointed high in the sky. Moving the tripod around on the ground will allow you to place your foreground silhouettes in your frame, leaving the sky open for your celestial capture.

Celestial Objects

Shooting any portion of the sky can return great results particularly with an interesting foreground. If you want to add a little sizzle, try including the Milky Way or Polaris (the North Star) in your image. The North Star will only have interest in a time-lapse or a long exposure, where you can see the rotation of the stars in a circle.

The Milky Way

The Milky Way is a great subject in the sky, and can add beauty to nearly any foreground. Capturing the Milky Way will constrain your shooting time, as you will have to shoot when it is in the right position. Old-school star charts or new-fangled apps can help with this, allowing you to see when during the night it will be in position. When you find your ideal time, make sure you show up 45 minutes or an hour ahead of time. Start shooting immediately, and by the time the position is right, you will be all set up and getting great images.

Try It Again

Undoubtedly, your first attempt will have some issues. You may want to fix composure, exposure length, or subject. Plan (if you can) a few hours or nights in a row to shoot. Time-lapse projects are very time consuming, so save those for later. Many still shots of the night sky have an exposure of under a minute, so you have plenty of time for adjustments and new shots. Change your angle, move your camera, and adjust exposure settings, and then hit it again. If you have multiple nights, you have a great opportunity to spend some daytime editing and evaluating the work of the previous night. Evaluate your images, and plan your adjustments for your next night.

Night photography can definitely be photos of just the stars, but adding in some interesting foreground objects as silhouettes or highlighting some obvious star patterns can help the photo be much more dynamic!

Categories
Night Photography

Night Photography Beginner Basics: Camera Settings

Last post, we talked about basic gear. This post, we’ll talk about camera settings. But first, lets talk about star movement.

Star Movement

Stars move across the sky. This isn’t actually true, as this movement is caused by the earth’s rotation, but we’ll ignore that for now. For our purposes, the stars move, and we may or may not want to capture that movement.

Celestial Photography falls into two main capture goals: Star Trails, and Still Shots. Star Trails are accomplished by leaving your camera’s shutter open for a long period of time. The longer the time open, the longer the arcs of the stars appear in your image. Star Trails are awesome, but I want to focus on Still Shots in this post.

For Still Shots, you actually want to PREVENT any star trails from happening. An exposure that is too long will only cause the stars to look smudged, and you will lose the sharp image you are looking for. Your savior here is The Rule of 600.

The Rule of 600

To find out our maximum exposure length without capturing star movement, you can use the rule of 600:

600 / (Lens Focal Length * Sensor multiplier) = Maximum Exposure Length in Seconds

Your Lens Focal Length is just what it sounds like. We used a 16mm lens for many of our shots, so 16 is our number in the formula. If you have a zoom lens, you will need to estimate where you are in the range of the lens’ zoom capability.

Your sensor multiplier is the effect that your sensor has on the effective focal length of your lens. For a camera with a full sensor, this value is 1. Many SLR cameras have a sensor that is smaller than full size, and will have a multiplier of 1.5 or 1.6. Research your camera ahead of time to find out what this value is. We used a Canon 5D mkII, which has a full frame sensor and a multiplier of 1.

Plugging those in:

600 / (16 * 1) / = 37.5 seconds

With a 16mm lens on a full frame sensor, we can take an image up to 37.5 seconds long, and not capture star movement.

Consider a few other lenses:

200 mm lens on a full frame sensor: 600 / (200 * 1) = 3 seconds 

100 mm lens on a crop sensor: 600 / (100 * 1.5) = 4 seconds

You can see why wide angle lenses are popular here: the longer the exposure, the lower the camera ISO can be, resulting in less image noise.

The Rule of 450?

Many photographers find that staying away from the boundary of star movement capture helps them capture more vivid images. The Rule of 450 is useful here: Use 450 instead of 600 in the same equation, and you give yourself a margin of safety.

450 / (16 * 1) = 28.125 seconds

Shooting at 28 seconds gave us a clearer image.

Aperture

To capture a Still Shot, you want to use a large aperture. Our images were captured at f 2.8. A wide open aperture will allow capturing as much light as possible in the short time allowed. This setting is often confusing, because star trails are usually captured with a much higher aperture value.

ISO

With your aperture all the way open, and your shutter speed limited by the star movement, ISO is the main thing you will adjust to set exposure. The goal is to get a good image with the lowest ISO possible. Higher ISO values will introduce sensor noise into the capture, and this will degrade the quality of your image. To get the ISO set correctly first make sure your aperture and exposure length are set properly. Take a test image, and view it on the camera. Experiment with ISO settings till you get a good image and then leave it there. Typically, you’ll do this at the start of the evening, and will leave the exposure settings alone as you capture different scenes. Most of our images were taken at ISO 1600 and 3200.

Focus

Images should be captured with the lens focused to infinity, but this is trickier than you might think. Most lenses will allow you to focus a little past infinity to allow for temperature and pressure variations in the operating conditions of the lens. To find your ‘true’ infinity, you can use one of two methods.

First, plan ahead and find the infinity point during daylight. This is best done by focusing on a far off object, like a mountain top or the far side of a valley. Allow autofocus to pick the focal point, and then look at where it set it. You can either remember this point, or mark it. You can scratch a line in the focal ring and body of your lens, but my personal favorite involves blue painters tape or similar. Simply focus your lens to infinity, then place a piece of blue painters tape across the focus ring and the body of the camera. Using a sharp knife, slice the tape so that the focal ring can still move. To focus back to infinity, just put the lens in manual focus and align the pieces of tape.

The second method of infinity focusing involves using the live view feature of your camera. You will need to find a bright star in the sky, and zoom in using the camera’s back screen. When it is as large as possible, fine tune your focus with the focus ring. This will be much easier if the camera is on a tripod, which you’ll need for the shot anyway.

This should be obvious, but I’ll make it clear anyway: You will focus to infinity with the lens in manual focus mode. Someday, cameras may be able to autofocus on stars, but it isn’t this day.

Mirror Pre-Lockup

Many SLRs have a setting that allows the mirror to move and lock prior to the image capture. If you can find this setting on your camera, activate it. Under normal operation, the mirror moves out of the way just prior to opening the shutter, and this movement can make the camera vibrate just slightly. Under normal use, you’ll never notice this movement, but it can prevent sharp images when taking long-exposures. This mode moves the camera out of the way prior to opening the shutter. It’s a small thing, but it’s the small things that get a great sharp image.

There you go. Those basic settings will get you shooting what you need. Check out our other posts on our Night Photography series to learn about Gear, Light Painting and Composure!

Night Photography Beginner Basics: Dark Sky Composure

Night Photographer Beginner Basics: The Gear

Night Photography Beginner Basics: Light Painting


Categories
Musings of Sam

Perfect can be the Enemy of Good

Our planning during our stay in Eureka and our travel north was pretty bad. We had trouble getting reservations at the spot we wanted in Trinidad, and ended up spending two nights at Johnny’s Marina in Eureka. It was a good spot for errands, and the folks were nice.

I wasn’t very bothered by it until we drove up to Clam Beach on Saturday Afternoon for a bike ride and some beach time. As we pulled in, we discovered that there were plenty of RV spots in the small campground right at the beach. We hadn’t tried to stay at the beach for fear of getting a spot, and just drove up for an afternoon and evening.

Realizing suddenly that we could have done things very differently. I got a little grumpy. We could have been staying right there at the beach! No half-hour drives back afterward, and much more of our time could have been spent at the beach. It ended up being warmer than we had expected, and we could have easily changed our clothes, if we had brought the Airstream!

I had a genuine Pink Kink in my Think.

During our bike ride, I got over it. (Jess had been expecting I would, and was glad when I quit complaining.) I came around to realize that our situation was far from dismal. Rather than spending time bemoaning a slightly less than perfect situation, I should just relax and enjoy the bike ride. And the blackberries that grew alongside the bike trail. And frisbee on the beach. And I did. I got over it, and we had a great evening.

The pursuit of perfect was ruining a perfectly good day. We try and avoid locking our schedule down too tight, which allows us to change it for the better when opportunity allows and something strikes our fancy. On the flip side, some days are not ideal. I need to accept the bad with the good, knowing that we are living an amazing adventure.

On the way out of the beach, I caught a glimpse of the campground. It had filled a bit, with some colorful characters that I wouldn’t have felt comfortable with my kids around. I really didn’t mind our drive home, and I’ve resolved to handle my next ‘Good’ situation with more grace and less complaining.