Categories
Photo Gear Photography

What’s in My Camera Bag

what's in my camera bag

In another life (and hopefully a future one as well) I was a professional wedding photographer. Don’t get all hung up over the word “professional”, it just means that I took photos in exchange for money. I wasn’t a “just do it for friends and family” type, or a “practice by taking photos of my kid’s friends” type of photographer, I really did get paid well to take wedding photos for some of the most amazing clients I’ve ever met.

I just wanted to preface this post with that, so when you see my list of equipment you don’t freak out. Remember, I did make quite a bit of money and a lot of that money went towards purchasing gear. Add to that the YEARS which I spent learning about light, aperture, shutter speed, and practicing capturing the “moment” and there you have my basis for the fun photos of my kids and the places we visit. Also remember that a great camera does not make a photographer. You can have the fanciest, most expensive camera around and still take really terrible photos. Some of the best photographers I know shoot some pretty awesome pictures with their camera phones (not necessarily for clients though).

Okay, so the list of equipment (all with affiliate links to Amazon – you have been disclosed):

Cameras:
Canon 5D Mark II
Canon 7D

Lenses:
EF 35mm f/1.4L USM
EF 50mm f/1.4 USM
EF 85mm f/1.8 USM
EF 70-200mm f/2.8  USM (not the version II, the older one)
EF 16-35 f/2.8 USM (wow. there’s a newer version of this one too)
EF 17-40mm f/4 USM
EF 24-70mm f/2.8L USM (also not the newest version – I’ve had this one since 2008. My first L-series lens. *sniff*)
EF 100mm f/2.8 Macro USM

Quite the list. HOWEVER, most of them sit in my LowePro X100 tucked away where I don’t even see them. I can’t remember the last time I pulled out my 35mm lens (GREAT for shooting low-lit wedding receptions however). I also have a flash bag with two 580 EXII speedlights, some Pocketwizard triggers, and various light stands, umbrellas and other lighting gear I was SURE I would need. Haven’t really touched those either.

So what do I use most?

95% of the photos taken on my blog and our in our galleries are taken with the 5D Mark II and my 16-35 f/2.8, usually shooting wide open and at 16mm. That’s it. That combo is the one I carry around with me on the Capture Pro attached to our adventure bag. Occasionally I’ll wrap up my 85mm f/1.8 lens in one of these and stash it a pocket of the adventure bag but rarely do I pull it out. If I’m feeling particularly lazy, or we won’t be gone for long, I’ll just grab my Kelly More B-Hobo bag from under the couch (where it is accessible) with my camera and two lenses and sling that over my shoulder. I also have a Black Rapid Strap stashed in there should I need it, but mostly the Capture Pro + the Cuff do just fine.

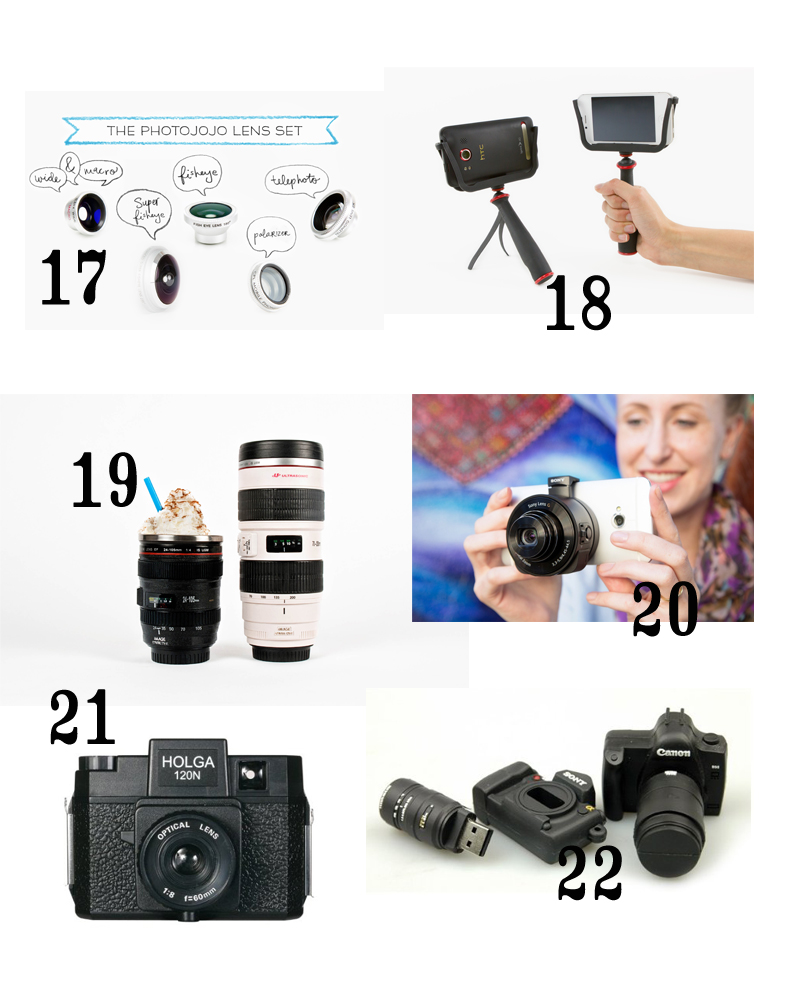
This set up is definitely not for everyone. The best advice I have if you are looking to purchase an expensive lens is to rent one. A lot of camera stores will rent, or you can find places online that will ship them to you. Two that I have used are LensProtoGo and BorrowLenses. I also wrote a blog post about the Canon 50mm f/1.8 lens that is a cheaper alternative to an L-series (expensive, really nice glass). As far as cameras go, I love the Rebel Series. Most Costco’s have the newest one in stock or you can probably find a used one on Craigslist (although be careful about that) or a refurbished one from Adorama or B&H.

For my style of photography this works. My brain just thinks in wide angles. I love the extended and distorted lines it creates, I love the context and feel I get when shooting wide, and I love, love the storytelling.  That’s what I’m good it. If I had to define myself as one type of photographer it definitely wouldn’t be portrait. It would be storyteller. Which is perfect for our current adventures.

Categories
Photo Gear Photography

BlogStomp & PicMonkey – Two Amazing Tools for Your Photos

Blogstomp & Picmonkey copy

BlogStomp: A Photographer’s Best Blogging Friend

As a photographer, blogging your photos used to be ridiculously painful. So many companies sold “blogboards” or templates with actions you could use in Photoshop to automatically insert photos into cool grids and storyboards. While the photos looked great, it still took FOREVER to do. Then along came BlogStomp and the entire photography blogging world turned upside down. I’m telling you. Worth. Every. Penny. And then some. You drag and drop photos into the desktop program (yes, you have to install it). After selecting a group of photos, BlogStomp will automatically generate storyboards based on the number of photos and their orientation (vertical or horizontal). You then hit “stomp” and voila! Ready to go. Okay, okay, you have to configure some settings first, but once that is done everything is pretty streamlined. You can even auto add a watermark.

Do me a favor and buy through THIS link. It’ll help pay our campground fees.
BlogStomp Tutorial: http://blogstomponline.com/support/blogstomp-tutorial/

Blogstomp Screen Shot 2 copy

PicMonkey: A Blogger’s Best Pinterest Friend

I’ve cruised Pinterest and seen the super cute title overlays that those bloggers always manage to put on their main photos. When we first started blogging, that was my biggest question. How do they do that? I pulled a few photos into Photoshop, played around with text and shape layers and immediately thought that this was WAY too much work. Ridiculous. No one has time for that. While I’m sure there are more automated ways to handle title overlays (actions for one) I didn’t want to go that route. I knew from my experience as a blogging photographer that there had to be the “thing” that everyone used. There had to be. A quick Google search came up with a pretty awesome tutorial for an online photo editing program called PicMonkey. Super genius! It has quite a few tools, but I use it mainly for adding text & the reduced opacity shapes you’ll see on my photos. Is it the “thing”? You tell me. Its definitely turned into my #2 (BlogStomp will always be #1) getting-photos-Pinterest-worthy-and-ready-for-the-blogging-world tool.

As to not reinvent a perfectly good tutorial (once again, no time for that) I’ll just link to hers. She put all the effort into it, so she might as well get the credit, right? Check it out HERE.

Picmonkey screenshot copy

So there you go. 2 great tools for photo editing and displaying online in blogs. You don’t have to be a professional to use these either! Dress up your photos for Facebook or create a collage of your vacation photos for your personal blog. Come back and leave a link so I can see what you do with them!

Categories
Most Popular Posts Photo Gear Photography The Basics

Editing Photos on Your Phone with Snapsneed

Editing Camera Phone Photos with Snapsneed 05

I’ve often heard that the best camera is the one you have with you. I don’t know about you, but I pretty much always have my phone with me. Whether I’m out on a walk with the kids, at a beach, or just hanging out in the Airstream its usually in my pocket or close nearby. That means I also always have a camera. We recently purchased the Nexus 5 (straight from Google, we’re Android snobs like that) and it has an 8 MP camera, a HDR feature, and does great in low light. For a point and shoot style camera, its a good one.

But, my photos can always be better and I don’t want to have to upload them and edit on the computer. Takes too long. Enter: Snapsneed. Snapseed is a fantastic photo editing app that’s easy to use, has all the features you need, and you can share straight to Instagram or Facebook.
Okay, so here’s what I usually do. The first photo is the screen you get when you import a photo. I usually start with “Automatic”. It does some auto contrast, which you can adjust by sliding your finger horizontally across the screen (right is more contrast, left is less) before accepting the changes by clicking the check mark in the lower right hand corner.Editing with Snapseed Screenshot
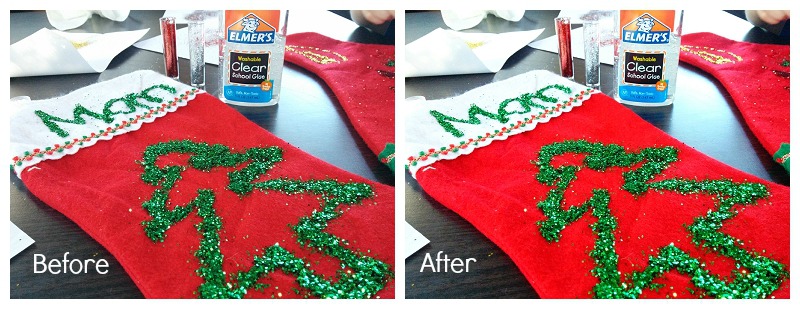
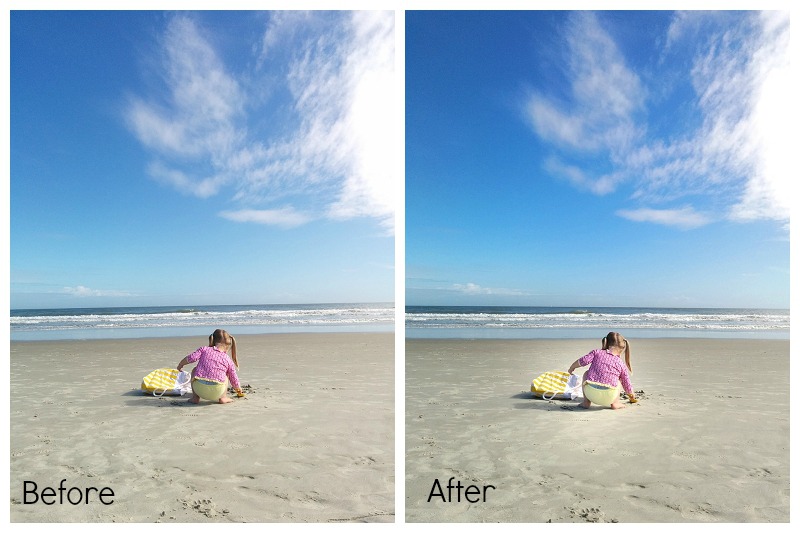
After that it depends on the photo. I select “Tune Image” from the bottom menu, and then when you slide your finger up and down you’ll get the sub-menu. I typically brighten the photo a bit using “Brightness” and then I’ll pop the colors a bit with “Saturation”, sometimes I’ll add some of the nice yellow tones with “Warmth”. I find that most cameras typically underexpose their photos, so even just brightening it up a bit will help the overall image. All the adjustments work the same. Slide your finger right for more, left for less, and then click the little check mark to be done.
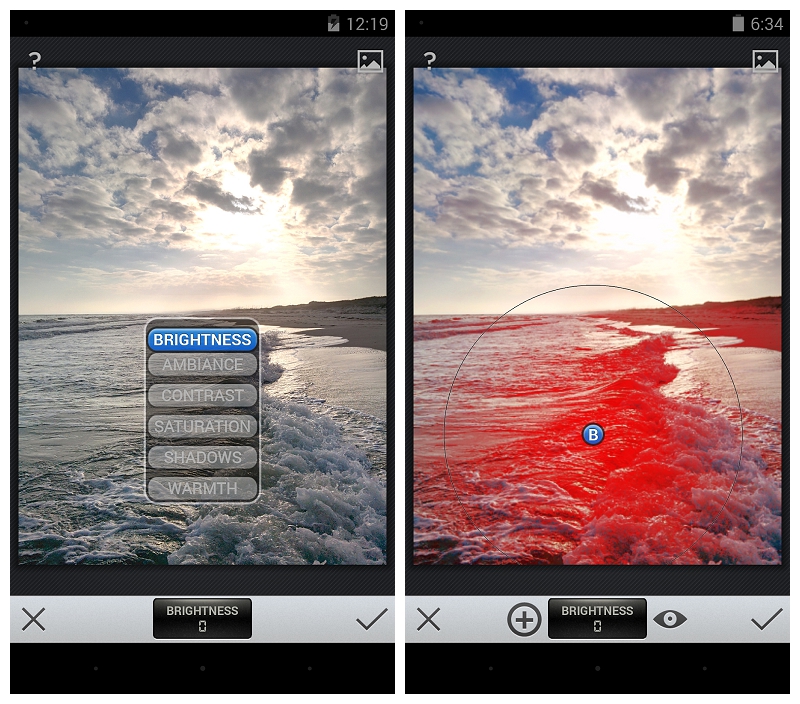
The last thing I use is the Selective Adjust. If you have just one spot on your photo that needs to be brighter/darker, or is just too saturated you can use this to edit just that piece of the photo. Click on Selective Adjust from the main menu, and then the little “plus” button. Click on the screen where you want to adjust, and it’ll put a large circle around that area. You can pinch it (two fingers) larger or smaller, you can move it around if you didn’t get it quite right the first time, and you can choose Brightness, Contrast, or Saturation by sliding your finger up and down. Once you like it, just click the check button!

Screenshot_2013-12-17-12-19-33And that’s it! Sometimes I’ll sharpen it a bit (under details) or Straighten if its really wonky. I don’t use their filters – I find I usually like the Instagram ones better anyway, and then I just have a nice clean image I can save in my gallery.

You’ll find that Snapsneed won’t fix your photos. I will always be an advocate of getting it right in camera, but it can add some nice enhancements that will make your photo just a little better. Here are two more Befores and Afters of some of the photos I’ve taken with my phone:

This one I did a selective adjust to brighten Cara up just a bit so she’s more the focus of the photo.

The changes don’t need to be extreme to improve the photo. Often just a little adjustment will make a good picture great. I often post a picture to Instagram without additional filters, because it looks so great out of Snapseed.

And, there you go! Happy editing!

Categories
Holidays & Bdays Photo Gear Photography

5 Places to Find Amazing Christmas Cards & Templates

5 Places to Find Amazing Christmas Cards & Templates

Before I became a photographer I didn’t care much for sending out Christmas cards. There were a few years we made our own, but most years we didn’t even send one out. In the photography world, however, most photographers send out cards to all their clients as a way to say “thank you”, “keep in touch” and even as a reminder to come back in the next year for updated portraits. It’s a marketing expense. Justifiably so.

I got hooked. I seriously LOVE them now. I think they are so fun. I love how the Christmas card world has evolved, and now you have boutique cards, cut out cards, tri-fold cards and all other sorts of creative shapes and sizes. It’s fabulous. So many choices!! BUT, as a regular ol’ person (no access to a fancy shmancy photo lab) where do you get the cool cards? Never fear. I am here to help.

I figure there’s 2 types of people looking for Cards – those with some Photoshop skills, and those without. If you have a copy of Photoshop or Photoshop Elements and know your way around layers and layer masks, it opens up a whole new world of Christmas card making. If not, no worries. I’ve got you covered too.

Here are 5 places I recommend shopping for Christmas cards, or Christmas card templates:

1. Etsy. No joke. Its a mecca of Christmas card templates in all shapes and sizes. I just did a search for Christmas card templates and came back with 6, 504 items. Most templates are between $4-$12 if you are buying just one. There are also vendors for maybe $15 that you can send photos to, they’ll insert into one of their templates and send you back the file. Not a bad deal. Here’s two of my favorite vendors: one, two.

2. Pro Digital Photos: No templates, just cards. Super cute ones though. They are a nifty little boutique photo lab located in Pleasant Grove Utah. I use them for a lot of my press-printed marketing material and also my Christmas cards last year. They have a lot of the fun die-cut cards and boast over 350 different options.

3. Bird Design Shop: Templates. I love hers. I couldn’t find one that fit our photos for this year, but I desperately tried. I love that she sells collections (if you are a photographer wanting to offer different designs for your clients to choose from), but also sells them singly as well. She also has some really cute Facebook Timeline templates as well.

4. Tiny Prints: They have a gazillion designs, but their search options make their selection less intimidating. You can pre-ship your envelopes (get a jump on labeling them) or even have Tiny Prints mail them out for you! Phew. A lot less work that way.

5. Costco: The professional photographer in me had to swallow a bitter pill to put this on the list, but they have really stepped up their game. In addition to their usual, weird-sized, photo cards (which I do NOT love), they are now offering 5×7 premium double-sided Premium Stationary Greeting Cards. They actually look really nice.  I’m impressed.

Spend a few minutes looking through your options, and send a great looking Christmas Card this year. Don’t forget to send me one too! 🙂

Categories
Holidays & Bdays Most Popular Posts Photo Gear Photography

22 Gifts for the Photographer in Your Life

Everybody knows someone that is a photographer, and with Thanksgiving wrapped up and Christmas approaching I thought I’d help you out with your shopping list. Here are 22 great gifts for the photographer in your life (in no particular order).

1. Black Rapid Strap: I love mine. The cross body carrying method is 10x more comfortable than a strap around your neck. They have both a women’s and a men’s version (although I just have the men’s. Women’s wasn’t yet created when I acquired mine).

2. Joby Gorillapod: Flexible, lightweight, adjustable, and easy to carry with you on the go. Get super creative and wrap around a pole or a tree for some great stable photography.

3. Add the Joby Ballhead X to your Gorillapod and you are golden. Much easier to move the camera around and fine tune positioning.

4. Digital Timer Remote for your SLR: Allows you to set your shutter on a timer. Also does intervals – I totally use this with my kids when I actually want to be in the photo. Put your camera on a tripod, set the intervals for every 10 seconds and then go about your activity (obviously you have to be fairly stationary). Worked great for coloring Easter Eggs one year.

5. Think Tank Card Wallet: For those wedding photographers that have a ton of memory cards. I love that it has a strap for you to attach to your clothing. Also has a business card slot for easy identification.

6. Eneloop AA Batteries: I’ve lost track of how many of these I actually own. Every photographer needs more rechargeable batteries. Trust me. These are the best.

7. The Capture Pro: For full reasons why should get this, read my blog post here. Its fabulous.

8. The Daisy Grip: I don’t own one (yet) but my child photographer friends swear by them.

9. The Expo Disc: Get perfect white balance in tricky situations. Fabulous for wedding photographers when the lighting can be all over the place at receptions.

10. The F-Stop Watch: Totally on my list.

11. Camera Cookie Cutters: Who doesn’t love sugar cookies?

12. Photo-opoly: Personalized game of Monopoly. I’ve never tried it, but it has great reviews on Amazon! Fun, easy to put together.

13. Going Pro: Scott Bourne & Skip Cohen are two of the greats in the photography world. Fantastic book about taking the leap from amateur to pro photographer. Have it, read it, loved it.

14. Understanding Exposure: For experience or beginning photographers. Understanding your camera, f-stops, and dozens of other topics to get your camera of Auto and have more control over your photos.

15. Camera Charm Necklace: Sparkly.

16. Keep Calm and Snap On Poster: Decorates one of the walls in my office. Kind of an odd size, so I had it matted and framed at Michael’s.

17. The PhotoJojo lens set: ooooh. These are fun! They’ve even added a polarizer since I bought mine. Might be time for a new set.

18. The Slingshot: stabilizing grip for your phone and it also folds out into a tripod! Super useful for video.

19. Canon Camera Lens Mug: My dad bought me one of these for my birthday. I totally love it.

20. Smartphone Attachable Lens – Sony Qx10: One of the coolest innovations for camera phones yet. 10x optical zoom, f/1.8, the lens carries everything it needs inside it and you control it with your phone. You can also find it here.

21. Holga Camera: For those of us that have always shot digital, this is a fun little experiment in film. Don’t forget to also buy film.

22. Camera Shaped USB Drive: Why not?