Categories
Photography The Basics Tips & Tricks

8 Tips for Getting the Best Vacation Photos Ever

8 tips to get the best vacation photos ever

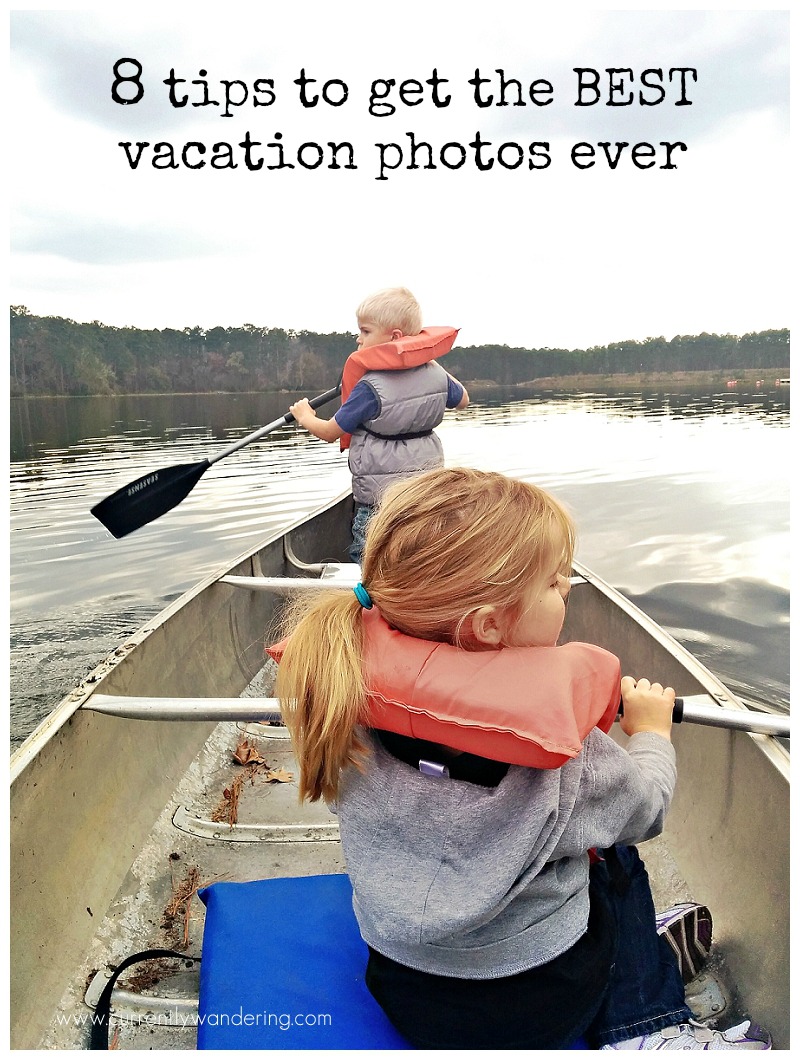
You’ve planned, organized, packed, sweated, and agonized over creating the best possible vacation for your family. Now that its here and you are going, how are you going to remember it? Photos of course. Here are 8 tips to help you get the best vacation photos ever:

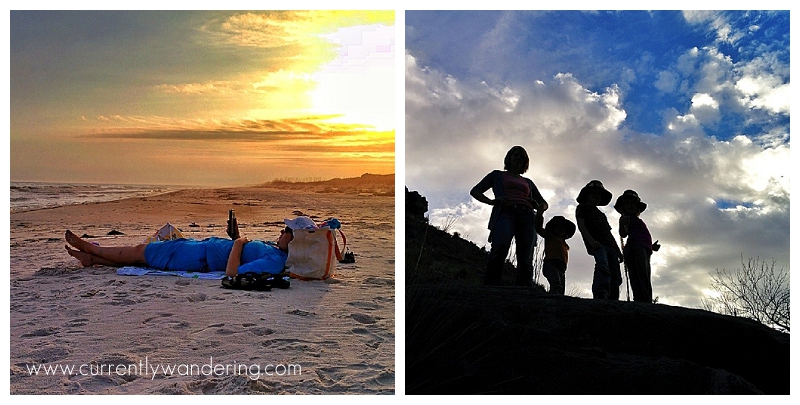
1. Wait for the good light.
As I look through the hundreds of photos I’ve taken over the last few months, my favorites are always the ones during golden hour. In fact, I often plan our outings after or during dinner (bring a picnic!) to make sure we get good lighting. Beautiful back-lighting, gorgeous scenery, and cute kids. Always turn your subject away from the sun so they are not squinting.

IMG_3675-Edit copy

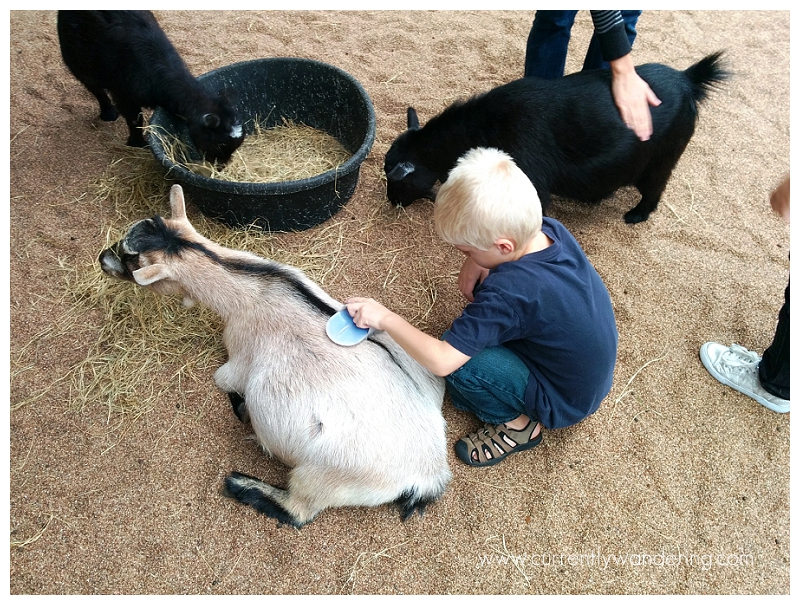
2. Let your kids just be kids.
The last thing you want when you get home is a folder full of your kids with cheesy smiles in front of various national landmarks. I don’t know about you, but my kids don’t smile all the time (or look at the camera) and it would be an unnatural reflection of whatever vacation we were on. Capture your kids pensive, silly, enjoying the moment or even the tantrum your 2 year old throws when she is exhausted.goblin valley 2013_006_WEB

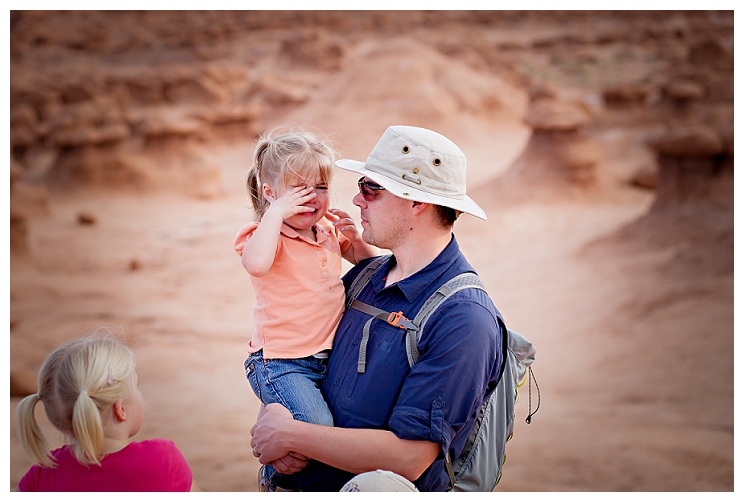
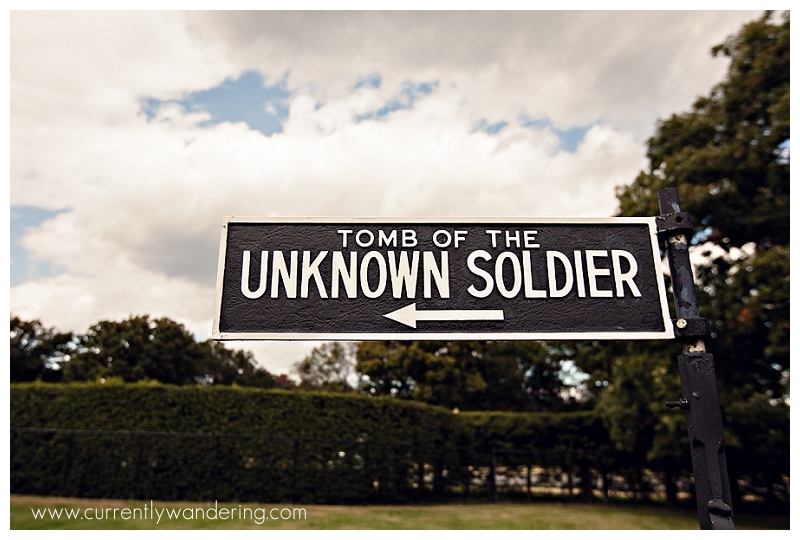
3. Take photos of the details.
Thinking like a wedding photographer, I LOVE details. Signs, small hands holding a flower, the little things that happen. Too often I’m shooting with my wide angle lens capturing the entire scene and then all of my photos look the same. Mix it up. Shoot wide and then narrow in. I’m always amazed at how differently a scene can look depending on which part you focus on.

IMG_3208-Edit copy

4. Have your camera handy.
Nothing is worse than missing THAT moment because you are digging through your purse looking for the camera. Use a sling bag, a Capture Pro, or something similar so that your camera is accessible but not in the way.

Peak Design Capture Pro with Cuff

5. Get on the other side of the camera.
I’m probably the WORST at this. No one can take photos as good as I can, so therefore I have to keep the camera the whole time. Right? Wrong. Poor kids are going to think they never had a mother. Hand the camera off – even if it won’t be an award winning photo (but really, you never know) at least you’ll be in it.

On the other side, it also helps to have a husband who takes awesome photos with his camera phone.

6a46646c5edb11e3bb44125da3cb3f33_86. Don’t forget the extra batteries!
Or the battery charger. Or your memory cards. Totally guilty of that. Nothing spoils the moment by stressing about running out of battery or not being able to use your camera at all.

7. Try a Different Perspective.
Sometimes I’ll look around online and see the same photos of famous places. How can you take that photo differently? Get down low, hold your camera up over your head, try off to one side. Experiment around until you find a unique perspective. Make the photos YOURS, not just a copy of someone else’s.

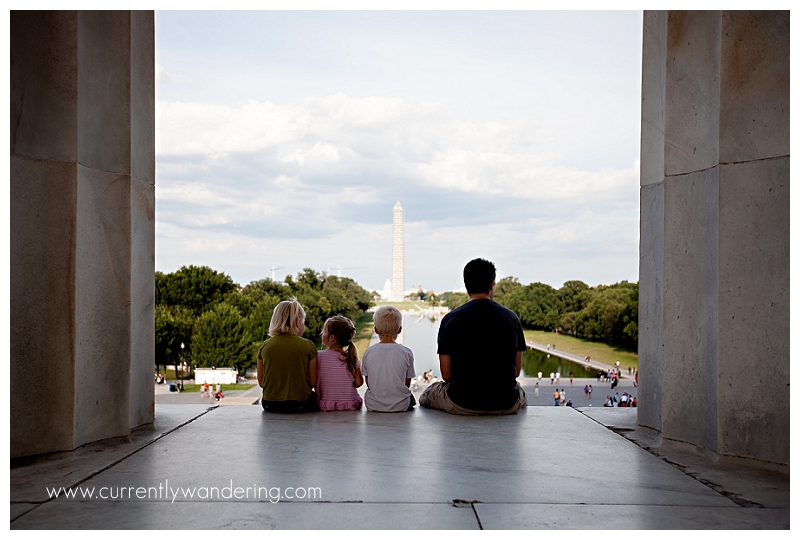
7.5 Direct but Don’t Pose.
I find there is a distinct difference. The photo below didn’t just happen. One of my kids was sitting there and I thought it looked like a sweet shot, so I asked everyone else to go sit down too. Then I said “just look at each other” or maybe it was “everyone look at each other” or “look at the Washington Monument”. I can’t remember exactly. I let them be themselves but in a place that made sense for my photo. My kids have gotten SO good at “everyone look at each other and laugh” that it makes ME laugh every time now too.

IMG_1022IMG_0038
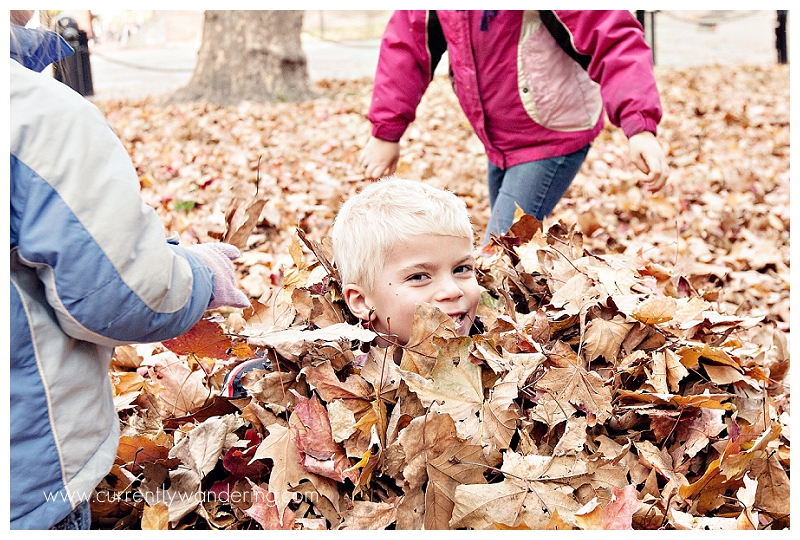
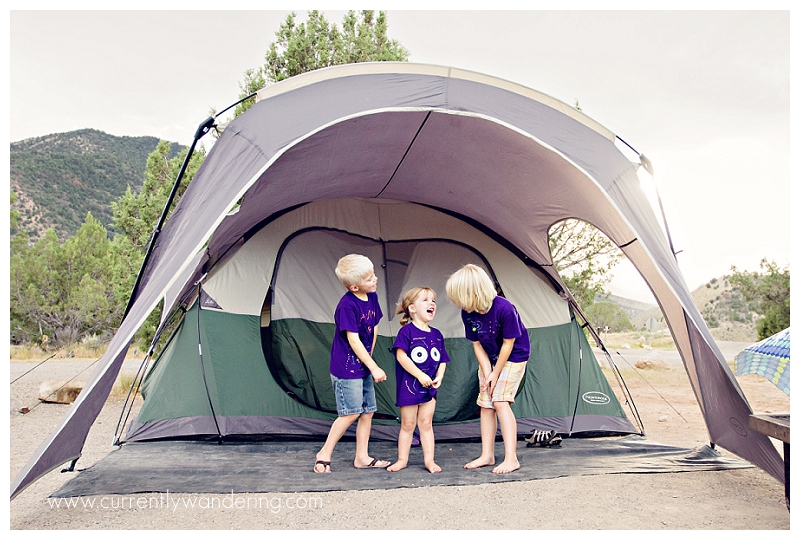
8. Be flexible and just let moments happen. 
Some of our BEST photo opportunities have happened when we least expected or when we deviated from “the plan”. Whether it is taken a few extra minutes to pull of the side of the road because the sunset is just amazing, hiking just another half mile, or letting your kids make and then jump in a pile of leaves in Independence Square, those photos can end up being your favorites because they weren’t planned. Along the same line is to just let things happen. Don’t be in a rush, let the moment play out. Be Patient. Good photos come to those that wait.

IMG_2170-Edit copy

There you have it! All my secrets. 🙂 What advice or tips do you have for me?


Categories
Adventure Reports Florida Photography The 50 States The Basics Tips & Tricks

The Best Camera is the One You Have With You: 7 Tips for Taking Better Photos with Your Camera Phone

The Best Camera is the One You Have With You. 7 Tips for Taking Better Photos with Your Camera PhoneWe pulled into the near-empty parking lot at the Jacksonville, Florida Zoo and all climbed out of the car. I walked around, opened the back of the truck to grab out our adventure bag and my camera. A quick check of the camera to make sure all was in order before heading out, and wait! What? Where are all my memory cards?

I’m sure I’m not the only one this has happened to. Super excited to use your “big” camera on an adventure only to realize that you are missing a memory card, or your battery, or even your lens!

I could have been angry or frustrated and let that ruin my whole day, but instead I decided to challenge myself to see what photos I could capture with the one camera I DID have with me: my phone. You know what? These photos turned out to be some of my favorites.

Here are a couple of tips for capturing GREAT photos with your camera phone:

1. Photography Rules Still Apply. Probably even more so. Rule of Thirds? Check. Leading lines? Got it. Watch your angles, make sure your photos have an obvious subject, create balance, and isolate clutter.

2. Use Your Screen. You don’t have a viewfinder, so take advantage of your viewing screen. One of my favorite experiences at this particular zoo was watching my kids feed the giraffes. Something about their crazy long tongues had us all in fits of giggles. The nice part about using a camera phone instead of an SLR is that I can hold the phone out in front of me while still viewing the screen. This allows me to get a different angle (lower OR higher) while still seeing what I’m shooting. It also avoids the awkward photographer squat (yeah, you know what I’m talking about).

3. Crop, Don’t Zoom. Just pretend you have a fixed lens. Using your zoom will often pixelate your photo anyway (decrease the quality) so it’s better to crop in on a photo during editing. I cropped the above photo of the giraffe to help isolate him and make him the center of the photo.

4. Get Close. Really Close. Obviously at a zoo its difficult to get close to the animals, but what else can you take a photo of? The vegetation at this zoo was amazingly beautiful. Cactus, trees, bushes, cool plants, flowers, they had it all. It added to the overall experience, so why not take a photo so you can remember it?

5. Don’t Be Afraid of Sun Flare. I love sun. I love the added dimension the light gives to my photos. Yes, shooting on an overcast day is easy, but your photos can be so much more dynamic with a little back lighting. Face the sun, focus on your subject and then move the sun around in the frame by physically moving your phone. Once the sun hits the edge of the frame, you’ll typically get the cool flare that washes the light over your photo.

6. Edit, Don’t Filter. If you want clean photos that don’t look like everyone else’s, use an in phone editing app instead of applying the same filters everyone else is using. I rarely feel the need to filter after I’ve used Snapsneed to dress up my photos. Check our tutorial here if you’re not familiar with it.

7. Use a lens. Wait, what? Its a camera phone. If you want to be even MORE creative with your phone photos, add some lenses like those found over at the Photojojo store. Small, magnetic, and easy to take with you. They have a wide variety including even a polarizer (I don’t have that one yet!).

What else have you thought about while shooting with your camera phone? Share in the comments below, and happy shooting!


Categories
Most Popular Posts Photo Gear Photography The Basics

Editing Photos on Your Phone with Snapsneed

Editing Camera Phone Photos with Snapsneed 05

I’ve often heard that the best camera is the one you have with you. I don’t know about you, but I pretty much always have my phone with me. Whether I’m out on a walk with the kids, at a beach, or just hanging out in the Airstream its usually in my pocket or close nearby. That means I also always have a camera. We recently purchased the Nexus 5 (straight from Google, we’re Android snobs like that) and it has an 8 MP camera, a HDR feature, and does great in low light. For a point and shoot style camera, its a good one.

But, my photos can always be better and I don’t want to have to upload them and edit on the computer. Takes too long. Enter: Snapsneed. Snapseed is a fantastic photo editing app that’s easy to use, has all the features you need, and you can share straight to Instagram or Facebook.
Okay, so here’s what I usually do. The first photo is the screen you get when you import a photo. I usually start with “Automatic”. It does some auto contrast, which you can adjust by sliding your finger horizontally across the screen (right is more contrast, left is less) before accepting the changes by clicking the check mark in the lower right hand corner.Editing with Snapseed Screenshot
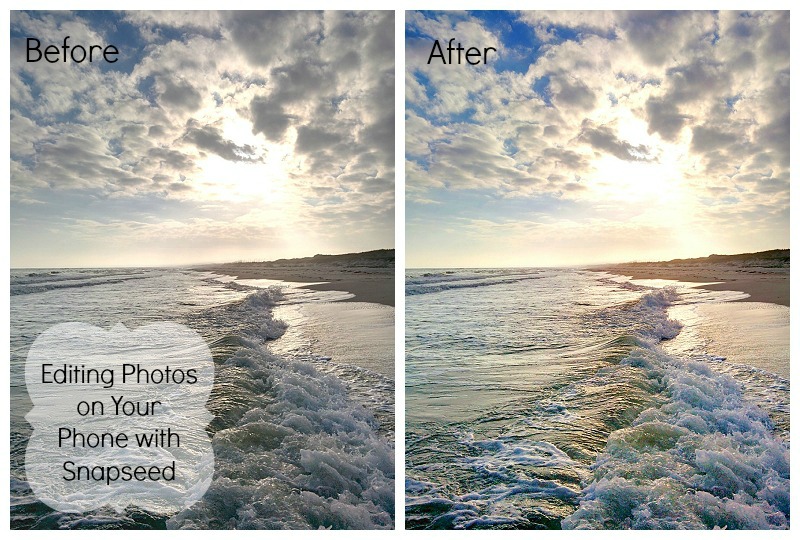
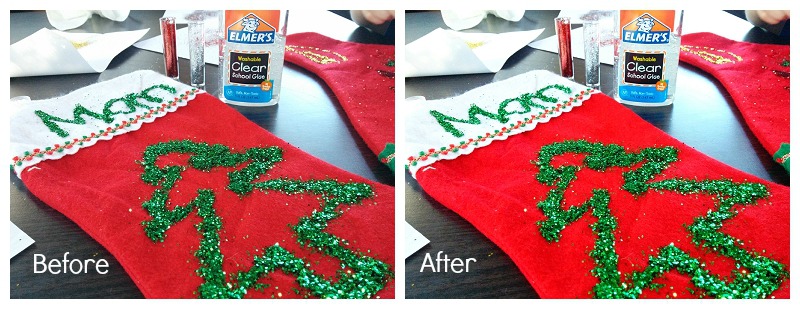
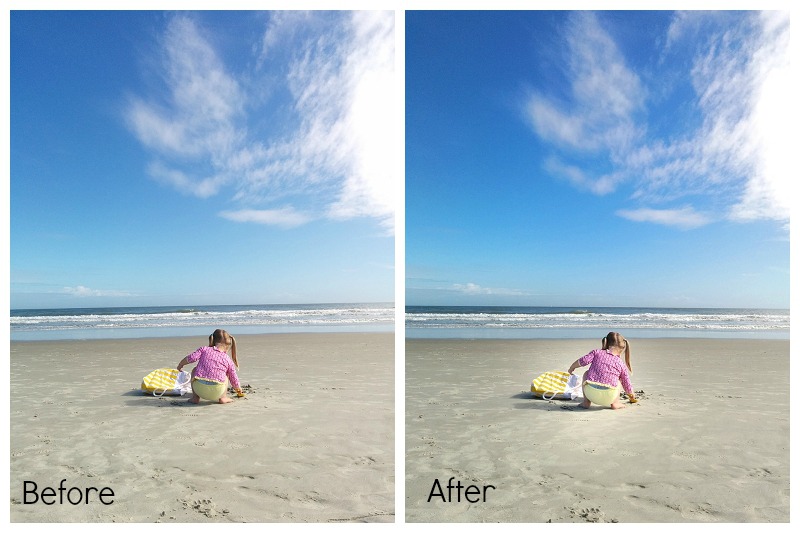
After that it depends on the photo. I select “Tune Image” from the bottom menu, and then when you slide your finger up and down you’ll get the sub-menu. I typically brighten the photo a bit using “Brightness” and then I’ll pop the colors a bit with “Saturation”, sometimes I’ll add some of the nice yellow tones with “Warmth”. I find that most cameras typically underexpose their photos, so even just brightening it up a bit will help the overall image. All the adjustments work the same. Slide your finger right for more, left for less, and then click the little check mark to be done.
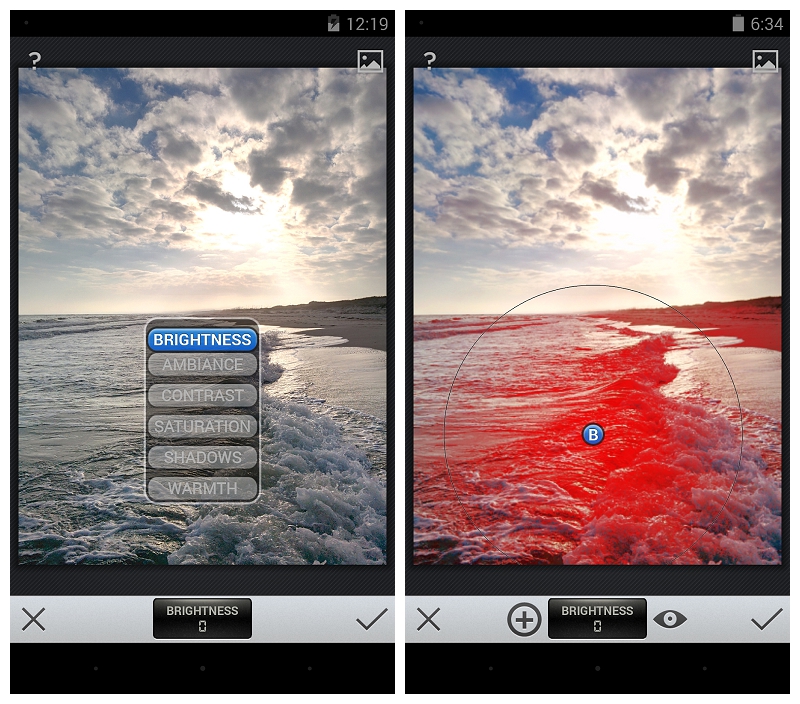
The last thing I use is the Selective Adjust. If you have just one spot on your photo that needs to be brighter/darker, or is just too saturated you can use this to edit just that piece of the photo. Click on Selective Adjust from the main menu, and then the little “plus” button. Click on the screen where you want to adjust, and it’ll put a large circle around that area. You can pinch it (two fingers) larger or smaller, you can move it around if you didn’t get it quite right the first time, and you can choose Brightness, Contrast, or Saturation by sliding your finger up and down. Once you like it, just click the check button!

Screenshot_2013-12-17-12-19-33And that’s it! Sometimes I’ll sharpen it a bit (under details) or Straighten if its really wonky. I don’t use their filters – I find I usually like the Instagram ones better anyway, and then I just have a nice clean image I can save in my gallery.

You’ll find that Snapsneed won’t fix your photos. I will always be an advocate of getting it right in camera, but it can add some nice enhancements that will make your photo just a little better. Here are two more Befores and Afters of some of the photos I’ve taken with my phone:

This one I did a selective adjust to brighten Cara up just a bit so she’s more the focus of the photo.

The changes don’t need to be extreme to improve the photo. Often just a little adjustment will make a good picture great. I often post a picture to Instagram without additional filters, because it looks so great out of Snapseed.

And, there you go! Happy editing!