There are many different types of back country cooking. If you look at the cooking section of any outdoor store you’ll find gourmet, deluxe utensil sets, to simple one pot Jet Boil stoves.
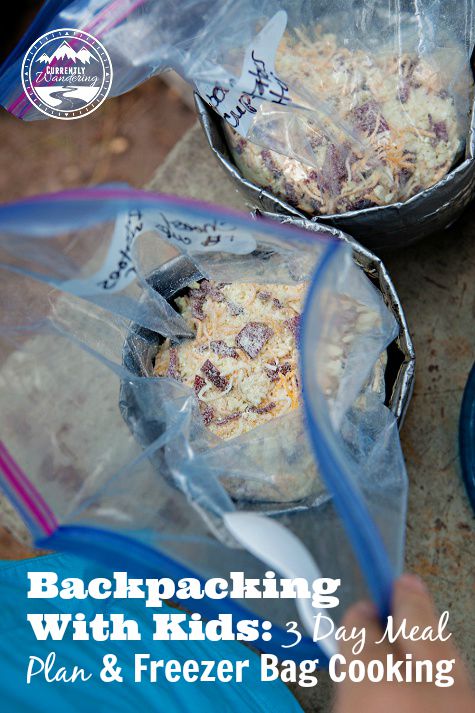
For much of our backpacking, we do what’s called Freezer Bag Cooking. We love that it is simple, easy to clean up, and requires very little dish washing (totally a perk – remember this is vacation for us!).
The basic idea is that you buy ingredients that will reconstitute quickly with just hot water. Freeze dried chicken, vegetables, and fruit are pretty common, as are quick cooking pasta, instant rice and instant potatoes. The downside is that this type of cooking can be a little pricier, and sometimes you don’t have all the ingredients on hand.
Once you have all your ingredients, you put them together in meals in Ziploc Freezer Bags. Don’t cheap out on these and get the wimpy generic brand ones. You want to make sure that hot water is not going to burn right through your plastic. We also write with a sharpie on the bag what the meal is and how much water we’ll need to add.
.jpg)
When you are ready to cook, you just boil water and then pour into the bag. Stir around with a spoon making sure you get all the edges. Squeeze all the air out, zip the top and let it sit for 5 minutes.
Sam made these awesome cozies to put our meals in while the sit. We actually leave the bags in there while we eat, and it keeps us from burning our hands! You can check out a tutorial by Backwoodspress on how to make them. We have another set with Hawaiian flower duct tape that are much prettier to look at, but they didn’t make the trip this time.
Easy enough, right? You can use a spork to eat them and then wash it when you are done, but we opted for plastic spoons instead. We just tucked them inside the plastic bags, sealed tight and put in our garbage collection. Super easy, non messy clean up!
.jpg)
Okay, now that you know how we cooked our food, let me tell you what we ate!
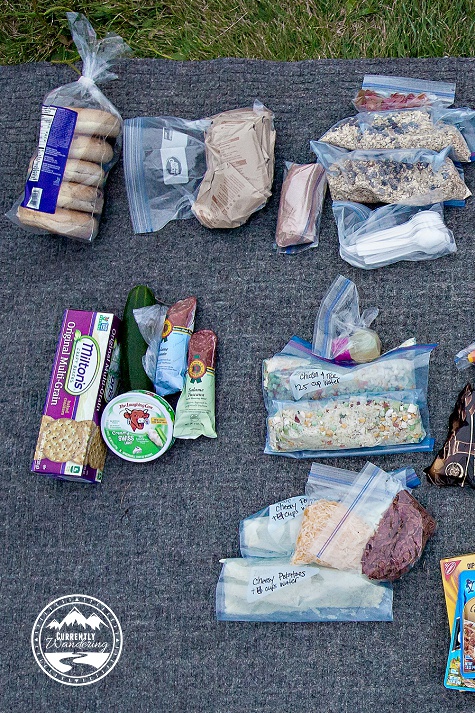
Day 1 Backpacking Meals
We used up our refrigerator items on the first day. Rotisserie chicken, string cheese, and cheddar for the mashed potatoes. It wasn’t that warm of a day, so we weren’t worried about it spoiling in just a few hours.
Breakfast: Bagels & Cream Cheese, Go-Gurt, grapes in the car on the way to the ferry.
Lunch: BBQ Chicken Wraps & Apples serves 5
- 6 medium flour tortillas,
- 1 small rotisserie chicken,
- 12 string cheese,
- 1 cup French Fried Onions,
- 1 small bottle shelf stable BBQ sauce
.jpg)
Dinner: Cheesy Bacon Onion Mashers serves 2 (we took 2 of these for our family of 5 and it was a little too much).
- 1 Family Size packet Idahoan Instant Baby Reds Mashed Potatoes (8.2 oz)
- 4 tbsp dry milk
- 1 tbsp dried onion
- 1/4 tsp black pepper
- 6 tbsp shelf stable bacon (I pre-cooked turkey bacon, chopped it up and took that packaged separately.)
- 1 cup shredded cheddar cheese (package separately)
Add 4 cups boiling water, stir, close the ziploc bag and let sit for 5 minutes before eating.
Dessert: We were supposed to have Cookies & Cream Jell-O pudding, but I accidentally doubled the water and it didn’t set. Oops. The kids made sure to tell the rangers I had ruined dessert. Sigh. We had mini Oreos instead.
Day 2 Backpacking Meals
Breakfast: 10 store bought variety oatmeal packets, hot chocolate
Lunch: Homemade Lunchables
- 7 oz Salami (we took 2 and only ate 1)
- 1 box Milton’s multi-grain crackers (8.3 oz)
- 1 cucumber,
- 1 container Laughing cow cheese (8 wedges)
.jpg)
Dinner: Chicken, Veggie Rice, serves 2 (we took 2)
- 2 cups instant white rice (make sure its instant, not minute and brown doesn’t work. I tried.)
- 4 tbsp vegetable soup mix (I thought it could use a little more)
- 4 tbsp freeze dried chicken
- 2 tbsp freeze dried celery
- 4 tbsp freeze dried mixed veggies (I used the Just Veggies Mix from Amazon)
- 1 tsp dried garlic powder (could use more)
- 2 tbsp olive oil (add in after the water)
- salt to taste (we didn’t have any and it needed it!)
Add 2.5 cups boiling water and stir. Close the bag and let sit in your cozy for 5 minutes. Stir in olive oil and enjoy!
Dessert: Chocolate Chip Cookie Bars (recipe to come soon!), Hershey’s Fun Size Chocolate & roasted marshmallows
Day 3 Backpacking Meals
Breakfast: Homemade Blueberry Oatmeal, hot chocolate. I tried a recipe from the YummyLife and it needs a little tweeking. Like more sweetener. I’m still going to play with it a little more.
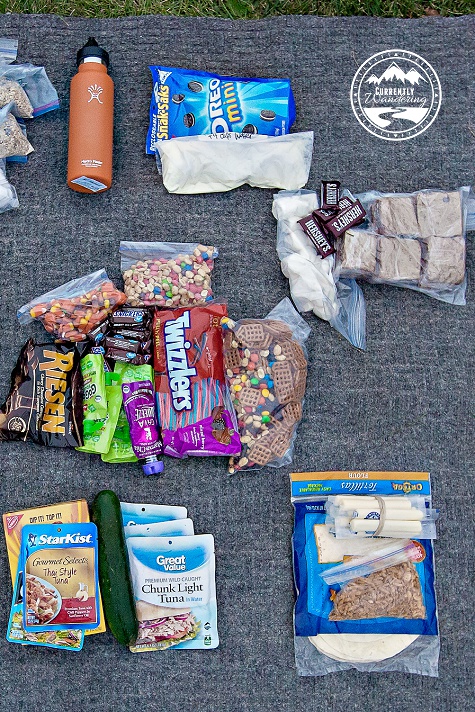
Lunch: Tuna & Crackers
- Chunk Light Tuna Packet in Water (6.4 oz – we took 2, and only ate 1)
- 2 Flavored Tuna (2.6 oz)
- 8 oz box wheat thins,
- 1 cucumber (I thought it didn’t taste good by now, but Sam and the kids ate it).
Snacks
- Homemade trail mix – square pretzels, M&M’s, craisins, peanuts, mini marshmallows
- Go-Go Squeeze Applesauce
- Pull & Peel Twizzlers (maximum entertainment value)
- Skittles & Peanuts trail mix
- Candy Corn (could’ve put these in the trail mix!)
- Riesen (Sam and I ate these, we didn’t share)
- 10 Fun Size Snickers Bars
There you go! 3 days of easy meals for your next back country camping experience. We don’t backpack often enough to really need more meals than this. I do have one other recipe to try out for a dinner, and I’ll post that after we test it out!
.jpg)













saving this post for our next camping trip!
[…] Andrew’s 8th Birthday on the Apostle Islands How We Backpacked on the Apostle Islands with Kids Backpacking With Kids: 3 Day Meal Plan & Freezer Bag Cooking […]
Very cool. I love your boil and eat recipes. Would be great substitutes for instant lunch and ramen.
[…] Food and Snacks (see 3 day meal plan here) […]
[…] backpacking, freezer bag meal recipes after our first trip to the Apostle Islands last year in our 3 day meal plan. Since then we’ve done a few more trips and I neglected to add the NEW recipes we tried to […]
[…] then had our Freezer Bag cooking meals (We did a Thai noodle dinner this time and it was delicious!), Jet boil, and extra […]