Categories
Featured Destination Florida National Parks On the Water

Canoeing Nine Mile Pond in Everglades National Park

Canoeing Nine Mile Pond in Everglades National ParkVisiting the Everglades has been a travel goal for some time. Despite setting a goal to make it there, we had somehow managed to not spend much time researching our options.

We planned to spend a few days there in our usual slow travel style. Our early research indicated that we should get good verizon service at the Flamingo campground, and that would provide the needed opportunity to work.

Upon arrival I set about trying to configure my assortment of antennas and booster technology to secure the expected signal. Try as I might, I could not manage any usable signal. A few tests from the truck (also outfitted with a booster) in sections of the Flamingo area also failed to find a usable signal.

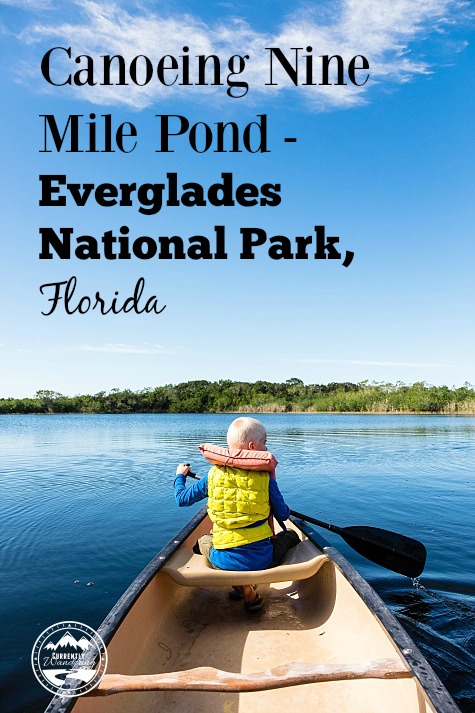
Without good signal, our visit was going to be much shorter. Our real goal of the visit was to get out and experience the everglades from a boat. There were boat tours available, but what really interested us was a canoe rental. Rentals were available right there in the marina, but also at a lake back up the road called Nine Mile Pond. This pond contained a canoe trail marked by poles along the way, and promised paddling through mangrove forests as well as the open glade.

We picked this option, and set about making it happen. We ended up renting two canoes from the concessionaire near the Flamingo Visitor Center. Unfortunately, a large group beat us to the rentals already located at the pond, so we paid an extra $45 to have two canoes transported up there. Frustrating, but worth it.

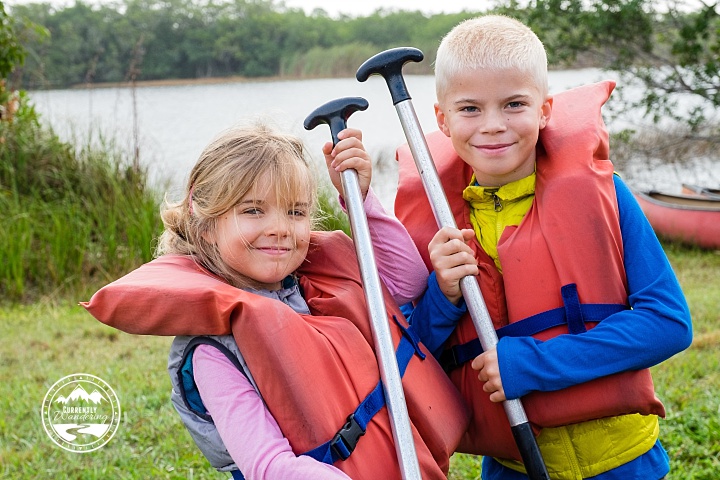
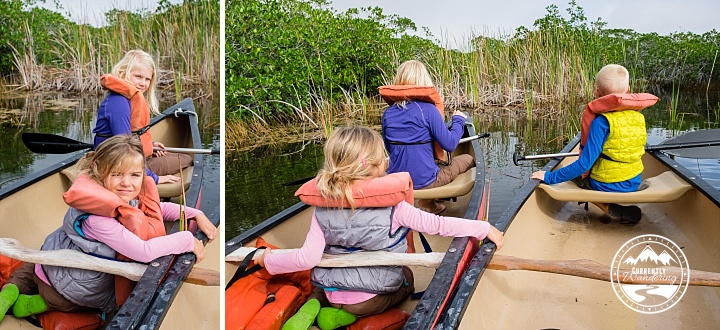
We arrived at the pond with life jackets and paddles, and retrieved the canoes from the concessionaire. In just a minute we were in the water, paddling across a small lake to the start of the trail.

DSCF2770

DSCF2778

As we followed the trail out of the lake, we immediately plunged into the mangroves. We became immediately grateful for two things. First, the trail markers. All long the canoe trail were poles stuck in the ground. Each marker bore a number which could help us choose the right direction as we paddled. Without those markers, it would have been impossible to find our way through (or out!) of those mangrove forests.

Canoeing in the Everglades

Canoeing in the Everglades

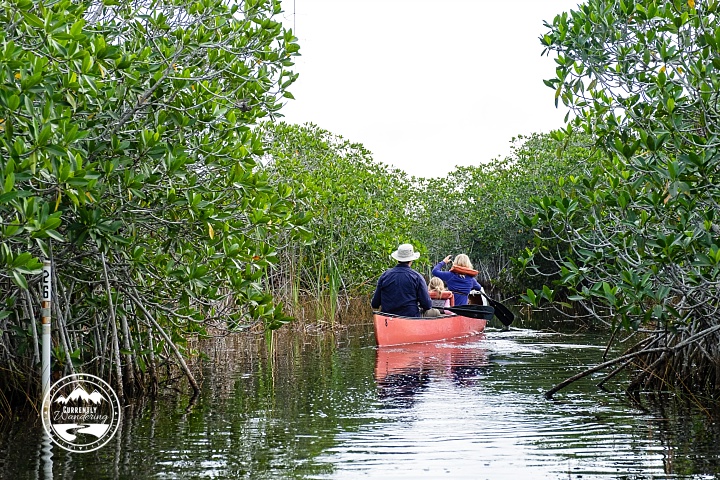
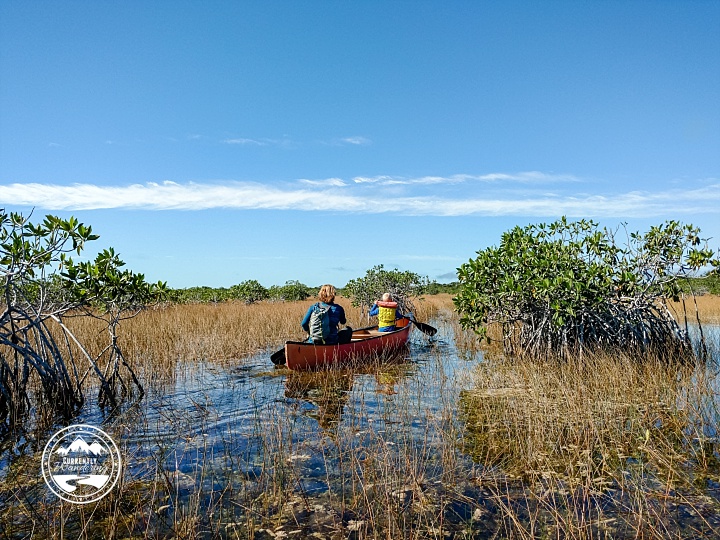
Padding through mangroves is beautiful, but the paddling trail was often narrow and often turned quite sharply. Thus, the second thing we became grateful for: mangrove roots. The roots of the mangrove trees grow out from the trunk of the tree above the waterline, and grow outward before plunging down into the water. The result of this root growth pattern is a natural ‘bumper’ of sorts that made paddling a little easier. When we missed a turn or edged too close to the trees, the natural edge created by the roots prevented us from paddling too far under the trees.

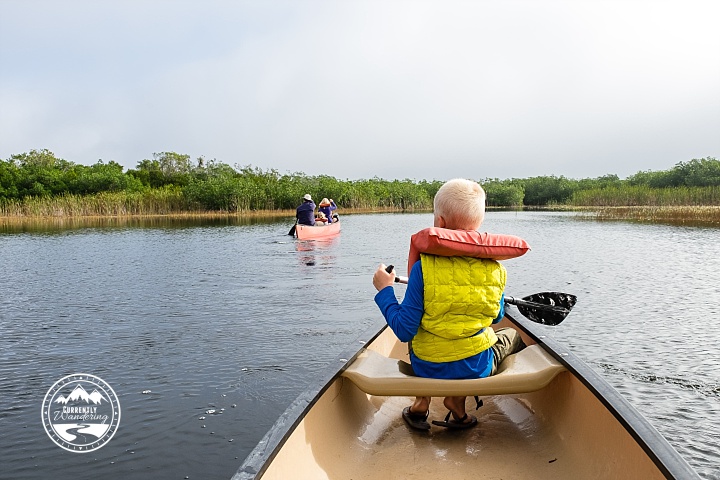
The mangrove forest eventually broke apart, and we found ourselves in more open sections of the glade. Glades are sunny, open areas in a forest. The Everglades are named for this, with plenty of open glade areas that stretch far into the distance. At the midpoint of our paddle, we came into a large glade that was a wonderful cross between a meadow and a lake. The area was covered with water shallow enough to allow grasses to grow. From near the waterline, it looked as though the meadow was grassy and solid enough to walk across it. Instead, we got to paddle through it.

DSCF2801

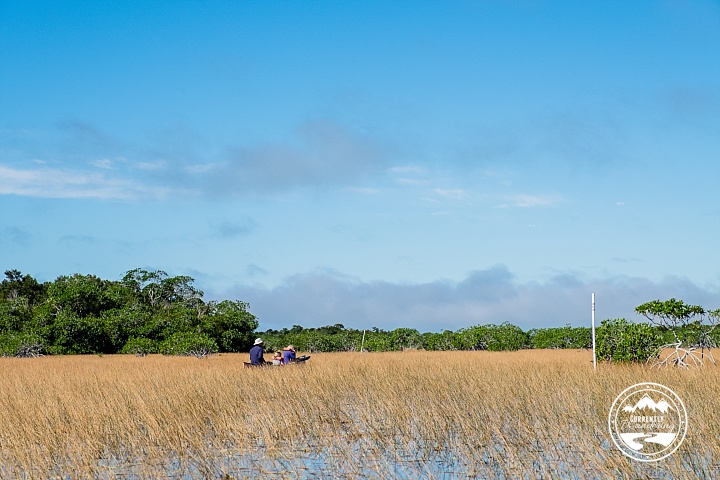
The meadow contained a shortcut that allowed us to cut our paddle in half. We took the shortcut and had a snack, and then headed continued along the trail back to the truck.

DSCF2783

It is hard to describe just how beautiful and unique this adventure was. At times like this, I’m really grateful that Jess captures so many wonderful scenes during our adventures. As you consider my description and compare it with her pictures, I’m sure you’ll agree.

I’m reasonably good paddling a canoe, but Jess struggles when conditions are difficult. On the second half of our paddle, She really hit her stride, and was navigating through the mangroves like a pro. I even had the chance to teach a few new paddling strokes to Rachel, who was in the front of my boat. Cara sat in the middle between Rachel and I, and took turns paddling in the more open spots.

2016-01-07 10.41.22

The shortcut made our paddle the perfect length at just under two hours. With that adventure completed, we headed back to pick up the Airstream and head back into the land of signal. I look forward to a time where better timing (and/or better signal) allow us to visit the Everglades longer. Despite our short visit, I cherish the adventure we had.

Categories
Solar & Power The Airstream

Power Upgrade – 2000 Watt Pure-sine Inverter

In case anybody needs proof that I love my wife, I’ll tell you about the Inverter we installed in the Airstream. You see, my wife loves her Blendtec Blender, which checks in at 1800 watts of pure blending bliss. She found a lower-wattage hair dryer for use in the Airstream, but that Blender was going to come along with us. Prior to this upgrade, every boondock blend required hooking up the Honda 2000 generator. Since my prime motivation for this entire power upgrad was laziness, I wanted to make sure that blending was easy.

Two types of inverters exist in this world: Pure-sine wave and Modified-sine wave. The Pure-sine wave inverters produce an AC power signal that looks very much like we are used to in home wiring. Modified-sine wave generators produce an AC power signal that is ‘blocky’ and follows the desired signal with some approximation. Some electronics do just fine with a modified-sine inverter, and they are MUCH cheaper. Many advanced electronics don’t do well with the blocky signal approximation and so require the more expensive variety. I decided to buy quality in this case, and chose a pure-sine inverter.

All pure-sine inverters are expensive, but some are much more so than others. The inverter I chose was the Samlex Solar PST-2000-12 PST, which I actually purchased at BestInverter.com due to a slightly overall cheaper price. I also purchased the RC-200 Remote Control Panel for mounting out in the kitchen.

The product listing pictures of this inverter make it look quite small. Really, it is pretty darn huge. I had used measurements before purchasing to verify that I would be able to fit this where I wanted, and it fit rather well. I mounted the inverter under Cara’s bed, with the DC power connections on the side closest to the DC wiring panel. With the high amperage draws required to produce 1800 watts of AC power, the voltage drops over distance. We minimized that voltage drop by using large wire (AWS 2/0), and by keeping the run as short as possible. The design of this inverter means that the AC power cable actually comes out of the other end, but the length of the AC wire is much less of a problem than the length of the DC wire.

IMG_20150524_194142

Here, for some scale, is my completed DC wire panel with most of the blue inverter visible.  (Look down below for a picture with some protective panels in place.)

When I added the inverter, I also added two additional components to my DC wiring setup. I added a 250 AMP fuse to prevent the inverter (or anything else, really) from drawing too much power through the wires. I also added a disconnect switch that could isolate the inverter from the rest of our Airstream’s DC wiring. Both of these components were wired into the positive wire leading to the Inverter.

I mentioned this on my last post about the battery upgrade, but it is worth mentioning again. The 2/0 wire that I used is very large, very stiff wire. It is nearly impossible to bend short sections of the wire to fit between the necessary mounting screws after the lugs have been crimped on. Before I crimped the ends, I made sure the wire was the needed length and bent if necessary to align as nicely as possible. I then marked the cable with a sharpie to help me align the lugs at the proper angle to make the connection. Short sections of this wire DO NOT TWIST. By being careful and triple checking my alignment and configuration, I was able to make every wire segment work properly without stressing the wire. As with nearly everything in RV life, you will have more success if you are not in a hurry.

After adding the DC wire connections, I ran the remote control panel wire from the end of the inverter down to the kitchen, where I cut an appropriately sized hole underneath the Solar Charge Controller remote panel. The length of my run was just slightly longer than the remote control wired provided by Samlex, so I added a length of wire here. It is worth knowing that the cable provided is a cross-over RJ50 10p10C cable (not a straight cable). You will need to either replace the entire length of the wire with a cross-over cable, or use a 10p10C adapter to join it to the needed length of straight cable. If you don’t understand this, ask me or call Samlex and explain your situation. 10p10C cables and adapters are not very common, so you will likely need to order this online.

Cutting a new hole for the Inverter remote control below the already installed Solar Charge Controller.

Having a remote control for the Inverter was a must for us. The inverter itself has a switch on it, but the inverter is mounted right under a sleeping kid. I did NOT want to disturb anybody just to turn the inverter on. The inverter itself does beep when turned on, but the noise isn’t super loud and it never wakes my kids up. Mounting the remote panels for the inverter and the solar charge controller also makes load monitoring easier. The solar charge controller is connected to a shunt battery monitor, which allows me to compare AC load with DC load and battery voltage. I highly recommend getting remote panels and mounting them someplace convenient.

The last wire to add was the AC wire running from the inverter to my AC panel in the kitchen. (I actually ran this at the same time as the control wire above.) This was a simple task, though the process of wiring it into the Airstream’s AC system was complicated enough that I’m going to write about that in a dedicated post.

Installing the DC wiring was tough, but a good thing to get finished in my project. The wires themselves are hidden behind a panel that I modified to fit the inverter. I also added some wood that covers the top of the main DC fuse to prevent things from dropping on it.

IMG_20150525_154223

And here we are, with the DC power stuff complete and only the AC wiring left to complete.

Categories
Florida

We Take a 4 Day Cruise to the Bahamas to Get Caught Up On Work

DSCF3547
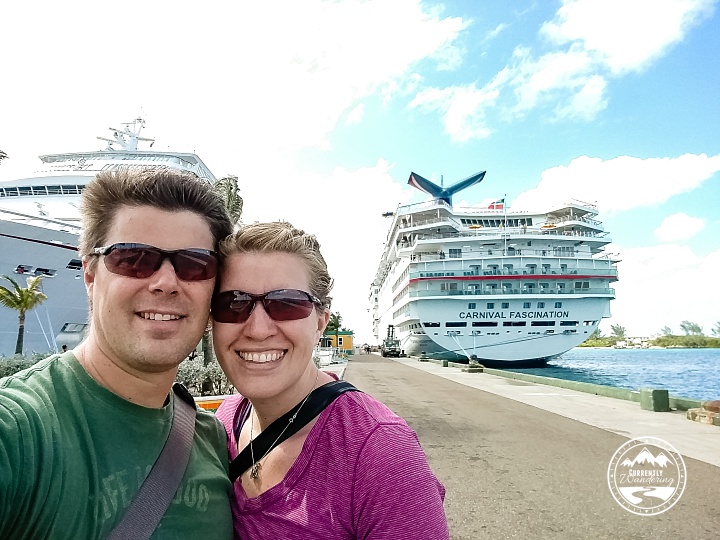
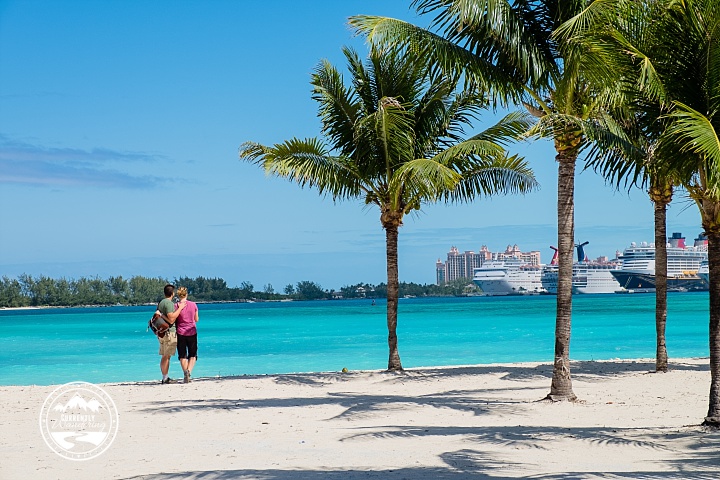
Jess and I just returned from a Carnival 4 day cruise to the Bahamas. My mother in law was kind enough to fly in from Utah and care for our kids while we were gone, leaving us with a blessed break from our normal life.

Now, how could full-time travelers need a break? It might not look like it, but our life is hardly a vacation lifestyle. We do adventure at a pretty good pace, but we also have school, work, cooking, and dishes, as well as the regular work of planning and researching our travels.

A cruise appealed to us for  a few key reasons: We wouldn’t have to cook, wash dishes, clean anything, or look after the kids for the duration of the trip. Internet access, though available and surprisingly affordable, was something we planned to avoid.

Now, plenty of folks cruise for other reasons: drinking, gambling, shopping, and exploring exotic destinations. Our reasons for booking this cruise were entirely different.

Jess had a huge backlog of pictures to edit, and I had a sizable backlog of video to edit. We were both having trouble getting caught up with the pressures of daily life, and having a backlog is a deterrent for creating more. This trip provided the perfect opportunity for uninterrupted work time. Our blog is an official product of my LLC, which allows us to write off many of our excursions or equipment expenses and with no airfare and a low rate for a late booking, this was not a very expensive work-cation.

IMG_20160220_144208664

Our full-time travel life has provided us with an unending stream of new places to visit, so we weren’t planning to book any shore excursions. We see a lot of “stuff” on a daily basis, so vacation at this point equals “not seeing”. In addition, the excursions sounded exhausting, would be expensive, and take up far too much time. Having snorkeled in the Dry Tortugas earlier this year, we felt there wasn’t much offered which could top that.

Our cruise had two ports and a day at sea. We didn’t even get off the boat in Freeport, choosing to spend the day working and enjoying the boat with fewer passengers about. We did, however, take a break and explore Nassau on foot. We visited the library and wandered through neighborhood streets over to Fort Charlotte where we learned a little of the history of this nation of islands. After a quick lunch at a slightly below-average seafood place (should have just eaten on the boat!), we wandered back by way of the beach.

IMG_20160220_104914869_HDR

I really dislike the hustle of shore visits. So many vendors try to make a buck off the visiting tourists and many of them are pushy. On our way off the boat we managed to fight our way through the gaggle of hustlers as we made our way off the front edge of town and into backstreets. On the way back to the boat, however, our walking route took us right through a huge section of tourism. We barely survived and it was our least favorite part of the trip.

On the boat we worked in batches, spending a few hours here and there on our projects and alternating between time in the cabin, up on deck, and in one of the lounges. In between, we enjoyed the food, the boat, the hot tub, a musical performance in the theater, two comedy routines, and time together as a couple. Editing is much better when you can order chocolate cake and cheesecake from room service, right?

IMG_20160218_134220088_TOP

Was it worth it? Absolutely. I finished all of our backpacking videos from last summer (subscribe to our YouTube channel to check them out as I post them), and Jess sorted, keyword tagged, edited, and backed up all of our photos from 2015.

As we cruised, Jess and I remarked how different it would be if our kids were there.  At some point we’d love to cruise with our kids, but for now we’ll stick to the Airstream and the adventures we can find on land and save cruising for catching up on work!

IMG_20160220_174252573_HDR

Categories
Solar & Power The Airstream

Power Upgrade – Adding Bigger Batteries

Last spring I performed a major Solar Power upgrade on the Airstream. I added 405 watts of solar panels and a solar charge controller to recharge our batteries and extend our boondocking options.

When we arrived in Idaho at my brother’s place last May, I began the second phase of that upgrade. I put in larger batteries, installed an inverter, and upgraded both the DC and AC wiring to suit our purposes. I did all three upgrades at the same time, but I’m going to talk about them individually for sanity preservation.

IMG_20150515_123552

When we bought our Airstream from the previous owner it was 5 years old and still packing the original batteries from the factory. Located in the battery box in the A-frame of the trailer, these two 12 volt batteries provided roughly 75 Amp-Hours of usable electricity when not connected to an AC power source.

Having two of these deep-cycle 12 volt batteries is a common setup, and it is sufficient for many weekend campers. You can do a single night in almost any weather, and with careful use you can go two nights without any power. For people looking for minimal dry-camping or just to provide power while in transit, this is a fine setup.

However, we had reached the point where we wanted more battery capacity. We are fairly heavy power users with two laptops, phones, tablets, and cameras to keep charged up. There are many options for such an upgrade and I’m not going to detail all of them. Lithium batteries are awesome but expensive, AGM batteries are expensive but only have a few advantages, and wet-cell batteries are cheap but require maintenance and must not be allowed to ventilate into the living space.

After researching, we chose to install two T145 Trojan Golf Cart batteries. We mostly did this following the example of Dave Zimmerman, whose own power upgrade provided plenty of insight and research for us to build upon. The T145 battery is the largest golf cart battery Trojan makes, and they are fairly large and heavy. They are also fairly cheap when stacked up against the options.

The cheapest price we found was online from a place in Southern California, but shipping was expensive. We really lucked out here with some family help. My father was driving right past the warehouse just two days after we had made our decision, and he modified his schedule slightly to pick them up. He transported them up to the Bay Area and passed them off to my older brother, who drove them from California to Idaho (regular work route for him) and kept them there until we showed up a few months later with the Airstream. Our rube-goldberg shipping kept costs low, and we really did get a good price at around $400 for the set.

The T145s have 230 amp-hours if drawn over a longer period. These batteries are also built to take a bit more abuse, so we figure we have 150 usable amp-hours in the batteries, for double our previous capacity. Under real-world use since we completed this battery install, our power lasts much longer even with very little solar input. We can now regularly stay someplace for 3-5 days with sub-perfect solar coverage. With great solar coverage, we are back to full charge before noon every day.

The new batteries don’t quite fit into the battery box on the Airstream as is. Dave used some c channel to extend his box top upwards by two inches. We didn’t want to block the front cargo hatch by doing so, and instead wanted to extend our box downward. Luckily, my awesome, battery-toting brother also happens to be an accomplished welder  and was willing to help a brother out.

IMG_20150522_113441

All of the work was done in the nicely proportioned driveway, just feet from my brother’s workshop.

We began by removing the old batteries and pulling the wiring out of the box. I also disconnected and removed the propane tanks, as I wanted them nowhere near the welding and grinding that would take place! Removing them also opened up some more room which helped the process a little.

IMG_20150521_174241

Our first major step was to cut the bottom off the old battery box. Using some new steel, we formed a new battery box and did a test fit. It measured up, so we continued and welded on a new battery hold-down threaded rod. This holds the batteries in place while jostling down the road. My genius brother used a t-nut with the spikes hammered flat, and welded that onto the new bottom through a hole drilled in the middle. We also cut some relief holes, and welded the new bottom onto the battery box.

After the welds were complete we did a confirmation test-fit with the batteries, and everything fit nicely! We didn’t lose much clearance on the bottom of the trailer, as the spare tire sites just behind the battery box and is a few inches lower anyway.

Some cleanup of the weld with the grinder, and we were ready to get it painted!

We painted the box in place, after generously masking off the trailer and everything else that we didn’t want painted. We started with primer, and then followed up with a few coats of dark grey paint I bought at the local hardware store. The paint selection wasn’t amazing, so the match is not perfect. The color is slightly darker and has just a little bit of sparkle in it. Even with it’s extra pizzaz, the hidden location makes it kind of difficult to spot.

IMG_20150522_133130

The weld looked great, and was large enough to be very strong. My brother was not impressed, but he’s a bit of a perfectionist and was working under quite cramped conditions. I’ve had several compliments about the weld by others since it has been done.

I modified the plastic battery tray that sat under the old batteries, and cut off one side so that the new trojans would fit.  With the batteries in place, it was time to complete the wiring upgrade.

The old batteries were 12 volt batteries wired up in parallel. This means that you wire positive to positive and negative to negative when joining the batteries in a bank. The new Trojan batteries are 6 volt batteries, and must be wired in series to provide the required 12 volts. This means that I added a wire that connected the positive terminal on one battery to the negative terminal on the other. The voltage across both batteries (measured from the remaining terminals) was 12 volts.

I also replaced the section of wire that ran from the batteries inside to the DC power distribution blocks. Most of my reason for doing so was my installation of a 2000 watt inverter, which I’ll talk about in another post.

I used 2/0 wire for the new cables, up from the AWG 4 cables in place from before. The cables were huge, but provide significantly low loss when pulling the amps I was planning for the inverter. I pulled out the old wire, and wired up the new one in it’s place.

IMG_20150520_140854
This was a test fit BEFORE we made the battery box taller.

Each wire was terminated with a crimp connector and covered in heat-shrink tubing. The crimp connectors are large enough that you need to buy a special tool to perform the crimp. You place the wire and connector inside, and use a reasonably sized hammer to crimp the connector tight. Doing so was not difficult, though you want to be careful when you add those connectors. AWG 2/0 cable does not bend or twist easily so you want to be darn sure of the desired angle of the connector before you crimp it on. I used a sharpie to mark the angle on the cable to make it easier to line up, and it worked out pretty well.

The batteries fit well, but for extra protection I modified some battery boot covers to fit over the 4 battery terminals to prevent accidental connections.

We did the work spread out over several days, mixed in with work, fun, and other Airstream projects. Up next, I’ll talk about adding the Inverter so stay tuned for that!

Categories
Airstream Accessories General Information The Airstream Tips & Tricks Tow Vehicle Travel

Gear Review: EEZTire Tire Pressure Monitoring System

Worried about your RV or Airstream tire blowing out? The EezTire Pressure Monitoring system is easy to install and use. Check out our post for details!My first experience with a tire blowout on the Airstream was only the second time I towed it. We were headed back to Virginia after picking up the Airstream in Carlyle, IL. (This was back in the fall of 2013.) Our second tow was from Louisville, heading East. Our destination was Lake Vesuvius, right at the southern tip of Ohio. Just miles away from our destination we passed through Ashland, Kentucky. Before we made it through town, we were flagged down by an angel in the form of a middle aged man, who informed us that we had blown a tire on the Airstream. We immediately pulled off the road into a church parking lot, then moved just down the street to have a tire place help us replace the blown tire with the spare.

We were incredibly lucky: no damage was done at all due to the warning and help we received from those blessed folks of Ashland. I felt a little dumb, as the previous owner had included a PressurePro TPMS (similar, but not exact, product link) when we purchased the Airstream. I hadn’t yet taken the time to figure it out yet, so it was not hooked up at all.

I quickly did figure it out, and we have used a Tire Pressure Monitor ever since. These systems consist of a monitor that you place in the cab of your truck, and a sensor that screws onto the outside of the tire valve stem of each tire. The Pressure Pro system I inherited had 6 sensors: all 4 Airstream tires and two for the back tires of the truck. I loved the assurance that came with having monitoring pressure on the tires, and I loved having an alarm sound when pressure dropped on any of the tires.

After a year or so, I began to have a few issues with a few of the tire sensors. Pressure readings were intermittent, and replacement was expensive. My search for new sensors also revealed newer (and cheaper) systems that not only monitored pressure, but tire temperature as well.  After some research I decided upon the EEZTire system, complete with 8 tire sensors.

Monitor

The difference between the PressurePro system and the EEZTire system was profound. The EEZTire monitor has an internal battery, which made setup fast and easy. After mounting the sensor on each tire, you program it to the monitor by entering setup mode, selecting the appropriate tire on the display, and holding it next to the sensor. The monitor does have a DC power cord that we use in the cab, but more than once I’ve used the portable monitor to make my life easier. (More on that later…)

DSCF3294

Sensor Types

There are two types of sensors offered by these systems: Regular and flow-through. They both report the same information, but the flow-through sensors have an air port you can use to add air to the tire without removing the sensor. I have found that feature to be useful, though it does seem to restrict the airflow a bit. I suspect the regular sensors are slightly simpler inside, which may turn out to be more reliable in the long run.

DSCF3285

Proper Sensor Installation

The absolute most important thing about installing your TPMS sensors is getting the sensor on tight enough. If the sensor is improperly installed, then air will leak out of the valve stem, giving you a flat tire. If you read reviews of every after-market TPMS, this will be the top complaint. I myself struggled with this after I installed my new sensors. The best way to ensure good mounting is to take the portable monitor into the Airstream with you, and watch the pressures. As the tires cool down they will drop a few PSI, but any more than that, and you’ll want to check on the tire. Watching the monitor closely your first few days can help you avoid finding only 10PSI in your tire minutes before checkout time at the campground. In extreme cases, a valve tool (available at any auto-parts store) can be used to adjust the inside seal of the EEZTire sensors.

The good news is that after proper mounting and installation, I have had very little issue with my sensors. They have already come in handy, alerting me to a flat tire that resulted from a metal pin in my tire.

Repeaters

Most TPMS makers sell a signal repeater that can be used on very long rigs. In my case, a 27 foot Airstream and a Dodge Ram extended cab short bed truck, no repeater has been necessary.

Benefits of my upgrade:

  • Internal battery allows mobile monitor use and easy setup.
  • Pressure AND temperature monitoring.
  • Cheaper price.
  • Easy (but slightly futzy) self-install.
  • User-replaceable sensor batteries.

If you are towing an Airstream or other travel trailer, I highly recommend a TPMS. It pays for itself in a single blowout by limiting damage. With multiple-axle rigs, it can be very difficult to tell that a tire has blown, leaving the tire to come apart and tear out the wheel-well and rv internals along with it.

Worried about a tire blowing out? The EezTire Pressure Monitoring system is easy to install and use. Check out our post for details!