Categories
Airstream Accessories

Gear Review: Scosche Magnetic Phone Mounts for the Truck and Airstream

Smartphones are a full-time traveler’s best friend, providing music, navigation, email, social media, a camera, and occasionally even phone calls. Of all the places we put our phone on a daily basis, there are two more important than most.

We have a car mount that holds the phone in a good place for navigation, and we have a mount where we place our phones to charge while we sleep. To make alarms quieter, we mount these to the wall right above where we sleep. This makes for potentially faster (and quieter) shutoff when our morning alarms attempt to raise us.

Up until the past few years, we’ve been using these Dockem Smartphone Wall Mounts, but they have both broken in a small way that prevents the phone from falling on our head while we sleep. It was time for an upgrade.

IMG_20160322_173237062_HDR

I had my eye on a solution that would work with a variety of phones, not just the ones we currently have. It had to not require a special case, and should be able to handle different sizes. I settled on the Scosche Magnetic Dash Mount.

IMG_20160323_124245558_HDR

These mounts work by combining a strong magnet in the dash mount with a small metal plate you can stick inside your phone case on any phone. Then, you just place your phone on the mount and it sticks. The hold is strong enough that the phone never falls off, yet can be easily pulled off when we need.

The picture above shows the dash mount glued to a Arkon Dash Mounting Plate left over from use with our previous suction cup phone mount. We’ve used that mounting plate a few times with different products, and it does a fine job sticking to the textured dash, while providing a smooth surface for things that need one.

IMG_20160323_124301635_HDR

In addition to the car mount, they sell Phone Wall Mounts as well, which we placed on the wall where our old holders used to be kept. They look like this:

IMG_20160322_173226106_HDR

Now, our phones mount nicely to the wall and in the truck, with mounting plates that will work on future phones as well! The picture below also shows a black cable clip that we use in several places to hold USB cords in place.

It is worth noting that the same company sells an ‘XL’ holder with stronger magnets for larger devices like full-sized tablets. The normal ones work just fine with our large-ish phones though, so I would only make that jump for a much larger device.

IMG_20160322_173216119

Categories
Backpacking Featured Destination Georgia National Parks

Backpacking on Cumberland Island National Seashore

Backpacking on Cumberland Island National Seashore

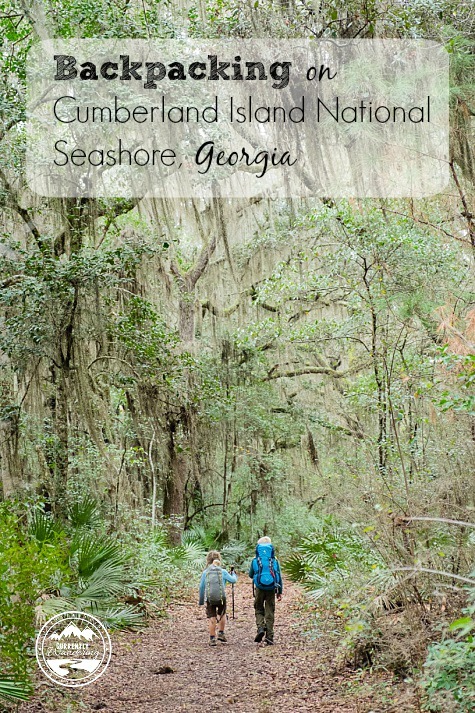
After spending months wandering around Florida, we were starting to miss our summer backpacking adventures.  After some research on The Outbound, Jess found Cumberland Island, located in Georgia, just North of the Florida border. Although we could do just a day trip, we kind of have a thing for camping on islands (see here and here) and it sounded like fun!

When we visited: March 3-5, 2016

Ages of kids: 10, 8, and 5

We actually had planned starting this trip a day earlier, but we ran into truck trouble. Our starter died, making it impossible to leave Savannah, Georgia the night before. We got on the road with a fixed truck the next day, but our two-day reservations had only one day remaining. We drove down to the little town of St. Marys, Georgia and set about finding a legal place to spend the night.

We decided to call the local police non-emergency number, and ask if there was any place where we could park. The dispatcher had an officer of some sort call us, and we explained our plans for backpacking and a need to park the Airstream. The officer was very helpful, and directed us to the long parking places along the waterfront, usually used to park boat trailers. She also assured us that there would be no trouble spending the night there.


Cumberland Island NS_01

In the morning, we set about finishing our packing, and trying to work out the details of our stay. Only one night of our original 1 day reservation remained, and we knew that most of the campgrounds were fully booked. I went to check in to the ferry, and asked about the possibility of finding a spot in a backcountry campsite for a second night. The cashiers for the ferry and the park are right next to each other, since you cannot camp on the park without having both a campsite AND a ferry ride. Both cashiers were very helpful, and within a few minutes I secured a site and changed our return ferry ride.

Note: The ferry people are INCREDIBLY difficult to get on the phone. While you need to make camping reservations over the phone first with the NPS (camping information available here), you can reserve the ferry online on their website here.

Cumberland Island NS_04

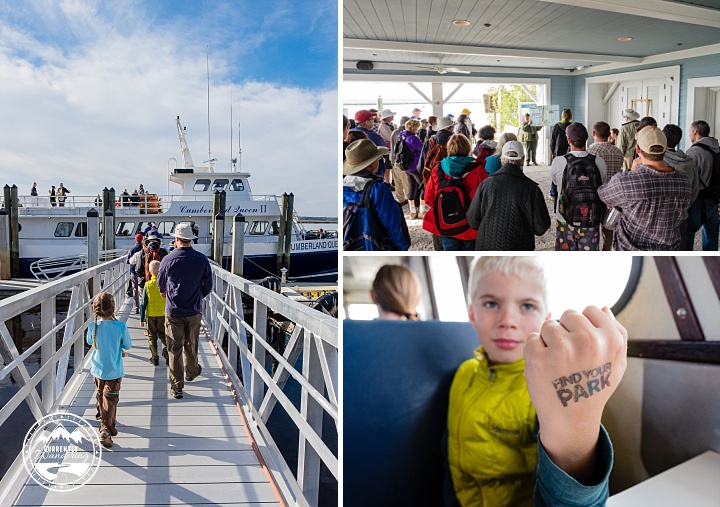
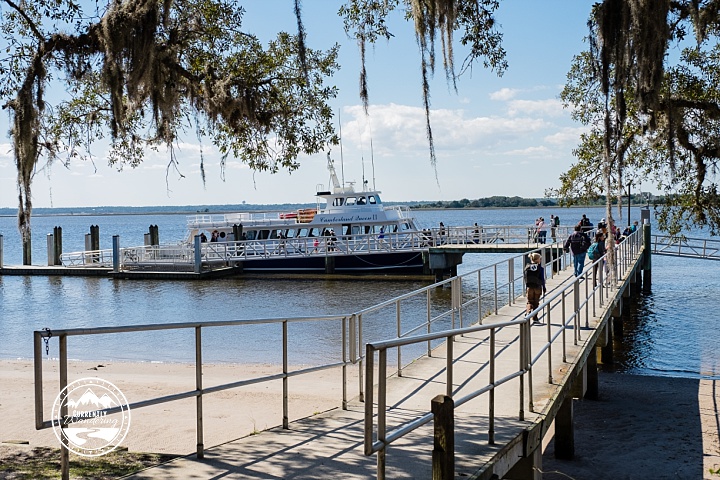
We had made an additional day of meals the night before, hoping for the second night. We threw in the additional food, and made the short hike down the sidewalk to the ferry. We pre-loaded our camping gear on the ferry, followed by a brief orientation  by the park service before boarding. The main point of the orientation was to make it clear that you had to get yourself back to the ferry on time to get a trip back home.

The ferry ride was about 45 minutes, which was just long enough to be interesting but not too long to become boring.

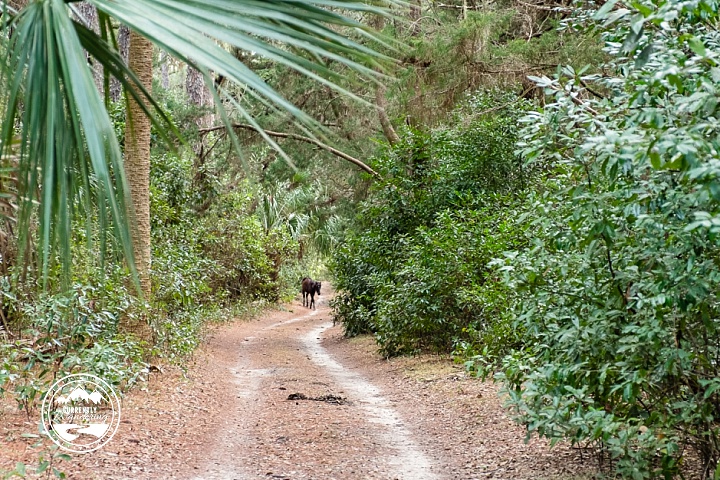
Upon unloading our gear and stashing it by the ranger station, we headed off on a short day hike, and immediately came face to face with one of the island’s wild residents.

Cumberland Island NS_07

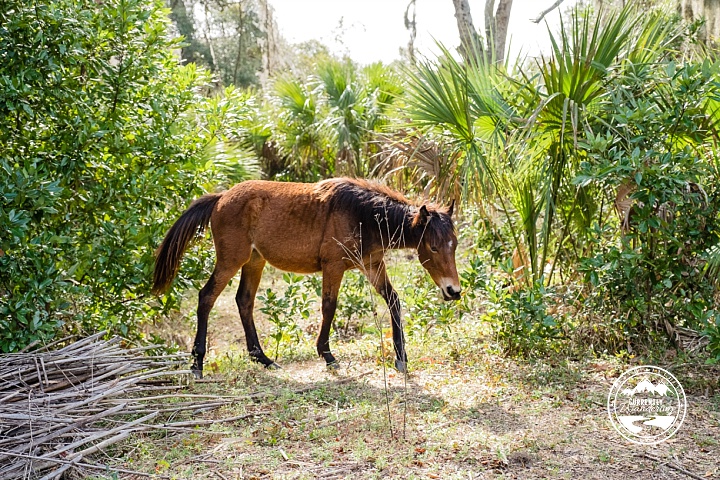
Cumberland Island is home to a few hundred feral horses, descendants of the horses kept by one of the various estates on the island.

About a mile walk from the ranger station are the Dungeness Ruins, a mansion abandoned and later destroyed in a fire. Since the ruins were the opposite direction from our campsite, we decided to walk down here first before heading north. Walking through the gates an imagining what this house must have looked like was a neat experience.

Cumberland Island NS_09

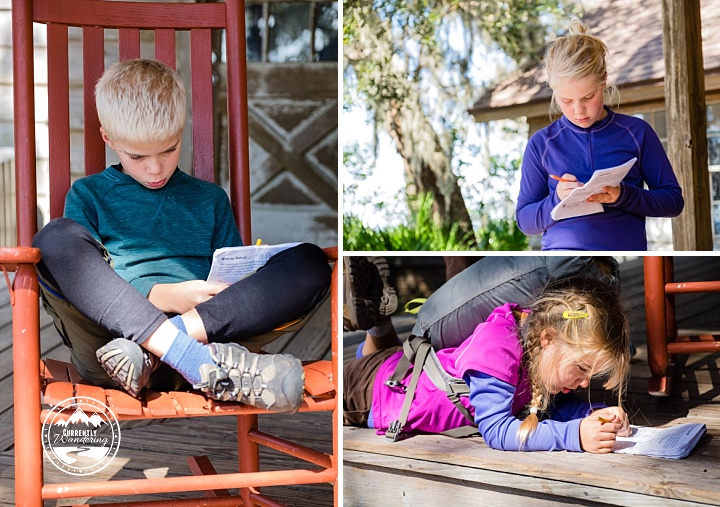
The size of this estate was incredible, and gave us an interesting introduction to the mixed history of this island. We explored a bit, and began working on the Junior Ranger pamphlets we had picked up right after we got off the ferry.

Cumberland Island NS_13

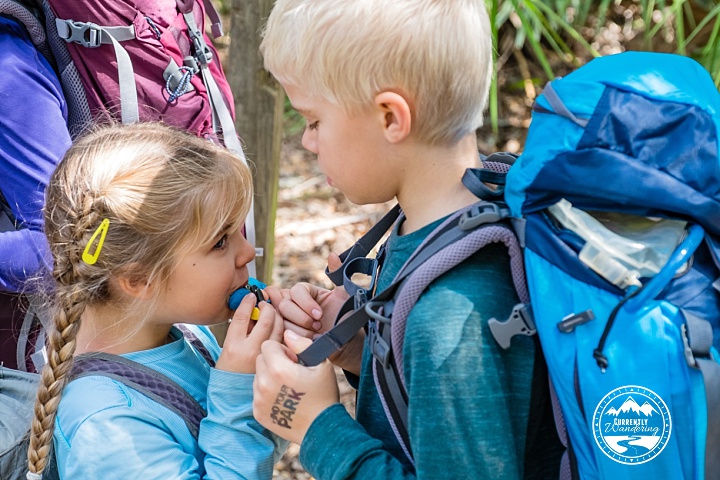
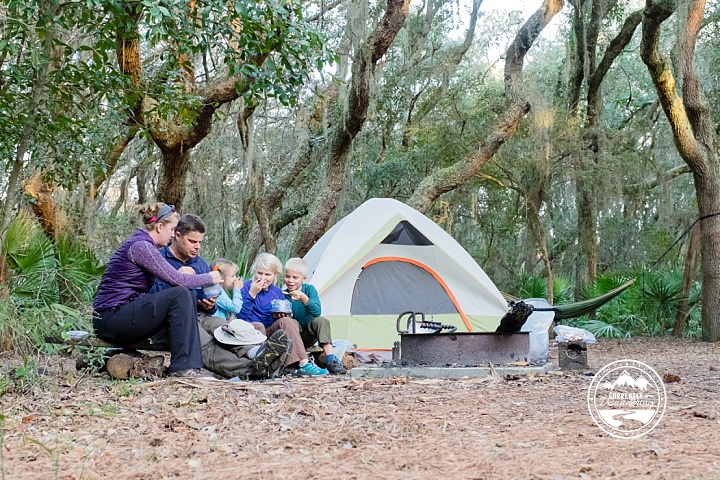
After we hiked back to the ranger station, we occupied the now-empty rocking chairs on the porch as we had a little lunch. We also topped off our water, as the campsites we were staying at did not have clean water sources. Cara was rocking some ridiculously cute braids, courtesy of Jess.

Cumberland Island NS_20

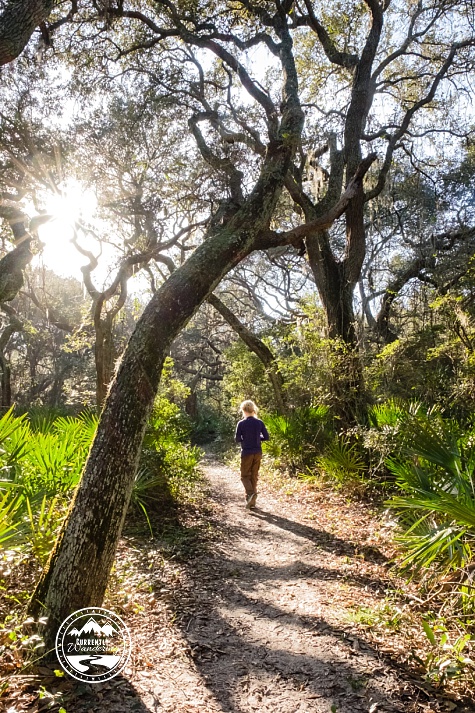
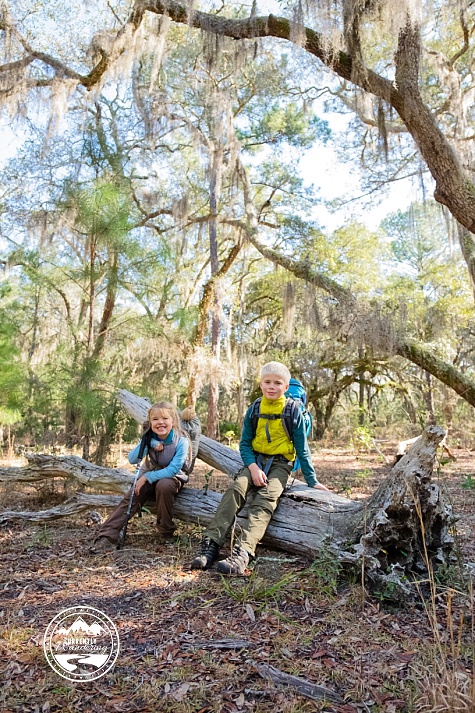
With shouldered packs, we set off to find our first campsite at Stafford Beach. Our 4 mile segment was beautiful, winding through spanish moss draped trees and dense palmettos. This terrain was certainly different than our previous hikes in Tennessee and on the shores of Lake Superior.

We were delighted to discover a great campsite at Stafford Beach that had trees for hanging the hammock. We don’t always hike the hammock in with us, but I was quite grateful that we did this time.

Cumberland Island NS_26

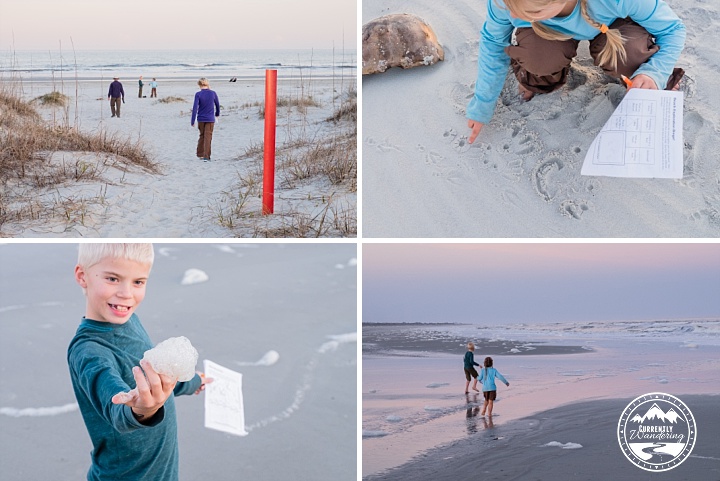
After a good rest and dinner, we headed out to the beach for some exploration. Of all the beachcombing we have done, this was our very first beach visit with horseshoe crab shells. Sea-foam, shells, and a beautiful sunset made it a very pleasant evening.

Cumberland Island NS_27

Cumberland Island NS_25

We slept well, but received a decent amount of rain overnight. We all sleep in a single tent that does not function very well in heavy rain, and nearly everything was a little bit wet the next morning. We set everything out to dry, but most of our stuff was packed still damp to the next camp, where we would set everything out yard sale style to dry in the gentle breeze.

Cumberland Island NS_33

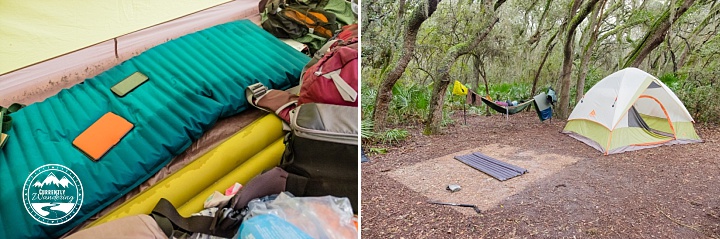
Our next campsite was at Hickory Hill, almost 3 miles further North. That distance was covered pretty quickly, and we immediately unpacked our wet gear and spread it out to dry. Our destination for the day was further along, but we would return for the night and only carry day-packs the rest of the way.

Cumberland Island NS_43

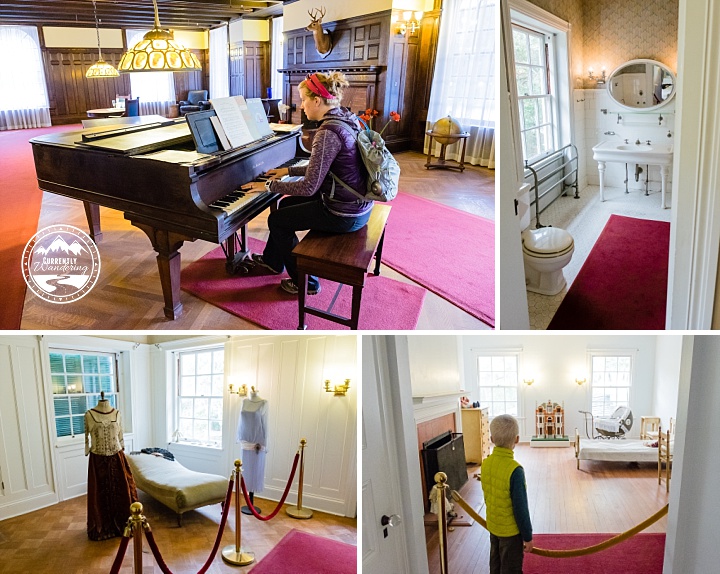
We set out for Plumb Orchard, a ‘cottage’ on the island that was still standing. The Park Service offers tours of the building, provided you can get yourself there. We day hiked an additional 3 miles there before enjoying lunch in the shade of the ancient trees on the grounds of this mansion. It was considered a cottage only because of the size and magnificence of the Dungeness Mansion that we had visited the day prior. Really, this house was something spectacular.

Cumberland Island NS_44

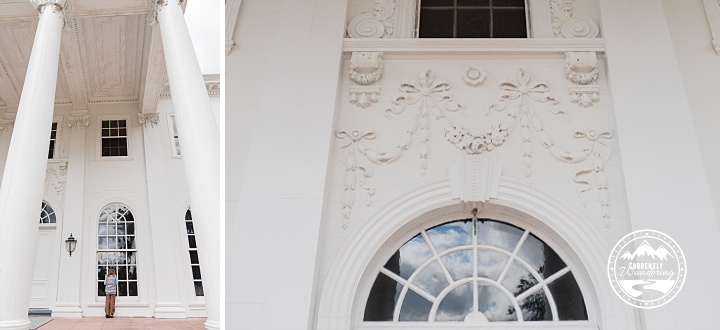
The majestic exterior was matched by equally beautiful interior rooms. In spite of the previous tour being packed, our tour time was attended by just our family, and we were treated to a wonderful personal tour of the house. Jess even had a hand playing the grand piano in one of the rooms decorated with one of a kind lamps and mounted game.

Cumberland Island NS_46

We spent an hour touring the house, marveling at the indoor plumbing, the inside swimming pool, and the sheer number of rooms available for guests to come and stay. After our tour, we filled up our water bottles from the potable water available at the house, and set off to hike the 3 miles back to our campsite at Hickory Hill. Along the way, we spotted a few more horses roaming their island home.

Cumberland Island NS_50

Our evening was peaceful and fairly quiet, the kids being tired enough to rest and read after our many logged miles. No rain fell on us that night, and we slept soundly.

Our next morning, we had our longest hike yet. We hiked nearly 7 miles from Hickory Hill to Sea Camp and the ranger station. I should mention that Hickory ‘Hill’ was indeed slightly higher than sea level, but a only a few feet. The entire hike was essentially flat, which our tired feet appreciated.

Cumberland Island NS_54

We relaxed on the beach at Sea Camp for a few hours after arrival while waited for the ferry, and spent some time finishing up our Junior Ranger Books. We really enjoy earning Junior Ranger badges, and Jess and I learn plenty as well. Having activities for the kids can help distract them from their tired muscles, and usually improve attitudes.

Cumberland Island NS_57

Remember how we had prepared an extra day of meals in case we could extend another night? We threw those meals in before we left, but we had completely forgotten to add extra snacks for that second day. We normally bring along small snacks that we eat while hiking and in between meals. With no snacks included for that second day, we cut it pretty close, food-wise. We rationed our snacks pretty well across both days, and we fared well enough. By the time we were ready to board the ferry, we had eaten every scrap of food we had. Nobody was in serious want for food, but we were all just a little hungry.

Our hiking milage added up to 13 miles of hiking with packs, and an additional 8 miles of day hikes for a total of 21 miles over three days. I couldn’t have been more proud of my kids for their great hiking and (mostly) good attitudes.

I pulled out my wallet and bought 5 refrigerated Snickers Bars from the guy on the ferry. They didn’t last long.

Cumberland Island NS_63

While we absolutely LOVED our time on the island, if we were to do it all over again we might camp at Sea Camp the entire time and bring our bikes to explore the island. Cumberland island is so flat that often I was wondering why we were hiking when bikes would be so much faster? There is a concessionaire on the island to rent adult bikes, but the information that we received was that the ferry is now letting people bring their own bikes (something we didn’t think they allowed). For sure call to double-check everything with the rangers before you make your plans!

Up Next: It Rains in Florida and Dashes All Hopes of Boogie Boarding One Last Time

Categories
General Information

Starda Casino: Der Ultimative Leitfaden für Starda Casino Login und Bonus Ohne Einzahlung

Willkommen zum ultimativen Leitfaden für das Starda Casino! In diesem Artikel beleuchten wir, was dieses Online-Casino auszeichnet und wie man von spannenden Boni ohne Einzahlung profitieren kann. Lassen Sie uns einen genaueren Blick darauf werfen, wie Sie sich erfolgreich bei Starda Casino anmelden und welche Überraschungen auf Sie warten.

Anmeldung beim Starda Casino

Um in den Genuss der Spiele zu kommen und alle Vorteile von Starda Casino zu nutzen, müssen Sie sich zunächst über den Starda casino Link anmelden. Der Anmeldeprozess ist einfach und benutzerfreundlich gestaltet, sodass auch Einsteiger problemlos Teil der faszinierenden Welt von Starda Casino werden können.

Bonus Ohne Einzahlung

Das Anmeldeangebot umfasst oft einen Bonus ohne Einzahlung, der es Ihnen ermöglicht, einige Spiele auszuprobieren, ohne Ihr eigenes Geld zu riskieren. Dies ist eine großartige Möglichkeit, das Starda Casino kennenzulernen und die Features zu testen, die das Casino zu bieten hat.

Vielzahl an Spielen

Das Starda Casino bietet eine beeindruckende Vielfalt an Spielen, darunter beliebte Slots, Tischspiele und Live-Casino-Erlebnisse. Die benutzerfreundliche Oberfläche und die nahtlose Starda Casino Login Funktion sorgen dafür, dass Sie schnell in das Spielgeschehen eintauchen können.

Spielkategorie Besonderheiten
Slots Große Auswahl an Themen und Jackpots
Tischspiele Klassische Spiele wie Blackjack und Roulette
Live-Casino Echtes Casino-Erlebnis mit Live-Dealern

Kundenservice und Sicherheit

Einer der Stärken von Starda Casino ist der exzellente Kundenservice, der Ihnen rund um die Uhr zur Verfügung steht. Zudem setzt das Casino auf höchste Sicherheitsstandards, um Ihre Daten zu schützen und ein faires Spielerlebnis zu gewährleisten.

Fazit: Das Starda Casino ist eine hervorragende Wahl für alle, die spannende Casinospiele lieben und von lukrativen Boni ohne Einzahlung profitieren möchten. Melden Sie sich noch heute an und entdecken Sie die fesselnde Welt des Starda Casino!

Categories
Florida

The Kennedy Space Center in Cape Canaveral, Florida

Most of our activities are chosen and planned by Jess as we travel. I spend much of my time working and don’t always adventure with the family. Every once in awhile, I choose a place that I’m particularly interested in, and Jess and the kids are awesomely accommodating. My chosen adventure this time was a week of Space Stuff at Cape Canaveral. In addition to witnessing a rocket launch, we spent a day exploring the Kennedy Space Center.

Headed to the Kennedy Space Center with Kids? Check out these tips!

We had camped at the crowded but conveniently located Manatee Hammock Campground, a county campground just south of Titusville, Florida. We watched the launch from the edge of the campground, and it was only a short drive as we headed over to the Space Center.

Date We Visited: February 6, 2016

Ages of Kids: 10, 8, 5

Kennedy Space Center_17

We don’t often pose as a complete family, so here is one of us, looking completely normal. The NASA ball is cool, but also notice the shuttle booster in the background.

Kennedy Space Center_27

I’ve been a minor space nut all my life. One morning a few years ago the kids wandered into my home office to say hello. I was streaming one of the Space X ISS Resupply rocket launches, and they asked what it was. I paused for a moment, and then explained that there were astronauts living in a spaceship in orbit around Earth, and this was a mission to send more food and science experiments. It was such a cool experience to share with my kids. We watched video tours of the International Space Station, and have since spotted the space station as it streaked across the night sky.

Kennedy Space Center_01

Visiting a veritable mecca of space travel was a continuation of that experience. Learning alongside my kids about various space travel accomplishments was a wonderful experience. Just inside the gates is the Rocket Garden, where they have a variety of rockets on display. The early days of space travel were a strange and wonderful thing. The kids piled into one of the spacecraft used to first circle the earth.

Kennedy Space Center_03

There are many things to see at the Space Center, but after the Rocket Garden we headed quickly to the Bus Tour. The tour is included in the admission tickets, and includes a drive by visit to a few launch pads. It was amazing to drive by the huge crawling platforms that were used to move rockets between assembly buildings and the launch sites. We also drove past one of the Space X launch sites and saw (at a distance) the ULA rocket that we watched take off a few days later.
Kennedy Space Center_07

Cape Canaveral is a huge area dotted with launch pads, but most of the space is just empty wilderness to maintain a buffer around launches. Explosions on the pad or in the air are hugely problematic, but having ‘nothing’ around the pad helps to slightly simplify things in the event of a disaster. All that area is free range for the wildlife, including alligators and an incredible variety of birds. The bus drove right by two bald eagles, just sitting right by the road. View blocking heads present for… uh… scale.

Kennedy Space Center_06

The main stop of the bus tour is the Saturn V center, dedicated to the Saturn V rocket and our exploration of the moon. The main feature of the center is of course a Saturn V in all of it’s glory. The sections were slightly separated for easier viewing, but were otherwise present, laid down through the building. Rockets are really stacks of rockets. Each stage has a fuel tank and an engine that burns the fuel to provide thrust. You generally need a stage for each phase of a mission. As each phase burns out it separates and drops off, making the load lighter and easier to accelerate for the next burn. Rockets delivering satellites to Earth orbit commonly have 2 stages. The Apollo missions to the moon had a much more difficult job which required many more stages and engines in different configurations to make the trip there, AND the trip back. The massive size of the rocket is impressive, and exploring and learning about them was a serious highlight of the tour.

Kennedy Space Center_14

Cara took to my suggestion and wore her Buzz Wings. The wings were originally part of a costume Cara had, and as she grew the wings were the only part of the custume that still fit. They have traveled with us, and though she doesn’t always wear them they come out her and there. Seeing her wear them as she wandered around looking at space stuff was especially cute.Kennedy Space Center_12

After exploring the rockets and exhibits at the Saturn V Center, we jumped back on the bus for a ride back to the Johnson Space Center. Our next goal was to see one of the spacecraft of my youth: The Atlantis.

Kennedy Space Center_22

Pictured above (with children for scale) is the main fuel tank and solid rocket boosters that boosted the Space Shuttle fleet into space. After entering the main doors we entered a presentation room with projection screens all over the walls and roof. Our introduction video was quite impressive, but the coolest part was when the wall behind the front screen opened to reveal the Atlantis on display. The Atlantis was amazing to see in person. It served for many years as part of the three shuttle fleet, running an amazing number of missions to space. The shuttle fleet was the main method of transporting and building the International Space Station and other space tools like the Hubble Telescope.

The moment the screen opened and I walked up to see Atlantis was my personal highlight of the entire day.

Around the ship itself was quite a number of displays, including mockups of the interior and exhibits to learn about flying the shuttle. The kids loved the slide, which we managed to not get a picture of.
Kennedy Space Center_18

Another area we visited twice was the play structure by the Rocket Garden. It was a wonderful display, and provided the kids plenty of unstructured relax time. We have learned that our kids to better on structured activities (tours, museums, etc.) if they can mix in some wiggle time. We also ate lunch here after I retrieved our lunch cooler from the truck.
Kennedy Space Center_23

We also viewed the 3D IMAX movie about an Atlantis mission to repair the Hubble Telescope. The movie itself was breathtaking, and I felt like it gave us a good view of what life in space was really like. The wonderful views of Earth, and of Atlantis in action made the time spent there worthwhile.

We loved our visit. The kids had fun, and Dad got his space fix in. We completed our space experience a few days later when we watched a rocket launch up into space.

And just for posterity, here is another of those whole family poses.

Kennedy Space Center_26

Categories
Airstream Accessories General Information Solar & Power The Airstream

Power Upgrade – The Bliss of Automatic Transfer Switches

Our Airstream didn’t come with an inverter installed. There is one AC panel inside the Parallax power distribution center which distributes the 30 Amps from the street connection to all internal plugs, the refrigerator, the DC power converter, and the air conditioner. Adding an inverter complicates this setup considerably, for reasons I will now attempt to explain.

We wanted the inverter to run the aforementioned blender and provide power to the AC outlets throughout the Airstream. There were a few things that we NEVER wanted the inverter to power. The air conditioner was off-limits as it draws more than the 2,000 watts our inverter can produce. The refrigerator also has a heavy draw, and I’d rather just burn propane while boondocking. But the MOST IMPORTANT THING to NEVER RUN OFF THE INVERTER is the DC Converter.

See, the DC converter uses AC power to charge the batteries and provide power to the DC systems in the Airstream such as lights and fans. The inverter uses DC power to produce AC power. Powering the DC converter (AC->DC) with the inverter (DC->AC) works these two components against each other, causing them to both lose excess power in the process and drain your battery down quickly with no benefit.

It is common to make sure the DC converter has a switch that can turn it off when the inverter is running to prevent this problem. If your AC panel has the converter isolated on a breaker, you can just switch the breaker off and no harm is done.

At this point, I’ll remind you of the primary reason for our Solar Install and Power Upgrade: Laziness.

I didn’t want to have to remember to switch the converter off. Luckily, somebody smart invented something called an Automatic Transfer Switch. This wonderful device can switch between two power sources. It is often used to wire in a backup generator, but in my case I’m going to use it to automatically switch between the inverter and shore power.

With the Automatic Transfer Switch and some reworking of the AC wiring, I’ll explain how I created a system that automagically does the right thing at the right time. Brace yourselves: there will be diagrams. First, here is the ‘before’ diagram. Notice that I’ve already included solar power, though it isn’t technically required for the inverter install.

Old Wiring Diagram

The A/C side of this situation is pretty simple here. Power comes into the Main panel, and is distributed as needed. Now, observe the ‘after’ diagram, as it exists at the end of my install.

New Wiring Diagram

There are a few changes here, so let me guide you through what I did.

The main concept is that I split the Main Panel into two separate panels. The Main panel has the main appliances that I never want to power from the Inverter. The new sub panel only powers the A/C plugs and receives power from the Main panel (when plugged into shore power) or the inverter (when inverting from the batteries). The miracle here is the Automatic Transfer Switch, which automatically selects the input that currently has power. This switch was semi-expensive ($75), and you can just install a battery isolator switch like I used in other places in my install. You have to mount the switch somewhere, and remember to turn it to the right power source depending on where you are drawing your power from.

Remember that my primary reason for this power upgrade was laziness. I didn’t want to see a switch mounted somewhere, and I didn’t want to have to remember to switch it. The Automatic Transfer Switch solved my problem nicely. With it in place, I can just use the power button on my inverter remote to turn on the inverter, and the power is automatically connected where I need it.

The benefit of having two power panels is also laziness. I never have to worry about switching off the converter, or having the refrigerator drain my batteries if accidentally left in A/C mode.

Splitting the Panel

The diagram above looks nice and clean, but the reality is a little more complicated. Because of the location of the AC panel in the Parallax Power Center, it made a prime location for the new Sub Panel. I added a new Main Panel on the other side of the Airstream underneath the wardrobe. Moving the main panel meant re-routing the wiring for the air conditioner, refrigerator, and the converter to the other side of the Airstream.

New Main Panel

During my solar install, I routed the solar cable through the wire chases that run underneath the floor. The chase in our Airstream (2008 International 27FB) runs from under the wardrobe to behind the power center. There are two of those wire chases right next to each other, and I used them to run additional romex from side to side. The Air Conditioner and Converter both needed to be run to the wardrobe side, and the Refrigerator needed to be modified to run to the new Main Panel. The new main panel is shown in the picture above, part way through my wiring process.

I also ran a new wire to connect the Main panel to the Automatic Transfer Switch, which mounted right to the back of the Parallax Power Center. Below is a picture taken after wiring it up, but before attaching the back cover.

Wiring the Automatic Transfer Switch

If that whole process sounds like a mess, it was. Honestly, I’m surprised it all worked out, and I didn’t make any critical mistakes. In the middle of the process, the hallway looked something like this:

IMG_20150520_173458

Maximum GFCI

In the factory configuration, the power plugs in the kitchen and bathroom were protected by a GFCI breaker. In my rewire, I added a few more so that every plug (including the refrigerator in the new main panel) was on a GFCI protected circuit. It might be overkill, but I thought a few more protections couldn’t hurt.

The Fateful Moment

I wired up everything, had all the circuit breakers in place, and all loose wires connected to the right places. To give things a test, I ran a power cord into my Brother’s garage and took a deep breath. Then, I flipped my main breaker on….. and nothing happened. After a few very confused minutes, I found out that I had tripped the GFCI outlet in my brother’s garage. A few resets and immediate faults convinced me that I had a wire fault somewhere. After isolating the main wiring components (because I have two panels now…) I discovered that I had over-tightened one of the wire stays, which pinched through the wire insulation and improperly grounded  a wire. After a quick fix, I was back up for another test. This time, everything worked. A quick celebration, and I re-mounted and closed everything up.

This brings us to the general close of Power Upgrade posts. I’ll post a cost breakdown and final thoughts, but I’ve described all the parts of our upgrade already. It was fairly hard to consolidate our experience down into just a few posts, and I’m sure I missed critical steps. Please reach out if you have questions about something I’ve missed.