Categories
Outdoor Gear Photo Gear

Gear Review: Peak Design Field Pouch & Slide Lite Strap

An important part of our adventures is preserving memories of them. We have found that taking pictures and video of our experiences helps the kids remember the experience when we talk about it later. The trick is having our camera gear with us so we can take those awesome pictures we value so much.

Many of our pictures are captured with our phones, but most of our best ones require some extra gear. The size of our ‘extra gear’ collection has decreased substantially since we started traveling full time, but we still have more than an average amount of gear & extras to bring along.

While Jess takes most of the photos, I do all our video and occasionally will set up a time lapse. Jess has her own set of gear and a bag, but my usual setup includes a Joby GorillaPod with a smartphone mount, a GoPro Hero 3 Black (although I’ve been drooling over the Go Pro Session), and an Anker portable battery. This setup is small, but really too large to hand carry or fit in my pockets.

About the time I settled on this set of gear, we were sent a Peak Design Field Pouch for review. We are still HUGE fans of the Peak Design Capture Clip, so testing out more of their products was pretty exciting. The Field Pouch has durable design, yet is flexible for a variety of loads. The pouch is perfect for day hikes and can also easily hold a kindle, batteries, and smaller cameras. An outside strap also naturally accommodates a Peak Design Capture Clip. The field pouch is nicely expandable, and has several soft internal pockets to keep things organized.

Originally we had intended to use the bag for Jess’ new Fuji X-T10 camera, and while the camera body itself would fit, when we kept the lens attached the bag was just too small. A smaller mirrorless camera like the Samsung Nx300 would appear to be a better fit.

DSCF4816

The field pouch can be carried via the included belt loops, but my favorite is to attach the Slide Lite Strap (which I get to down below) via the round anchors common to Peak Design Products. Using the strap, I can carry my Gorillapod comfortably alongside the bag with one leg over the strap. I like taking time lapse videos, and the GorillaPod is the best way to position my camera in the right position.

DSCF4809

The material and construction of the bag is amazing. It feels good, looks good, and is highly functional. The construction is similar to their Everyday Messenger Bag, which naturally makes me want to get one of those!

DSCF4817

The Slide Lite Strap is an awesome camera strap on it’s own. When I’m not using the strap Jess likes to steal it for use as a wide, comfortable camera strap. The strap moves easily between any gear with anchor links attached, making it easy to swap straps on cameras and gear.

IMG_20160220_131140329

Jess often shoots with a hand strap, but on a longer wander a shoulder strap is much nicer. Switching between them takes only seconds, but the connection is secure and reliable.

IMG_20160220_131011350

Also, who doesn’t love pictures taken in the Bahamas?

Categories
Daily Life Photography

On the Road – Capturing Stories Through Travel Photography

On the Road – Capturing Stories Through Travel PhotographyThe drive through Nevada on I-80 is definitely not listed on America’s Top 10 Scenic Drives. Boring, flat, and fairly ugly: I usually try and sleep through most of it while my husband drives and the kids lounge in the backseat reading or playing games on the tablet. This last time through, however, we purposely decided to spend the night just outside of Wendover, Utah and check out the Bonneville International Speedway. Specifically, I wanted epic photos of our Airstream on the Salt Flats.

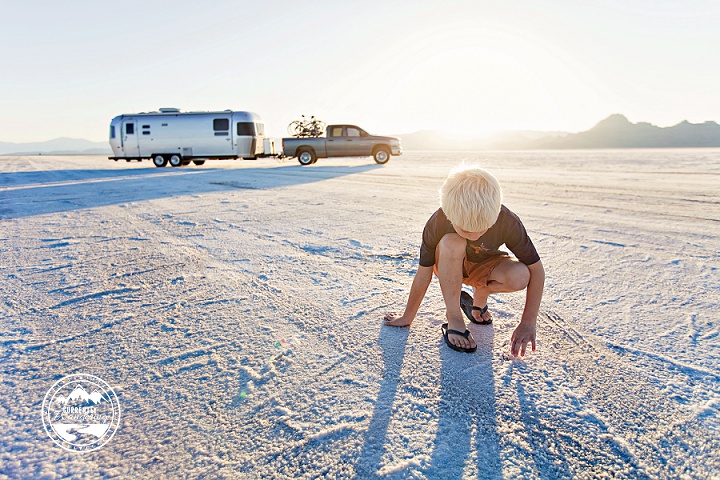
At first glance, the speedway isn’t much. The pavement ends with only a bullet-riddled, paint covered sign explaining that the wide expanses of salt stretching out to the horizon are used to test the speed of some of the fastest vehicles in history. Undeterred, we set about exploring and making a quick dinner while we waited for the light to get good. Once the sun starting dipping towards the horizon, we slowly pulled our 2008 Airstream Travel Trailer off the pavement and onto the salt flats. Tag-teaming with my husband, we angled the truck and trailer just right to capture the setting sun behind it, grabbed our cameras, and then let the kids play while we furiously took photos from every angle possible.

Getting these photos was an effort. Timing our arrival, waiting around for the light, figuring out the best angle so we could get great back lighting, all of these took work. Now, however, I look at the photos we took and I can feel the sun setting warm in my face, I can smell the salt, I can hear my children’s laughter and the crunch of the salt under our tires. These photos have captured memories and feelings for me that I remember every time I look at them.

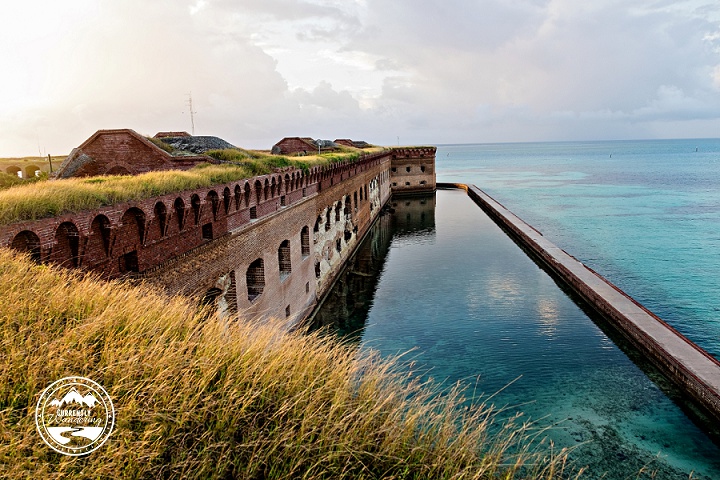
As we’ve traveled the United States in our Airstream travel trailer, I’ve had the chance to hone my travel photography skills. Each place we visit is unique. From the lush, green covered hills of the east coast, to the dry sweeping deserts of the west each place has its own feel, character, and ambiance. My goal is to capture not only what makes each place special, but what makes it special to us.

As you set out on your adventures, here are a few things to keep in mind to help bring back the best photos possible:

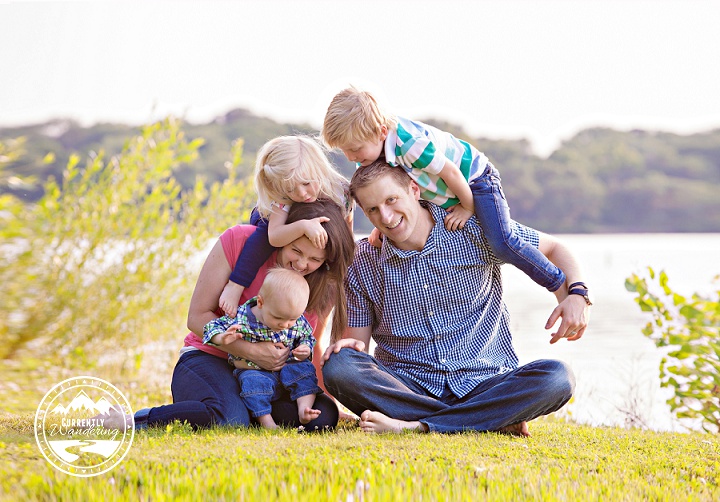
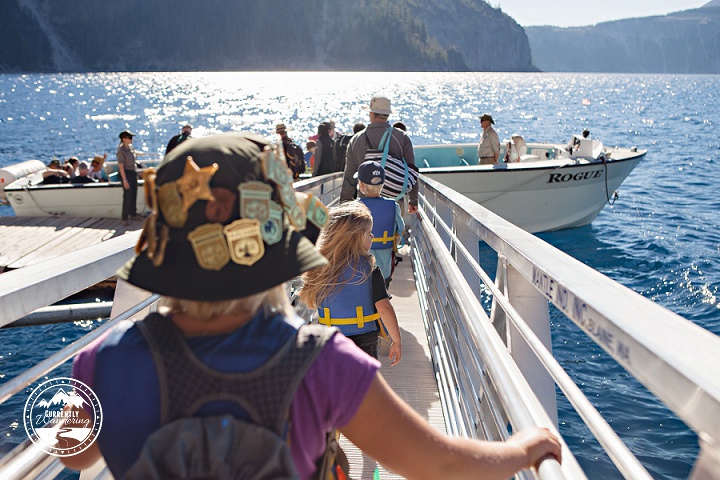
A great photograph tells a story. You picked your destination for a reason. What about the place is interesting to you? What are you trying to capture in your photo? Is it a person, place, or thing? Pick two to emphasize in your photos. Instead of a photo of Mount Rushmore, take a photo looking over the shoulder of your daughter looking at Mount Rushmore. Strike a balance between people and places.

Crater Lake_67Do some research beforehand. You had your reasons for your choosing your destination, but what else is close by? There have been many times while I’m researching a particular location that I learn if we adjust our schedule slightly we can also visit over a festival or other nearby special event.

IMG_3939-Edit
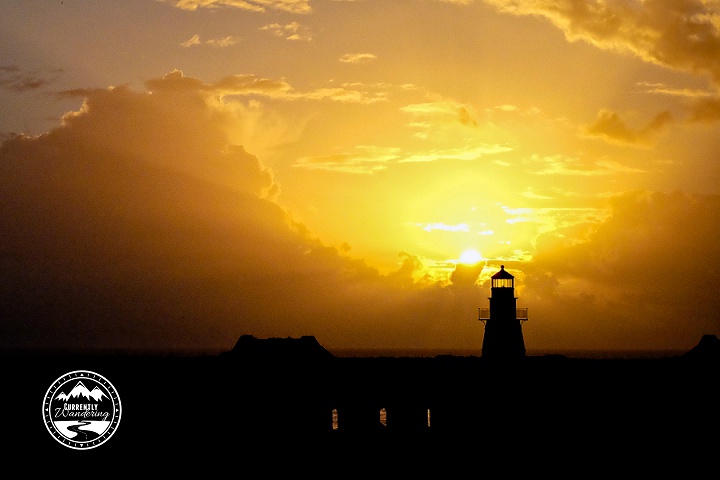
Wait for the good light. Generally speaking, midday produces the least interesting photographs. Get up early and photograph the sunrise before your kids wake up or stay out a little past their bedtime. I often plan our outings after or during dinner (bring a picnic!) to make sure we get good lighting. Beautiful back-lighting, gorgeous scenery, and cute kids are a winning combination.
Don’t forget the fundamentals! As a photographer, you know all about the rule of thirds, leading lines, simplifying the scene, using motion to create interest, and watching your backgrounds. Don’t throw these rules out the window just because you aren’t taking a portrait.

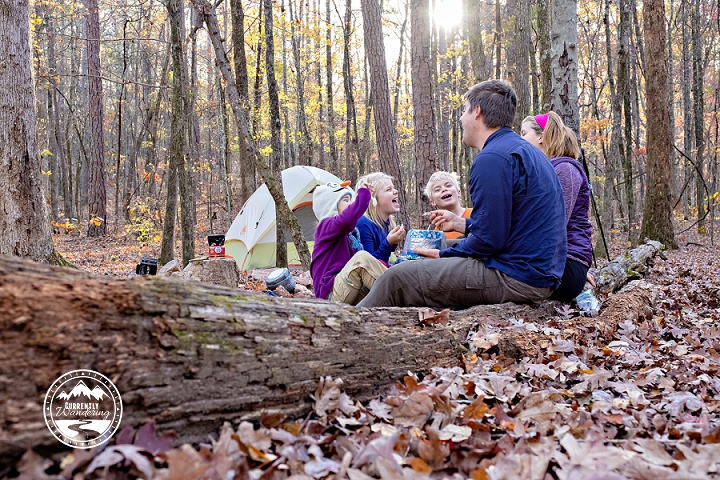
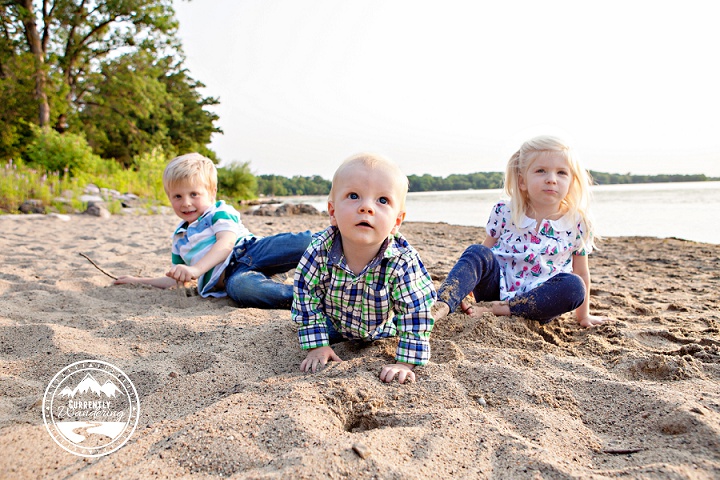
Let your kids just be kids. The last thing you want when you get home is a folder full of your kids with cheesy smiles in front of various national landmarks. I don’t know about you, but my kids don’t smile all the time (or look at the camera) and it would be an unnatural reflection of our experience. Capture your kids pensive, silly, enjoying the moment or even the tantrum your 2 year old throws when she is exhausted.

Don’t Be Lazy. This is the one I struggle with MOST. Because I naturally want the best light I should be up early or out late shooting, right? It rarely happens. Most days I’m content with my laziness and mid-day sun but every once in awhile I make the effort and am usually rewarded.

DSCF2644-Edit

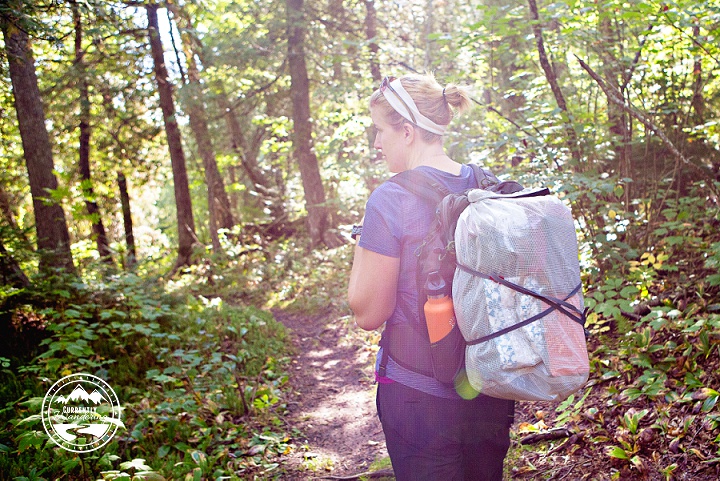
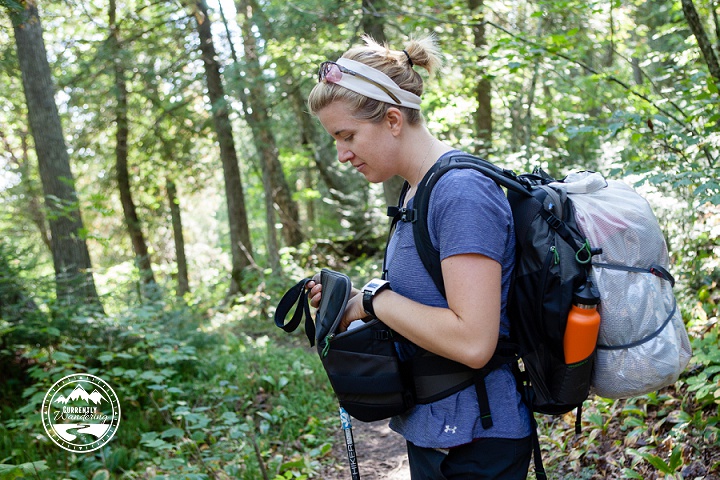
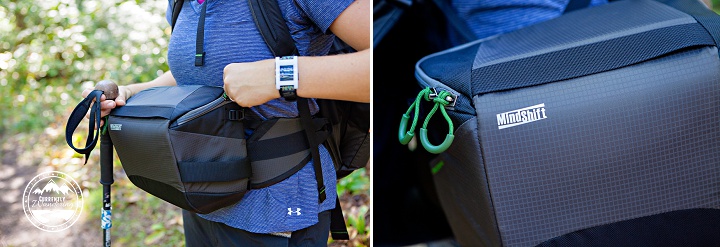
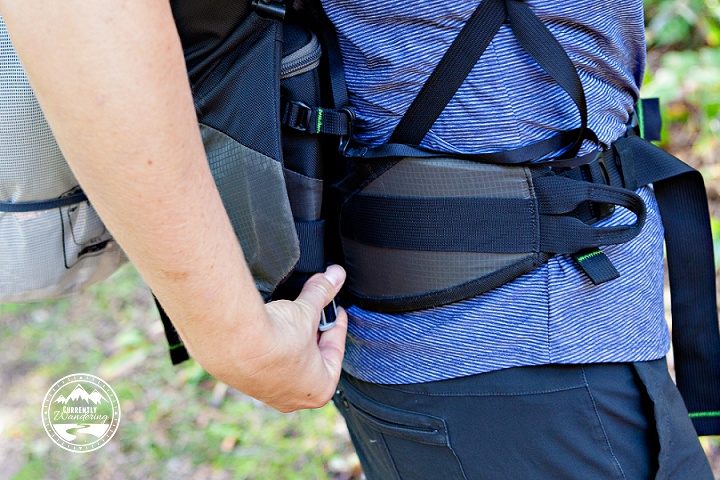
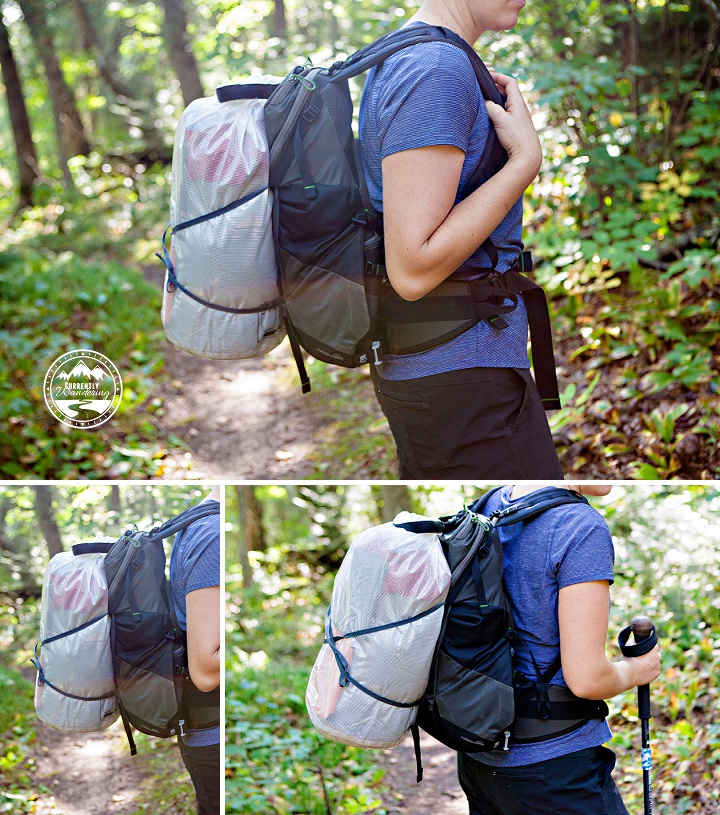
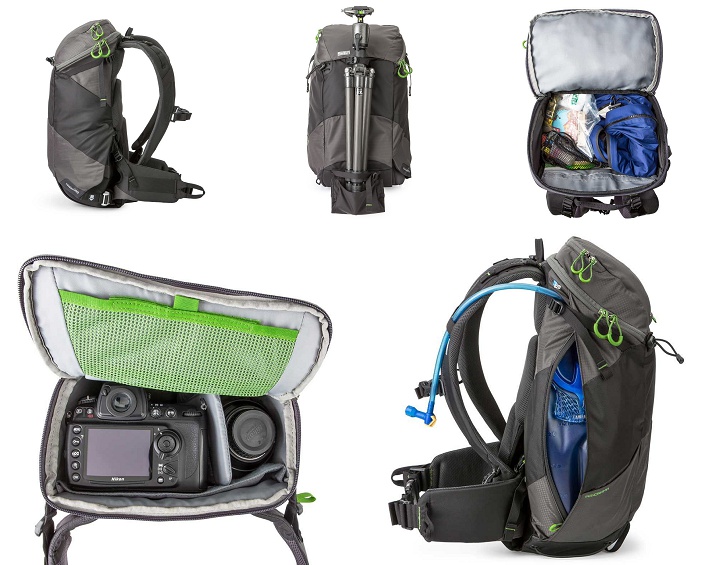
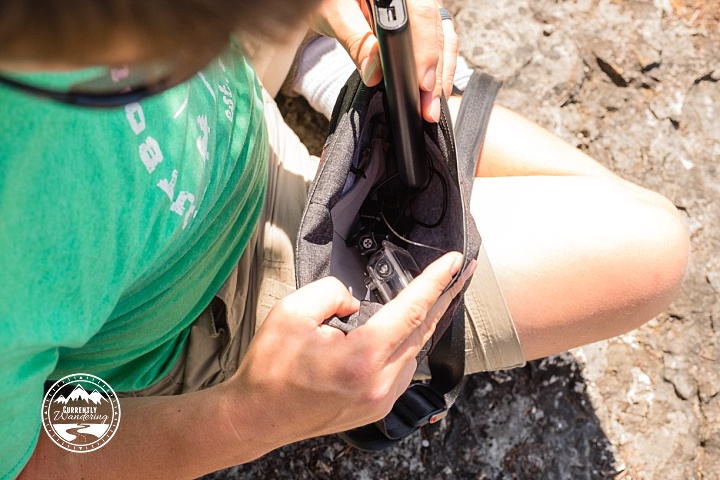
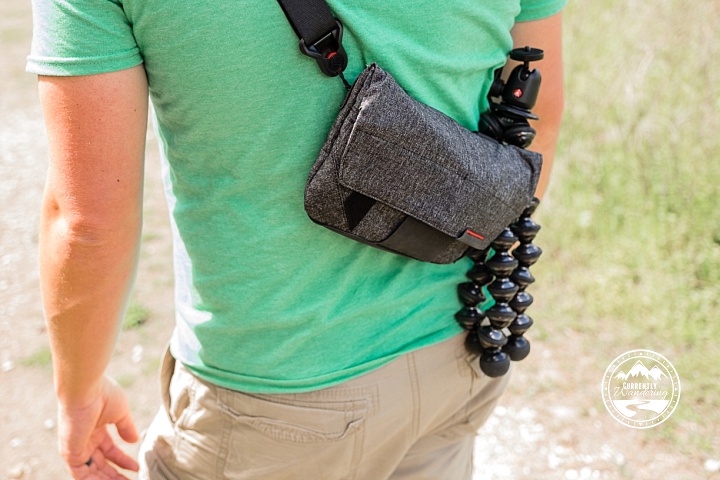
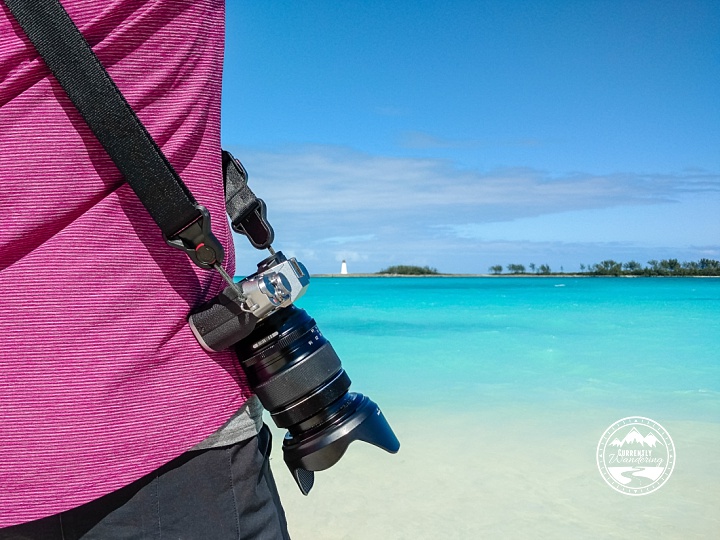
Have your camera handy. Nothing is worse than missing THAT moment because you are digging through your purse looking for the camera. Use a sling bag, a Capture Pro, or something similar so that your camera is easily accessible and, if possible, securely fastened to your body or inconspicuous.

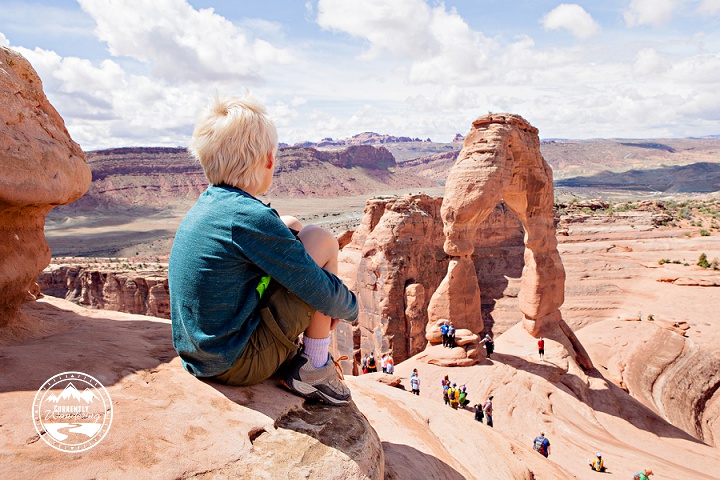
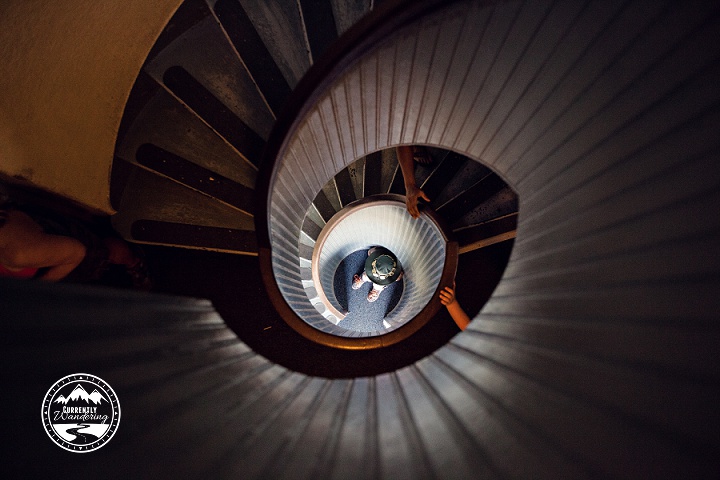
Try a Different Perspective. Sometimes I’ll look around online and see the same photos of famous places. How can you take that photo differently? Get low, hold your camera up over your head, try off to one side. Focus on a detail. Experiment around until you find a unique perspective. Make the photos YOURS, not just a copy of something you can find on a postcard. If you are a wide angle shooter, use a telephoto lens. If you only shoot with zoom lenses, take only your primes. Putting yourself out of your comfort zone will make you shoot deliberately.

IMG_5271

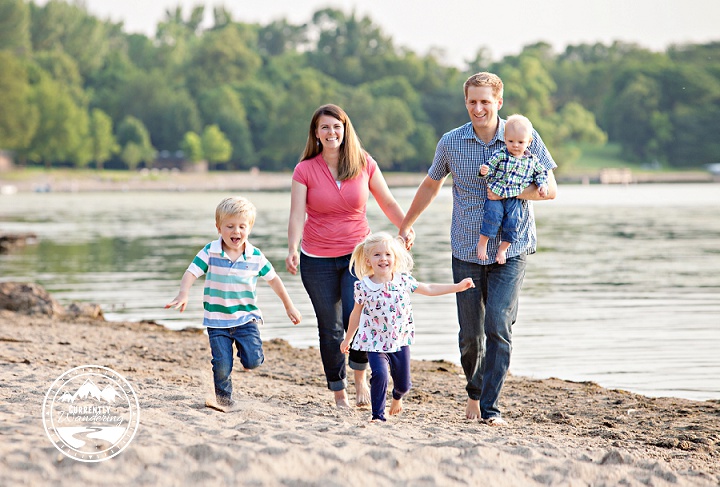
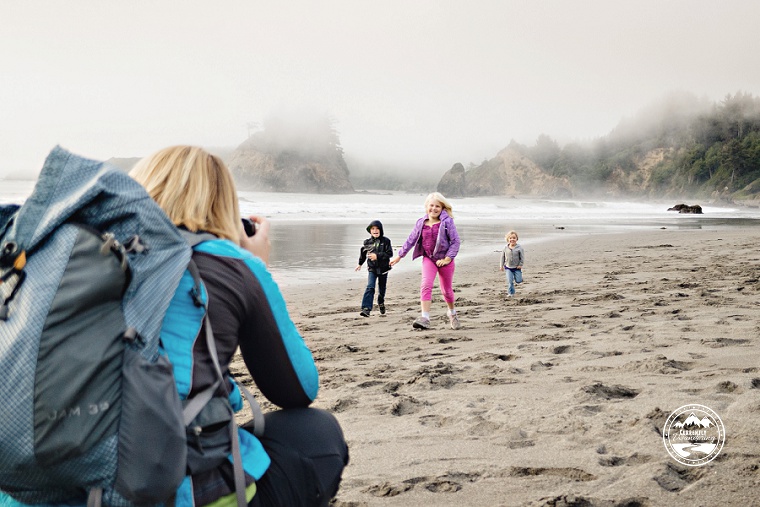
Direct but Don’t Pose. I find there is a distinct difference. We were strolling along a beach in northern California and the fog rolled through the rocks and spilled onto the sand. It was magical. I asked my kids to walk down a ways and then run towards me. Actually, I think Sam’s words were, “Come tackle mommy!” It totally worked.

Trinidad_16

Be flexible and just let moments happen. Some of our BEST photo opportunities have happened when we least expected or when we deviated from “the plan”. Whether it is taking a few extra minutes to pull of the side of the road because the sunset is just amazing, hiking just another half mile, or letting your kids make and then jump in a pile of leaves in Independence Square, those photos can end up being your favorites because they weren’t planned. Along the same line is to just let things happen. Don’t be in a rush, let the moment play out. Be patient. Good photos come to those that wait.

Categories
Photo Gear Photography

Why I Fuji’d My Canon 5D Mark II & Sold All My Lenses

Why I Fuji’d My Canon 5D Mark II & Sold All My Lenses
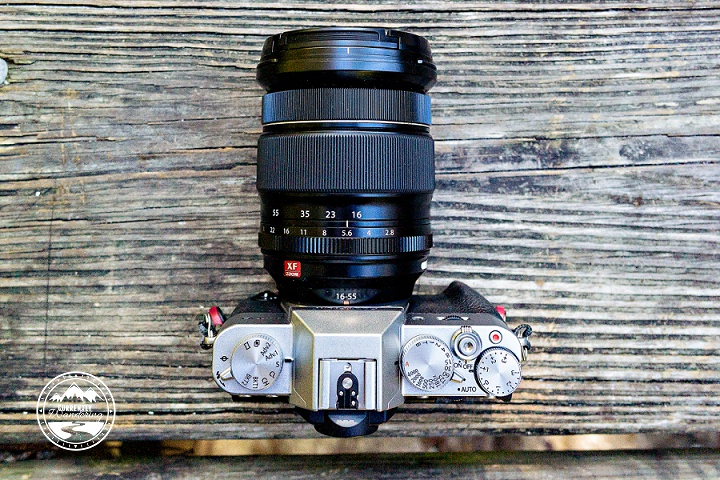
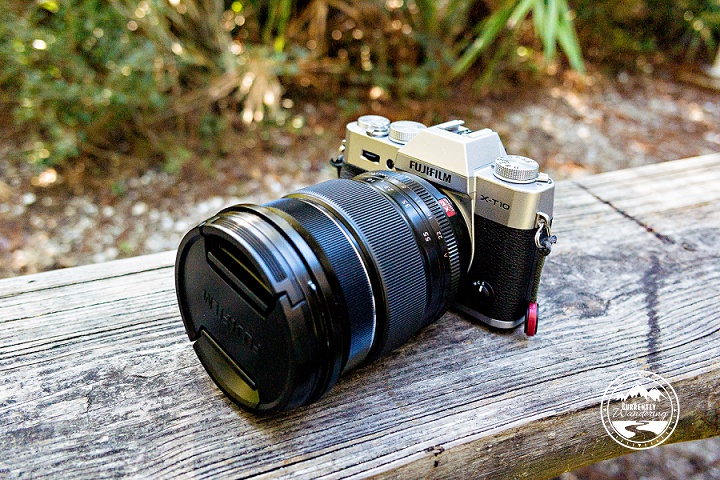
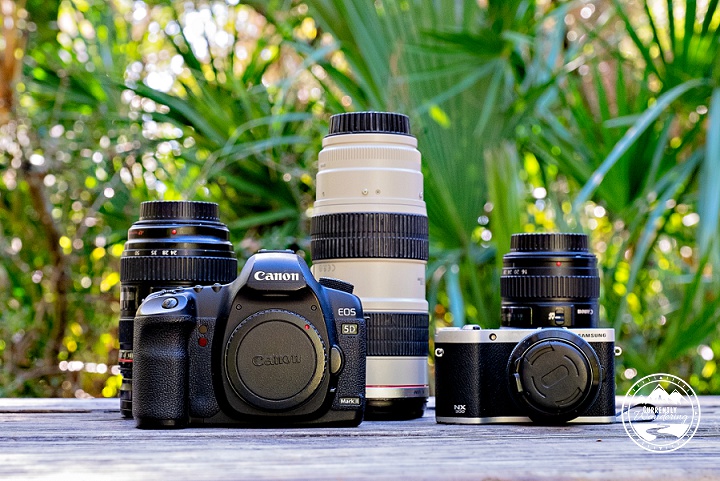
I own far too many cameras. In all honesty, its probably a photographer thing. Or maybe just a someone-who-likes-to-take photos thing. Unfortunately, the overabundance doesn’t end with cameras. I also have lenses, an external flash (or three), a light stand, Pocket Wizards, and quite a few other gizmos needed to create beautiful, stunning, portraiture.

Only I don’t do that anymore.

I waffled with the decision to try and run my photography business while we traveled. I thought through pricing, locations, and even how I would attract clients. In the end, I just didn’t have time. Travel IS my hobby. There’s not a whole lot of time for anything else. We also travel in an Airstream roughly the size of your master bedroom and there’s really just not ROOM for a whole lot else.

After becoming increasingly annoyed with the limitations and size of my Canon 5D Mark II, I knew it was time to switch things up. I debated long and hard between the Canon 6D and the Fuji X-T10 with the Fuji ultimately winning the match for a couple of reasons:

Fuji X-T1o in silver on Amazon, Body Only

Lightweight. Mirrorless cameras have smaller camera bodies than SLRs. I’m sure Sam could hold a discussion on the technical details (he is the one that has always been good at that), but I’m just happy with a simple, side by side, tactile comparison. After lugging my SLR and 3 lenses in a carry-on bag to Utah last fall I vowed I would never carry that much weight again. Having “professional” gear wasn’t worth the trip to the chiropractor.

Takes Quality RAW Images. This isn’t necessarily a reason to switch, but knowing that I could get high quality RAW images similar to my 5D Mark II was reassuring. I wasn’t going to lose anything I valued in the quality of my images by switching to a “non-professional” camera body or brand.

DSCF2663

Quality Lenses. Like any other camera brand, there are a variety of lenses to choose from. I typically find that I’m happiest with the expensive ones. Quality glass often makes more of a difference than the quality of the camera body, and I found plenty of honest, happy reviews about Fuji’s glass. I ended up buying the Fujinon XF 16-55mm F/2.8. It has a constant aperture, high-speed auto focus, is weather resistant, and sharp. Yes, the lens is almost bigger than the camera body, but I used my 24-70mm f/2.8Canon lens probably 85% of the time and this was a good equivalent with a little bit of a longer reach once you factor in the crop sensor. I could have gone with two, or three other prime (non-zoom) lenses to cover the range, but the idea behind the switch was LESS, not more. I’ve already done the 6 lens thing. I wanted one lens.

Built in Wifi. This wasn’t necessarily a tipping point for the X-T10 as the Canon 6D also has built in WiFi. My 5D Mark II decidedly does not. It was driving my crazy. I loved the feature on our Samsung Nx300 and to not be able to transfer from my “big camera” straight to my phone for social media was annoying.

Electronic Viewfinder AND Screen. This camera has both an LCD screen and a viewfinder. It FEELS like a small SLR because I can still hold it up to my eye and shoot. But, I also have the advantage of a tilt screen when I don’t feel like getting on my stomach in the dirt. Not new for many cameras, but this was a bonus over my 5D Mark II. I also love that what I see is what I get. No more “chimping” the back of the camera to see how the shot came out.

Personal Support Group. Seth & Drea Hughes (on Instagram here and here) are a traveling couple that I greatly admire. Seth is a fantastic professional photographer and recently made the switch from Canon to Fuji. I thought he was crazy, but he kept telling me how awesome, lightweight and great his X-T10 was. I’m so grateful for his patience as I asked a million questions and wavered in self-doubt. Check out his post on the switch here.

DSCF9716-Edit

The Controls. There’s definitely a learning curve to switching camera brands. Especially going from SLR to mirrorless. After a few frustrating days, I fell in love with the controls on the X-T10. I’ve set it up to mimic fairly closely the buttons on my 5D Mark II and only after a short week I felt the buttons and knobs were intuitive and easy to use.

SAM_0004-Edit

In addition to selling my 5D Markk II, I also unloaded a 35mm f/1.4, a 16-35mm f/2.8, an 85mm 1.8, a 70-200mm f/2.8 IS,  a 24-70 f/2.8, and my Samsung Nexus 300 & 20mm pancake lens. Whew. See? Way less than I used to pack around (as evidenced by this What’s In My Camera Bag blog post from 2 years ago).

While I still LOVED the Samsung, the idea behind it was a lighter camera when I didn’t want to lug my heavy SLR around. After buying the Fuji, it felt redundant.

Do I regret having all that gear to begin with? Absolutely not. I don’t regret running my own photography business, and shooting weddings is very different from candid, lifestyle travel photography. In addition to taking pretty photos,  I developed useful interpersonal skills, was drawn out of my comfort zone more times than I can count, and had the satisfaction that comes with making money from doing something you love.

While selling my camera felt a little like selling a small piece of my soul, I came to the realization that I love something more than taking photos for other people. I love to travel and spend time with my family, documenting our experiences along the way. Knowing I was trading in for something better for our situation made the decision easier.

SAM_0001-Edit

Categories
Backpacking Hiking Outdoor Gear Photo Gear

Gear Review: MindShift 180 Bag Rigged as a Backcountry Backpack

IMG_7026-Edit

While we would have loved to receive this item for free to review, we actually spent money to purchase it. This post contains Amazon affiliate links which help to fund the blog in a small, small way. Thanks for helping us out!

I’ve been on a quest to find the perfect bag. When you don’t have a lot of space to store equipment, each piece of gear needs to have multiple functions. I have a great over the shoulder camera bag (see that post here) but for longer hikes it just wasn’t cutting it. Plus, I wanted to be able to tote multiple lenses in a safe and easy to access manner.

Enter the Mind Shift Gear Rotation 180.

We ran into this bag at a camera shop downtown in Petaluma, CA. It piqued my interest as a solid, hiking/camera bag and even better when I found out they are made by Think Tank Photo who are leaders in the camera bag space.

The Mind Shift 180’s star feature is the accessible waist belt pack that swings around from inside the main bag. Hard to visualize? Here’s some photos to help out. The whole waist belt slides around and its super easy to get in and out which gives me access to extra lenses or even my camera if I’m not carrying it with the Capture Pro on a strap.
IMG_7029-Edit IMG_7032-Edit

The clip is easy to slip in and out without looking at it, but is also secure. There’s also a tether just in case the waist belt somehow comes undone so my gear won’t hit the dirt.

IMG_7045-Edit

Unfortunately, when we were planning our first backpacking trip in the Apostle Islands we just didn’t have enough room for all the gear. Sam has a huge regular backpack, but even with that we were having to give the kids too much weight. The Mind Shift 180 has a fairly large top storage compartment which is great for jackets, or food (which is heavier and better for an adult to carry), but it still wasn’t enough space.

Our solution? A dry bag roped to the outside. Fancy, right? We picked up this dry bag at Walmart for like $6. Its pretty heavy, but also durable which made it great for being on the outside. We stuffed a sleeping bag, everyone’s pajamas, and all the electronics in it and then tied it on to the Mind Shift 180 with these Sea to Summit Accessory Cords.

It worked surprisingly well. Because the Mind Shift is rather small, the pack overall wasn’t too heavy (my total pack weight for the Apostle Islands was 31 lbs) and I had no problems with unbalanced weight.

IMG_7049-Edit

It may not be the prettiest solution, but it totally worked! I would love for Mind Shift to come up with a legit attachment to the outside of this bag. They make a larger camera bag, but on shorter day hikes it would just be overkill and we don’t have the space anyway! This guy fits perfectly under the dinette seat for easy access and safe storage.

When I have easy access to lenses and even my camera, I am more likely to take photos along the way. Its also important for me to have my (fairly expensive) gear safe and I feel like the padding in this is definitely adequate. If you are looking for a bag to take out hiking, I definitely recommend this one!

61zidITJilL._SL1000_
Photo Credit: Amazon


Categories
Photo Sessions Photography

Madsen Family Lifestyle Photos – Minneapolis, MN

There are very few things I miss about our “sticks and bricks” lifestyle. Overall, living the life of a nomad suits our sense of adventure and we don’t mind the inconsistencies that come with it.

Everyone once in awhile though, I get to photograph a family and realize how much I loved it. I photographed weddings & families (kids, and even a birth!) for years in Utah before we left to travel in our Airstream. Interacting with clients, other photographers, and learning how to run my own business and handle a camera shaped a core piece of my personality and I think there will always be a bit of nostalgia there.

Living in Minneapolis, my brother’s family spends a lot of time at the lake. Baker Park is one of their favorites, so that’s where we chose to do a quick mini session one evening. During the week, the evenings there are pretty deserted, peaceful, and there’s gorgeous lighting as the sun goes down behind all the trees.  Couldn’t have asked for a better evening!

IMG_4991Love that this one shows off their personalities!

IMG_5077IMG_5085-EditIMG_4928IMG_4939IMG_5061

I’m not sure I really want to push photographing professionally as we travel, but I’m definitely open to the occasional photo shoot – so let me know if we’ll be in your area!