Categories
Airstream Meetups

Airstream Meet Up with Brad, Joan, & Archie

Brad and Joan_02

We spent quite a bit of time in the Pacific Northwest this fall, and even stayed twice at Valley of the Rogue State Park which is located between Medford and Grants Pass, OR. As we were coming south from Washington, we received an email from Brad who graciously invited us to come meet them and even park in their driveway in Grants Pass if our schedule allowed. Not really knowing who they were, we settled for dinner on a Saturday evening just to make sure they weren’t crazy people.

We should have just moved in from the beginning. We LOVED our time with them, and the kids especially loved their puppy, Archie.

Brad and Joan are Airstream owners who split their time between their beautiful 5 acre lot in Grants Pass, and their cabin in Idaho for the summer. They take the occasional trip south during the winter as well, and any other time they can get away.

Brad and Joan_01

After dinner the first night, we settled back in the Airstream for a few more days, and then moved over to their property for one more afternoon and evening of awesome company before heading farther south.

Isn’t their property gorgeous? I told Joan this might just be my dream house and lot, and Brad offered us a great deal to sell it to us on the spot as they’d love to downsize and move closer to family. Not quite ready for that, but a girl can dream of the future, right?

Brad and Joan_09

View from the wrap around porch overlooking the shop & our Airstreams. Don’t they look so cozy next to each other?

Brad and Joan_10

We did a homemade pizza night and Joan had the kids working some magic in the kitchen while I was told to go relax. Not a bad deal.

Brad and Joan_12

Before we left the following morning, the kids and I helped Joan tag trees for removal all over their property. These Manzanita bushes burn easily, so they wanted to thin them out and reduce the fire hazard. The kids had fun and Cara even managed to learn to tie them on by herself!

Brad and Joan_16

Brad & Joan were gracious, amazing hosts and we can’t wait to see them again. We had so much fun swapping stories and are hoping that we can meet up with them again this summer in Idaho if we can make that work with our other plans.

Yet again, we are finding that the people we meet while traveling make it the best of experiences. We only hope that we add to others lives as much as they add to ours as we area able to meet and visit and share stories and create new ones.

Categories
Solar & Power

Power Upgrade – What I don’t know about Installing Solar

IMG_20150112_154728_1

When I mentioned a power upgrade on Instagram, I received plenty of recommendations, and an overwhelming vote of confidence from those convinced I could do the install myself. I had been planning on having a professional installer do the work, and I thought I’d enumerate my reservations about doing a self-install here, for enlightenment, humor, and surely rebuttal.

I don’t know where to run the wires.

This is my largest issue. I’ve been up on the roof enough to be comfortable arranging, mounting, and sealing the panels to the roof. I can even run wires to a combiner box. What I don’t know is a good way to get those wires from the roof to the relevant places inside the Airstream.

One option is the fridge vent. I’ve done that before, having run my external antenna wires that route. The trouble is getting from behind the fridge over to where the solar charge controller lives, which is surely either in the front under the bed or in the galley floor panel. Either path is difficult to make work.

The other option is to drop the wires down through a hole above the pantry, but I would still need to run wire forward to the battery, and I’m not loving the external pipe route that I’ve seen on the AirForums.

In addition to the panels-to-controller box, I have the wires to run to the remote control and monitor panels. I can mount the box easy enough, but I’m not sure where the wires would need to make the trip from.

I have Zero DC Experience.

I could probably work past this one if I needed, by following diagrams and asking lots of questions. My biggest worry here is screwing something up, and either causing lots of damage or having to pay somebody serious $ to sort it all out.

I don’t travel with many tools.

I’m a pretty handy guy, but I’m not traveling with many tools. The custom work I have done I did before I sold the house (and the tools) or with the help of friends and family. I only have a basic set of tools with me, which does not include even an electric drill or screwdriver.

I can work past this one as well, enlisting the help of similarly handy friends.

Solar Rebate

Right now, I can get 30% back on a solar purchase as a tax credit, and that includes the cost of the installation. This brings the effective cost down quite a bit, and I don’t have to worry about all the complex issues. Call me lazy, but it is tempting.

Hybrid Approach?

At the moment, I’m leaning towards a hybrid install: part professional, part DIY. The portions of the install I’m least familiar with are the base system and monitor installation. A battery upgrade/replacement is doable, as is adding adding panels and wiring it to the combiner box. I’ve even already ordered a new multi-stage converter/charger that I plan to self install over the next week or so. (I ordered the Progressive Dynamics (PD4655V) 55 Amp Converter/Charger that installs as a drop in replacement for the single stage Parallax 7355 Converter Charger original to our Airstream.)

So there you have it: my concerns about self-installing solar. If you have information or guidance, please do share!

Categories
Solar & Power

Power Upgrade – Our Lifestyle and Power Needs

IMG_1792-Edit

The time has come for operation “Airstream Power Upgrade” or APU for short. When we bought our Airstream, we replaced the 5 year old batteries with flooded batteries from Costco. It was cheap, easy and we didn’t want to figure out other options or power configurations. Lately we’ve been spending more time off grid (or boondocking) and are in the market for some additional power. We have been gathering information to decide exactly what our needs are and how best to fulfill them. Here is a consolidated list of information that we are using to decide our way forward:

The Rig

We have a 2008 Airstream International 27FB, with a front bed modification. Though we pulled the queen bed, we left the electrical panel under the bed in place and unmodified. The two primary locations for electrical stuff is that panel and the fuse panel/converter underneath the pantry in between the bathroom and the stove.

Lifestyle

We are a full-time family of 5, home schooling and working on the road. We spend time both boondocking and with an electric hookup. We move roughly every 3 to 5 days. Our biggest wintertime power use is the furnace fan at night. With kids, we can’t as easily drop the temperature at night to save power. Summertime power drain switches to the fantastic fans, though the power draw doesn’t seem quite as bad.

This year we will be doing more ‘away from home’ activities, like backpacking or other trips where we will park the Airstream for a few days without hookups. Having a way to keep the batteries in good shape without hassle for a few days would be really helpful.

Batteries

We have 2 Group 27 Deep cycle marine batteries, for something like 150 or 160 Amp Hours. (When new). The batteries are only a year old but not in great shape, mostly due to neglect of the water levels.

I suspect our current use is on the order of 100 – 125 Amp Hours per day, based on how often we have to run our generator. We can really only run a day-ish on batteries, and I’m pulling out the generator far too often to be convenient.

DC Needs

  • Lots of USB charged gadgets (2 Phones, 3 Tablets, cameras, etc.)
  • Laptop power cord is a DC cord (no AC needed)
  • Nearly all lights are LED lights
  • Wifi Router (Pepwave)
  • House audio (built in sound system)
  • Fridge (electronics only, propane powered)
  • Fantastic Fans (mostly summer use)
  • Furnace Fan (mostly winter use)
  • Cooking Fan and shower vent fan (year round)

AC Needs

  • We have no inverter currently installed. We pull out the generator (Honda 2000) for use of our major electrics when boondocking.
  • Blender – 1800 Watts / Typical daily use 5 min
  • Hair Dryer – 1850 Watts / Typical use every few days 10 min
  • Hair Flatiron – ? Watts / Typical use every few days 10 min
  • TV – much lower, but we are low TV users.
  • Other misc chargers and devices, none of which is urgent while boondocking
  • We do not currently have an inverter.

Upgrade Goals

  • Run the generator less often.
  • Be able to park the Airstream for a few days without having to worry about the fridge running out of power.
  • Be able to monitor both power use to lower use and monitor drain.
  • Monitor battery state and charge to know when we are charged. (Will help reduce generator use).
  • Avoid becoming a slave to the panels.

Possible Options

My uneducated self can see a few ways to improve our power situation:

Solar Only

  • Panels (200-400 watts)
  • Solar Charge Controller
  • Battery Monitor

This is probably our best option, but also the priciest. Prices without installation are roughly $1,800 to $2,500. Install would likely be $1,200 additional. Self install is painful for a few reasons, but more on that
in a future post.

AC Charge Only

  • Multi-stage Converter
  • Battery Monitor

This would really just make our generator time more efficient, and provide better monitoring. This is an easier self-install, and somewhere in the $400 range.

Both Solar and AC

  • Panels (200-400 watts)
  • Solar Charge Controller
  • Multi-stage Converter
  • Battery Monitor

Battery Upgrade

I could upgrade the batteries, either to 6 volt or AGM, or both. This could lower the maintenance issues with the flooded batteries, but is pricy. $400 – $1,000, plus more to expand the battery box for larger batteries.

Inverter Upgrade

Use combination Multi-stage converter / Inverter to allow AC use from batteries. This is really a luxury item, but as long as we are discussing our options, let’s throw it in here. $1,000 -$2000, depending on which way we go, and it would likely need that battery upgrade!

Next Up…

I’ll discuss what I don’t know about installing my own solar kit.

Categories
California Hiking National Parks Outdoor Adventures

Our Kids Complete the Most Epic Hike EVER in Yosemite National Park

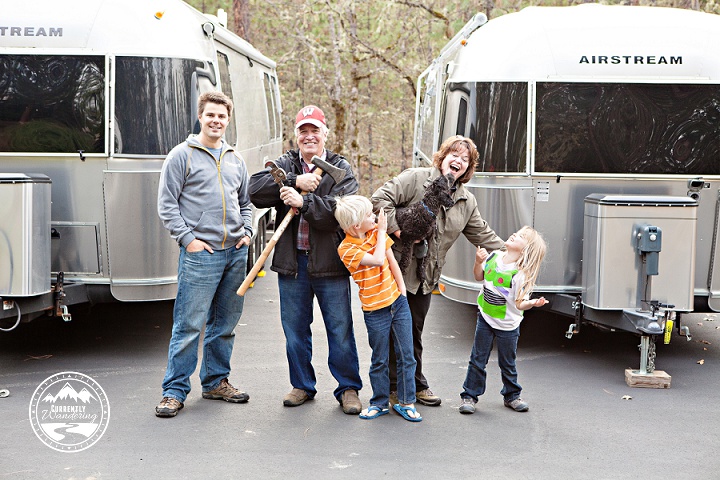
Our kids never cease to amaze me. They have adapted so well to this traveling lifestyle of ours and I see them growing and thriving in the most spectacular ways.

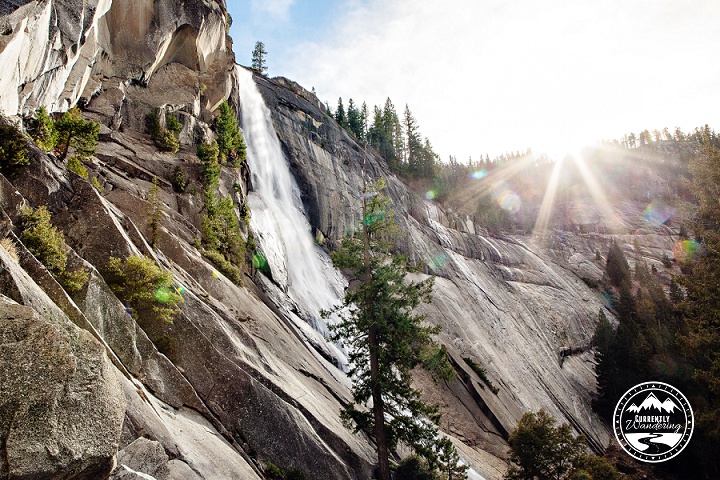
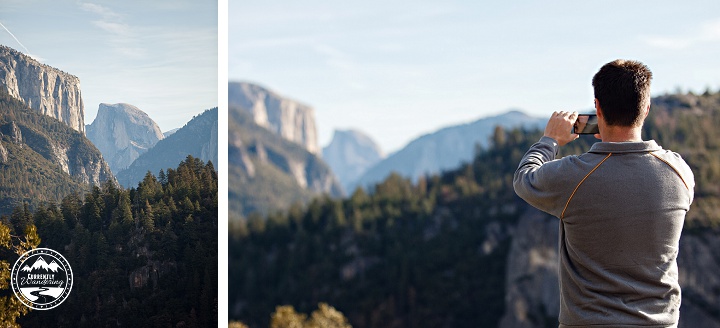
Hiking is definitely a huge activity for us. We started with short hikes when they were little, and gradually have been able to increase the distance as they become stronger and more used to the physical effort. The hike we completed in Yosemite definitely topped the list for difficulty, duration and amazing views.

When We Visited: December 8, 2014

Ages of Kids: 9, 7, 4

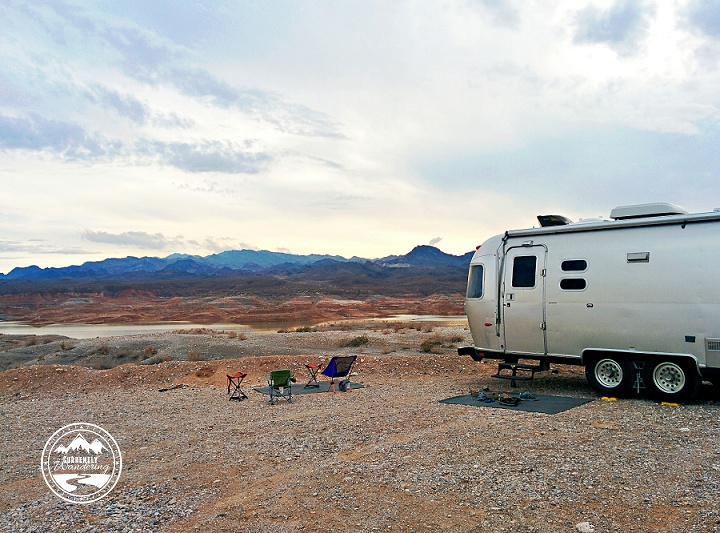
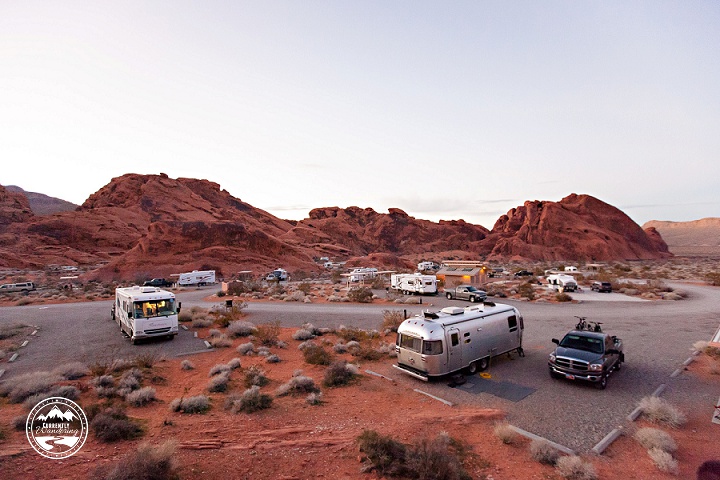
Where We Stayed: Yosemite Ridge Resort.  Our timing worked out for a visit across a Sat-Mon, with Monday being the day we spent all day at the park. We opted to stay outside the National Park near Groveland at an RV Park so that 1) Sam could have a prayer of getting Verizon coverage so he could work some on Saturday to make up for play on Monday, and 2) It was much, much closer to church.

I had one purpose for visiting this park, and that was to hike. A big one. It had been quite a while since we attempted an all day excursion, and having just seen the valley floor on my previous visit, I wanted to get up into the hills and really experience Yosemite. Even if that’s all we did on our visit, we felt that would be a better way to see the park than exploring a few of the shorter trails closer to the valley floor. We needed to get UP.

If we could snag a Jr. Ranger Badge while we were at it, I was okay with that too.

Yosemite HIke_04

I don’t think any of use quite comprehended what we were getting ourselves into as we left the Visitor Center and headed for the trail head. We planned to hike up to both Vernal and Nevada Falls, a distance, on paper, of 5.4 miles round trip. We also knew there was an option to come down the John Muir Trail, which considering it is the last section Sam hiked of his 240 miles we were kind of excited to all hike together. Coming down the JMT rather than back down the Mist Trail would add about 2.5 miles, however, so we figured we’d just see how it went.

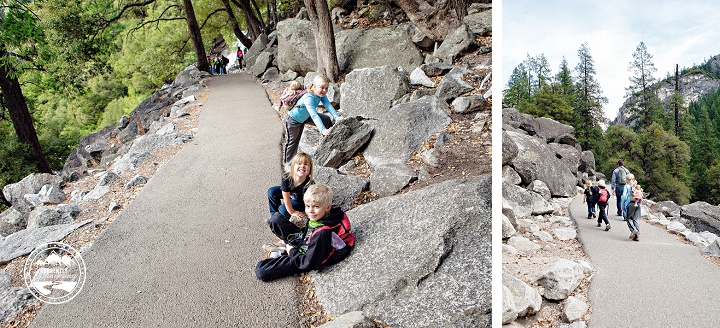
Everyone started out in great spirits. We had psyched the kids up for a long, difficult hike, but we knew that they could do it. The first section of the trail is paved and steep. We kept leap frogging a high school field trip group, and Cara kept teasing them about hiking faster than they were. Sam and I joked that these kids would never live it down if a 4 year old beat them to the top of the waterfall.

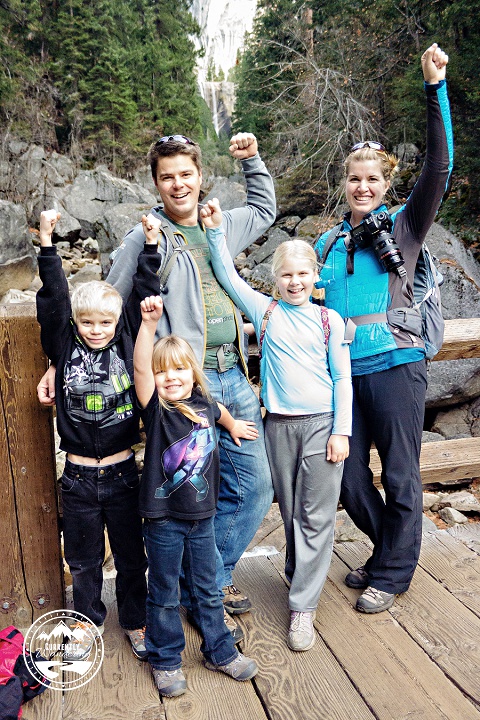
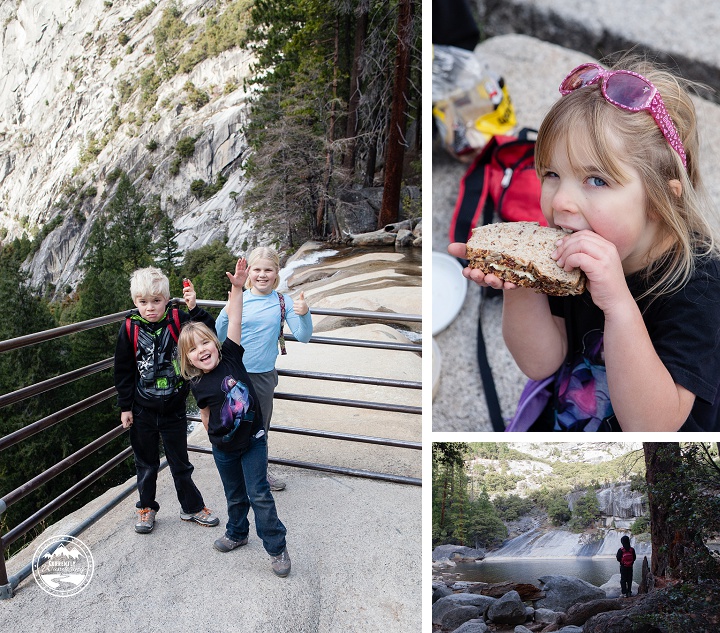
About .8 miles up the trail, we hit the footbridge and our first view of Vernal Falls. I handed my camera off to the field trip instructor and started giving him directions when he promised that he was a photographer and knew what he was doing. Perfect. We rarely get photos of all 5 of us and this is one of my all time favorites!

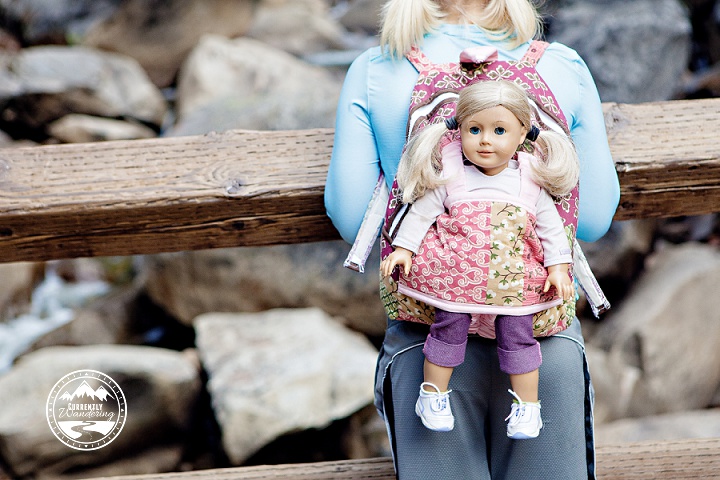
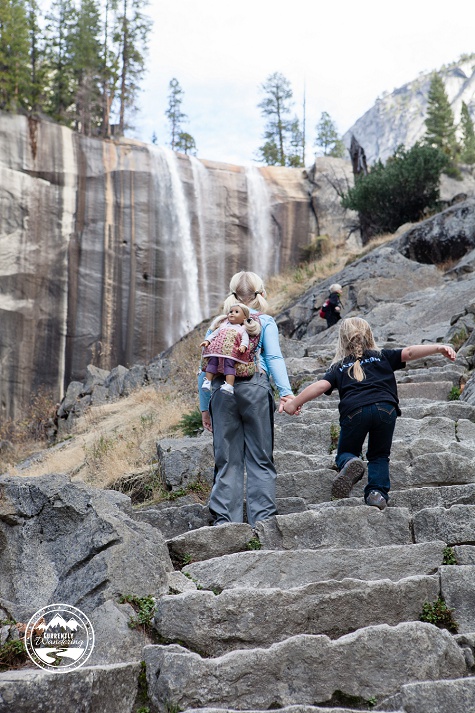
The little things that help our kids accomplish something difficult are pretty varied. For Cara, listening to music is a huge help. On this hike, Rachel really want to bring Rebecca, her American Girl doll along for the hike. She’s not very heavy and has a backpack she straps into, so we thought, “why not?” It was adorable to watch Rachel hike up the trail with her doll strapped to her back. I think it gave her encouragement to think she was “helping” her doll along and responsible for someone else throughout the hike.

Before reaching the top of the falls, we had to climb 600 granite steps that had been shaped out of the mountain. It was quite the work out and we were all pretty tired & hungry by the time we reached the top!

Feeding both body and spirit is definitely important. We packed in lunch to eat at the top of the falls and not only filled our hungry bellies, but re-energized the kids to keep hiking. Its amazing what a milestone can do for encouragement! We did beat the school group to the top of the falls, and they endured some good natured teasing from 4 year old Cara, despite having to stop here and there for a lecture from their teacher. Cara was very proud to be competing in league with ‘big kids’ and it gave her confidence and courage.

At this point we had a decision to make, continue to the top of Nevada Falls or head back down? We definitely wanted to keep going, but Rachel was having some severe cramping in her hip flexor and was struggling to even walk. We sat down and talked about pressing on in spite of difficulties, how excited everyone else was to see the other waterfall, and we stretched out her leg so she felt confident she could keep hiking. Had we remembered to bring our hiking poles, they also would have helped tremendously, but they were sitting back in the Airstream too far away to be useful.

We are proud of Rachel for how determined she was to see this thing through. We walked a little slower on the second half of the trail, and stopped frequently to stretch, but she kept hiking with very little complaining. I’m glad we kept going because the views just kept getting better and better!

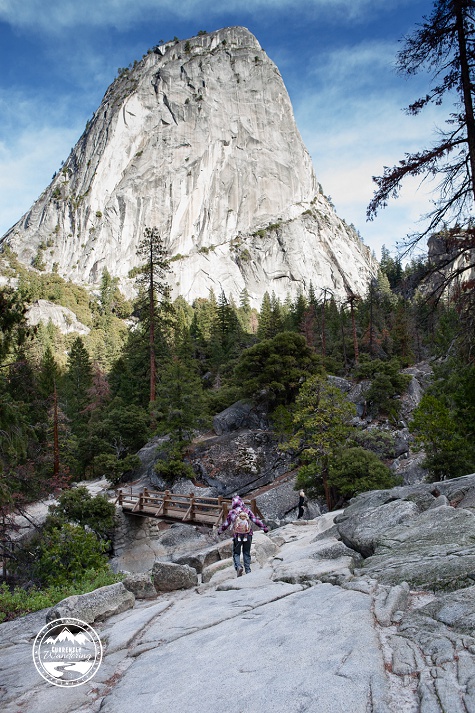
Just before we hit the top of Nevada Falls we had another steep, switchback, rocky section to hike. This time, however, we had the company of the sun which peaked over the nearby cliffs and bathed us in golden light. It was the first time that day we had seen the sun and I just stood for a minute and let the warm sunshine wash over my face. 

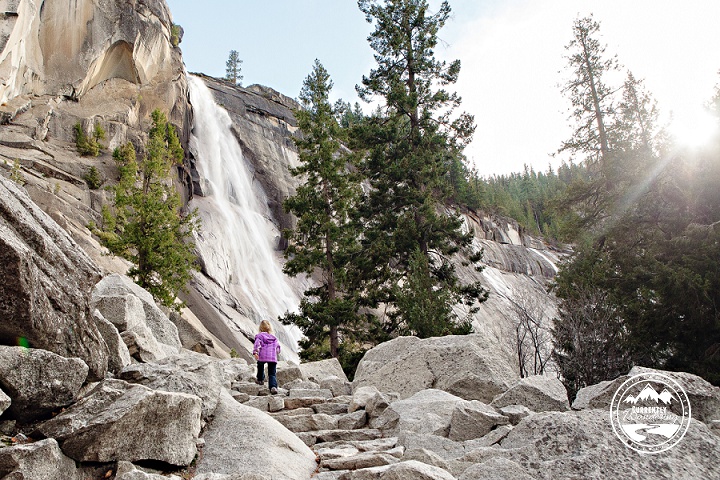
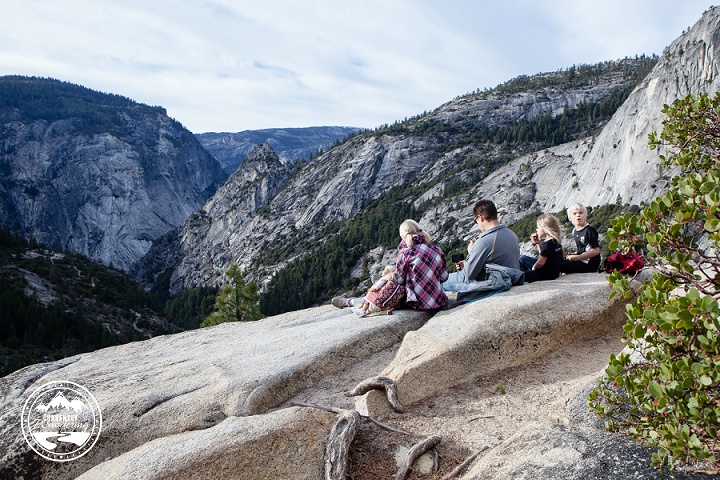
We saved our very favorite granola bars to eat at the top of Nevada Falls, and stopped for 20 minutes or so to complete their short Jr. Ranger books before heading back down the trail. Spending a few minutes which such a view (and our favorite snack!) was ample reward for our effort up the trail. Our break was short, as we’ve learned to keep moving so our muscles don’t freeze up, and by this time it was about 3pm and we needed to get off the mountain before it got dark.

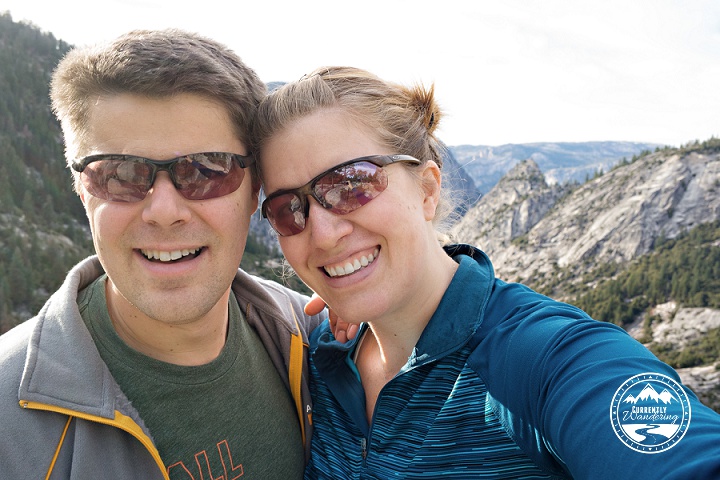
We made it! This was our “We can’t believe our 4 year old hiked all the way up here” self-congratulatory selfie photo.

The slog downhill began. The kids were pretty tired by now, and it was getting late into the afternoon. We were slightly worried we wouldn’t make it back to the visitor center in time to turn in our Jr. Ranger Books, but more importantly that it would be dark before we could get off the mountain. The views coming down the JMT side of the trail were spectacular, however, and was worth the extra distance we hiked.

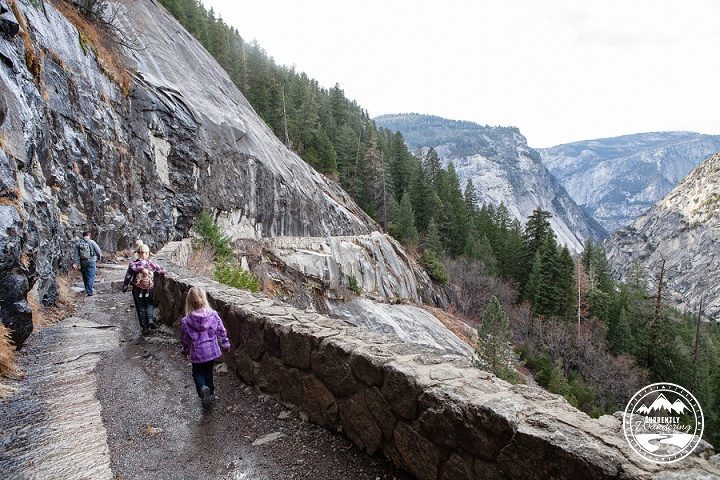
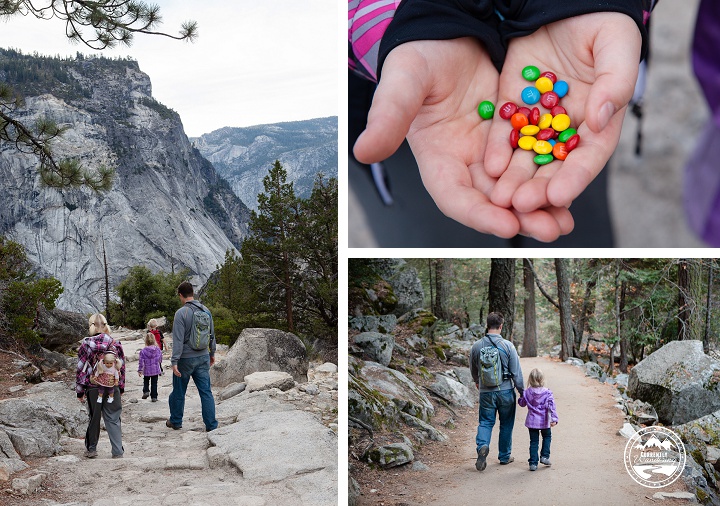
Lots of trail snacks, “I spy” games, music and anything else we could think of to keep them hiking. Sam and I were tired, which meant the kids must be doubly so. Little Cara had given her all, and just couldn’t make it the last mile. We alternated between carrying her and having her walk and it was pretty slow going.

We made it back to the car just as it was getting too dark to see around 4:55pm. The visitor center closed at 5pm so we raced back along the road to the closest drop off point and the kids and I ran from there on our already exhausted legs. We ran up to the visitor center just as the last ranger was walking out the front door. He was so great – the kids explained which hike they had just finished and he congratulated them and went back inside for the badges. Without even checking their sheets, he just asked what their favorite part was and handed them over. Obviously he was ready to go home too!

On the way out, we made a quick pit stop at the food market to grab some snacks for the way home. Everyone was tired, but it was definitely a fantastic accomplishment for everyone! Although on paper, the trail was supposed to be only 7. 5 miles or so, tracking with Endomondo I clocked 10 miles and 2000 feet of vertical elevation. We are so proud of our kids and what they accomplished!

Our decision to begin hiking serious hikes with the kids was deliberate, and over this last year we’ve seen them grow and become both physically and mentally strong. We have a learned and grown so much through these experiences, and I look forward to what we will accomplish this year!

Categories
Biking Outdoor Gear

Gear Review: Ride-aLong Bike

IMG_20141111_133651

We love to get out on family bike rides, and with a young child that can be slightly frustrating. She often wants to ride on her own, but the rest of us can ride 10+ miles and her little legs just couldn’t keep up with us. While Cara is amazing on her little strider bike, Rachel & Andrew can still dust her with their big kid bikes (much to her frustration!).

Our solution? A Ride-Along bike!

IMG_20140311_183836

We weren’t too picky about which bike we bought. As long as the long stem folded down, it had good reviews on Amazon, and looked decent enough it would work. We found the Wee Ride Co-Pilot Bike Trailer (link on Amazon) and had it shipped to the RV Park in San Diego where we were staying. Since we didn’t have room for both, the Co-Pilot Seat was donated to some friends.

IMG_20141111_153028-Edit copy

Cara isn’t quite tall enough to use the full force of her legs on the pedal stroke, so we also opted to get some pedal blocks as well (link on Amazon) to help with that. They work great and we’ve had no problems with them!
IMG_20141111_125127-Edit copy

Cara loves being able to pedal along with me, and is actually quite the helper going up hills! Pedaling also helps keep her entertained on longer rides, whereas in the Co-Pilot seat I think she got a little bored.

Multiple times we’ve been able to pull off 10+ mile rides with all the kids in tow. Of course the distance was broken up by snack & playground stops along the way, but they were still pretty tired by the time we were done!

For those with smaller kids that aren’t quite ready to pedal their own bike:

When Cara was littler and didn’t quite have the balance (or the reach) for a ride-along we had a Co-Pilot Seat (link to a similar one on Amazon) which we LOVED. This seat was awesome. We stacked it in with the small strider bike on our Yakima rack and strapped a bungee net over it. Yes, it got pretty nasty in the weather, but the cushions are washable and everything else is plastic. On longer rides, Cara would even take a nap. Total win!

a0dee1fc5c5b11e3b4f51212a90bc89b_8

Start Them Young!

Either way you start, we think it is best to start kids young. Because we started when they were small, they grew up thinking that this was the way all families did things. Now, they do amazing rides with minimal complaining because we took the pain to start them young.

Go, and start riding!