Categories
California National Parks On the Water

Kayaking on Santa Cruz Island, California

kayaking-santa-cruz

This last Thanksgiving weekend, we spent 3 days out in Channel Islands National Park. The park consists of 5 islands located off the coast of southern California.

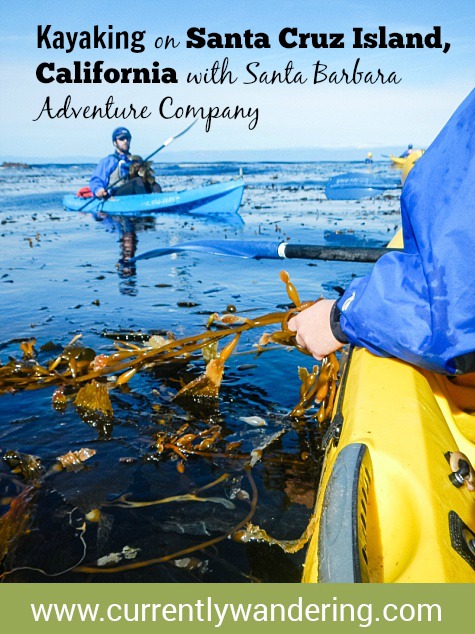
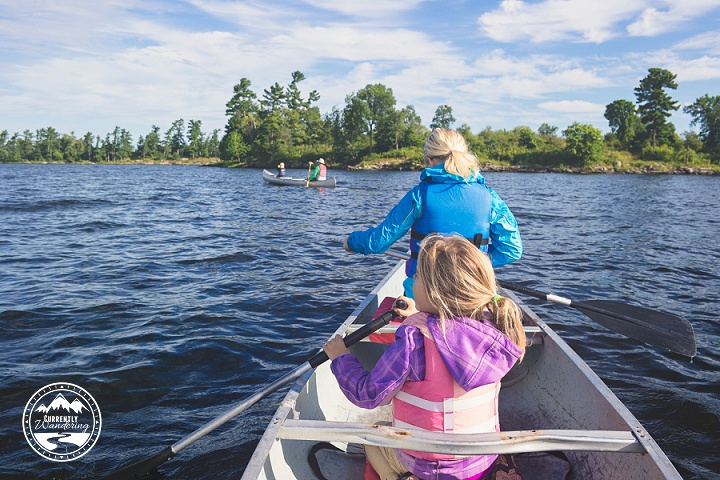
While doing research prior to the trip, I discovered one of the attractions for Santa Cruz Island is the sea caves. We have enjoyed paddling in lakes, streams, and rivers so adding some pacific sea cave kayaking to our resumes sounded like fun!

When We Visited: November 22-25, 2016

Ages of Kids: 11, 9, 6

channel-islands-2016_33We have a reasonable amount of paddling experience, and toyed with the idea of renting kayaks and bringing them on the ferry. After some research and discussion, however, both Sam and I agreed this adventure was out of our comfort zone. Instead we contacted Santa Barbara Adventure Company, who graciously agreed to comp both Sam & my fees on a media/press/blogger expedition. They are one of a few outfitters serving the Channel Islands and came highly recommended by some outdoor friends. They provided the kayaks, gear, and guides for our experience even going above and beyond with an extra guide to paddle with Andrew as all kids under 12 are required to paddle with an adult.

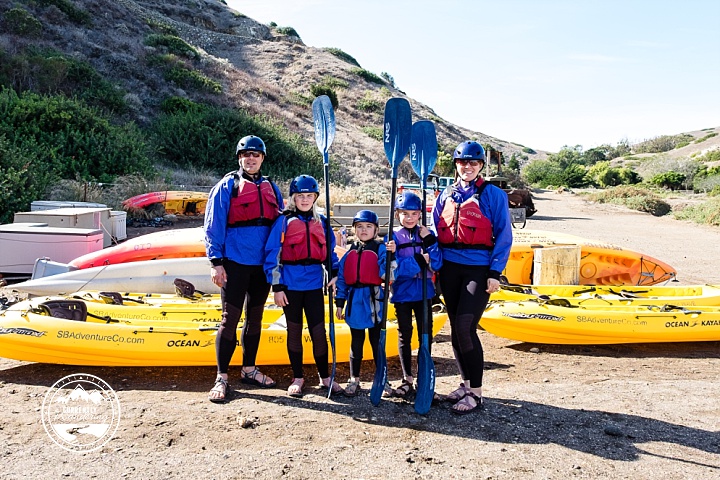
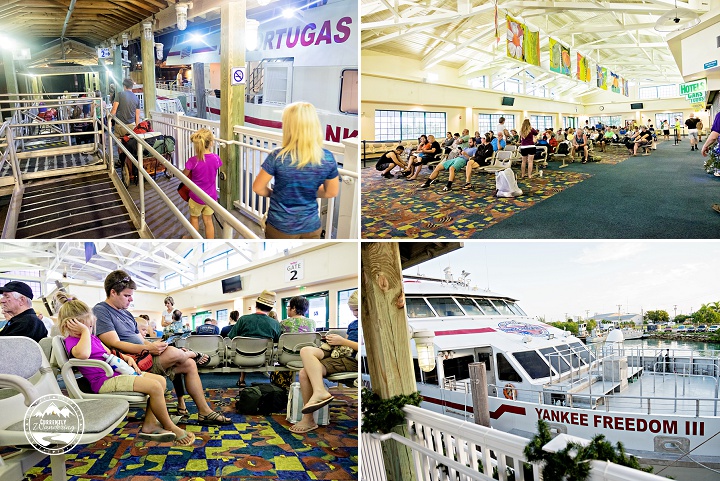
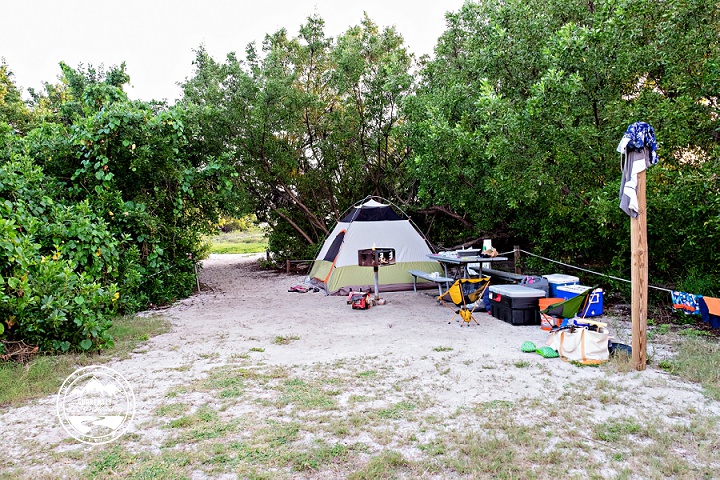
We walked down from the campground on Wednesday morning, and met our group near their equipment on the beach. Starting times vary as the ferry arrival isn’t super consistent. Many of the participants were coming over for just the day so we had to wait until everyone was unloaded. Totally not a problem.

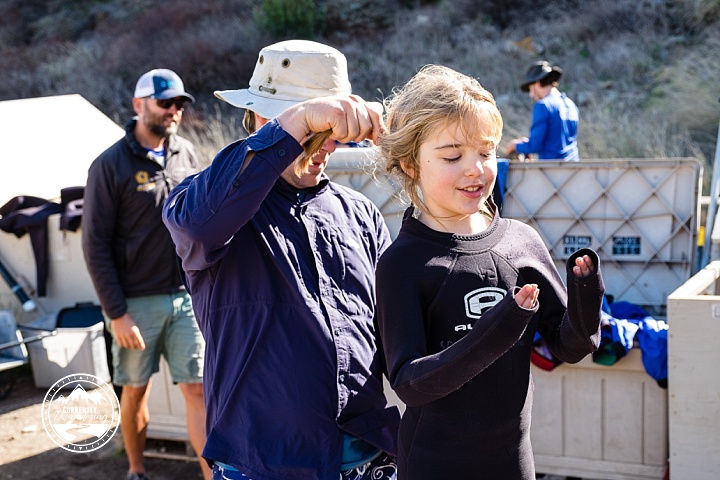
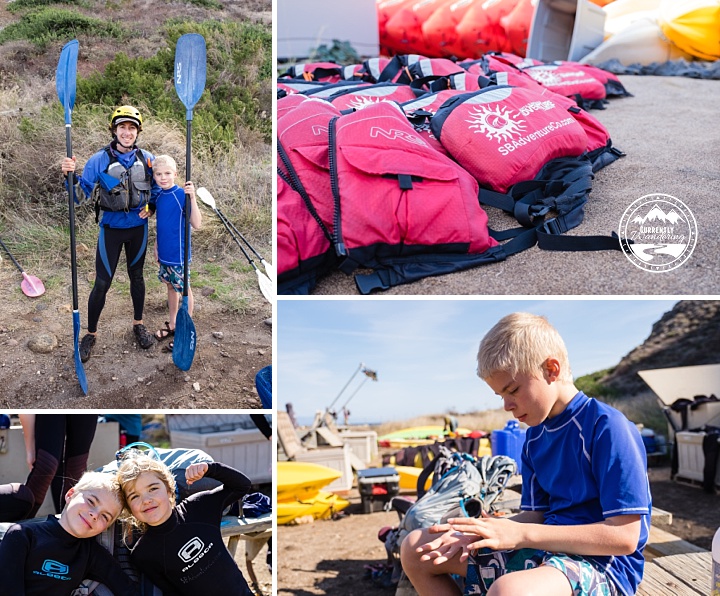
Before we hit the water, we outfitted in our suits, PFDs, and a good application of sunscreen. Wrestling kids into wet suits was a bit of a challenge for both them and us, but we all made it work. Our last major experience in the ocean was in Florida over Christmas, and water there was quite warm. Here in the Pacific the water is significantly colder so we opted for both wet suits and paddle jackets!

channel-islands-2016_40

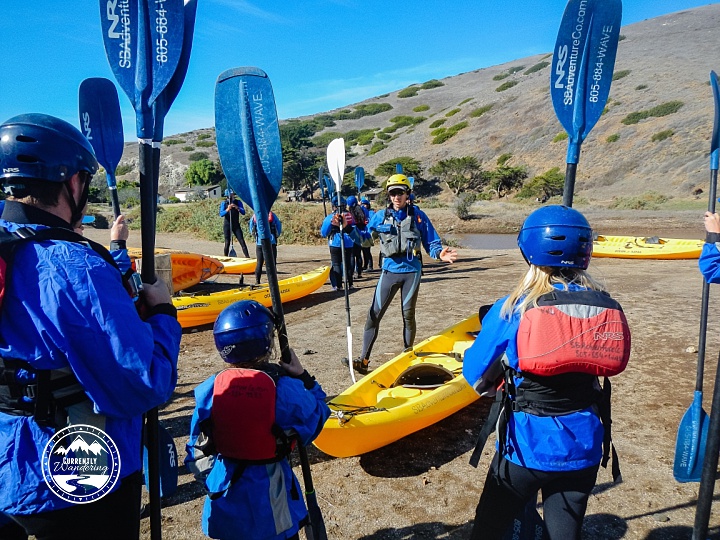
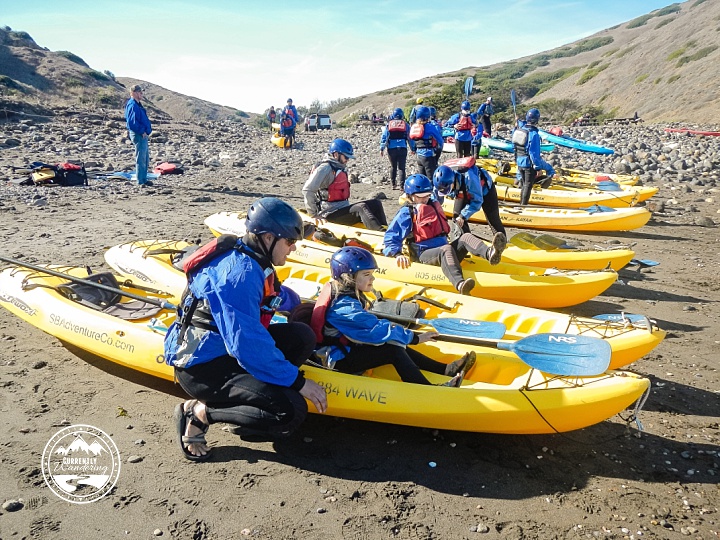
After gearing up, we had a quick safety talk. Our guides instructed us on paddle handling, how to get in the boat (rear end first, then swing your legs over!), and safety measures should someone fall out. The weather that morning was fairly windy, and I was grateful for our choice to work with an outfitter and for their attention to our safety. Our guides reiterated that if we weren’t comfortable we wouldn’t have fun and to let them know if we experienced difficulties!

channel-islands-2016_19

channel-islands-2016_38

Our guides specifically advised paying attention to our seat adjustment in the kayak. There are a set of straps that adjust the sitting position, and getting it right made a huge difference. Most of us got adjusted properly before launch, but Rachel needed some adjustment during our paddle. She was really struggle with leg cramps (and attitude!) and came close to the edge of a total meltdown. Our super attentive guide recognized her discomfort and managed her straps while on the water. While it wasn’t a fix for her attitude problems, we definitely solved the leg cramping and her spirits improved considerably!

channel-islands-2016_21

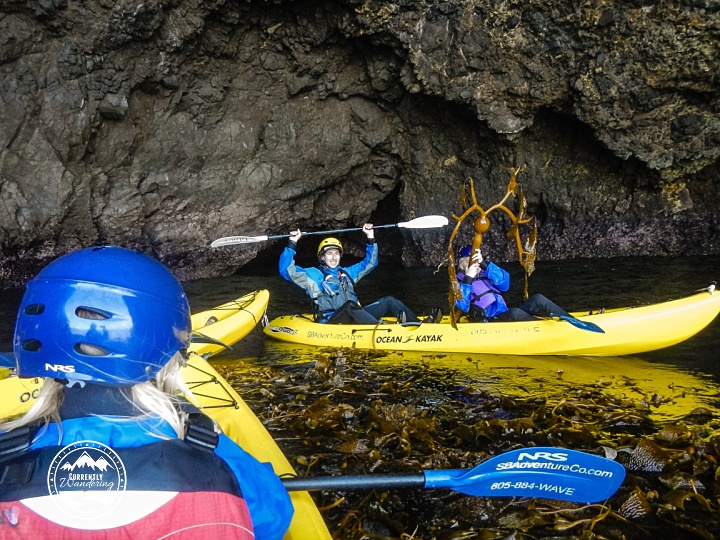
The kayaks are tandem kayaks and for good reason. During difficult wind or swell conditions it can take all the effort of two good paddlers to fight the waves. Sam is our strongest paddler, so he paired with 6-year-old Cara. I’m not the most amazing paddler myself, so Rachel came with me. Andrew joined a guide in a double kayak. He can be seen in the picture below, holding up a Giant Antler Kelp we found floating on the surface.

The main attraction to see around the islands are the sea caves at the bottom of the cliffs. We were able to paddle into and through several caves during our tour, and it was a great experience. We paddled along the edge of the cliffs to visit each spot, pausing in small coves to rest. On the first half of the trip, we were paddling against both the wind and the swell, and it was really challenging. Turns out you can also get a little motion sick while paddling a kayak through the ocean!

During our breaks, we listened to the now obvious advice from our guides and anchored ourselves to the kelp beds during our rests. By grabbing a handful of kelp, your kayak would not drift away, yet required no paddling to keep in place. Seriously genius.

Our guides talked to us about the island, the wildlife, how the caves were formed and other interesting facts about the area. I loved that our tour was not only physical exercise, it was informative as well. Two of the caves we visited were pretty large, but the last and smallest had fairly tight quarters. We entered one at a time and had just enough room to spin around and head back out. Only open at certain tide levels, the cave is called “Shark’s Teeth” and was definitely everyone’s favorite!

channel-islands-2016_36

It isn’t very obvious in the picture below, but the seas were pretty rough at points of our trip. At one point Jess and Rachel needed some help and accepted a temporary tow from one of the guides. Little Cara tried hard, but Sam was clearly doing most of the difficult work. At the halfway point of our trip, we had an opportunity to paddle past the point of the island to look down its length. This put us in full exposure to the stiff wind and oncoming swell

With guides present, we were able to be a little more adventurous. Sam and Cara paddled hard out beyond the point into the big swells, knowing that if they had some trouble guides were not far away. We also appreciated their knowledge of the sea caves, and which were safe to enter given the sea conditions and the current level of the water.

channel-islands-2016_22

We turned around and made it back across from the beach with about an hour and a half left in our time. Here we had the option to beach our kayaks, or to continue south and explore the other end of the island. We knew our kids were tired and it would be a paddle upwind to return, so we opted out. The rest of our group continued on but we were definitely happy with what we had accomplished.

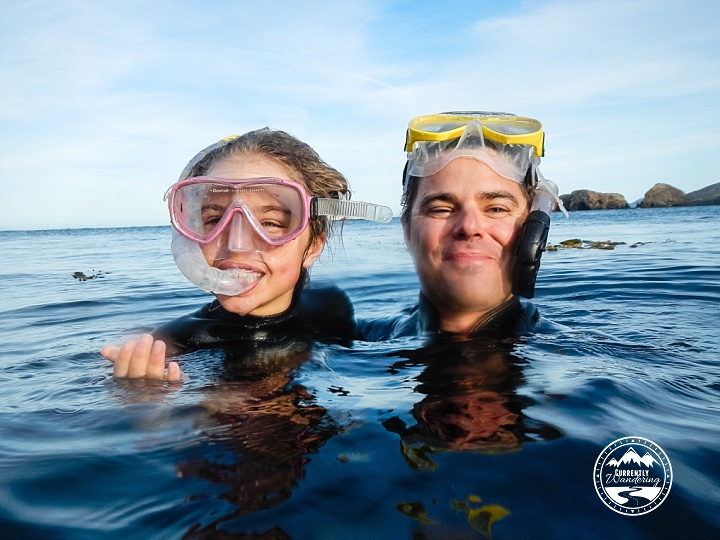
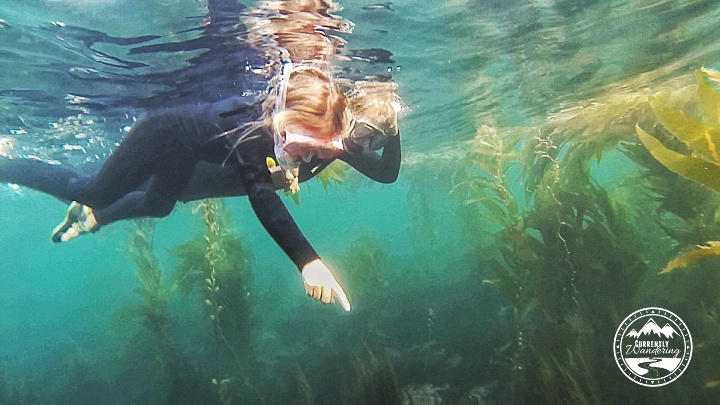
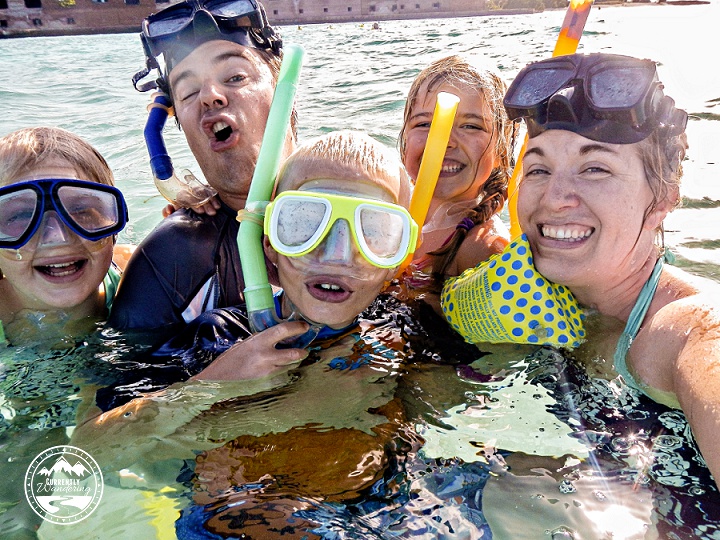
After stowing our kayak gear, Cara surprised us by insisting she wanted to go snorkeling. For no additional charge Santa Barbara Adventure Co will also provide snorkel gear. While Sam and I added a wet suit jacket to our sleeveless suits, our guide fitted the three of us with fins & masks. Rachel and Andrew, however, walked back to the tents for a rest claiming they were too tired for a swim. Apparently kayaking totally wore them out!

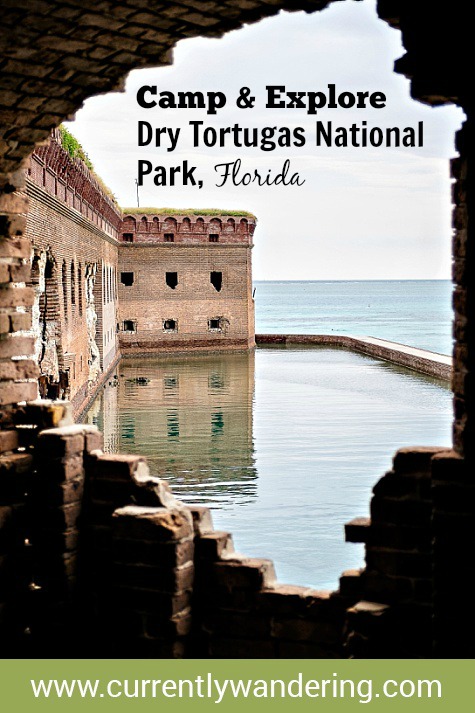
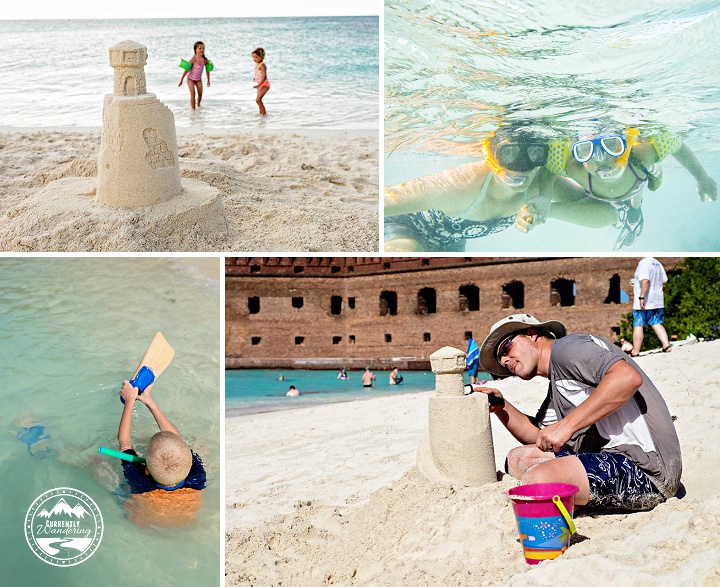
Cara didn’t last long, but watching her excitedly point out fish and swim through tall kelp was adorable! She seemed excited to have mom and dad all to herself and dove in like a champ. The kids all learned to snorkel on the Dry Tortugas last year, and apparently Cara liked it enough to go again. This time we had kelp beds instead of coral and it was fun to experience something completely different.

channel-islands-2016_39
channel-islands-2016_68

As a family we participate in a lot of outdoor adventure. From backpacking to mountain biking, or simple nature walks we regularly push our physical and mental boundaries. This kayak trip was definitely one of the hardest outdoor experiences we’ve had. That said, I’m so glad we did it! We felt completely safe and taken care of by our guides – which is honestly one of the best ways to push your limits.

If you head to Santa Cruz Islands in the Channel Islands National Park, definitely make the time for some sea kayaking while you are there. It’ll be worth it!

Categories
Backpacking Featured Destination Florida National Parks

Family Camping in Dry Tortugas National Park

Want to visit a remote, beautiful island on your next family vacation? Check out Dry Tortugas National Park! You can camp, explore, snorkel, and even earn a Jr. Ranger badge!

Dinner seemed to be running late, but since no one was paying any attention to the time, I’m not sure that it mattered. The kids and I were gathered around the picnic table reminiscing about our incredible day as Sam loosely monitored our sizzles sausages on the BBQ.

“Mom! Do you remember that really cool parrot fish I saw?” Andrew asks.
“Or what about purple coral?” Rachel chimes in.

We had spent all day snorkeling and playing in the water  in Dry Tortugas National Park – which is small group of islands located 70 miles off the coast of Key West, Florida. It is arguably the hardest National Park to visit as its only accessible by private boat, public ferry, or sea plane. The logistical difficulty only enhances its magical appeal. Crystal clear waters, coral beds, nesting birds, and a Civil War era Fort lead to plenty of exploration and excitement while visiting.

After dinner we set off to explore Fort Jefferson until the sun went down before laying on our sleeping pads listening to our audio book as we fell asleep exhausted from a day full of playing hard.

When We Visited:  Dec. 30, 2015 – Jan. 1, 2016

Ages of Kids: 5, 8, 10

Where We Parked the Airstream: There’s really no good option. All places to stay in the Key’s are expensive so we made a reservation at Boyd’s RV Park for Dec 29 – Jan 2. Since we had to get up so early for the ferry it was great to be close by, and we didn’t get back on the 1st until the afternoon and having a place to unpack and get settled back in the Airstream before driving the following day was also nice. I just wish it hadn’t cost us $100/night.

Choosing to camp in the Dry Tortugas may seem like a daunting proposition, but with a little preparation it can be one of the best experiences you’ll ever have as a family.

Camping Logistics

Book Early

The Yankee Freedom III  is the only authorized ferry concessionaire and takes out a limited number of campers per day (when we went it was 10). If you have a large group (or family) booking early ensures you can all go out at the same time. You can stay up to 3 nights which is well worth it!

Taking the Ferry

We had to have our gear at the dock ready to load by 6:30 a.m. Definitely early for everyone involved! They had carts available to haul our gear from the street to the ferry loading spot. Once we had our gear tagged and had a brief orientation by the captain we parked our truck in the nearby long-term parking and checked in at the office.

We only had to wait about 30 minutes in the lobby before they began boarding. An all-you-can-eat breakfast is included and available as you get on the boat, and it was delicious! Bagels, fruit, hard boiled eggs, cereal, toast, and yogurt. We definitely ate our fill!

Because breakfast was so large we wished we had gotten our free lunch on another day. Two large meals in one day was a lot.

DSCF2416

Primitive Camping

You have to take everything with you, including any water you may need for your stay. There are bathrooms aboard the Yankee Freedom when it is docked, and there are composting toilets for after it leaves/before it arrives.

There are carts to haul your gear from the ferry over to the campground, but its not a far distance if you just end up lugging everything over.

The National Park service has hard sided coolers you can use while on the island. During certain times of the year they occasionally have rat problems, so keeping things boxed up is a good idea. We keep a Costco soft cooler in the trailer, so we used that and transferred everything to a hard sided cooler when we got there to help drain off excess water and keep our food colder.

DSCF2487

For water we took our two Rhino water jug containers, three of our Platypus water bags, plus a dozen or so plastic water bottles. We had plenty of water and dumped out almost a full Rhino jug before heading back on the ferry.

Our campsite was fortunately protected from the sun…..and unfortunately protected from the wind. It was pretty hot and muggy at night and any kind of a breeze would have helped that! The sites on the other side of the trees closer to the ferry would have been perfect!

Watch the Weather

During our visit, the weather was quite warm, even during the night. Careful watching of the weather told us that it would be quite warm, with perhaps only a sprinkle or two. We didn’t pack any very warm clothes as a result of the conditions we expected. Neither Sam or I even pulled out our sleeping bags. We just slept on top of our sleeping pads.

The weather can be cooler, and you will want to be prepared. Plan ahead by seasonal forecast, and make any last minute gear adjustments as necessary within the last few days before your trip.

Gear

We have a hard sided Rubbermaid 35 gallon ActionPacker tub we keep in the truck with all of our backpacking gear. We emptied it out and filled the tub with food, charcoal, a 5 gallon bucket from Home Depot for making sandcastles, and anything else we didn’t want to risk getting wet on the ferry ride over.

We put everything else into black garbage bags inside our backpacking bags so if they got splashed we wouldn’t end up with wet sleeping gear. For a full list of our backpacking gear see our list here.

We also brought our compact camping chairs, swimming suits, and 2 swim towels to share.

Food

We went all out on this one. Since camping usually consists of hauling our gear on our backs and eating freeze dried food, having carts was a bit of a luxury. We brought supplies for tin foil dinners, BBQ’d sausages, ate deli pasta salad from Publix, made fry bread scones for breakfast on New Year’s Day, and munched on crackers, meat, and cheese for lunch. We even snuck in some Birthday Cake Oreos for Sam to celebrate his birthday on the 30th!

We definitely did not go hungry and probably brought way too much food.

DSCF2486

Using the self-light charcoal was not a big deal, and we even managed to boil water for oatmeal one morning using our wood-fed backpacking stove. We just shoved charcoal in there instead of sticks and it worked like a charm. We ended up buying ice from the ferry every day, and in the hard-sided coolers we had no problems keeping everything cold.

The ferry provides you one lunch on any day you are there. In hindsight we should have saved it for our last day, but we still survived. Lunch is available from 11am-1pm everyday and if you’d rather eat their food its all you can eat sandwiches, chips, cookies, and soda for $7/person.

Activities on the Island

Snorkeling

The ferry (and the seaplane) provided snorkeling gear for us to use for the duration of our stay. They also have flotation vests and pool noodles if your kids (or you!) need help staying afloat. We picked up the gear at the dock, and then we just kept it by our campsite. The kids started out pretty hesitant (especially Cara), but by the end they were all snorkeling like champs. We had trouble getting them OUT of the water.

Snorkeling turned out to be a fantastic family adventure!

DSCF2449-Edit-2

DSCF2524

The best snorkeling we found was either by the old pilings (south beach) or if you follow the line of the moat wall straight out towards the buoy’s there are some amazing coral beds. Its not very deep, and we were able to find spots for the kids to rest where they (or at least we) could touch the sand with our flippers.

Cara wore her arm floaties so she swam circles around us most of the time. The best snorkeling was before the ferry arrived in the morning and scared all the fish away, so it definitely pays to get up early at least one morning!

Take Pictures

The island is so small that you can experience both a sunrise and a sunset over the water. The Fort itself is quite picture-worthy from nearly any angle, and presents amazing opportunities both within the fort and from atop the fort walls. Bring a waterproof camera if you can, and document the amazing fish and coral you see while snorkeling!

DSCF2652-Edit

DSCF2663 DSCF2453 DSCF2458-Edit

Explore the Fort

The Rangers on the island have an incredible amount of historic knowledge about Fort Jefferson. We learned why it was built, who lived there, how the soldiers collected water, and even about the Cuban refugees that continue to show up on a semi-regular basis. At one point the fort was even used as a prison, housing Dr. Mudd who was imprisoned for setting the leg of John Wilkes Booth after the Lincoln assassination. The Park Ranger hosted two tours everyday and from what I gathered one was a moat tour looking at wildlife, and the other was about the fort.

Fort Jefferson is beautiful and definitely worth exploring on your own as well as on a tour!

DSCF2725-Edit

DSCF2469

Earn a Jr. Ranger Badge

We are advocates of the Jr. Ranger Program, but did you know that even as a adults you can earn one? Since the Dry Tortugas are a pretty remote spot, I think having a badge deserves some bragging rights. Its super short, easy, and well worth the effort.

DSCF2696

See the Stars & Explore in the Dark

The night sky out at the Tortugas is incredible. One night the Ranger Mike brought out his telescope and we got a look at some of the stars up close. He’s not an astronomer by any means, but we enjoyed hanging out with him and the other campers inside the fort after dark.

The next night, Sam and I snuck away after the kids were in bed and set up the camera for some long exposure photography. There are also bioluminsecent algae that live in the moat and surrounding water. If you walk the moat (carefully) while its dark you can see them flashing. Its incredible.

DSCF2592

Our friends from the Bareneckers took the opportunity for a quick dip in the water during their stay and actually swam among the flashing lights. We weren’t quite that brave!

Camping on the Tortugas for New Year’s Eve created opportunity for some fun light painting with glow sticks. Ashley Longnecker provided the glow sticks, and I provided the camera. Kids and adults alike had fun and it was a fun substitute for fireworks! Happy New Year!

DSCF2559

Get Up With the Sun

Playing hard all day and getting to bed early has its perks. Both mornings we were up before the sun and wandered out of the tent to find the sunrise. The first morning we were at the beach with the kids in their pajamas looking at washed up jellyfish. The second morning we hiked the stairs to the top of the fort to watch the sun come up. Both were magical!

DSCF2497-Edit

DSCF2644-Edit

Watch Out for the Hermit Crabs & Carlos the Crocodile

These guys are everywhere. Completely harmless (unless you try and pick them up and then you probably deserved to get pinched) they are fun to watch as they wander all over the island. Keep an eye out, and try and avoid stepping on them. I love how they come in all sizes, shapes, and colors. There are also a few other types of crabs on the island and we had fun watching them scuttle around. Thankfully our kids were not skittish and took it all in stride.

There’s a crocodile that lives in the moat surrounding the Fort. His name is Carlos and he’s pretty shy when it comes to people. After the ferry left we were wandering the moat wall and happened upon him lazily swimming. There is a pretty big gap in the wall where he could get out, but it sounds like he likes his living quarters!

DSCF2457

Our visit to the Dry Tortugas was amazing and memorable. While you can visit the Dry Tortugas on a day visit, we highly recommend saying a few nights. The additional cost is minimal and the experience is magical. Our visit happened to span the change of year. Sitting with our family on the moat wall, we watched an amazing sunset over the water as we discussed what an amazing year we’ve had. This experience was definitely one of our favorites!

DSCF2554-Edit

DSCN7046

Categories
Featured Destination Minnesota National Parks

5 Family Friendly Activities at Voyageurs National Park

Voyageurs National Park, Minnesota isn’t on the way to anywhere. You have to actually try to visit this northern Minnesota park and I had been looking forward to it for quite sometime. Our experience here was relaxing, fascinating from a U.S. History perspective and so much fun.  I’m so happy we spent the time to drive up and stay a few days.

This park is named after the French trappers who roamed the backwater lakes and rivers in large canoes transporting goods for various trading companies in the late 17th and early 18th centuries. The international boundary between the U.S. and Canada closely follows the voyageurs classic route along the park’s northern border. With plenty of paddling routes, islands, hikes, lakes, boat in campsites, and some of the most amazing park rangers I’ve ever met, this park has hit our list of favorites!

When We Visited: July 27-30, 2015

Ages of Kids: 9, 7, 5

Where We Stayed: There’s not a campground IN the National Park but there are two options just outside the boundaries. We stayed at the Woodenfrog State Forest Campground (review on Campendium) but there’s also the Ash River Campground at the other end of the park (Campendium link). The volunteer we talked to said that Ash River was more of an open field and hardly ever fills up.

We spent four days exploring this area of Minnesota and loved it. There are a few activities that take some advanced planning, but many you can do in a few hours. I’d recommend at least staying overnight (if not more) to get the most out of your time here. If we had been a bit more prepared with food and gear we would have been tempted to overnight out on the peninsula or on one of the islands!

Here are our top 5 suggestions of things to do in the park:

1. Participate in the North Canoe Program

We drove into the Kabetogama Visitor Center our first drizzly morning to get our Jr. Ranger Books and were a little surprised to see rangers dressed in odd clothing come out of the backroom and start talking in French accented English. I was fascinated and we hung around long enough to enjoy the ranger program and learn a few things about the park.

Voyageurs National Park_05

The kids and I loved it so much, we opted to drive (with Sam this time) 45 minutes down to the Ash River VC to try and participate there the following morning. As a participant in the North Canoe program, you are a prospective Voyageur and are given a rundown of your responsibilities, attire, and on a good weather day – you pile into the canoe with 10 other people and actually paddle. Unfortunately, it was still too stormy to paddle, but the programs were different enough that although we did it twice it was still a lot of fun.

Voyageurs National Park_08

I would definitely call ahead and schedule this if you know the dates you will be there. The Visitor Centers do the program on different days of the week, so make sure to check their schedules. Kabetogama ScheduleAsh River, Schedule Rainy Lake Schedule

2. Go on a Hike

The best hikes on the mainland are down by the Ash River Visitor Center. The rangers told us both the Blind Ash Bay and Sullivan Bay Trails hike out to great overlooks. We opted for Blind Ash Bay as it was a little longer and the ranger said they had recently seen some wild blueberries and raspberries along the trail.

Voyageurs National Park_18

It was probably the slowest 4 miles we have ever hiked due to our frequent stopping to pick the delicious fruit. The scenery also reminded me a bit of the Pacific Northwest with a mix of birch and pine trees, plus some ferns and mushrooms growing in the shade. We loved it.

Voyageurs National Park_19

If you take a water taxi over to the peninsula (there’s a list of commercial services in the Park Newspaper) Locater Lake sounded like a great option as a 4 mile out and back to the lake. If you are super adventures, reserve a canoe from the visitor center before you leave and paddle around Locator Lake once you’ve hiked out there.

3. Stay in a Campground

We stayed in the Woodenfrog State Forest Campground on the mainland, but there are also quite a few back country sites – both on the peninsula and on the islands in Lake Kabetogoma. You need a permit for any of them (and a water craft to get you there), and I imagine some are more hard to schedule than others. We did check out one of the canoe-in sites on an island and it was pretty awesome. My kids said they were ready to move in, but we
‘ll save that for the next trip!

4. Earn a Jr. Ranger Badge & Make a Necklace

 The Voyageurs Junior Ranger badge was fairly easy and fun to do. Both my older kids were able to complete the book on their own, and Cara had an easier book that was perfect for her age level! As a bonus you can also earn the Night Explorer Patch – just ask at the visitor center for the separate book (we earned ours last year in Cedar Breaks National Monument in Utah).

Both visitor centers we visited had great kid’s stations with coloring, bead necklace making and other activities. Our kids even made necklaces and gave them to the ranger & volunteers as a thank you for the awesome program!

Voyageurs National Park_15

Voyageurs National Park_13

5. Get Out on the Water

Voyageurs National Park is mostly used by those in a boat. We saw SO many vehicles with boat trailers in every parking lot. There are houseboat campsites, lots of fishing, tour boats, rental canoes and kayaks – you name it! We rented canoes from Arrowhead Lodge & Resort which was just down the hill from our campground. We went early in the morning as the wind was going to pick up later – but it was still a bit of a difficult paddle. Despite the wind, we thoroughly enjoyed paddling out to the islands and exploring the campsites.

Voyageurs National Park_21

Voyageurs National Park_22

Also- we found out that the park service rents canoes on some of the inland lakes on the peninsula! We thought about taking a water taxi over to Locater Lake (about a 2 mile hike in) and renting a canoe there to paddle around, but opted for the closer paddle around the islands instead. You reserve the canoe at the visitor center and they give you a key. Once you get back, you just turn your key in! How cool would that be?

This park has so many amazing possibilities for exploration and learning about history. My absolute favorite part was the interactive North Canoe program – I feel like we learned SO much about the Voyageurs. These were truly amazing boys & men that worked long, hard days paddling and transporting goods up and down these northern rivers. Forever we will always remember that as Voyageurs “You must protect ze goods for ze compan-e!”

Road School Add On: I’ll give a bonus #6 just because I’m that in love with this National Park. In the Visitor Center we were introduced to these two books:

the broken blad

Broken Blade is a story about a boy who becomes a Voyageur after his father dies. As part of their road schooling I told my kids they had to read The Broken Blade and now they are begging to read Wintering as well. There’s a Kindle Version of the first, but I think we are going to have to order a physical copy of book #2. (Amazon affiliate link)

We are also planning a trip up to Grand Portage National National Monument when we hit the North Shore of Lake Superior. Grand Portage was the meeting place for the Voyageurs to exchange goods from the east for furs from the west, and apparently they had quite the party. I can’t wait to see more of the Ojibwa Native American side to this part of history once we get there!

Categories
Featured Destination National Parks Oregon

Visiting John Day Fossil Beds in Eastern Oregon

John Day Fossil Beds_09

Eastern Oregon definitely gets less press than its beautiful counterpart – the coastline. The geography is very different, and luckily for us, so was the weather. After Halloween in Lincoln City (2014) we knew we needed to get out of the rain or we’d go crazy. A rather intense couple of driving days took us through Salem to Bend, to Prineville, and on to the Painted Hills Unit inside of John Day Fossil Beds National Monument.

When We Visited: November 3-4, 2014

Ages of Kids: 9, 7, 4

Where We Stayed: There is no place to camp IN the park. This one of the only parks we’ve done a drive through with the Airstream. We mostly just planned to have Sam take the day off work (except for a lunch meeting) and we left early from Prineville to the Painted Hills Unit, then the Visitor Center in the Sheep Rock Unit. Once we were done, we then drove to Clyde Holliday State Recreation Site, arriving after dark. The park was peaceful and we would definitely recommend staying there!

John Day Fossil Beds_06

Inside of the John Day Fossil Beds National Monument there are three different units: The Painted Hills Unit, the Sheep Rock Unit, and the Clarno Unit. Which you visit is largely determined by your vehicle type, and how much time you have as they are pretty spread apart. We had seen photos of the Painted Hills, so for sure that was on our list and then we needed to hit up the Thomas Condon Paleontology Center in the Sheep Rock Unit to get our Junior Ranger Books.  We decided to save the Clarno Unit for a later visit since it was farther out of the way.

The Painted Hills are an impressive geological collection of varying layers of rock and clay. The reddish color had a pretty sticky, mud like consistency which was unsurprising since it had been raining. However, it IS clay so I imagine it is always a little sticky.
John Day Fossil Beds_07

In addition to the short Painted Cove boardwalk hike that takes you up close and personal to the clay, there’s also a few overlooks with views like this one:

John Day Fossil Beds_20

We also drove into the unit a little farther and hiked the short Red Scar Knoll Trail, which ended at this huge pile of yellow and red clay.

John Day Fossil Beds_11

After leaving the Painted Hills Unit, we stopped a few miles down the road where we actually had cell coverage so Sam could make his work meeting. While he worked to the pay the bills, the kids and I whipped up a quick lunch. I love traveling with our refrigerator.

After that it was about an hour drive to the Thomas Condon Paleontology Center in the Sheep Rock Unit. We picked up our Jr. Ranger Books and then hung out in the children’s room for a bit while they worked on their school for the day

Since it was already afternoon and we didn’t have a ton of time, the ranger recommended hiking through Blue Basin on the Trail of Time. It was spectacular! I have never seen anything like these blue hills. It kind of reminded of us Bryce Canyon – only a different color. The kids were particular fascinated by the small GREEN creek running out through the canyon. The minerals from the rock seep into the water, and it had an almost paint-like consistency. Andrew had fun throwing rocks in and watching them spash!

John Day Fossil Beds_24

John Day Fossil Beds_30

John Day Fossil Beds_36

On our way back to the Paleontology Center, we stopped by the Historic Cant Ranch to see how a family used to make their living in this canyon raising sheep. The Ranch is well done and super informative. There were signs everywhere about the type of equipment they used for farming, how they sheared the sheep, and generally what life was like on a ranch in the early 1900’s.

John Day Fossil Beds_44

Lastly, we stopped back by the Visitor Center to finish up our books using the displays, and to pass them off with the ranger. Our kids got to wear ranger hats while they were getting sworn in. This was a first for us, and I don’t think any of the kids found them very comfortable!

John Day Fossil Beds_49

Although we didn’t see everything, I felt like we developed a good appreciation for this park and what makes it special! We would definitely go back and would love to see the the sections of the park we missed. John Day Fossil Beds National Monument in Oregon is definitely a must see!

Categories
National Parks Washington

A Soggy Day at Mount Rainier National Park – Washington

A Soggy, yet beautiful day spent at Mt. Rainier National Park in Washington!

We’ve been excited to visit Mt. Rainier National Park as such an iconic volcano definitely needed a wander. Unfortunately, the perfect storm of off-season, incomplete planning, and, well, RAIN, landed us in a possibly less than ideal situation.

When We Visited: September 23-24, 2014

Ages of Kids: 9, 7, 4

Where We Stayed: Ohanapecosh Campground

From Puyallup, we drove north on the 410, and then State route 123 down the east side of the park. Our target was the Ohanapecosh Campground, situated conveniently close to the Ohanapecosh Visitors Center since we planned to earn another Junior Ranger badge during our stay. This situation seemed ideal. It rained on us a bit on the way out of town, but as traffic cleared, the rain did too, and we had an enjoyable drive all the way to the campground.

Compared to our drive, our arrival was less the ideal. As we pulled up to the campground registration, we realized that the conveniently located visitors center was closed. Not only was the center closed for the DAY, it was closed for the SEASON. No Junior Ranger Badges here, folks. After finding the dump station (which made the Most Scenic Dump Station Ever list) and a site, we talked over our options. We could drive down the crazy, windy road to the other campground (didn’t sound fun), or just camp here and drive the truck in on a day trip the following morning. The latter option won out and we settled in with our hot chocolate for a night full of rain.

Mount Rainier NP_43

It rained. And rained some more.

We woke up to some German Pancakes, then packed a lunch and headed out in the truck for a day of adventure. Since there was no internet signal available, we turned a Thursday into a Saturday and I took the day off work. Some quick investigation after we arrived confirmed that the only visitor centers still open were on the other side of the park, so we drove the Stevens Canyon Road to the Paradise Visitor’s Center. Along the way, we paused for pictures in Stevens Canyon, which treated us to beautiful views of the landscape decorated with clouds low in the valley and wonderful fall colors.

Mount Rainier NP_44

Mount Rainier NP_01

Mount Rainier NP_05

As we drove along, we noticed two soggy backpackers along the side of the road. They looked at us so hopefully that we just had to stop and pick them up. They had traveled from Idaho to hike in the back country, and had enjoyed it up till last night’s constant rain. I couldn’t resist helping, and we managed to squeeze them in the truck by having both Cara and Andrew buckled in the front bench with us. Luckily there were no rangers in sight. We dropped them off where the road forked and wished them well on their journey!

The Visitors Center at Paradise is a beautiful building. Built like a lodge, there are exposed beams and iron work. The entire lobby is pretty open with huge windows that (I assume) provide majestic views on sunny days. We picked up our Junior Ranger Books,  and then sat down in the theater for a quick movie about the park. The plus side of an overcast, rainy day was the lack of crowds so we spread out in the lobby and worked on the kids’ Jr. Ranger Books. We managed to time a short hike during a brief respite of the rain up to Myrtle Falls and then ate lunch inside on the picnic tables (you can tell they have inclement weather often). Overall, we managed to have a pretty good day!

Mount Rainier NP_06

Mount Rainier NP_13

On the way out, we managed a quick hike along the Nisqually Glacier overlook trail for some great views of the blue ice.

Mount Rainier NP_27

And, of course, the puddle jumping.

Mount Rainier NP_39
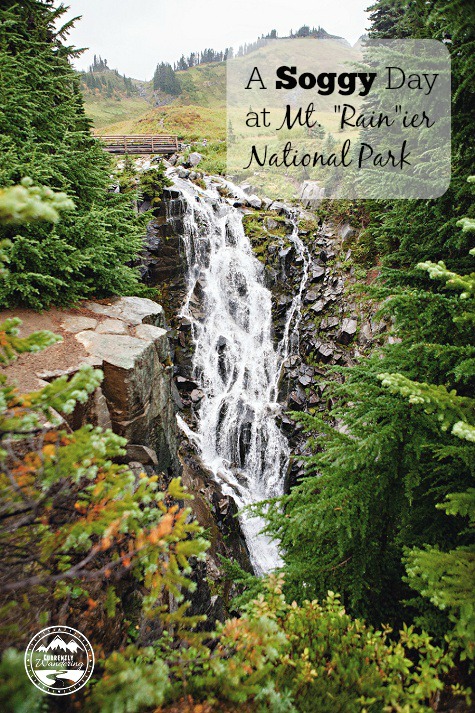
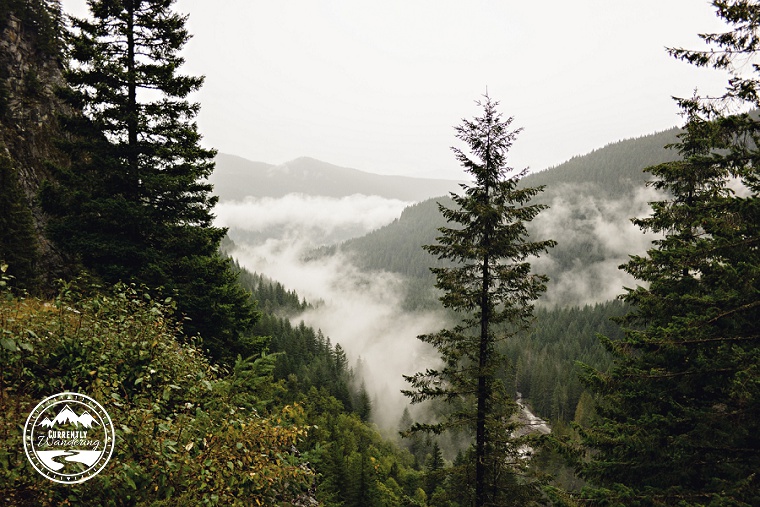
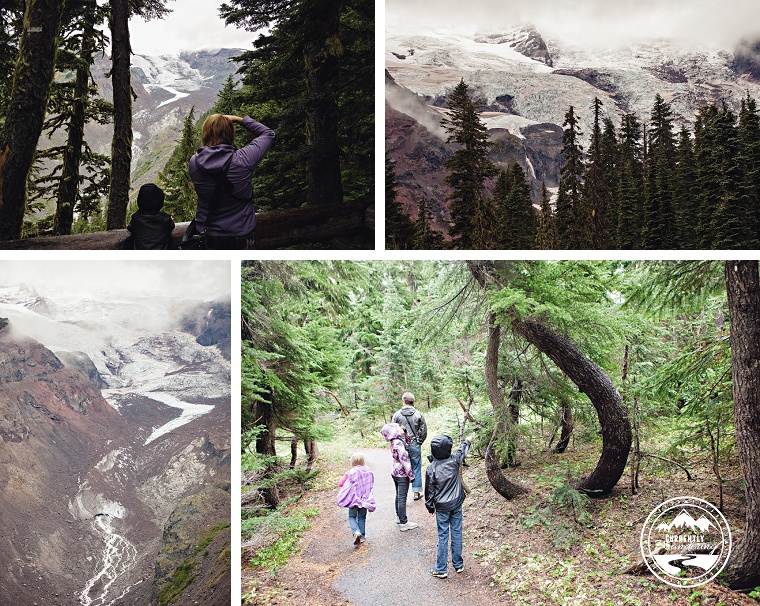
Unfortunately, the clouds never broke, and we didn’t get a view of the mountain top. Despite our visit to the park, the best view of the mountain we had was from Tacoma, a few days earlier. Even with the rain, we had a great time. We discovered that there are quite a few activities in the park for kids, so we’ll be sure and return.