Categories
Airstream Meetups

Airstream Meet-Up: AudreyAirstream

Through Instagram we realized that Heather & Jeff of Audrey Airstream would be in Napa, California the same time as us! After visiting with Sam’s family in the area for almost two weeks, we were just about ready to head back across Nevada to take care of the Utah house. Knowing they were coming into town, however, we extended our stay by just a few days in order to overlap. So glad we did!

Who Are They: Heather, Jeff, and their Airstream named Audrey

Website: AdventureswithAudrey.com

When We Met Up: April 2014

A Little About Them: Heather & Jeff were on a 2 month trip around the western US during a break from working. They both had just quit their jobs and were taking a break before heading back into the work scene. They hail from Las Vegas, NV.

Hiking in Napa_004

After a few back and forth emails with Heather about where we wanted to meet up, I finally had the  idea to go hiking in the Skyline Wilderness Park where we were staying. Jeff is a avid hiker, and I know that Heather often tags along (although she says she can’t go as far as her husband!).  We picked a trail with some potential views of the city and had a great time. I was SO impressed with Jeff and my kids. Andrew talked his ear off about everything under the sun and Jeff amazed Rachel with his grass eating skills. I’m now convinced that if I ever need my kids to hike without whining we have to take Jeff with us. They still tag rocks and yell “Switchback!” when turning sharp corners.

Hiking in Napa_007

Afterwards, we hung out for a bit at the Airstream and ate Triple Berry and then Mango & Pineapple Sorbet. Yum!

Hiking in Napa_008

We are so grateful to have met this amazing couple! Part of the reason we LOVE traveling (and in an Airstream to boot!) is the amazing community of people that we associate with. We haven’t met anyone that wasn’t gracious, willing to help with anything, and amazingly nice and good with our kids. Plus, when they come bringing Annette’s Chocolate you just know you are bound to be friends. 🙂

Hiking in Napa_010

Categories
WanderLog

Exploring Southern Utah State Parks

Travel Dates: May 17 – 23, 2014

We finished up last weekend at Fremont Indian State Park by exploring the underground Pit House, visiting nearby Historic Cove Fort, and even taking the kids on a 5 mile bike ride.

Next we headed to Sand Hollow State Park with a beautiful reservoir, red rocks, and fun wading in the water. The kids even convinced us to rent a kayak one evening for a paddle out on the lake.

After a day doing laundry, grocery shopping and playing at the local splash pad while Sam worked we packed up and headed to Snow Canyon State Park to meet Jess’ family for the Memorial Weekend holiday.

This Week on Instagram May 17-23 2014

Categories
California Featured Destination National Parks

They Don’t Make ‘Em Like They Used To – Point Reyes National Seashore Lighthouse

SAMSUNG CSC

Imagine yourself out at sea on a small boat. Suddenly dark clouds gather on the horizon and the wind starts to whip your hair around your face. Moving too fast, the storm envelopes you and suddenly you aren’t sure which way is the shore. Then, a beam of light from the nearby lighthouse cuts through the storm giving you direction and guidance back to safety.

American lighthouses are iconic. From the sweeping coasts of New England, to the rocky shores of California, lighthouses have saved hundreds of lives as they’ve warned sailors of dangerous shores. Point Reyes is no exception. Jutting out on a peninsula just 10 miles from San Francisco Bay, Point Reyes is the windiest place on the Pacific Coast and the second foggiest on the North American continent. It is also my favorite lighthouse we’ve visited to date.

When we visited: March 2014

Ages of Kids: 8, 6, 3

Tips: The drive out to the lighthouse is not a short one (40 min to an hour depending on where you are staying), but is beautiful nearly any time of year. The road can be a little rough, though any standard passenger car should be able to make it, and certainly any tow vehicle. While there always seems to be an RV parked out there, I would advise against it. The weather can be rough as well. If the winds are strong enough, they close the stairway down to the lighthouse. Even when it’s open, it is worth bringing jackets to survive the weather.

Because there wasn’t a good location for a lighthouse on top of the bluff, engineers blasted a level spot 300 feet below the top of the cliff. This put the lighthouse below the level of the fog, making the light more effective as a warning system for ships. Supplies and materials for construction took 6 weeks to lower down from the top. Luckily, we didn’t have to be lowered by rope. Long ago, stairs were built into the side of the cliff, allowing visitors to travel down to see it.

Point Reyes Seashore_037

Retired in 1975, the National Park Service maintains the historic building and surrounding area and even has a ranger on site (and inside) the main room. Andrew was insistent he wanted to go inside, only when we arrived the door was very visibly locked. As we wandered around, ate our snacks, and generally tried not to get blown out to see by the gusty wind we noticed just as we were about to leave that the door was open! Andrew raced excitedly raced ahead only to find a room crowded with people and a ranger given a “tour”. Much to his disappointment he had to be quiet and not step on anyone else in the room. Poor kid.

We loved hearing the ranger talk about the lonely and secluded life of the lighthouse keepers, the operation of the lighthouse, how the Fresnel (frey-nel) lens was made in France and then brought over, transferred ships, and then brought by ox cart overland. We learned that the lighthouse and all of its parts are original. Many retired lighthouses have been converted into museums, have replicated parts, or are now restaurants. This one is completely original which adds to the romanticism of it all.

Point Reyes Seashore_042

Keeping up with safety and technology, the Coast Guard eventually automated the light, and then later decommissioned the lighthouse entirely and  installed an LED light on top of the nearby generator shed. Yup, that’s it. That tiny thing poking up from the roof with the solar panels attached. For me, having lighthouses reduced to small blinking lights makes original lighthouses like this one a real treat! If you are a lighthouse person, you’ll love it. If you are not, you might just become one during your visit!

SAMSUNG CSC

In addition to the lighthouse, the view out at Point Reyes is simply fantastic. After our climb back up the stairs, we took a small trail at the top to look out over the ocean and bluffs. Despite the wind and the cold it was a great day!


&nbsp

Categories
Bedroom Remodel Most Popular Posts

Airstream Remodel: Queen to Twins Part 2

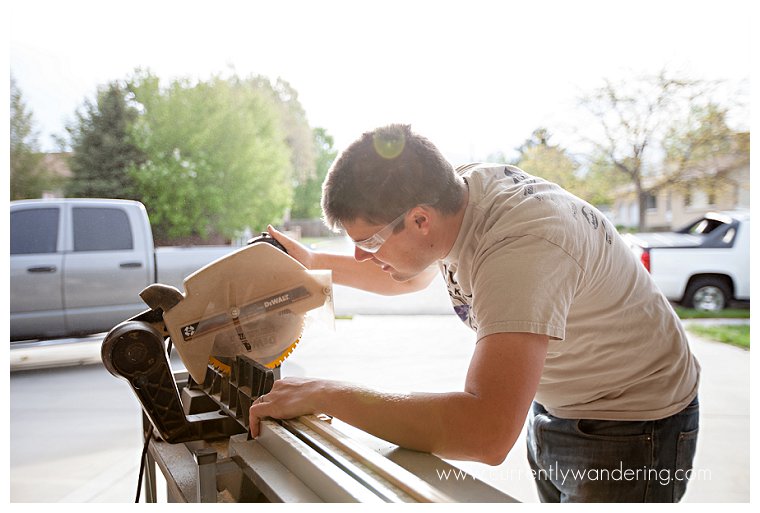
In Part 1 of this post, we removed most of the queen, , and cut the bottoms and the tops of the beds to fit the space we needed. Now, to build the rest of the beds! Before we dive in, please enjoy this shot of me looking manly at the miter saw.

Queen to Twin Part II_009

We were very lucky in this project to have my Father, Paul, out to help for a few days. He modified a needed trip to Salt Lake City to squeeze in some help for us, and we are grateful! The project progressed much better, and faster, then it would have without his help.

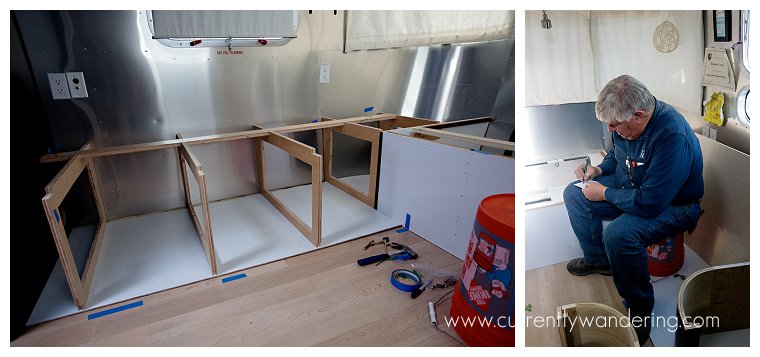
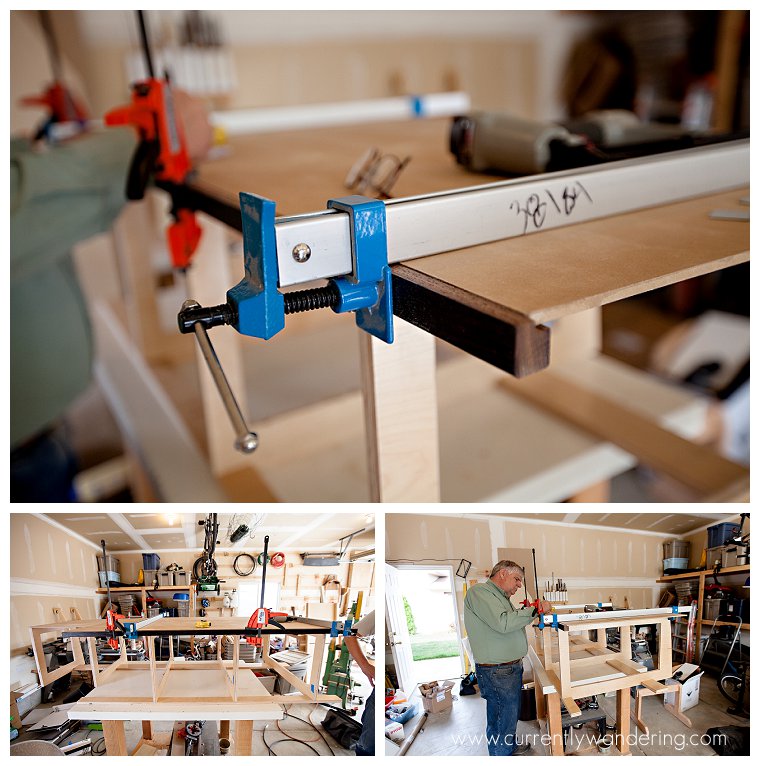
Our first order of business was to cut the vertical supports for the beds. We used 3/4 inch prefinished maple plywood for these pieces. We cut out the main supports for both sides at the same time, batching parts of the process where it would help. Our plans involved several notches to allow for trim, support in the front corner, and the hinge of each bed.

We removed the centers of each support to save weight, and the savings added up. I weighed the removed centers, and it was roughly 50 lbs of weight that would NOT be added to the Airstream. The removed middle weighed more then the surrounding piece! I relied upon the engineering knowledge (and extensive experience) of my Father to leave the right amount of material to provide the necessary support. The straight lines of the middle pieces were plunge cut with a skilsaw, and the corners finished with a jig saw. We routed the inside edges to make storage access a little less sharp.
Queen to Twin Part II_001Custom work requires lots of custom fitting. We scribed and cut the back of each piece to fit the curve of the Airstream. Note the blue tape visible on the leftmost support: each piece was fit and placed in order. You can see a temporary support attached where the bed hinge will be placed, as well as the empty front notch of each support.

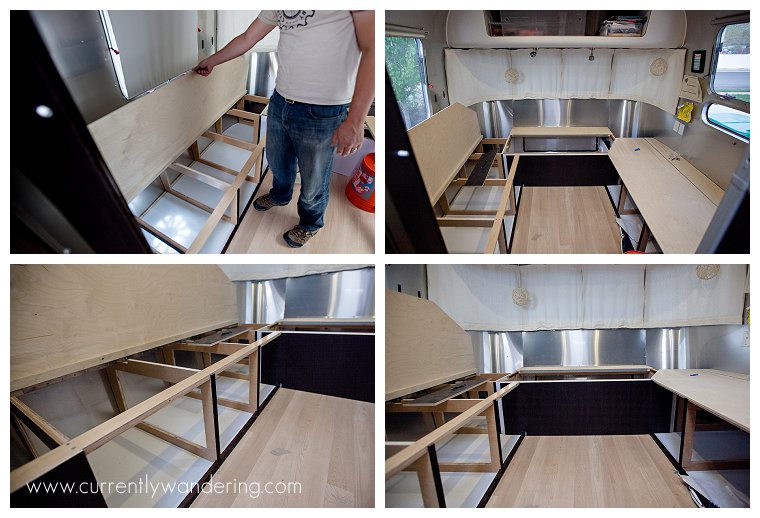
The beds were formed by attaching the bottom 1/4 melamine to the vertical supports with screws. This allows the entire unit to be carried in and placed in the right spot as a single unit. This picture was taken during a test fit.
Queen to Twin Part II_006

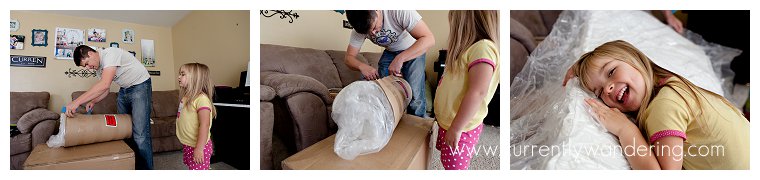
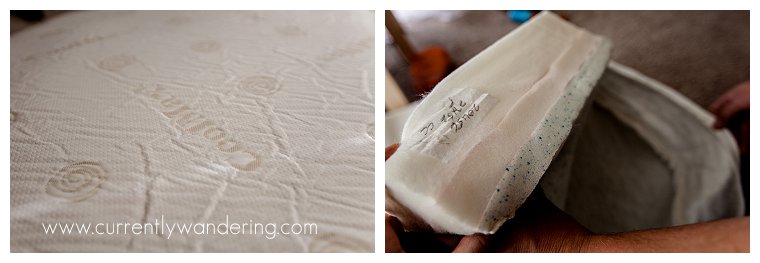
In the middle of our workday, our previously ordered mattresses arrived. Each mattress was ordered the right size and shape to fit into it’s place. The mattresses arrived with all the air removed. As we opened the packaging, the foam began to expand to it’s proper shape and thickness.

Queen to Twin Part II_010Queen to Twin Part II_011

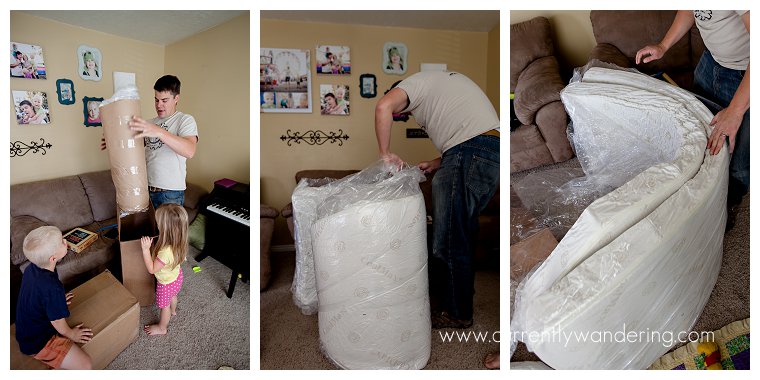
We spent a little more than minimally necessary, and bought a three layer mattress: memory foam, air foam, and then a sturdy foam on the bottom. I’m sure they have more formal names, but that’s what we are going with for blogging purposes. They are comfortable, and we like the zippered covers they came with. The mattresses were purchased from mattressinsider.com and cost roughly $900 for all three, custom cut from our previously made templates, and shipped. As a side note, we are extremely happy with this company. They have great customer service, walked Jess through all of our options and made recommendations. They even saved our templates should we want to order custom mattress protectors or sheets!

Queen to Twin Part II_014

We decided in the middle of the first day that some trim would finish out the job nicely. I had planned on using some gel stain on some oak or poplar to match the wenge interior (dark wood) on our International CCD Airstream, but hadn’t done the purchasing yet. We took a break and drove up to MacBeath Hardwood in Salt Lake City an bought a 5 foot piece of 4/4 wenge to use as trim. At over $22 a board foot, wenge is not cheap, but you’ll see later that it was worth it.

Working that wenge was a joy. We cut off just the segments we needed (note the DARK sawdust on the garage floor) and planed it down to the desired size. One coat of finish was all it needed, and we let it dry overnight.

Queen to Twin Part II_003

The next morning, we began the final assembly of the first bed, including cutting and installing the lower trim piece you see in the picture. This piece hides the front edge of the 1/4 melamine bottom, and sticks up enough to prevent the storage bins from sliding out from under the bed while towing.

Queen to Twin Part II_008

The bottom trim was secured with finish nails and brads, both through the bottom and into the 3/4 vertical supports. You can also see here that we had finished the mdf bottom of the 1/4 melamine as a moisture prevention step. Time will tell if that was enough.

Queen to Twin Part II_018

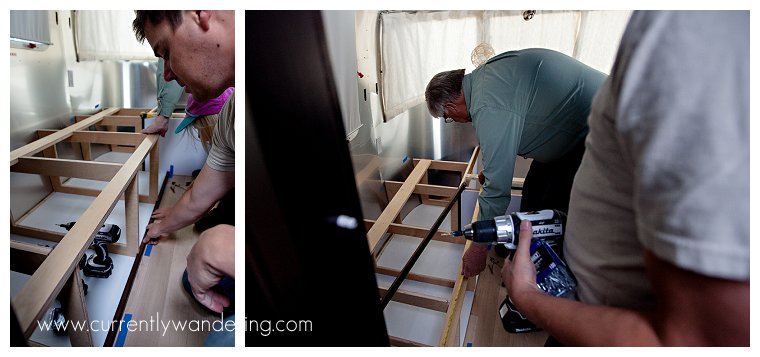
After the first bed was in place, we made quick work of the second bed for the other side. We cut and mounted the hinges to the 3/8 baltic birch plywood bed top, and secured them in place. The back of the bed top was secured to the vertical supports to hold those corners in place, and the front corner was supported with a strip of 3/4 maple. In addition to the bottom trim, each 3/4 vertical support received a piece of wenge trim to hide the front edge of the plywood.

The last major piece shown here is the covering of the white panel you see in the first picture, just behind the orange bucket. That melamine plywood was part of the original queen, but that piece was under the middle of the bed, and not visible. It was glaring white and ugly. When we removed the queen, we removed the end tables as well. Each end table had a section of wenge veneer plywood that we reused to cover the end. We cut the usable sections of the plywood, then used biscuit joints (unglued) to align the edges together. We screwed those panels in from the inside of the storage compartment. The seam between the two panels is nearly undetectable, and the finished effect is perfect.

Queen to Twin Part II_022

Between the wenge trim on the beds, the wenge panels at the end, and the relocated heater vent (not shown), it is very difficult to tell where the original work ends and the rework begins.

You’ll notice that the beds in the pictures do not yet have gas springs as a lift assist…. because I have not yet installed them!

Continue reading Part III!

Categories
Featured Destination National Parks New Mexico

White Sands National Monument, New Mexico

White Sands New Mexico_020

Layer upon layer of gypsum sand scattered across miles of sweeping dunes. With promises of sledding and fun we excitedly geared up for an afternoon of exploring.

When we visited: January 23, 2014

Ages of kids: 8, 6, 3

Tips: Plastic bottomed boogie boards work really well as sleds.

“Mom? Is that snow?” One of the kids called from the back seat. “It sure looks like it!”

And it did. There was a even a plow.

The kids had begged and begged all winter to go someplace with snow. This was their first year away from Utah’s snowy, wintery, weather and I think they were feeling the lack of powdery goodness. However, with a promise of  “sanding” at White Sands National Monument, I think we kept them more or less at bay.

When we arrived mid-morning, it was cold enough outside that we bundled up. Coats, scarves, hats, and even gloves were employed to combat the New Mexico chill. Once the kids stepped out onto the crisp, white, sand however, all thoughts of shoes were forgotten. The ranger had even told us to make sure we took our shoes off to feel how delicate, fine, and soft the sand felt compared to the beach. Having just come from Florida a few months earlier we definitely wanted to make that comparison. The shoes never made it back on.

White Sands New Mexico_013

Cara was content to sit and play with her sand toys, not really interested in the activities of her older siblings. Somehow Rachel became determined that Cara needed the experience of coasting down the white dunes, and gently prodded, coached, and enticed her on to the front of her boogie board turned sled. And then halfway down, Andrew had to jump on the back as well.

White Sands New Mexico_009

After a few minutes of play, I retreated to the Airstream to make grilled cheese sandwiches for lunch while watching the kids out the kitchen window and listening to their screams of delight through the cracked door.

White Sands New Mexico_006

Although we did one short hike, earned a Jr. Ranger Badge, and even met up with the coolest British traveling family, sanding was definitely the highlight of our visit.