Categories
Featured Destination Florida National Parks On the Water

Canoeing Nine Mile Pond in Everglades National Park

Canoeing Nine Mile Pond in Everglades National ParkVisiting the Everglades has been a travel goal for some time. Despite setting a goal to make it there, we had somehow managed to not spend much time researching our options.

We planned to spend a few days there in our usual slow travel style. Our early research indicated that we should get good verizon service at the Flamingo campground, and that would provide the needed opportunity to work.

Upon arrival I set about trying to configure my assortment of antennas and booster technology to secure the expected signal. Try as I might, I could not manage any usable signal. A few tests from the truck (also outfitted with a booster) in sections of the Flamingo area also failed to find a usable signal.

Without good signal, our visit was going to be much shorter. Our real goal of the visit was to get out and experience the everglades from a boat. There were boat tours available, but what really interested us was a canoe rental. Rentals were available right there in the marina, but also at a lake back up the road called Nine Mile Pond. This pond contained a canoe trail marked by poles along the way, and promised paddling through mangrove forests as well as the open glade.

We picked this option, and set about making it happen. We ended up renting two canoes from the concessionaire near the Flamingo Visitor Center. Unfortunately, a large group beat us to the rentals already located at the pond, so we paid an extra $45 to have two canoes transported up there. Frustrating, but worth it.

We arrived at the pond with life jackets and paddles, and retrieved the canoes from the concessionaire. In just a minute we were in the water, paddling across a small lake to the start of the trail.

DSCF2770

DSCF2778

As we followed the trail out of the lake, we immediately plunged into the mangroves. We became immediately grateful for two things. First, the trail markers. All long the canoe trail were poles stuck in the ground. Each marker bore a number which could help us choose the right direction as we paddled. Without those markers, it would have been impossible to find our way through (or out!) of those mangrove forests.

Canoeing in the Everglades

Canoeing in the Everglades

Padding through mangroves is beautiful, but the paddling trail was often narrow and often turned quite sharply. Thus, the second thing we became grateful for: mangrove roots. The roots of the mangrove trees grow out from the trunk of the tree above the waterline, and grow outward before plunging down into the water. The result of this root growth pattern is a natural ‘bumper’ of sorts that made paddling a little easier. When we missed a turn or edged too close to the trees, the natural edge created by the roots prevented us from paddling too far under the trees.

The mangrove forest eventually broke apart, and we found ourselves in more open sections of the glade. Glades are sunny, open areas in a forest. The Everglades are named for this, with plenty of open glade areas that stretch far into the distance. At the midpoint of our paddle, we came into a large glade that was a wonderful cross between a meadow and a lake. The area was covered with water shallow enough to allow grasses to grow. From near the waterline, it looked as though the meadow was grassy and solid enough to walk across it. Instead, we got to paddle through it.

DSCF2801

The meadow contained a shortcut that allowed us to cut our paddle in half. We took the shortcut and had a snack, and then headed continued along the trail back to the truck.

DSCF2783

It is hard to describe just how beautiful and unique this adventure was. At times like this, I’m really grateful that Jess captures so many wonderful scenes during our adventures. As you consider my description and compare it with her pictures, I’m sure you’ll agree.

I’m reasonably good paddling a canoe, but Jess struggles when conditions are difficult. On the second half of our paddle, She really hit her stride, and was navigating through the mangroves like a pro. I even had the chance to teach a few new paddling strokes to Rachel, who was in the front of my boat. Cara sat in the middle between Rachel and I, and took turns paddling in the more open spots.

2016-01-07 10.41.22

The shortcut made our paddle the perfect length at just under two hours. With that adventure completed, we headed back to pick up the Airstream and head back into the land of signal. I look forward to a time where better timing (and/or better signal) allow us to visit the Everglades longer. Despite our short visit, I cherish the adventure we had.

Categories
Backpacking Featured Destination Florida National Parks

Family Camping in Dry Tortugas National Park

Want to visit a remote, beautiful island on your next family vacation? Check out Dry Tortugas National Park! You can camp, explore, snorkel, and even earn a Jr. Ranger badge!

Dinner seemed to be running late, but since no one was paying any attention to the time, I’m not sure that it mattered. The kids and I were gathered around the picnic table reminiscing about our incredible day as Sam loosely monitored our sizzles sausages on the BBQ.

“Mom! Do you remember that really cool parrot fish I saw?” Andrew asks.
“Or what about purple coral?” Rachel chimes in.

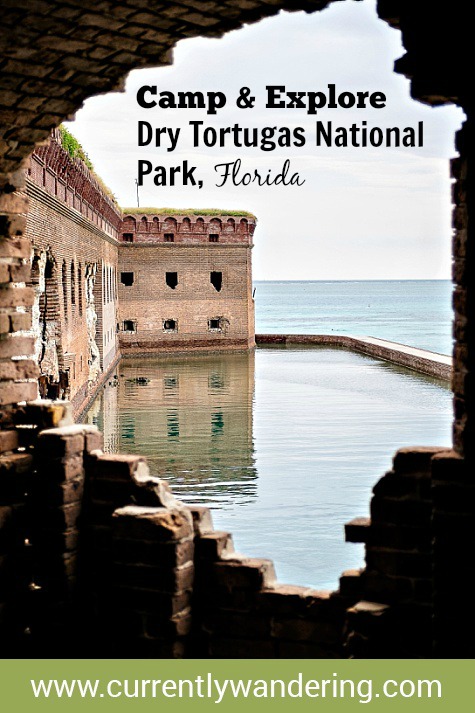
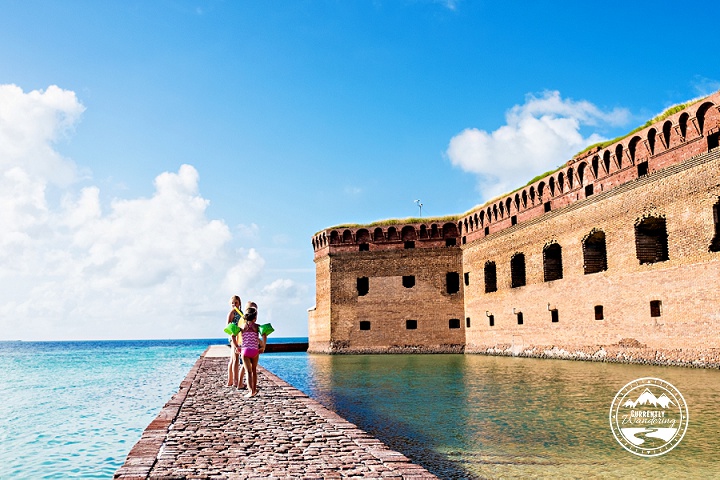
We had spent all day snorkeling and playing in the water  in Dry Tortugas National Park – which is small group of islands located 70 miles off the coast of Key West, Florida. It is arguably the hardest National Park to visit as its only accessible by private boat, public ferry, or sea plane. The logistical difficulty only enhances its magical appeal. Crystal clear waters, coral beds, nesting birds, and a Civil War era Fort lead to plenty of exploration and excitement while visiting.

After dinner we set off to explore Fort Jefferson until the sun went down before laying on our sleeping pads listening to our audio book as we fell asleep exhausted from a day full of playing hard.

When We Visited:  Dec. 30, 2015 – Jan. 1, 2016

Ages of Kids: 5, 8, 10

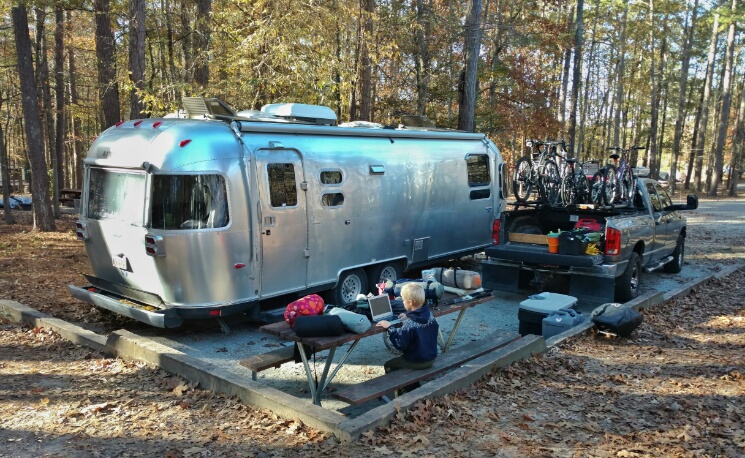
Where We Parked the Airstream: There’s really no good option. All places to stay in the Key’s are expensive so we made a reservation at Boyd’s RV Park for Dec 29 – Jan 2. Since we had to get up so early for the ferry it was great to be close by, and we didn’t get back on the 1st until the afternoon and having a place to unpack and get settled back in the Airstream before driving the following day was also nice. I just wish it hadn’t cost us $100/night.

Choosing to camp in the Dry Tortugas may seem like a daunting proposition, but with a little preparation it can be one of the best experiences you’ll ever have as a family.

Camping Logistics

Book Early

The Yankee Freedom III  is the only authorized ferry concessionaire and takes out a limited number of campers per day (when we went it was 10). If you have a large group (or family) booking early ensures you can all go out at the same time. You can stay up to 3 nights which is well worth it!
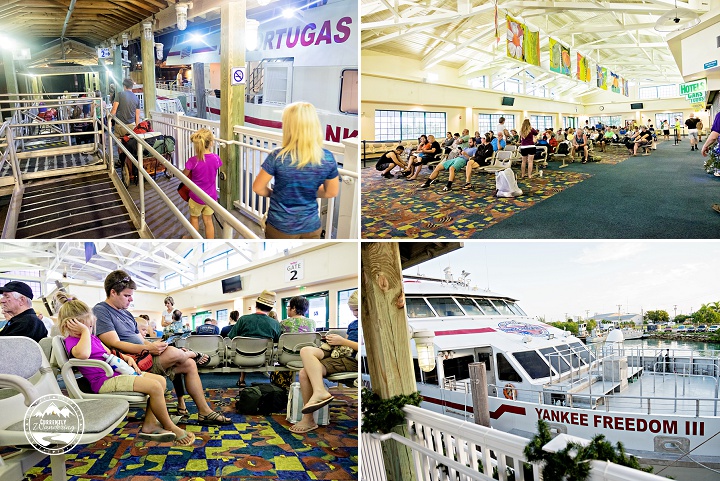
Taking the Ferry

We had to have our gear at the dock ready to load by 6:30 a.m. Definitely early for everyone involved! They had carts available to haul our gear from the street to the ferry loading spot. Once we had our gear tagged and had a brief orientation by the captain we parked our truck in the nearby long-term parking and checked in at the office.

We only had to wait about 30 minutes in the lobby before they began boarding. An all-you-can-eat breakfast is included and available as you get on the boat, and it was delicious! Bagels, fruit, hard boiled eggs, cereal, toast, and yogurt. We definitely ate our fill!

Because breakfast was so large we wished we had gotten our free lunch on another day. Two large meals in one day was a lot.
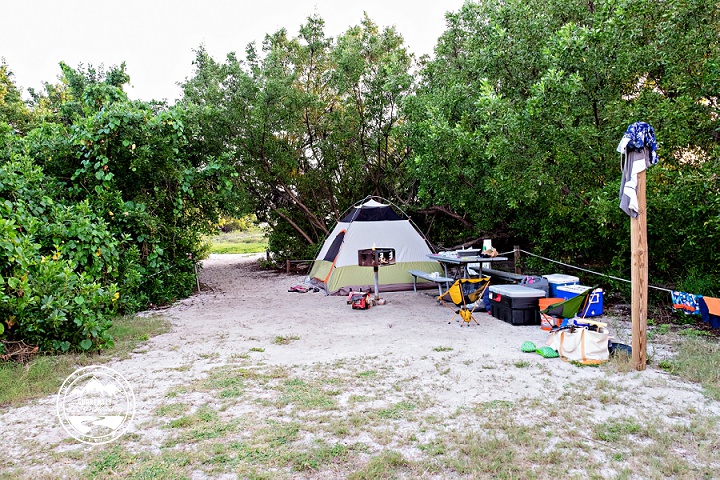
DSCF2416

Primitive Camping

You have to take everything with you, including any water you may need for your stay. There are bathrooms aboard the Yankee Freedom when it is docked, and there are composting toilets for after it leaves/before it arrives.

There are carts to haul your gear from the ferry over to the campground, but its not a far distance if you just end up lugging everything over.

The National Park service has hard sided coolers you can use while on the island. During certain times of the year they occasionally have rat problems, so keeping things boxed up is a good idea. We keep a Costco soft cooler in the trailer, so we used that and transferred everything to a hard sided cooler when we got there to help drain off excess water and keep our food colder.

DSCF2487

For water we took our two Rhino water jug containers, three of our Platypus water bags, plus a dozen or so plastic water bottles. We had plenty of water and dumped out almost a full Rhino jug before heading back on the ferry.

Our campsite was fortunately protected from the sun…..and unfortunately protected from the wind. It was pretty hot and muggy at night and any kind of a breeze would have helped that! The sites on the other side of the trees closer to the ferry would have been perfect!

Watch the Weather

During our visit, the weather was quite warm, even during the night. Careful watching of the weather told us that it would be quite warm, with perhaps only a sprinkle or two. We didn’t pack any very warm clothes as a result of the conditions we expected. Neither Sam or I even pulled out our sleeping bags. We just slept on top of our sleeping pads.

The weather can be cooler, and you will want to be prepared. Plan ahead by seasonal forecast, and make any last minute gear adjustments as necessary within the last few days before your trip.

Gear

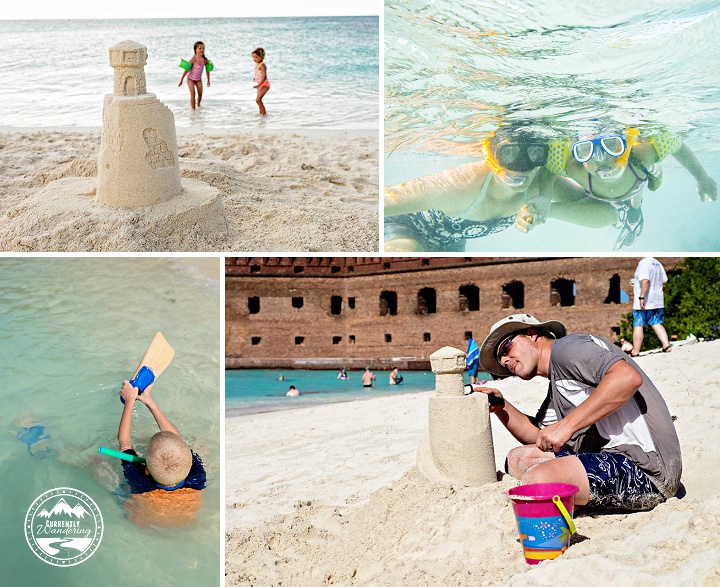
We have a hard sided Rubbermaid 35 gallon ActionPacker tub we keep in the truck with all of our backpacking gear. We emptied it out and filled the tub with food, charcoal, a 5 gallon bucket from Home Depot for making sandcastles, and anything else we didn’t want to risk getting wet on the ferry ride over.

We put everything else into black garbage bags inside our backpacking bags so if they got splashed we wouldn’t end up with wet sleeping gear. For a full list of our backpacking gear see our list here.

We also brought our compact camping chairs, swimming suits, and 2 swim towels to share.

Food

We went all out on this one. Since camping usually consists of hauling our gear on our backs and eating freeze dried food, having carts was a bit of a luxury. We brought supplies for tin foil dinners, BBQ’d sausages, ate deli pasta salad from Publix, made fry bread scones for breakfast on New Year’s Day, and munched on crackers, meat, and cheese for lunch. We even snuck in some Birthday Cake Oreos for Sam to celebrate his birthday on the 30th!

We definitely did not go hungry and probably brought way too much food.

DSCF2486

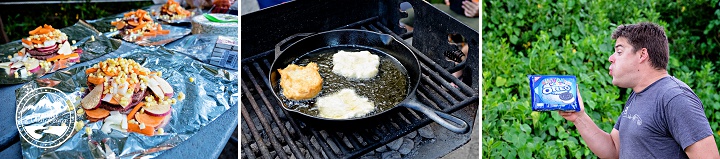
Using the self-light charcoal was not a big deal, and we even managed to boil water for oatmeal one morning using our wood-fed backpacking stove. We just shoved charcoal in there instead of sticks and it worked like a charm. We ended up buying ice from the ferry every day, and in the hard-sided coolers we had no problems keeping everything cold.

The ferry provides you one lunch on any day you are there. In hindsight we should have saved it for our last day, but we still survived. Lunch is available from 11am-1pm everyday and if you’d rather eat their food its all you can eat sandwiches, chips, cookies, and soda for $7/person.

Activities on the Island

Snorkeling

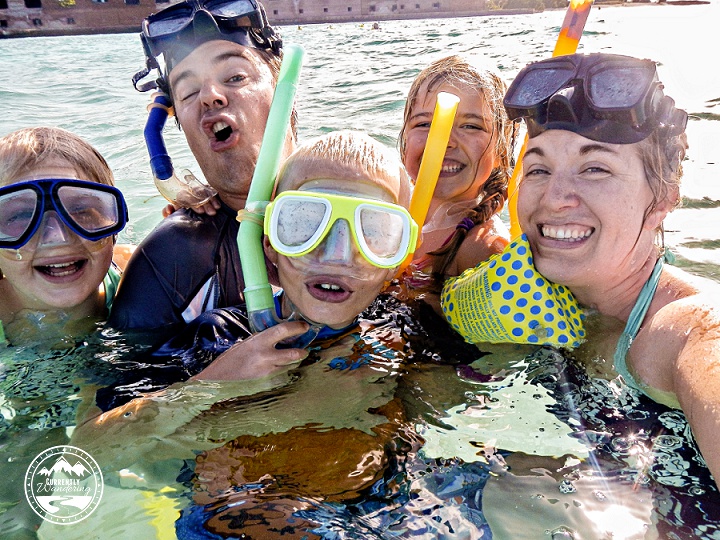
The ferry (and the seaplane) provided snorkeling gear for us to use for the duration of our stay. They also have flotation vests and pool noodles if your kids (or you!) need help staying afloat. We picked up the gear at the dock, and then we just kept it by our campsite. The kids started out pretty hesitant (especially Cara), but by the end they were all snorkeling like champs. We had trouble getting them OUT of the water.

Snorkeling turned out to be a fantastic family adventure!

DSCF2449-Edit-2

DSCF2524

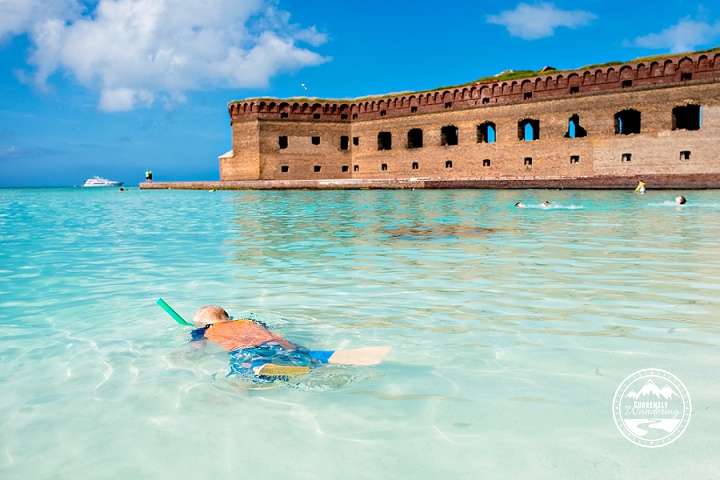
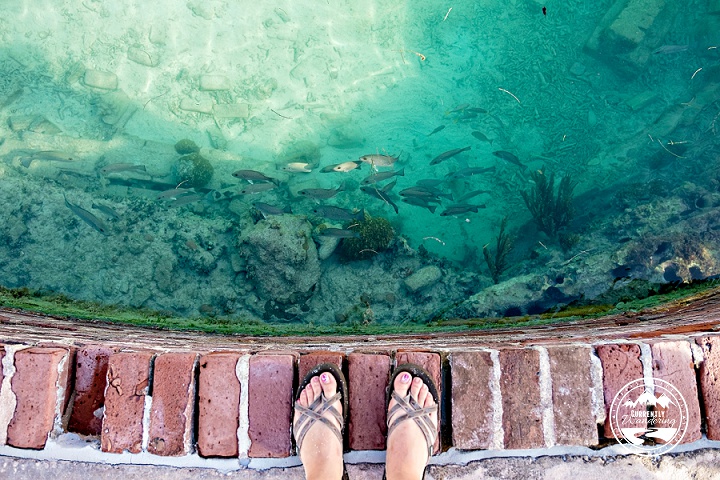
The best snorkeling we found was either by the old pilings (south beach) or if you follow the line of the moat wall straight out towards the buoy’s there are some amazing coral beds. Its not very deep, and we were able to find spots for the kids to rest where they (or at least we) could touch the sand with our flippers.

Cara wore her arm floaties so she swam circles around us most of the time. The best snorkeling was before the ferry arrived in the morning and scared all the fish away, so it definitely pays to get up early at least one morning!
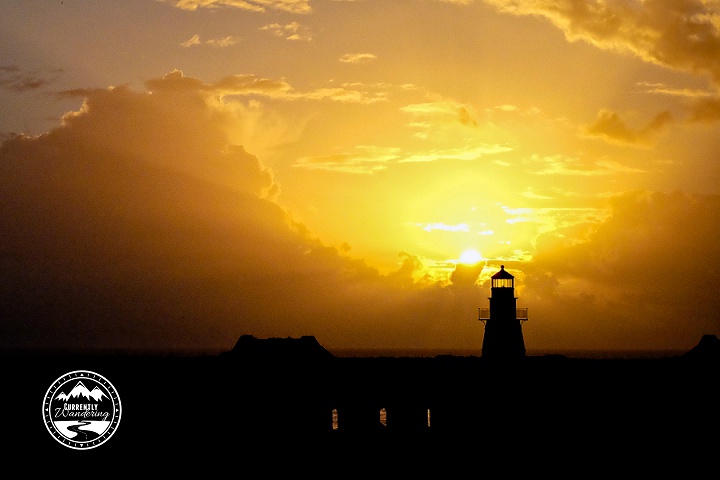
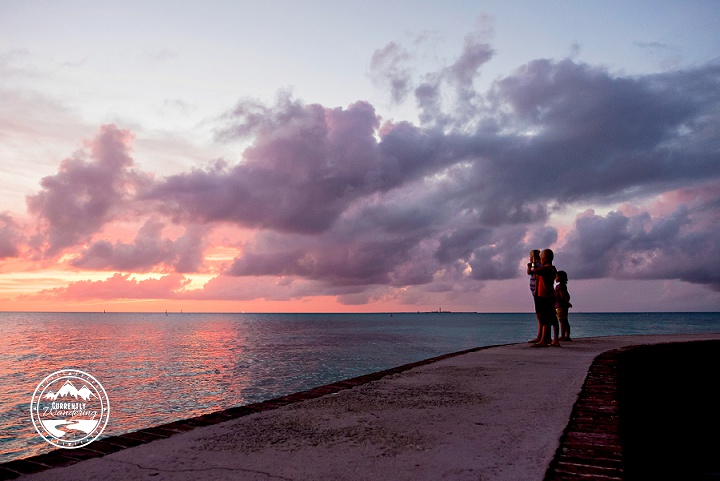
Take Pictures

The island is so small that you can experience both a sunrise and a sunset over the water. The Fort itself is quite picture-worthy from nearly any angle, and presents amazing opportunities both within the fort and from atop the fort walls. Bring a waterproof camera if you can, and document the amazing fish and coral you see while snorkeling!
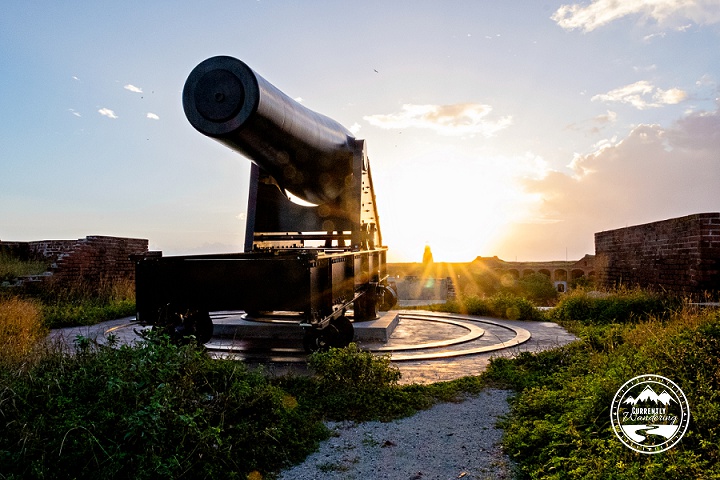
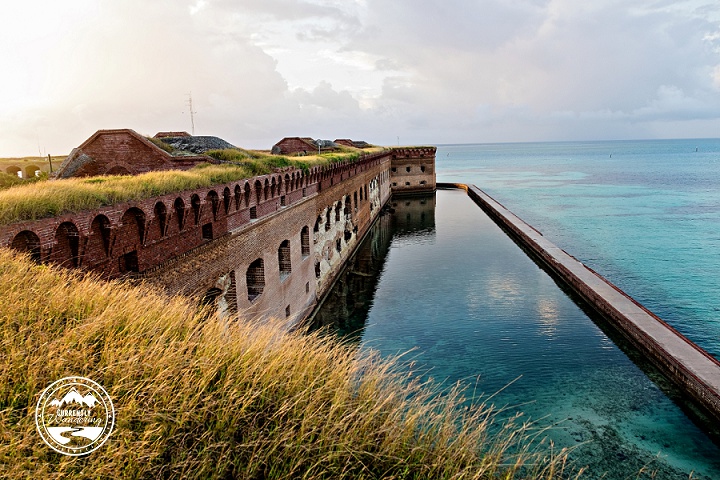
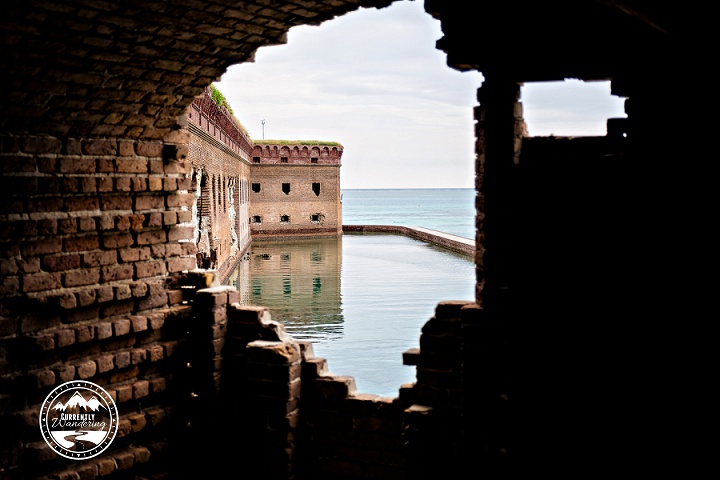
DSCF2652-Edit

DSCF2663 DSCF2453 DSCF2458-Edit

Explore the Fort

The Rangers on the island have an incredible amount of historic knowledge about Fort Jefferson. We learned why it was built, who lived there, how the soldiers collected water, and even about the Cuban refugees that continue to show up on a semi-regular basis. At one point the fort was even used as a prison, housing Dr. Mudd who was imprisoned for setting the leg of John Wilkes Booth after the Lincoln assassination. The Park Ranger hosted two tours everyday and from what I gathered one was a moat tour looking at wildlife, and the other was about the fort.

Fort Jefferson is beautiful and definitely worth exploring on your own as well as on a tour!

DSCF2725-Edit

DSCF2469

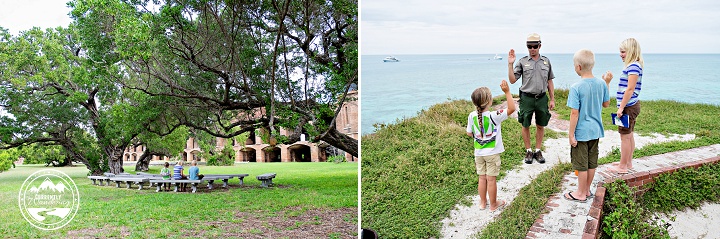
Earn a Jr. Ranger Badge

We are advocates of the Jr. Ranger Program, but did you know that even as a adults you can earn one? Since the Dry Tortugas are a pretty remote spot, I think having a badge deserves some bragging rights. Its super short, easy, and well worth the effort.

DSCF2696

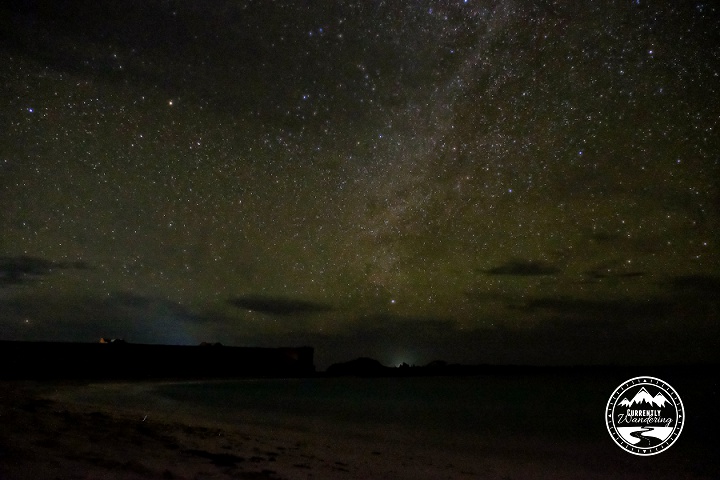
See the Stars & Explore in the Dark

The night sky out at the Tortugas is incredible. One night the Ranger Mike brought out his telescope and we got a look at some of the stars up close. He’s not an astronomer by any means, but we enjoyed hanging out with him and the other campers inside the fort after dark.

The next night, Sam and I snuck away after the kids were in bed and set up the camera for some long exposure photography. There are also bioluminsecent algae that live in the moat and surrounding water. If you walk the moat (carefully) while its dark you can see them flashing. Its incredible.

DSCF2592

Our friends from the Bareneckers took the opportunity for a quick dip in the water during their stay and actually swam among the flashing lights. We weren’t quite that brave!

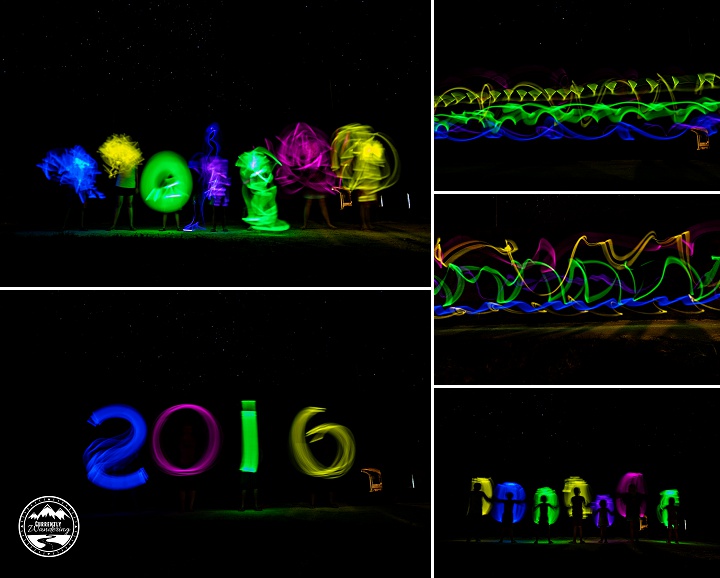
Camping on the Tortugas for New Year’s Eve created opportunity for some fun light painting with glow sticks. Ashley Longnecker provided the glow sticks, and I provided the camera. Kids and adults alike had fun and it was a fun substitute for fireworks! Happy New Year!
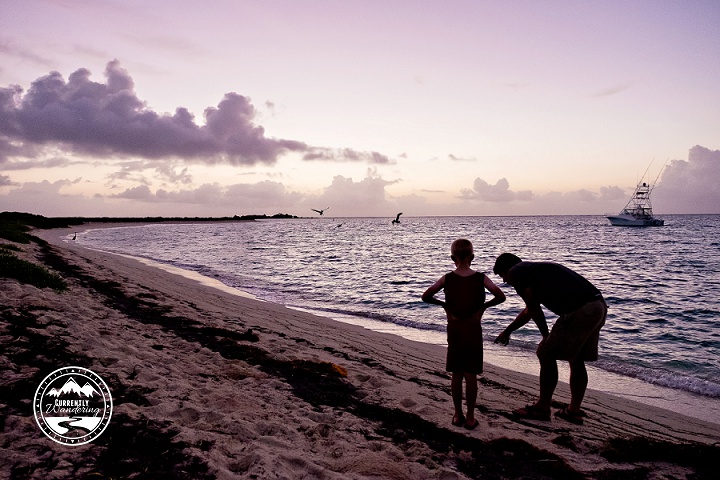
DSCF2559

Get Up With the Sun

Playing hard all day and getting to bed early has its perks. Both mornings we were up before the sun and wandered out of the tent to find the sunrise. The first morning we were at the beach with the kids in their pajamas looking at washed up jellyfish. The second morning we hiked the stairs to the top of the fort to watch the sun come up. Both were magical!

DSCF2497-Edit

DSCF2644-Edit

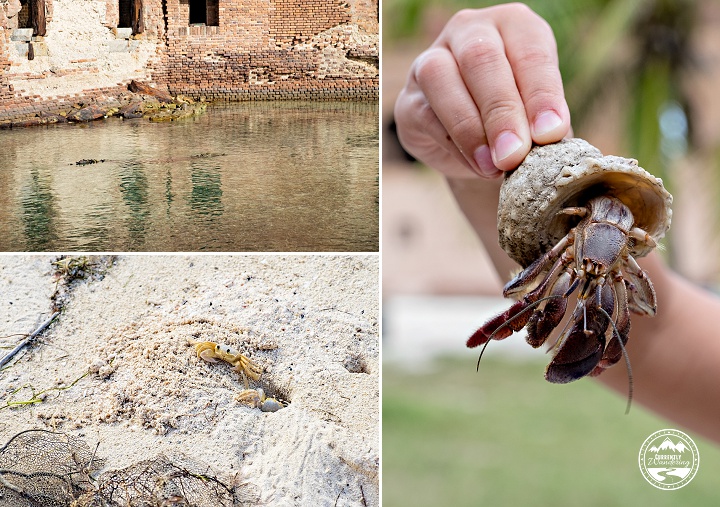
Watch Out for the Hermit Crabs & Carlos the Crocodile

These guys are everywhere. Completely harmless (unless you try and pick them up and then you probably deserved to get pinched) they are fun to watch as they wander all over the island. Keep an eye out, and try and avoid stepping on them. I love how they come in all sizes, shapes, and colors. There are also a few other types of crabs on the island and we had fun watching them scuttle around. Thankfully our kids were not skittish and took it all in stride.

There’s a crocodile that lives in the moat surrounding the Fort. His name is Carlos and he’s pretty shy when it comes to people. After the ferry left we were wandering the moat wall and happened upon him lazily swimming. There is a pretty big gap in the wall where he could get out, but it sounds like he likes his living quarters!

DSCF2457

Our visit to the Dry Tortugas was amazing and memorable. While you can visit the Dry Tortugas on a day visit, we highly recommend saying a few nights. The additional cost is minimal and the experience is magical. Our visit happened to span the change of year. Sitting with our family on the moat wall, we watched an amazing sunset over the water as we discussed what an amazing year we’ve had. This experience was definitely one of our favorites!
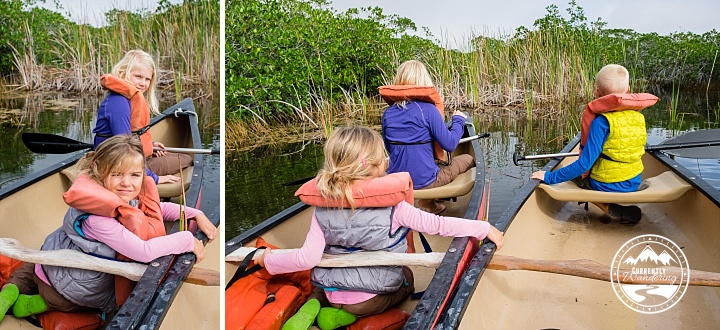
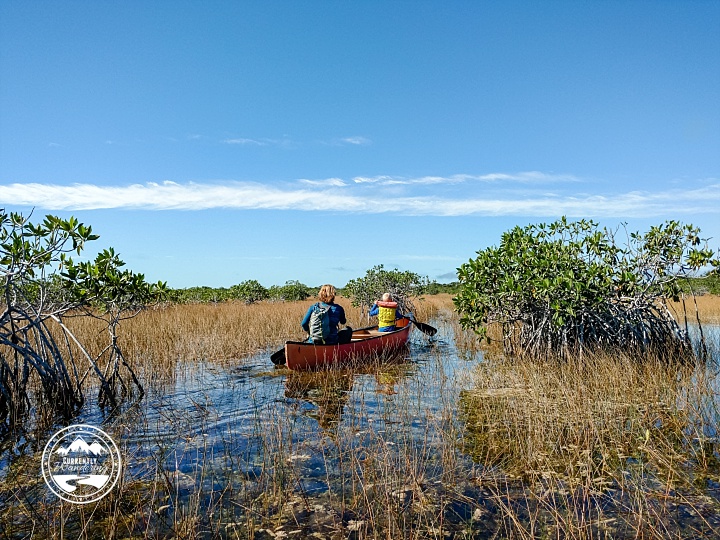
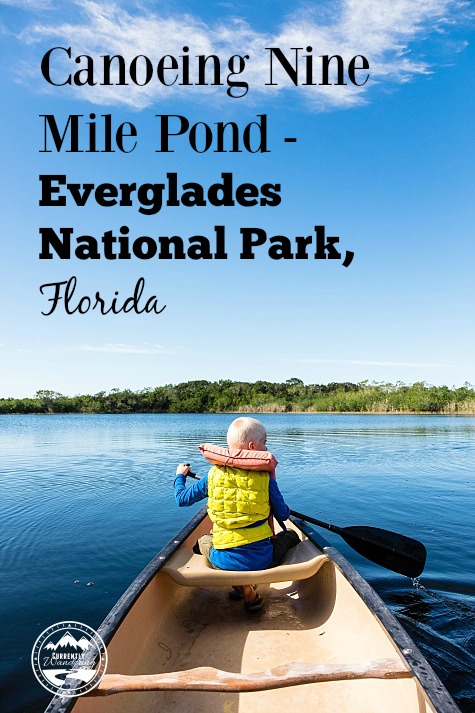
DSCF2554-Edit

DSCN7046

Categories
Backpacking Georgia Outdoor Gear

Backpacking with Kids: The Gear List

Gear List For Backpacking with Kids from CurrentlyWandering
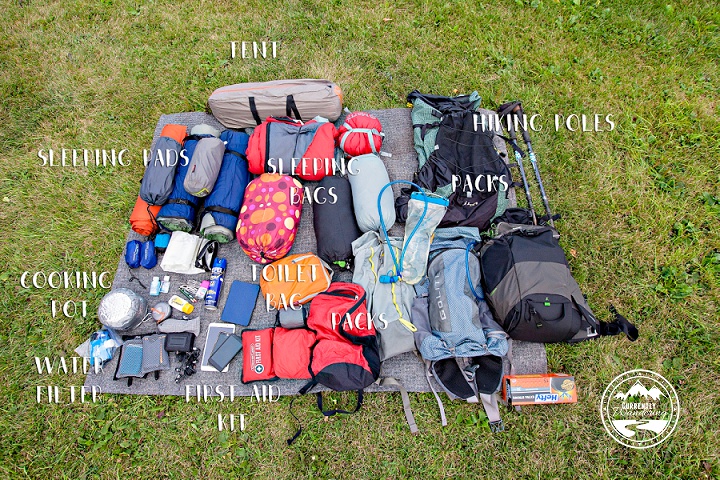
Last Thanksgiving we went backpacking in Franklin D. Roosevelt State Park in Georgia. Andrew is working on his Wolf rank in Cub Scouts, and needed to create and use a gear list for a hike or backpacking trip. He did an excellent job, and the trip was great, so I thought I’d share the gear list we made. This doesn’t include any food, so that’ll just have to be the subject of another post.

wpid-14495489987281.jpg

Standard Disclaimer: This worked well for us given the weather and ages of our kids. Adjust accordingly, Your Mileage May Vary, etc. etc. We’ve also included some Amazon and REI affiliate links. Shopping through these helps support our blog in a small way and we appreciate it very much!

The core of our backpacking gear remains the same no matter where or when we are going. You need somewhere to sleep (tent), something to sleep in (sleeping bag), and something to put it all in (backpack). All other gear really depends on when and where you are going, how cold it will be, and your comfort level. Our gear list is ever evolving, but here are some ideas to get your started!

Our Tent

We have a  Kelty Yellowstone 6. It is definitely NOT a back country tent, but we already owned it and had it with us in the Airstream. At 14lbs its a beast, but we’ve concentrated on getting our other gear as light as possible. I think when the kids are comfortable sleeping by themselves, we’ll eventually have two light weight tents. It IS a great car camping tent, however, just in case you are looking for that. But since you are here looking for backpacking gear, its probably not relevant.

Back on topic…

In addition to the tent, we also have a large piece of plastic (cut from a larger piece at my father in law’s house when he was doing some home improvement repairs) we use as a groundcloth. Its not fancy, but it does the job.

Sleeping Bags

Sam and I sleep VERY differently. At one point in our marriage we tried sleeping bags that could zip together, but that didn’t last long. He is constantly too warm, and I am constantly freezing.

Sam’s Bag: Since he is a super warm sleeper, Sam didn’t want anything overly warm. Half the time his bag is unzipped while I’m snuggled in tight. He has something similar to this REI Helio Sack 55 Sleeping bag from REI.

Jess’ Bag: REI Flash Sleeping Bag. I absolutely love it. Its down, lightweight, incredibly warm and cozy. I love that I have a place to tuck my pillow in and it won’t move, much. Its a bit pricey, but I expect it’ll be my sleeping bag until we are done backpacking. And then it’ll probably be Rachel’s.

With kid bags its important to make sure they won’t be too cold. This obviously depends on the weather and where you will be, but if you start out with a cheaper bag just make sure they have warm pajamas if the temperature is going to drop at night.

Rachel & Andrew’s Bags: Marmot Mavericks 40 Semi – Rectangular Sleeping Bag. Looks like this one is no longer available, but we love that it has two zippers, and even a place to stuff a pillow.

Cara has cheap sleeping bag from Wal-Mart (the polka dot one in the photo below). Out of all the kids, she could probably use a better one since little kids tend to not stay in their bags at night. So far we’ve been fine and eventually we’ll upgrade Rachel to a small women’s bag and she’ll inherit hers.

Another great option for kid’s bags that’s been tested by friends of ours are the Backcountry Quilts. Check out a review by Alyssa at Kidproject.org here.

Backpacks

Sam has an AIRX bag from ULA leftover from his trip on the John Muir and carries the tent and most of the bulky gear since his bag is the largest. Jess carries the Mindshift 180 bag with her camera gear (blog post here), Rachel has a GoLite 35L Bag (no longer available), Andrew has the REI Flash 18, and Cara uses the ChicoBag Reusable Travel Pack.

We are changing these up in the future with the addition of a Deuter Fox30 for Andrew and new bags for Rachel and I so we’ll keep you posted on how those work out!

Backpacking Gear

Clothes (Per Person)

  • (2) underwear
  • (2) socks
  • thermal pajamas
  • long sleeved shirt (not cotton)
  • short sleeved shirt (not cotton)
  • hiking pants (REI Link child, women’s)
  • rain shell
  • hiking boots
  • beanies
  • puffy vest
  • rainshell

Hiking Gear

  • Backpacks
  • Hiking Poles (REI link)
  • Trail Map
  • First Aid Kit
  • Platypus Water bladder (2) (Amazon link)
  • Platypus Big Zip Reservoir with Hose (1) (Amazon Link)

Cooking

Sleeping Gear

Toiletries

  • Toothbrushes with steripods (4) (Amazon link)
  • Bathroom Bag
    • Hand shovel
    • Hand sanitizer
    • Toilet Paper
  • Toothpaste

Extras

  • Books (Kindles)
  • Swiss Army Knife & Dad’s Multi-tool
  • Bluetooth Speaker (for listening to audio books at bedtime)
  • External Battery and USB cable (Amazon link)
  • Phones (scriptures, camera, music, audio book)
  • Camera – Fuji X-T10 (Amazon Link)
  • Gorilla Pod with ballhead (Amazon Link)
  • Card games
  • Bug Spray
  • ENO Hammock (Amazon Link)
  • Sun Screen
  • Micro Fiber Pack Towels (Amazon Link)

There’s the short list! Make sure you tailor your gear list to your family’s needs and know that it will evolve over time. We are still switching out some of our heavier gear for lighter stuff.

What equipment or brands have you found useful in your back country adventures?

Categories
Backpacking National Parks Outdoor Adventures Video Wisconsin

Video: Backpacking on the Apostle Islands

Apostle Islands National Lakeshore_20

During our backpacking trip on the Apostle Islands this August, I recorded some video to help us remember the trip. Our two night, three day trip gave us so much video that I ended up with three videos! If you want to see more of our adventures, subscribe to our YouTube channel.

I hope you enjoy a glimpse of our adventure there.

Categories
Biking Michigan

Taking Star Line Ferry to Bike Mackinac Island and Loving the Library


We don’t often do “touristy” things, but when we do we make sure they are going to be epic! Our trip to Mackinac (pronounced Mackinaw) Island was no exception. Despite the many souvenir & fudge shops, gear rental and horse-drawn carriage tours all pulling for us to spend money, we managed to make our visit very #likeacurren and include quite a bit of wandering.

When We Visited: Sept 23, 2015

Ages of Kids: 10, 8, & 5

How We Got There: Star Line Mackinac Island Ferry

The Star Line Ferry runs from either Mackinaw City or St. Ignace out to Mackinac Island many times a day. You can see the rates and download the schedule here on their website. We chose to go over early so we’d have most of the day to spend there and still be able to drive an hour or so away when we got back.

Star Line also offer free parking and we had no problems parking both our trailer and truck in their back lot. After we parked we headed over to the ferry dock on our bikes.

Mackinac Island_02

Check in was super easy! We got yellow tags to put on our bikes and then we stacked them to be loaded. After that we got in line and waited to board.

Mackinac Island_05

The kids chose to ride on top and it was super windy! We had all brought jackets anyway (which was a good thing) and we quickly put them on. The wind drove Rachel a little crazy with her hair whipping all around, but we had fun!

Star Line Ferry boasts a “Fast, Frequent, Fun, and Friendly” Hydro-Jet Ferry with the signature water jet rooster tail. The boat was definitely fast and fairly smooth!

Depending on your ferry time, the boat also takes you out under the Mackinac Bridge which we loved.

Mackinac Island_19

Mackinac Island is particularly special because there are no cars allowed on the island! Everyone gets around by bikes or horse draw carriages.

Mackinac Island_23

Mackinac Island_13

More than 80% of the island is part of Mackinac Island State Park, and there are numerous bikes paths and trails. If you go through the island its pretty hilly, but we chose to do the 8.2 mile M-185 that goes around the entire island. It was flat and the kids did great!

Mackinac Island_14

There were plenty of stops along the way to keep us entertained. We climbed the stairs to Arch Rock, walked the nature trail, and enjoyed reading a little history at the British landing.

Mackinac Island_17Mackinac Island_20

It was about lunch time when we got back downtown and we had heard from our friends over at Take That Exit that Island Slice Pizzeria was amazing – and it truly was! We got a BBQ pizza Detroit style and it was probably the BEST pizza I’ve ever eaten.

We also wandered around, watched one guy make fudge, and found some yummy ice cream.
Mackinac Island_21

Our last stop, however, was the public library! We have a habit of finding local libraries and the kids have various books they grab and sit down and read for a bit.

Most amazing was the back porch with Adirondack chairs and an amazing view of the lake! I think we could’ve stayed there all day!

Mackinac Island_32

We took the afternoon ferry back to Mackinaw City, except this time we opted to sit below out of the wind!

Mackinac Island_26

We had an absolutely fabulous time over on Mackinac Island, and definitely recommend going. There are plenty of places to spend money, but the island is also a peaceful, out of the way retreat if you know where to look!

Sponsorship disclosure – We partnered with Star Line Ferry. In exchange for ferry tickets to Mackinaw Island we agreed to share our honest experience and review with our readers. All photos, opinions and content are ours.