Categories
Biking Minnesota

Sometimes You Just Gotta Mountain Bike Solo – Ironton, Minnesota

Mountain Biking in Ironton Minnesota

While we were mountain biking at Lebanon Hills Regional Park in Minneapolis, we started chatting with a woman who was there with her niece and nephew. She is an avid mountain biker and gave us a few other places in the state that had good trails. On our trek north, we ended up doing some service for natural disaster clean up near Brainerd, which put us darn close to the Cuyuna County State Recreation Area she had mentioned.

We took a chance that the campground was decent (and had an open spot) and drove over in the late afternoon. While the campground wasn’t much to look at (and Sam warned me to definitely NOT look in the bathrooms) it was smack dab in the middle of a trail system. This is great because we have become extremely lazy and prefer to ride right from camp rather than driving someplace and then unloading the bikes.

914409_1443806802612415_990976234_n (1)

We tested out a small section of trail with the kids our first evening, and even though they whined a bit, Rachel actually rode it again with Sam after we switched bikes (it was a much better ride on the 29er over the cyclo cross). The following day they weren’t interested in riding at all, so I snuck away in the afternoon to test out ALL the rest of the trails. Okay, I didn’t expect to ride them ALL but I was sure going to try.

11355114_1616909808598781_1271556149_nThe trails were awesome. The system consists of a series of networked trails that create quite a few loops. Some with pretty significant climbs, rollings hills or speedy downhill runs. I rode about 12 miles in just over two hours and when I texted Sam and asked how things were going and if I could do one more loop, he immediately responded with, “Go get ’em!”

I seriously love my husband.

While riding solo is definitely not ideal in case something drastic happens, its better than not riding at all. While at our sticks and bricks house, I would often not do an activity because I had no one to go with. It just didn’t seem fun or feasible. Now, however, I’ve learned that some alone time on the trails is not necessarily a bad thing jump at the chance to get out. Traveling has created more opportunities to get out and enjoy the sports I love!

Categories
Biking Daily Life Michigan Mommy Diaries

At Least There Was a Caterpillar

SAM_4477-EditLife is always harder when Sam is gone. This was true back in our sticks and bricks, and even more so on the road. He always gives me my second wind around 5pm when I’m about to crash, and I love sharing responsibilities, fun, and chores (those pesky things) with my best friend.

Occasionally he still has business trips that take him away from home, and I try and keep everyone still breathing and functional on my own. I am two days into his current 3 day business trip and remarkably today went better than yesterday.

We are camped in a State Park that has a network of mountain biking trails and after getting out on my own yesterday (don’t worry, the kids were fine) I was determined to take them out today on what the locals assured me was an easier trail.

First off, you have to be a special kind of crazy to take three kids mountain biking by yourself especially when one of them is 5 years old and frequently interchanges her “tired” voice with her “whiny” voice. Both sound the same to me.

Fortunately the trail started out pretty level & smooth, but we gradually had sand, tree roots, and even a few climbs that included sand and tree roots.There was definitely more walking the bikes than riding them on the last half of the trail. When Endomondo called out our lap pace and indicated the last mile took us 33 minutes I just had to laugh.

The bright side of walking your bike up the trail is that you see things that otherwise would have been a blur. As I waited at the top of the hill I watched Andrew bend down and then exclaim, “Mom! This is a really cool caterpillar!”

And it was. I dropped my bike and trekked back down to see it. The little guy was fuzzy, white, and had black spots running down his back and was arguably one of the most interesting caterpillars we’ve seen. After we saved his life by moving him off the trail with a small twig, the kids continued pushing their bikes up the hill.

This time though there was a little more spring in their steps. Even if the trail was frustrating, slow, and a discouraging, at least there was a caterpillar.

Categories
Backpacking Fitness & Recipes

Airstream Kitchen: Whole Grain Chocolate Chip Cookie Bars

Apostle Islands National Lakeshore_66

We discovered these delectable treats as I was looking for a way to pack a dessert in to the Apostle Islands for Andrew’s birthday.  Made with whole wheat flour & ground flaxseed, I can at least pretend they are more healthy than regular chocolate chip cookies, right? At least until we add the marshmallow.

Whole Grain Chocolate Chip Cookie Bars

1 cup whole wheat flour
1 1/4 cups white flour
1 1/2 Tbsp ground flaxseed
1 tsp baking soda
1 tsp sea salt
1 cup unsalted butter, softened
3/4 cup packed brown sugar
2 eggs
1 tbsp vanilla
1 cups semi-sweet or dark chocolate chips
Large, toasted marshmallows (optional)
Hershey’s chocolate bars

Preheat oven to 375 degrees, and spray or grease a 9×13 pan.

In a medium bowl, cream butter, then add sugars and mix until creamy. Mix in eggs and vanilla. Gradually stir in flours, baking soda, and salt until completely mixed. Really you should mix these all separately first, but I always just mix the soda and salt in the measuring cup with the flour after dumping a little in the bowl to make room. Call me lazy. Or just efficient.

Add chocolate chips until just mixed in.

Spread mixture evenly in prepared pan. Bake for 20-25 minutes or until golden brown. Cool in pan, cut into bars.

These are easy to wrap individually and take hiking or backpacking, or cover and store in a cool, dry place.

We roasted marshmallows over the fire, stuck a piece of Hershey chocolate inside, and then smashed them on top of the cookie bars.

I don’t think we’ll ever eat a regular S’more again.

Whole Grain Chocolate Chip Cookie Bars with Marshmallows. Delicious and slightly healthier than regular cookies!

Categories
Backpacking Outdoor Gear

Gear Review: Sawyer Mini – Cheap and Easy Water Filter for Backpacking or Emergencies

While we would have loved to receive this item for free to review, we actually spent money to purchase it. This post contains Amazon affiliate links which help to fund the blog in a small, small way. Thanks for helping us out!

Most backpacking requires a way to filter water. Despite looking clean and clear, most water contains bacteria that will make you pretty sick. The problem is easily remedied by a few methods. Water treatment drops will kill bacteria, but they don’t remove them and can leave a bad taste in the water. My favorite method is the use of a water filter.

Most of the water filters I’ve used in the past have been great, but fairly bulky and expensive. On our recent trip backpacking in the Apostle Islands, we tried a new water filter that is both cheaper and lighter than any I’ve tried before.

We used the Sawyer Mini water filter, which can be bought for $20 to $25 either online or in many outdoor stores. The filter is small and lightweight. It does sacrifice some ease of use, but for the weight and cost savings, the tradeoffs are worth it for most purposes.

SAM_4350-Edit

The filter unit itself is easy to understand. Dirty water goes in one end, and clean water comes out the other. With the filter comes a small, lightweight bag to use as a ‘dirty’ bag. The connector is a standard bottle thread though, so you can replace the included bag with anything from a cheap water bottle to a full sized two liter bottle.

IMG_20150824_185331

You filter water by filling the included bag (or replacement bottle) from a lake or a river and screwing it on to the filter. you then squeeze water through the filter and into your clean water bottle. The process is quick and easy. You do need to make sure you don’t get dirty water on the clean end of the filter, but that really is the only thing to pay attention to.

In addition to using a different bottle, there are other upgrades you can make as well, including quick attachment connectors to common water bladder systems. In a genius way, this filter system is perfect. It provides just the bare necessities, and allows expansion and customization as desired.

This filter performed wonderfully during our backpacking trip. It will also make an excellent addition to our emergency supplies, allowing us to filter water in circumstances where we cannot find clean water.

There are instructions right on the dirty bag for how to backwash the filter (when it starts slowing down or gets clogged) as well as how to clean for long term storage. Spoiler- you just use a little bit of bleach water and squeeze through the filter, drain it, and let it air dry.

Pros: lightweight, small, easy to use, screws onto any top of regular bottle.

Cons: Included bag is a little small for a family of 5. It just takes a little longer to filter enough water.

We are definitely glad we have this, and plan to upgrade to a larger dirty water bag in the future. We’ll buy one of Sawyer’s, or most likely just get another Platypus Platy Bottle and write “Dirty” on it with a sharpie.

Categories
Backpacking Wisconsin

Backpacking With Kids: 3 Day Meal Plan & Freezer Bag Cooking

Backpacking With Kids - 3 Day Meal Plan and Freezer Bag Cooking

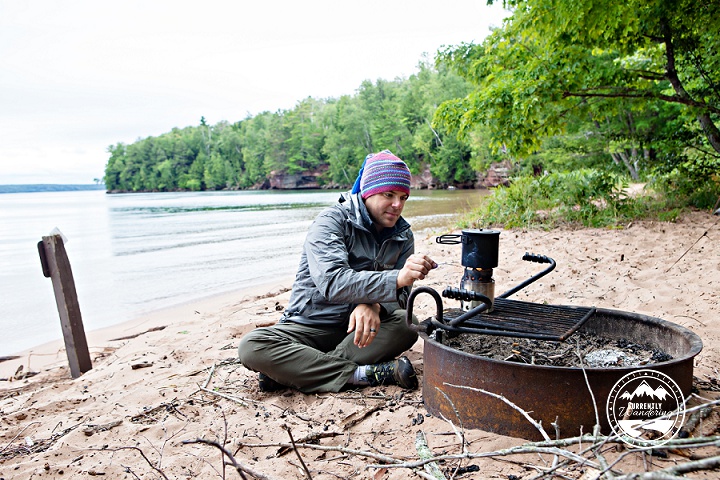
There are many different types of back country cooking. If you look at the cooking section of any outdoor store you’ll find gourmet, deluxe utensil sets, to simple one pot Jet Boil stoves.

For much of our backpacking, we do what’s called Freezer Bag Cooking. We love that it is simple, easy to clean up, and requires very little dish washing (totally a perk – remember this is vacation for us!).

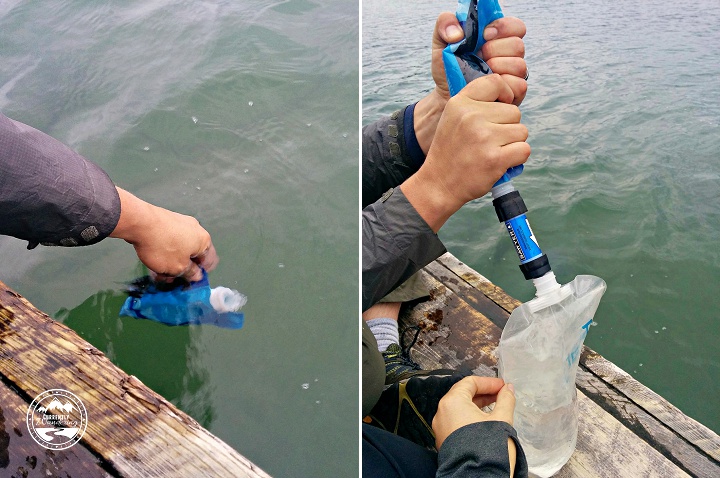
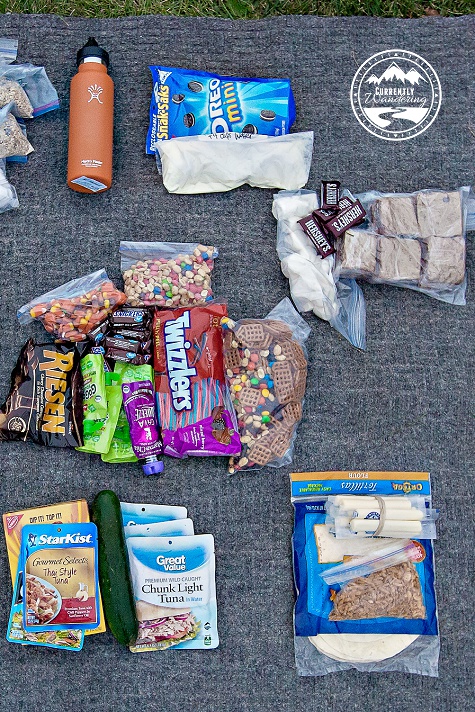
The basic idea is that you buy ingredients that will reconstitute quickly with just hot water. Freeze dried chicken, vegetables, and fruit are pretty common, as are quick cooking pasta, instant rice and instant potatoes. The downside is that this type of cooking can be a little pricier, and sometimes you don’t have all the ingredients on hand.

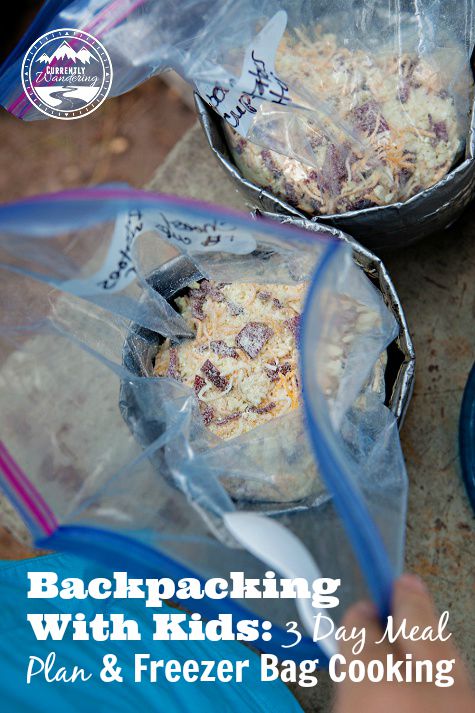
Once you have all your ingredients, you put them together in meals in Ziploc Freezer Bags. Don’t cheap out on these and get the wimpy generic brand ones. You want to make sure that hot water is not going to burn right through your plastic. We also write with a sharpie on the bag what the meal is and how much water we’ll need to add.

Apostle Islands National Lakeshore_61

When you are ready to cook, you just boil water and then pour into the bag. Stir around with a spoon making sure you get all the edges. Squeeze all the air out, zip the top and let it sit for 5 minutes.

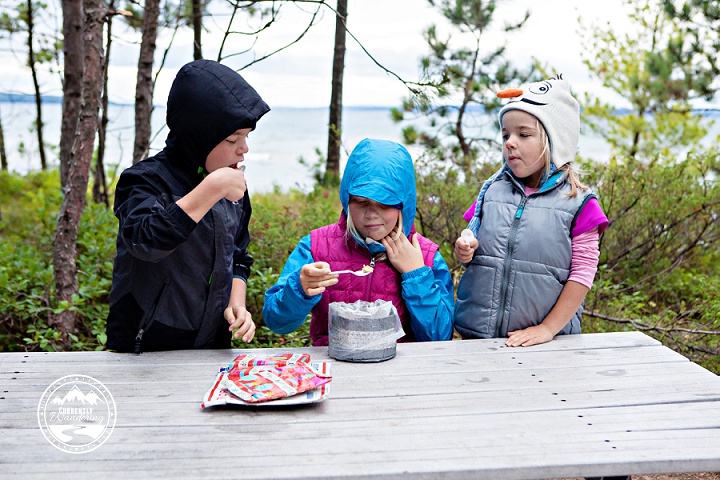
Sam made these awesome cozies to put our meals in while the sit. We actually leave the bags in there while we eat, and it keeps us from burning our hands! You can check out a tutorial by Backwoodspress on how to make them. We have another set with Hawaiian flower duct tape that are much prettier to look at, but they didn’t make the trip this time.

Easy enough, right? You can use a spork to eat them and then wash it when you are done, but we opted for plastic spoons instead. We just tucked them inside the plastic bags, sealed tight and put in our garbage collection. Super easy, non messy clean up!

Apostle Islands National Lakeshore_29

Okay, now that you know how we cooked our food, let me tell you what we ate!

Backpacking with Kids Meal Ideas 2

Backpacking with Kids Meal Ideas 1

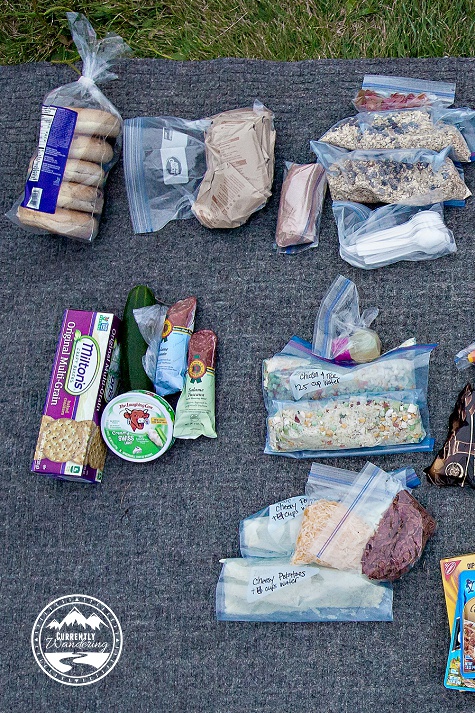
Day 1 Backpacking Meals

We used up our refrigerator items on the first day. Rotisserie chicken, string cheese, and cheddar for the mashed potatoes. It wasn’t that warm of a day, so we weren’t worried about it spoiling in just a few hours.

Breakfast: Bagels & Cream Cheese, Go-Gurt, grapes in the car on the way to the ferry.

Lunch: BBQ Chicken Wraps & Apples serves 5

  • 6 medium flour tortillas,
  • 1 small rotisserie chicken,
  • 12 string cheese,
  • 1 cup French Fried Onions,
  • 1 small bottle shelf stable BBQ sauce

Apostle Islands National Lakeshore_30

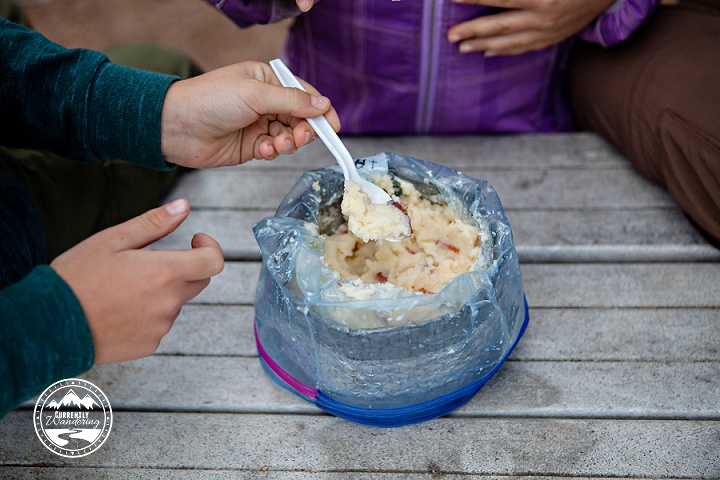
Dinner: Cheesy Bacon Onion Mashers serves 2 (we took 2 of these for our family of 5 and it was a little too much).

  • 1 Family Size packet Idahoan Instant Baby Reds Mashed Potatoes (8.2 oz)
  • 4 tbsp dry milk
  • 1 tbsp dried onion
  • 1/4 tsp black pepper
  • 6 tbsp shelf stable bacon (I pre-cooked turkey bacon, chopped it up and took that packaged separately.)
  • 1 cup shredded cheddar cheese (package separately)

Add 4 cups boiling water, stir, close the ziploc bag and let sit for 5 minutes before eating.

Dessert: We were supposed to have Cookies  & Cream Jell-O pudding, but I accidentally doubled the water and it didn’t set. Oops. The kids made sure to tell the rangers I had ruined dessert. Sigh. We had mini Oreos instead.

Day 2 Backpacking Meals

Breakfast: 10 store bought variety oatmeal packets, hot chocolate

Lunch: Homemade Lunchables

  •  7 oz Salami (we took 2 and only ate 1)
  • 1 box Milton’s multi-grain crackers (8.3 oz)
  • 1 cucumber,
  • 1 container Laughing cow cheese  (8 wedges)

Apostle Islands National Lakeshore_64

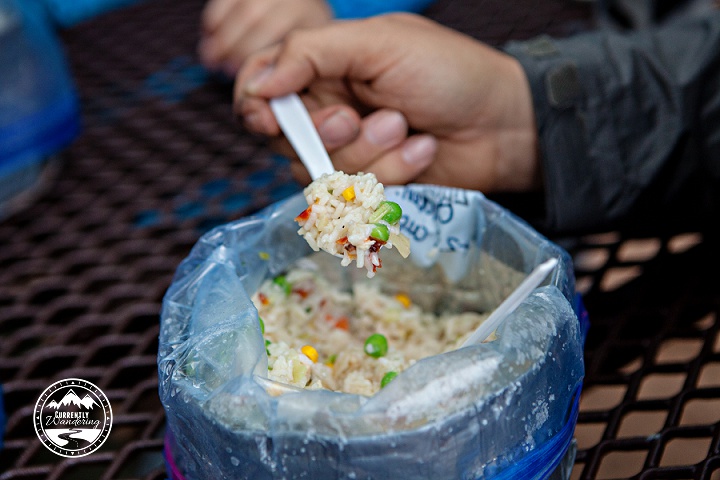
Dinner: Chicken, Veggie Rice, serves 2 (we took 2)

  • 2 cups instant white rice (make sure its instant, not minute and brown doesn’t work. I tried.)
  • 4 tbsp vegetable soup mix (I thought it could use a little more)
  • 4 tbsp freeze dried chicken
  • 2 tbsp freeze dried celery
  • 4 tbsp freeze dried mixed veggies (I used the Just Veggies Mix from Amazon)
  • 1 tsp dried garlic powder (could use more)
  • 2 tbsp olive oil (add in after the water)
  • salt to taste (we didn’t have any and it needed it!)

Add 2.5 cups boiling water and stir. Close the bag and let sit in your cozy for 5 minutes. Stir in olive oil and enjoy!

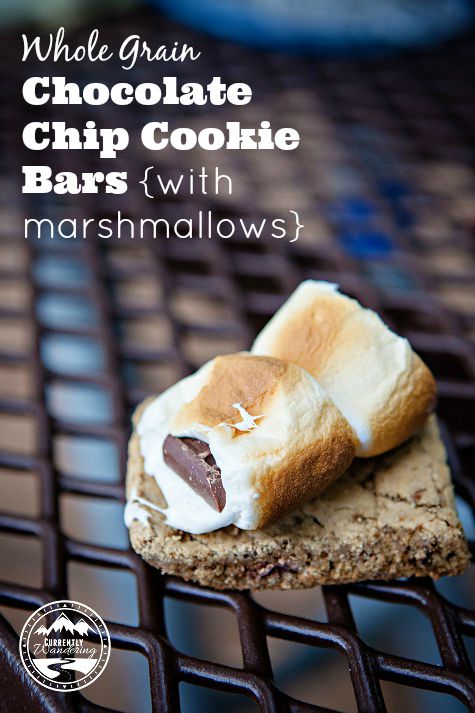
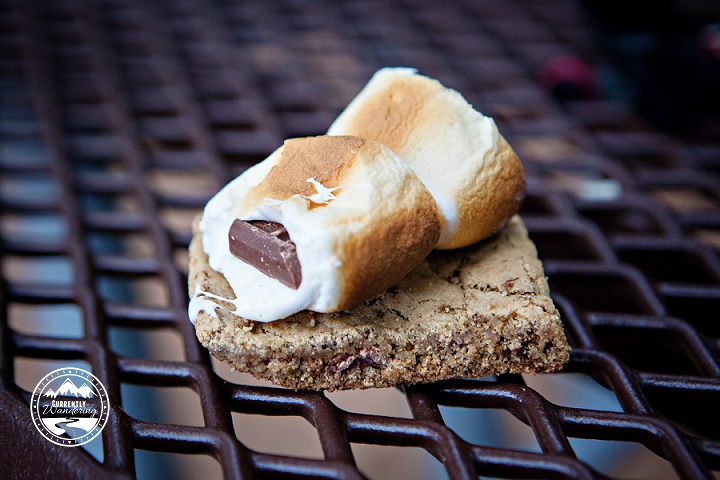
Dessert: Chocolate Chip Cookie Bars (recipe to come soon!), Hershey’s Fun Size Chocolate & roasted marshmallows

Day 3 Backpacking Meals

Breakfast: Homemade Blueberry Oatmeal, hot chocolate. I tried a recipe from the YummyLife and it needs a little tweeking. Like more sweetener. I’m still going to play with it a little more.

Lunch: Tuna & Crackers

  • Chunk Light Tuna Packet in Water (6.4 oz – we took 2, and only ate 1)
  • 2 Flavored Tuna (2.6 oz)
  • 8 oz box wheat thins,
  • 1 cucumber (I thought it didn’t taste good by now, but Sam and the kids ate it).

Snacks

  • Homemade trail mix – square pretzels, M&M’s, craisins, peanuts, mini marshmallows
  • Go-Go Squeeze Applesauce
  • Pull & Peel Twizzlers (maximum entertainment value)
  • Skittles & Peanuts trail mix
  • Candy Corn (could’ve put these in the trail mix!)
  • Riesen (Sam and I ate these, we didn’t share)
  • 10 Fun Size Snickers Bars

There you go! 3 days of easy meals for your next back country camping experience. We don’t backpack often enough to really need more meals than this. I do have one other recipe to try out for a dinner, and I’ll post that after we test it out!
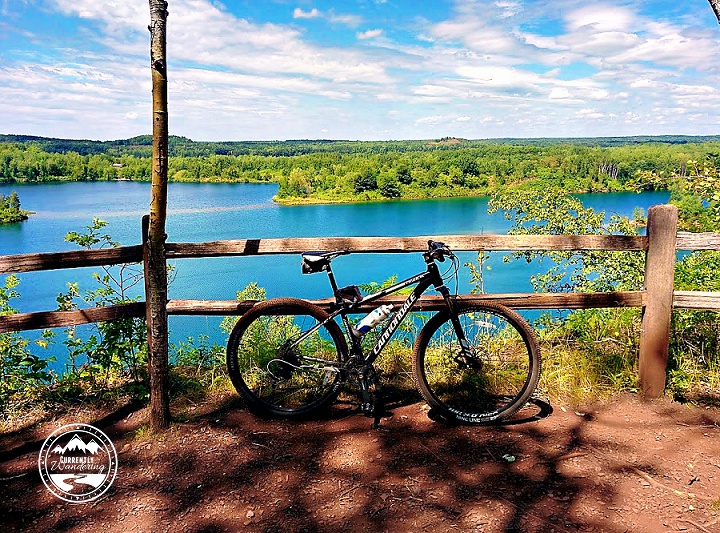
Apostle Islands National Lakeshore_38