Categories
Grand Teton NP Homeschool National Parks Yellowstone

What is the National Park Junior Ranger Program?

To date our kids have earned 112 Junior Ranger badges at the various National Park, National Historic Sites, and Monuments run by the National Park Service. Its a great way to learn more about the parks we visit, often giving us direction and more information about the wildlife, geology and history (see our list of badges).

We find these booklets are a great learning experience for kids and adults alike. Sam and I have learned a lot about our National Parks by helping our kids complete their activities. These badges aren’t just for kids though! Anyone can complete the work and be sworn is as a Jr. Ranger so don’t be afraid to ask next time you visit a NPS site.

We decided its time for a little Junior Ranger 101 and tried to tackle the most common questions we hear. If you have any other questions, please feel free to ask!

What is a Junior Ranger?

The Junior Ranger program is an activity based program conducted in most parks across the country. Potential Junior Rangers received a booklet from the visitor center, and upon completion are sworn in and received a patch or badge. The motto of Junior Ranges is “Explore, Learn, Protect!” and the activities reinforce these values through puzzles, question and answers, observation, and outdoor activities. Each program is unique to the park and they vary widely. Some have been newspaper fold outs, some are extensive booklets with amazing graphics, some are simply printed in black and white and stapled together.

Where Can I Earn a Junior Ranger Badge?

Most National Park sites have Junior Ranger programs. Many people don’t realize they are even in a NPS run site – when we visited the St. Louis Arch three years ago I was shocked that there was an entire museum below ground run by the National park Service. Its official name is the “Jefferson National Expansion Memorial” and yes, there is a badge. I’m still waiting for the chance to get back there and earn it.

Wildlife refuges often have badges (we earned our first one in Florida last year), and many state parks also have their own programs. California’s program is quite extensive and time consuming as its designed for local kids to visit multiple parks over their summer break. Humboldt County also an an EdVenture Quest where kids can solve a riddle to earn a patch (California Jr. Ranger Program & Redwood EdVentures Quest). Colorado has one badge for all the parks, while Arizona has a unique button for each park.

Earning badges in beautiful parks with friends is the best!

The most unique badge we’ve heard of is the Eisenhower National Historic Site in Gettysburg for the Junior Secret Service Agent in Training program. You have to go to the Gettysburg National Battlefield Visitor Center and take a bus to the site, but then can be sworn in as  Junior Secret Service Agent. How cool is that?

Chances are, if there’s a visitor center they probably have a program for kids. You just have to ask.

How Does the Program Work?

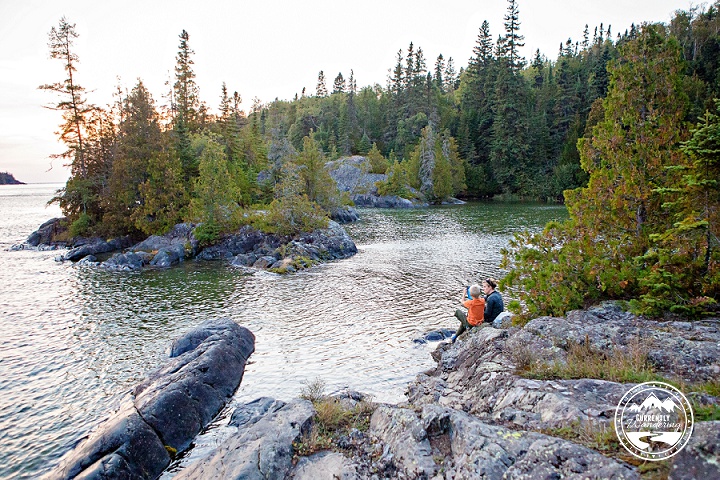
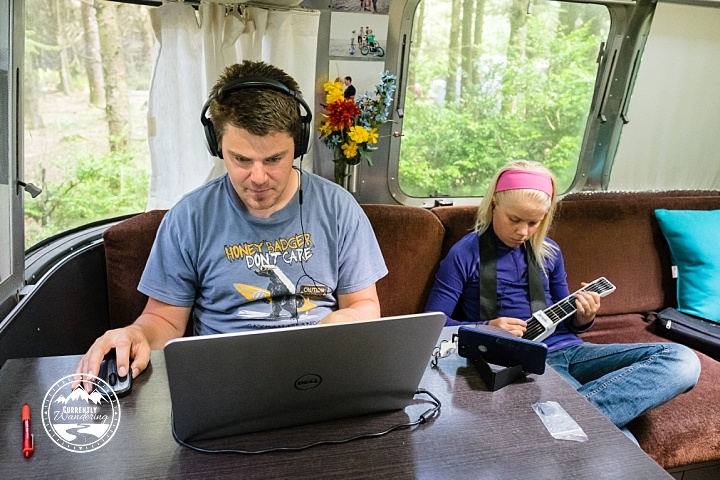
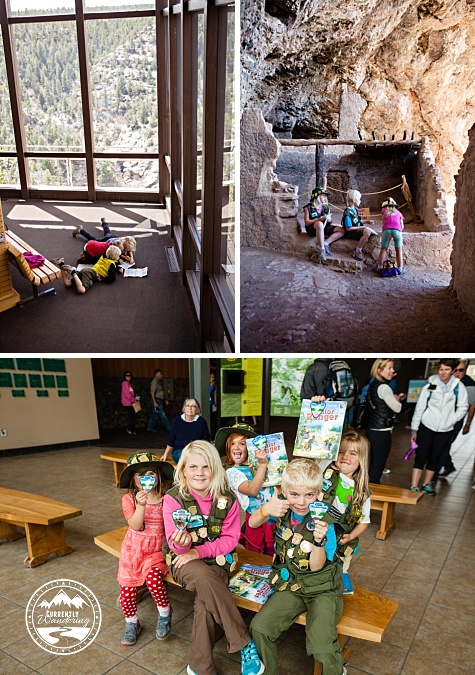
Our first stop at most NPS sites is the Visitor Center where we pick up our books. Rangers are generally excited to hand them out and are supportive of kids wanting to learn more about the park! Books in hand, we take a look at the activities required. There are usually different age groups with various requirements. Older kids have to do more complicated activities, while younger kids have activities that are more appropriate to their age. The best part is that as they get older our kids are more capable of doing it one their own! At this point, Cara still needs quite a bit of help but she’s getting there now her reading skills are up to snuff.

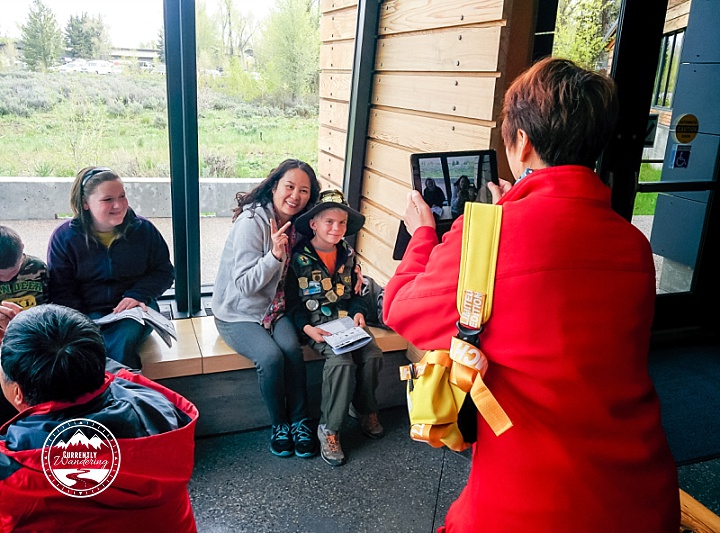
Once you’ve completed the book, take it back to the visitor center and have the ranger check it over. They make sure the kids have done enough work and check their answers. Some rangers are extremely thorough (Saguaro National Park) and others give it a cursory glance and call it good. Depends on how much time they have or how many kids are lined up to pass off their books. The ranger then signs their certificate, and the kids line up for their pledge. After raising their right arm the kids repeat the pledge after the ranger. My favorite pledges involve promises to “eat their vegetables” and “obey their parents”. After they’ve been sworn in, they get a handshake and their badges!

Getting sworn in as Jr. Rangers in Dry Tortugas National Park, Florida

Does it Cost Money?

Most of the programs are free, but a few charge a nominal fee. Yosemite has both a free and a paid version (you earn a patch with the paid book), and Yellowstone charges $3 per book. I think they just get so many visitors that it would be cost prohibitive to provide the program for free at those parks.

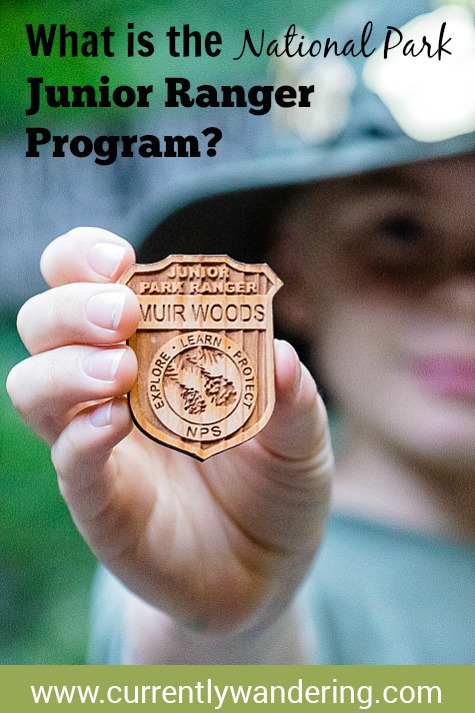
What do the Badges Look Like?

Each badge is different. We’ve learned that some have the generic NPS logo (the arrowhead, bison, river, tree) on them, while others have a graphic specific to the park. The latter are definitely our favorite and now the kids are disappointed when its just the “regular” one.

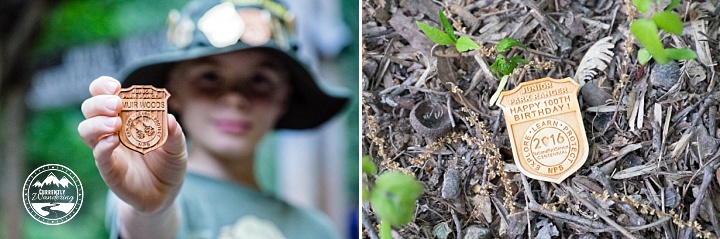
Some parks have wooden badges and we are finding these more common. At first I thought they weren’t all that great, but slowly they’ve absolutely become my favorite ones. We’ve found wooden badges at Yosemite, Zion, Marin Headlands, Muir Woods, Chiricahua and Fort Bowie to name a few.

We’ve also run into a few metal badges. They tend to be smaller, but also are unique and fun to collect.

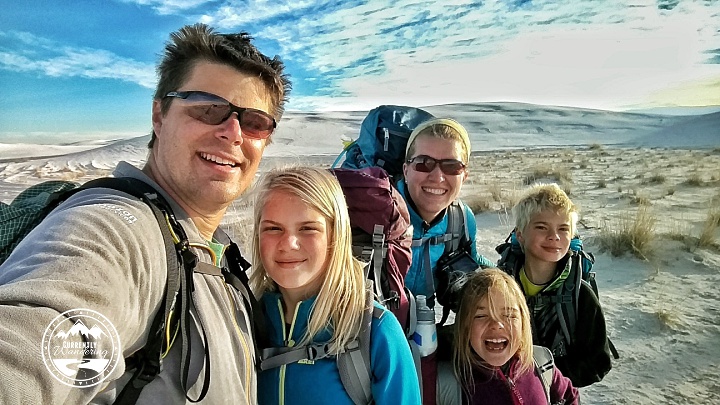
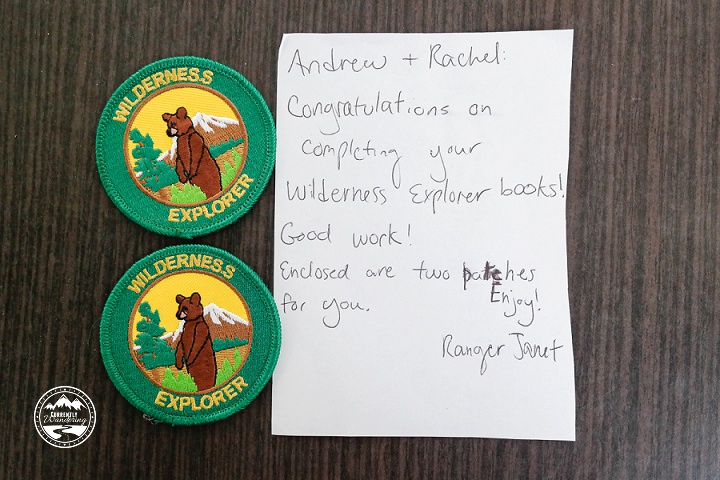
Most parks no longer have patches. I feel like budget cuts have made it impossible for parks to keep offering these. Sometimes you can buy a Junior Ranger patch in the bookstore (they are usually around $5) or if a park still has some, they offer the choice between a patch and a badge. We snagged up some of the last patches White Sands National Park had as they said they aren’t getting any more.

Only SOME of our badges!

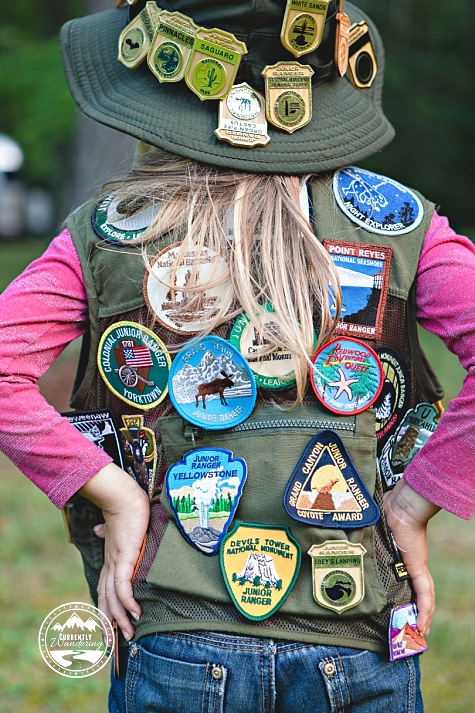
Junior Ranger Hats & Vests

Some visitor center bookstores have a collection of Junior Ranger items. We’ve seen binoculars, books, pencils, and most importantly: hats & vests. We bought our kids hats when they had earned their first 5 badges, and then vests once those started to fill up. If we loaded ALL our badges and patches onto the clothing I’m sure I wouldn’t even be able to see my kids anymore! It does create quite a stir when they walk into a NPS site all decked out.

Photo with a tourist at Grand Teton National Park, Wyoming

For awhile we sewed patches on the back of my kids’ vests, but then it got crowded! I still love having them on there, even if the kids don’t to wear their vests anymore. I think they just got tired of all the attention, plus the vests just got HEAVY.

At some point, I’d love to create a wall hanging for the badges, or even a quilt with a map of the USA and sew on their patches. There’s lot of options, but for now we collect and then drop them off in storage when we swing through Utah. We just don’t have room for all of them right now!

Other Options for Earning Badges

If you can’t make it to a National Park, or miss out on earning a badge don’t worry! Many of the parks have the booklets available for download on their sites and then you can mail it in (see our post How to Mail in Jr. Ranger Booklets to Get Your Badge).

You can also mail in your books if you don’t make it the Visitor Center before it closes, or just run out of time to get it done.

There are also badges connected to multiple parks, or even no parks at all. We’ve earned the Ocean Steward Badge (picked up at Olympic National Park), Wilderness 50th Anniversary, Junior Night Ranger Explorer (coolest patch ever!), Paleontologist, Underwater Explorer (picked up in Wisconsin and turned in in Florida), Historic Preservation, and the Centennial Jr. Ranger.

We’ve also printed off the Junior Archaeologist Book, Cave Explorer, and the Underground Railroad. I have these on hand and we work on them occasionally to supplement our school work. Eventually we’ll mail them in to collect our badges!

 Web Rangers Online

Last, but not least, there’s also a Web Rangers program! It is an online activity for kids where they learn about, History, Nature, Puzzles, Science, Parks and Animals.

After logging on, each child gets to design a ranger station. From there, they can explore many activities about our presidents, animals, sea, earth, and lots of other topics! My kids also like that there are lots of fun puzzles to do to.

As they complete activities, a bar graph on the side moves on the category of Easy, Medium, or Hard. When you finish all of the activities the “lamp of brilliance” turns on and you can submit your name for a patch!

Related Articles – For more information check out these other great articles  on the Jr. Ranger Program!

Currently Wandering – Our Kids Earn Their 75th Junior Ranger Badge

Faith Takes Flight – The National Park Jr. Ranger Program

Take That Exit – Earn Junior Ranger Badges at State, National Parks

Categories
National Parks New Mexico

Backpacking & Sledding in White Sands National Monument, New Mexico

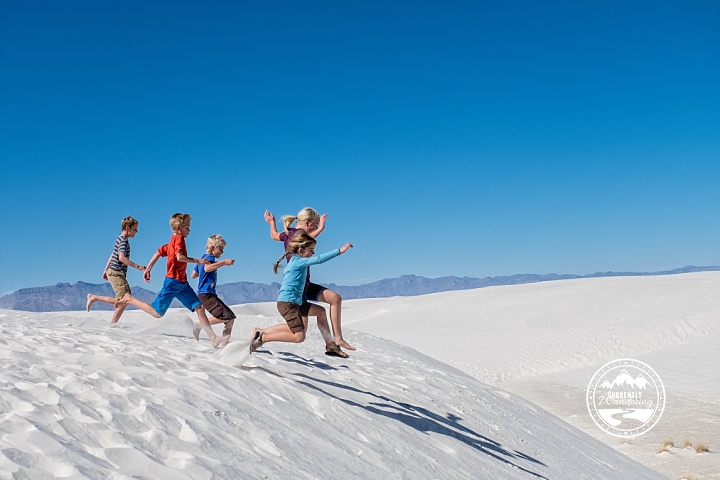
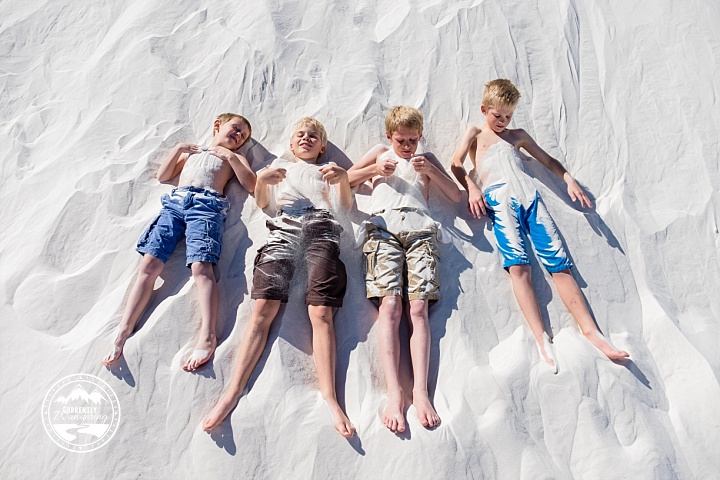
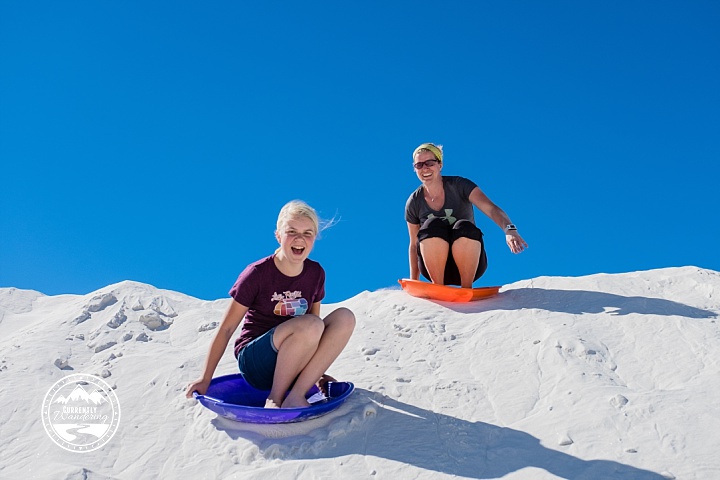
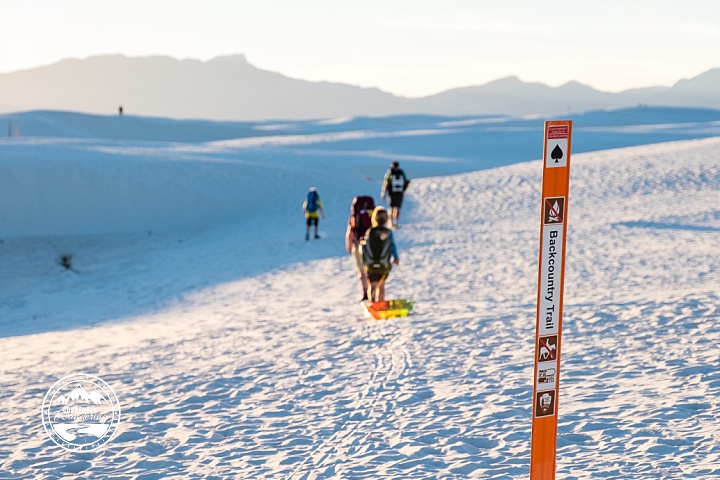
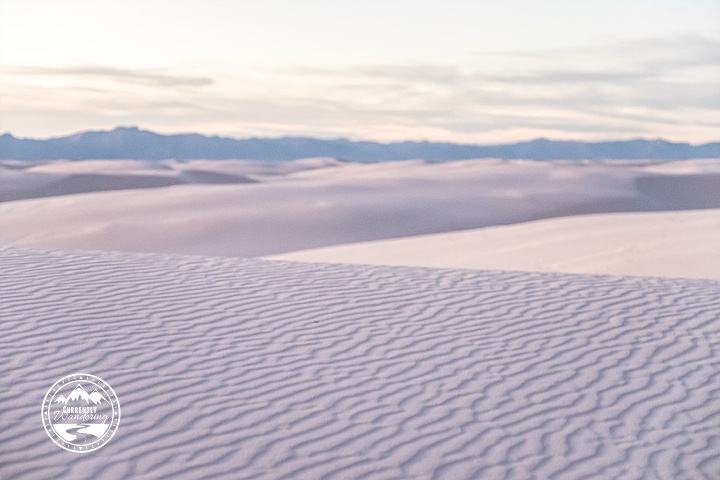
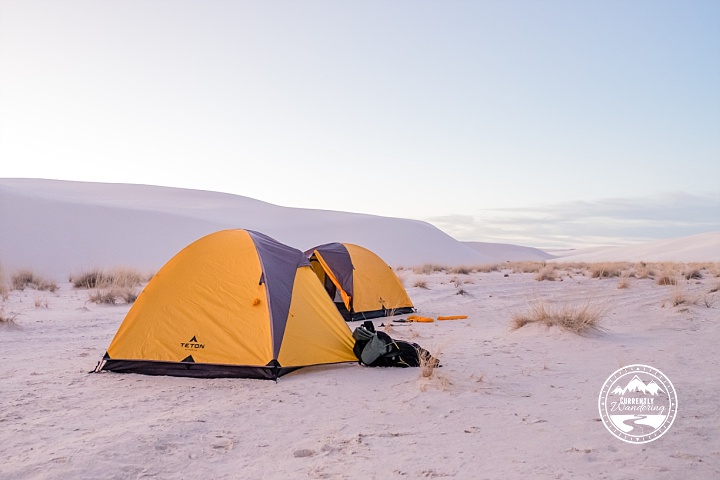
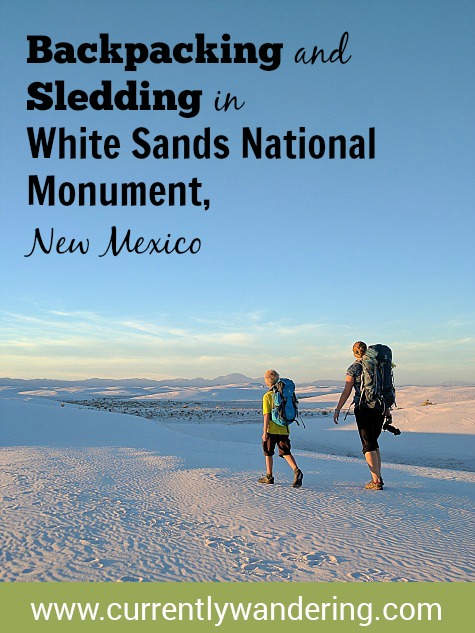
"White Sands National Monument is one of those other-worldly places. Located in southern New Mexico this park is truly one of a kind. We visited three years ago on our initial trip from Virginia to Utah and the kids have been begging to go back. When we decided to stay west this winter they unanimously voted White Sands as the one place they wanted to visit for sure.

Travel Dates: February 17-18, 2017

Ages of Kids: 11, 9, 6

Where to Stay: There is no campground for trailers in White Sands National Monument. However, Lake Holloman is a free option about 5 minutes from the entrance, or Oliver Lee Memorial State Park is about 30 minutes away.

Where to Get Sleds: The Albertson’s in Alamagordo sells sleds (usually) but you can also get them from the Gift Shop through the courtyard and past the Visitor Center desk. At the time new disks were $16 and used were $10. They will also buy them back once you are done ($7 new and $3 used I believe).

We arrived Airstream in tow and parked in the Visitor Center lot where they have ample room for bigger vehicles. We went inside, grabbed our Junior Ranger books and headed to watch the video about the park. Unfortunately about this time a school group came through so we didn’t explore the exhibits further. After about 15 or 20 minutes of working distractedly on their books, the kids looked up at me and said, “Mom? Can we just go sledding?”

I realized we weren’t going to get anything else done before we hit the slopes as it were, so we bought used sleds from the Gift Shop for $10 each, some wax, and loaded up for the drive into the park.

I love that the parking lots are HUGE and we can just drive our entire Airstream into the park. The best dunes are located near the end of the one way, teardrop shaped loop. We parked near the Alkali Flat Trailhead where there were multiple large dunes to choose from.

We also met up with both @liddleadventures and @thefamilycan so it was a full day of friends and sun! We couldn’t have asked for a more perfect day.

With cloudless blue skies, and warm temperatures, our visit this time was totally different. We basked in the sun wearing shorts and short sleeves, and even had to apply sunscreen in order to not be burnt. It felt like the perfect beach day and we were up and down the dunes for hours.

At one point in a conversation with another family, we were musing about the back country camping in the park. There is a loop for tenters and we joked about pulling out our tents and just staying the night.

And then we totally did.

Sam drove back to the Visitor Center to grab a permit (first come, first served) and I double checked to make sure we had enough food to pack in for dinner and then breakfast the next morning. Around 3pm our friends both took off for their next destinations and we set about packing up our overnight gear and prepping food.

Once we were ready, we drove to the backpacker trail head, parked the trailer and set of into the sunset for our short one mile hike to campsite #2. Cara insisted on bringing a sled and pulled it behind her as we followed the orange markers out over the dunes.

We got to camp and hurriedly set up our tents before it got dark. In hindsight, we could have timed things to arrive just a little bit sooner, but honestly the kids were having so much fun sledding with their friends that I’m not sure we would change anything.

Have you ever had a random idea to turn a one day visit into a backcountry overnight trip? Me eithe…. Yeah. That happened. In our travels, we have learned to say Yes when adventure calls. That is how we ended up hiking into the otherworldly scene displayed here. We found our campsite amidst the dunes just before nightfall. Staying overnight allowed us to experience not only the late evening and early morning unavailable to daytime visitors, but also a brilliantly bright full moon. -@telegramsam

Hooray for a spontaneous backpacking trip! While sledding yesterday in White Sands National Park we decided to grab a back country permit and stay the night. With a full moon, plenty of stars, and a gorgeous sunrise we definitely made the right decision! -@currentlywandering

Camping on the dunes is prohibited so all of the camp sites are nestled in valleys between dunes. We settled into our little spot, made dinner, and the kids managed a final sled before bed.

One of the perks of staying the night was the ability to see both sunset and sunrise in the park. Sunset over the gypsum sand was pure magic. Depending on the time of year, the park can close before sunset actually occurs which I think is totally sad. The rangers drive through the park at closing announcing over a loudspeaker that everyone needs to leave. I’m grateful we were able to just stand and enjoy it.

At first we were excited there was a full moon and then we realized that its really hard to sleep when its so bright outside! Sam, Rachel, and I went for a walk at 10pm with no headlamp (and no shoes honestly) to try and bring on some sleep. I didn’t even try to capture any star photos as the moon would have just washed them out.

“The moon was full last night, and as it shone upon the brilliant white sand around us, it lit up the night in a way I have never seen before. It was bright enough to allow a late night wander without any light at all. It was so bright that we had moon shadows. It was so bright that we had trouble falling asleep. It was indeed otherworldly.” -@telegramsam

We had plans to be 5 hours south of White Sands by Saturday night, so were were up and out of camp early the following morning. We had a quick breakfast of Cliff Bars, fruit strips, and hot chocolate before making our way back to the trailer. Halfway there we realized the Visitor Center didn’t open until 9am (we needed to turn in our Jr. Ranger books) so we slowed down a bit and got some more sledding in.

Backpacking trips that involve sand dunes and sledding are much more fun. -@currentlywandering

I love that we could revisit one of our favorite places and the experience was so different than last time. White Sands is definitely a unique visit and camping in the back country made the visit even more special.

Categories
Backpacking Tips & Tricks

8 Tips For Taking Your Kids on Their First Backpacking Trip


My husband, Sam, and I completed our first backpacking trip together in New Zealand’s rugged mountains four months after we were married. Actually, it was my first backpacking trip ever. While he grew up with parents who frequently went into the back country, we were more front country, car camping kind of people. Despite the flies, the rain, and the incredibly steep trails, I was hooked after that one experience.

Knowing how incredible it feels to wake up in a tent on top of a mountain, we agreed that we would love to share that experience someday with our kids. This last year we finally reached our goal, completing four separate excursions in various states across the U.S. We watched our kids struggle up steep trails and bundle up against cold, windy weather but then also lift their faces in awe as they soaked up an early morning sunrise.

So, how did we do it? How did we go from tent for two, to trailside with five? Here are eight tips for taking your kids into the backcountry for the first time:

Plan Carefully.

There are many questions to consider when planning your child’s first backpacking trip. What are your goals? How many nights do you want to do? How far can your kids hike? What is there to do once you get there? Are you going to start after dinner? Early in the morning? How steep is the trail? Is it a long drive to the trailhead? Knowing your kids and their limits (generally speaking) can give you a good idea of where to start.

Many of our overnight hikes leave around 2pm, hike five miles to the campsite, eat dinner, have a lazy morning and hike back out around lunchtime. Simple, easy, yet a great way to unplug and be together as a family. Other families I know grab Subway after work on the way to the trailhead and hike a mere mile or two in before setting up camp for the night. Know your goals and then research the best way to accomplish them.

Start Simple.

Long before we loaded our kids up with a pack we hit the trails. We hiked short trails, long trails, hikes in the mountains, and hikes in the desert. Our kids could hike up to ten miles, which we did repeatedly over the course of a year. Our first backpacking trip, however, was a short 3.5 miles. We’ve gradually increased the distance over time, but we’ve found that hiking with a pack is a different experience for a kid. My husband has memories growing up of even shorter, one mile hikes to backcountry sites shouldering his small backpack and water bottle. The idea is to get your kids used to hiking in to their campsite wearing a pack whether it’s one or ten miles in.

Take Your Time.

On multi-day trips, my husband and I often remind ourselves we have ALL DAY to hike with the kids. The beautiful part of backpacking is that often there’s not much to do besides hike, so taking all day to hike that 3.5 miles not going to crimp anyone’s schedule. Smell the flowers, throw rocks in the stream, take a longer snack break and don’t push too hard.

Pack Plenty of Treats.

Well-thought out and distributed candy, snacks, and gummies can help motivate even the most reluctant hiker. Quick carbohydrates and sugar are often the perfect pick-me-up. We often have a mile limit or a goal to reach before we sit down to pull out the treats, which keeps the kids from asking every five minutes if they can have skittles. A special treat for reaching the “top” is also a welcome bonus. Our kids love Australian licorice, skittles mixed with toffee covered peanuts, mini M&M’s, and Pull-and-Peel Twizzlers.

Simple Meals.

While you may enjoy a gourmet backcountry dinner, chances are your kids are just hungry. In addition to plenty of snacks and treats, we do Freezer Bag Cooking for dinner and breakfast. All dry ingredients are prepared beforehand at home and then sealed in a freezer bag before getting tossed in our packs. Once mealtime rolls around, we boil water, add to our freezer bag, stir, let it sit in a cozy for 10 minutes, and voila! Dinner is served. Our three kids typically share a meal, while Sam and I eat a second. Our favorites so far are Cheesy Bacon Onion Mashers, Chocolate Protein Oatmeal, and Chicken Thanksgiving Dinner.

Be Prepared for Boredom.

Let’s face it. Most kids are addicted to screen time and even when they are conditioned to get outside often there’s still going to be whining about being bored. At camp, my older two kids will happily read on a Kindle for an hour or two, but after ten minutes my five year old is complaining because no one will play with her. We’ve learned to be strategic about how much time we will have at camp, whether or not there is anything nearby to explore, and to bring card games and even toys to play with once we get there. Packing a compass for scavenger hunts, a GPS unit for Geocaching, or a pocket knife for whittling sticks are all fun ways to spend time together once camp is set up.

Ultralight is Best, but Don’t Stress About Gear.

Between the two of us, we carry most of the gear. From the tent to the sleeping bags, cooking gear, and the food, most of it is packed into our two larger bags. Over time we’ve been able to make adjustments and swap not-so-light gear out for less weight as we gradually increase our distance, but start with what you have. At short distances, ultra-light gear is not as important. Let your four year old wear her Winnie-the-Pooh backpack and bring her stuffed animal. You can see our gear list here.

Have a Good Attitude.

The best thing you can do to help your kids have a good attitude and appreciation of the experience is to have a good attitude yourself. If your kids hear you talk about how much you enjoy the view, how much you appreciate the challenge of that ridge in front of you, and the good memories you have of other backpacking trips, your kids are likely to adopt a similar attitude. If they hear you complain about how dirty you are, how much you miss your bed at home, and the pains you feel, they will likely adopt those feelings too. Having a good attitude can be a challenge, but the payoff is worth it!

While we introduced our kids to backcountry camping fairly spectacularly manner, camping for two nights on an island in Lake Superior is not feasible for everyone. Our main goal, however was to have the experience end solidly with a “backpacking is really awesome” mindset for the kids no matter where we went. We feel it was a success since the kids happily followed that up with three more trips over the next few months.

Backpacking, or doing anything outdoors, with kids involves a different mindset. Suddenly we weren’t doing this for us, we were doing it for them. The miles are shorter, the terrain a little easier, the views maybe not quite as majestic, but the time spent together hiking, setting up camp, and snuggling in our sleeping bags while the stars wink overhead is irreplaceable.

Categories
Arizona

Our Boondocking, Nomad Neighborhood in Las Cienegas NCA

Las Cienegas has been on our visit list since the WanderingWatsons visited two years ago. Once we managed to pull ourselves away from the mountain biking haven at McDowell Mountain, we drove straight to this boondocking site southeast of Tucson, AZ. Loaded up with extra water, groceries, and not very many plans we were set for a calm week.

From the terrain we were driving through, it was hard to believe we had just left the Sonoran desert. This landscape was closer to an African Savannah with scrubbly trees and tall, brown grass.

We found ourselves a campsite big enough for @thefamilycan to join us the following day, and settled in for another amazing Arizona sunset. Seriously. I don’t know how this state delivers the colors so consistently.

Temperatures dipped below freezing at night, but during the day the sun warmed us up. With friends nearby, forts to build, a dog to walk, and school & work to complete we were content to mostly just sit and not go anywhere.

“It was pretty chilly yesterday evening, but you wouldn’t know it from the way the kids played outside. I love the open space that our #bigbackyard often provides. Having the @thefamilycan around makes for good friend time.” -@telegramsam

When we decided to spend a portion of our winter in Arizona again this year, places like this were exactly what we had imagined. No pressure to see or do anything, just beautiful views and wide open space. There’s something about this spot that was incredibly peaceful. Both @thefamilycan and we were extremely content. Perhaps there does need to be some land in our future after all?

“The best kind of neighborhood. Sad to leave our awesome spot in the grasslands, but laundry, groceries, a tank dump, and being closer to Sunday church services were in order. Excited to still be caravanning with @thefamilycan for at least another week though. Hooray!” -@CurrentlyWandering

Categories
Giveaways Homeschool

Learning the Guitar with jamstik+ & Four Chords {Plus a Giveaway!}

There are many perks to the traveling lifestyle, but there are also a lot of activities and hobbies we have put on hold. When we were selling the house and most of our stuff, I looked longingly at the guitar I had bought 6 months previously. I had every intention of learning to play, but naturally life got in the way and I never found time to dedicate to practicing. I grew up playing the piano and love to have music in our lives which is something we’ve definitely missed!

Last summer, Sam found a company called jamstik+.  We don’t have room for a full size guitar, but the jamstik+ is small, compact, and lightweight and comes with an app to actually teach me to play. We contacted the company and they graciously sent us two jamstik+ guitars so Rachel and I could both learn how to play.  Over the last 6 months we’ve written about our experience in three different posts for their blog (Part I & Part II), but I figured it was time to post over here as well!

The Guitar

The jamstik+ connects to our devices via Bluetooth, so there are no cords between the jamstik+ and the device we are using. Its also smaller than a normal guitar, and a bit harder to hold in your lap. We’ve found using the included neck strap helps keep it in a more comfortable position.

When we’ve gone back and forth between a regular guitar and the jamstik+ over the last few months, we have noticed the difference in fret board in size. Also, friends that can already play the guitar take a minute to get used to the smaller fret board and fingerings! Overall we’ve had success transitioning between the two and Rachel has already asked for a “real” guitar once we settle down somewhere.

Where to Buy: On Amazon or use code “CurrentlyWandering on jamstik.com for 15% off your order (more color choices here!)

The Lessons

JamTutor is their lesson app. Its easy to get set up and the lessons progress fairly naturally. The lessons include picking single notes, strumming, chords and introduce “Arcade Mode” which is a fun way to play with background music. Kind of like “Dance Dance Revolution” video games where you have to step on the correct arrows as they scroll down the screen. Arcade Mode is Rachel’s favorite and she spent close to an hour one day just going through the different challenges.

My favorite part about the jamTutor app is that we can start and stop as needed. I realize that for some that may be de-motivational, but for me it’s a perk. Sometimes life gets crazy busy and there is little time to practice. Not having the guilt of paying for lessons is such a blessing! Granted, it can be hard to get started again, but we’ve found that repeating a few lessons or arcade challenges brings us up to speed very quickly.

In a small space, it is also nice to have a guitar with headphones! Rachel can play right next to Sam while he’s working and both are able to accomplish their tasks. Occasionally I’ll have her practice without headphones just so I can hear her progress, but mostly she will have them in.

Learning Songs

Rachel has far surpassed me in skill as she is assigned practice for school and I get, well, lazy. Distracted? Otherwise engaged? She’s been fairly diligent and has learned to love and look forward to playing. I’m so proud of her.  I love listening to her sing and even our other two kids will sing along with whatever song she’s playing.

She now practices songs mostly using the FourChords app. From their website: “FourChords Guitar Karaoke is the fastest way to learn new songs! The songs are displayed in adjustable karaoke-style display with easy chords, an acoustic backing track and lyrics. Songs are re-arranged into easy versions, no knowledge of tabs or sheet music needed. Each song includes chord charts.”

Her current favorite songs are: “Eye of the Tiger”, “Gironimo”, and “Pompeii”. Using the app, she’s easily able to filter songs by chords. She can choose to exclude the pesky B chord, for example, and only look through songs she knows the chords for. She loves there are culturally popular songs as well as achievement awards that keep her motivated to practice! She’s also learned a few strumming patterns (something not included in jamTutor right now) and can easily switch between chords as she plays. I’m very jealous.

Last week out in the grasslands we utilized Sam’s video skills and put together a little music video of her playing. Notice the drone footage. Yep. More on that later!

The Giveaway!

Now to the REALLY good part! We’ve teamed up with jamstik+ to give away a guitar, travel case, and a 1 year subscription to the Four Chords app! We are super grateful for their generosity and can’t wait to get this instrument into one of our reader’s hands. Use the widget to enter below. Contest ends on February 5, 2017 at midnight Mountain Standard Time. Good luck!

jamstik+ & Four Chords Giveaway