Categories
Biking Daily Life Minnesota Mommy Diaries

Strawberry Picking & I Run Our Bikes Into an Overhang

SAM_4070-Edit I honestly knew it would happen sooner or later. I’ve heard horror stories of friends forgetting they had bikes mounted to the top of the car when they pulled into their garage. Since we are frequently carrying all 5 bikes around on the back of our truck, I kind of forget they are there sometimes (check out this post for our configuration). Parking in downtown metro areas can be difficult as often the clearance levels are quite tall enough for us. Those don’t seem to be a problem though as I usually remember because there are signs saying “low clearance”. But what happens when there aren’t any signs?

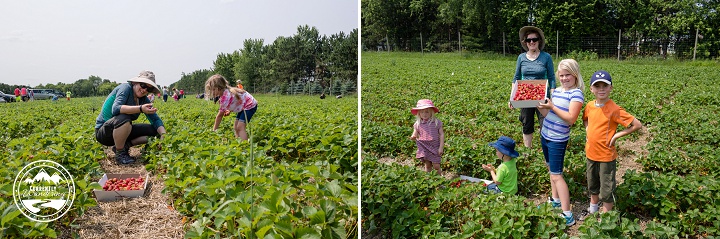
It was a beautiful day in Minneapolis, Minnesota. We made plans with my sister-in-law to visit a local farm and pick strawberries. The kind where they hand you a box and set you up on a row to pick until you are done. Sounded super fun and the kids were pretty excited. Unfortunately, there was a miscommunication on timing and location and we ended up with a spare forty-five minutes.

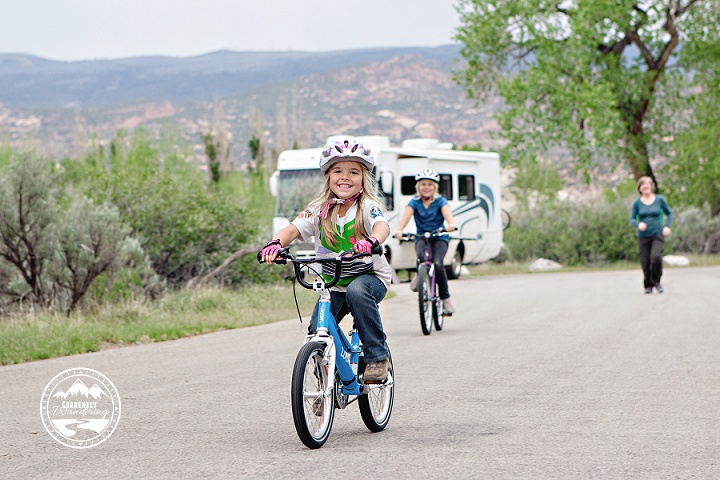
While we were waiting we checked out the local off-road cycling track at Elm Creek Park Reserve. Since we always have our bikes with us, it was super easy to pull them off ride, load back up and head to meet my sister-in-law. We even had a spare bike for my mom to ride!

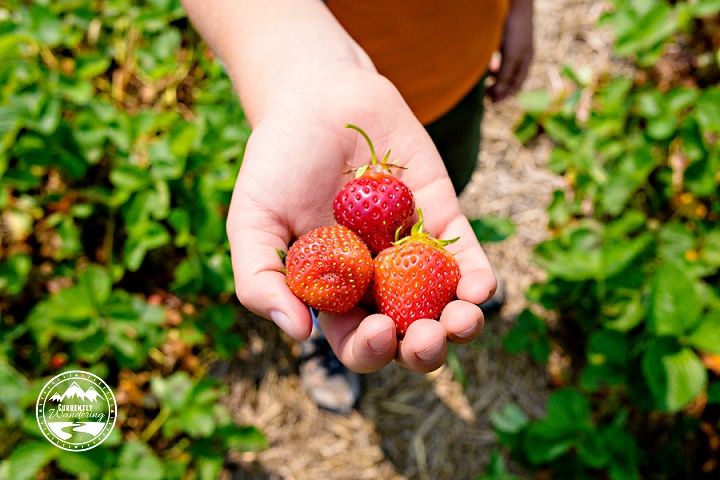
Soon enough we were at the farm picking plump, red strawberries off the vines. Not wanting TOO many strawberries (small fridge, remember?) we picked for about forty-five minutes and the kids had a lot of fun.

SAM_4072

As we were driving out, the check out stand was located underneath a pagoda-looking structure. You drive in one end, stop in the middle, they weigh your strawberries, you pay and then drive out.

Turns out its on a hill.

We made it through the entrance, and then promptly crashed the bikes into the overhang on the way out.

SAM_4075

I can still hear the crunch of metal bending awkwardly, and see the bikes hanging off the truck in my rear view mirror. I will probably have nightmares for weeks to come.

Had I been in a less frantic state of mind, getting a photo of the two adult sized bikes barely hanging onto the racks by their wheel straps would have been epic. Turns out, however, I was too busy trying to minimize even more damage and get them down off the racks instead.

IMG_20150702_123008

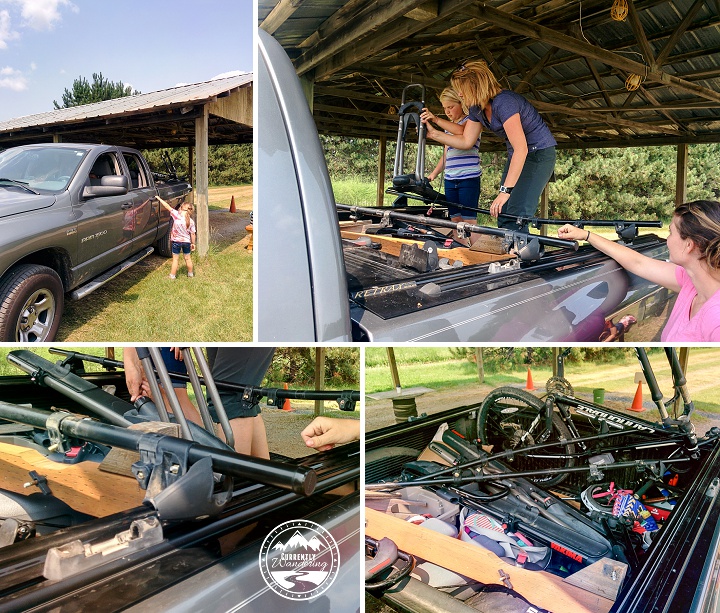
The owner felt terrible, but there wasn’t a whole lot he could do. Since one of our cross bars was bent and two of the towers had ripped out of their counterparts, I worked on taking all the bikes and the rack off the truck. At this point I was grateful my sister-in-law was there in her mini-van as we loaded most of the bikes into the back of her vehicle, and the rack pieces into mine. Did I mention Sam wasn’t with us? I called him on the phone and we both kept pretty calm. Mostly I was just mad I couldn’t go ride those trails some more.

IMG_20150702_122632

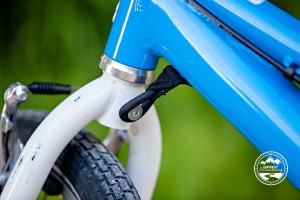
A quick assessment of the damage had dollar signs in my eyeballs, but once I calmed down and we made it to a local bike shop (which the farm owner had called and told them we were coming) it looked like one ruined High Roller Yakima rack, one bent cross bar, and a tacoed rear wheel on the mountain bike.

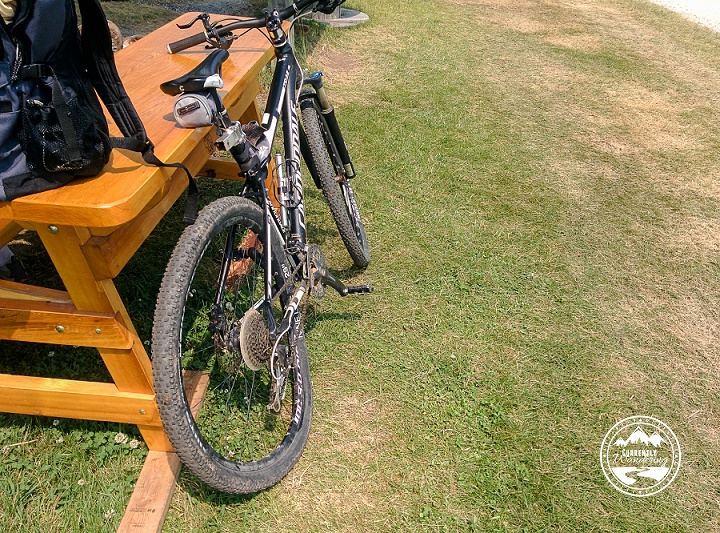
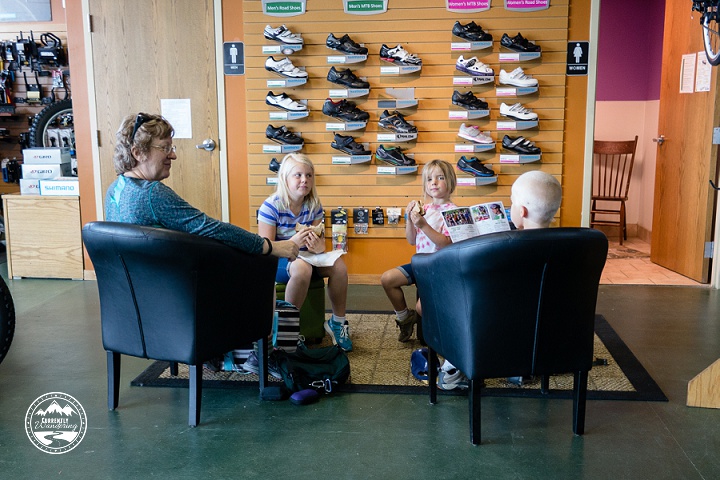
A quick replacement of the rim and a thorough inspection by the mechanic and the mountain bike was back in business. Somehow the mechanic even managed to straighten out our Yakima cross bar. Super human strength? I think so. Once the bar was straight I was able to put the towers back together and mount the bars completely. How they ripped apart and nothing cracked or broke is a complete mystery to me. We’ll definitely put that in the “tender mercies from the Lord” category and file it away. While they were working on my bike, the kids, grandma, and I camped out in the store and finally ate our lunch. The employees even offered us water bottles. Best bike store ever. If you need a bike shop in Minneapolis, definitely check out Trailhead Cycling and Fitness in Champlin.

SAM_4079

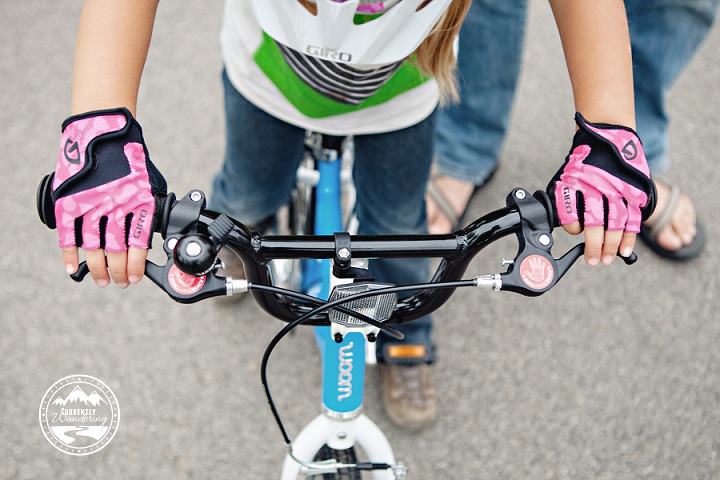
Since the rest of the bikes were with my sister-in-law I had to wait until we got back to her house to check them out. The kids’ bikes were short enough they didn’t really hit anything and looked fine, but the cyclocross had a ripped seat (it hit facing backwards, seat first) and a pretty out of true rear wheel. There was another bike shop about 10 minutes from her house and with a sob story they were able to true it in about 15 minutes only having to replace one spoke.

In the meantime I had a little ice cream therapy.

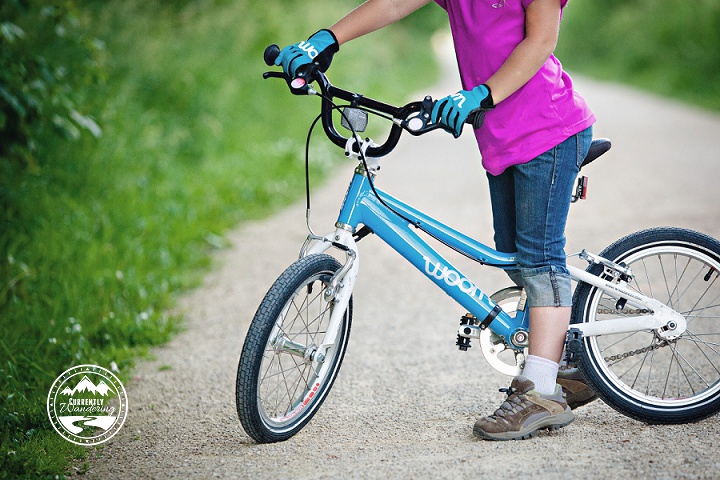
We ended up having to replace two of our High Roller racks, but were able to find one at about half the new cost on Craiglist and ended up with a Yakima Raptor Aero for the other one. Cara’s Woombike is too small to fit on the High Roller anyway, so it will come in handy in the near future.

All said and done, the experience wasn’t as tragic as I had expected. We ended up only spending about $60 over our insurance deductible and decided it wasn’t worth the trouble of filing the paperwork. Should it ever happen again (which it’d better not), it looked like our personal property insurance would have helped covered the replacement costs.

On the bright side, we managed to get everything taken care of to ride the Watermelon Ride in nearby Shoreview which we found out about from a flier in the bike shop. Always need to look for the silver linings, right?

Categories
National Parks Utah

Golden Spike National Historic Site

Golden Spike National Historic Site - Utah

Many of you may not have even heard of Golden Spike Historic Site outside of Salt Lake City, Utah. It’s actually located west of Brigham City (which is north of Salt Lake City) and there’s really no seeing it on the way to somewhere else. I’m pretty sure its out in the middle of nowhere
, but we really enjoyed our experience and felt it was worth the time to get out there.

When We Visited: July 14, 2014
Ages of Kids: 8, 6, 4

We drove up to Brigham City from the KOA in Salt Lake City so Sam could do an onsite visit for work at the manufacturing plant there. It was only another 35 minutes out the site so the kids and I drove out to spend the morning earning a Jr. Ranger Badge and learning about railroads and trains.

Golden Spike National Historic Site - Utah

On May 10, 1869 the Union and Central Pacific Railroads joined at Promontory Summit, Utah Territory completed the first transcontinental railroad. We picked up our books and the headed outside to see the replicas of the two trains, Jupiter and No. 119, that were in place as the last tie was laid and the four special spikes were driven to complete the track.

What is funny is that immediately after the ceremony the laurel wood tie and the spikes were removed and replaced with items not some tempting to a thief.

Golden Spike National Historic Site - Utah

We also listened to the ranger talk about the the event (it was a big party), the trains, and how the trains are actually stored and maintained. Did you know that the trains coming from the east ran on coal, and those coming from the west ran on timber? The fuel source was based on how readily available it was in the country they were passing through. Neat, huh?

Golden Spike National Historic Site - Utah

My favorite part was when the stoked up the engine for a steam demonstration and we got to see No. 119 in action:

During the summer, the Site also does reenactments of the ceremony which I think would be pretty cool:

“The Driving of the Last Spike is reenacted during the summer season allowing visitors to relive this celebration. Volunteers portray the dignitaries who were at the ceremony on May 10th, 1869.
Reenactments are held Saturdays and holidays, starting the first of May through mid-September, at 11:00 a.m. and following the 1:00 p.m. Steam Demonstration.”

Last but not least, we explored the visitor center to finish up our Jr. Ranger badges and turned them in.

Golden Spike National Historic Site - Utah

The more we visit National Historic Sites, the more I learn to love history and the great country we live in. Railroads were a huge part of our Nation’s economic development and it was fun to see such a site dedicated to such a monumental event!

Golden Spike National Historic Site in Utah is worth the drive to get out there! Great history and some awesome trains.


Categories
Fitness & Recipes Outdoor Adventures

New, Fun Ways to Dress Up Your S’mores

SAM_4064-Edit
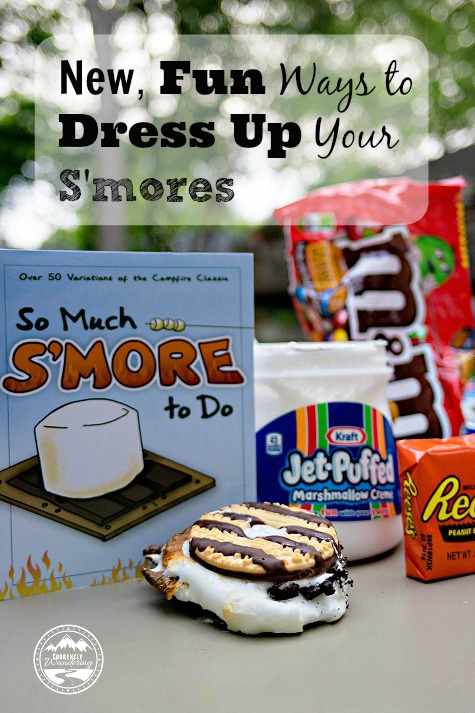
We rarely have campfires, but when we do my kids love to roast S’mores. After seeing the “So Much S’More to Do” book in a half dozen National Park visitor centers, we decided to buy one. We loved it so much that we gave a book, plus a dozen or so S’more fixings to all of our family for Christmas last year.

Last week we had a little get-together with all of my family here in Minnesota, and my brother has a beautiful, new fire pit in his backyard we just had to put to good use. The girls took a trip to the grocery store for the treats and we had a great evening roasting marshmallows over the fire and discovering new, delicious ways to eat them!

Some of our favorite personal recipes:

S’Less
Directions: Roast your marshmallow until golden brown. Gently pull it off your stick and put a piece of Hershey’s chocolate INSIDE the marshmallow. Let it melt for 1-2 minutes and eat without a graham cracker.

S’Less with Peanut Butter
Directions: Same as above, only use Peanut Butter M&M’s instead of plain chocolate.

Peanut Butter Cup S’Mores
Directions: Use a Reese’s Peanut Butter Cup in place of your plain chocolate.

A new favorite recipe this time around included marshmallow cream, chopped up Oreos and Keebler Fudge graham cookies. Last winter we had a fire with friends in Las Vegas and I pre-made brownies to use instead of chocolate (Instagram photo).

Other fun recipes in the book are: Peanut Butter & Banana S’mores, Rice Krispie Bar S’mores and even Pumpkin Pie S’mores.

Oh! The possibilities! What’s your favorite way to eat a S’more?

New, Fun ways to dress up your Smores!

Categories
Biking Outdoor Gear

Gear Review: 6 Reasons WOOM Is the Best Kid’s Bike Out There

The bike company that focuses all of its time and energy on designing high quality and lightweight bikes for children of all ages.

We knew Cara was in the market for a new bike, but we kept putting it off. With how much we ride bikes (including the crazy mountain biking she’s done on her strider- see our YouTube video here), we also knew that a cheap bike from Wal-Mart was just not going to cut it. Since we didn’t know what to do, we just did….nothing.

Then we found out about WOOM Bikes. These are seriously awesome. After learning about this company I knew we wanted one of their bikes for Cara, and after a short email conversation they were gracious enough to send us a WOOM3 bike for review.

Note: The company behind WOOM Bikes is German, so ‘woom’ is pronounced ‘voom.’ Makes sense, right?

The short story is that, as parents, we absolutely LOVE this bike. Cara loves it too and has totally taken off riding as we expected her too. Yes, they are pricey, but they also have a fantastic Upcycle program (if you don’t have younger children to pass the bike on to). With how much we ride and enjoy riding long distances having a great bike for our kids is super important.

Woombike_21

For the longer version, read on for our Our Top 6 Reasons WOOM Bikes Are the BEST:

1. Ease of Assembly 

I do have some experience adjusting and maintaining bikes, but none was necessary. The bike arrived packaged carefully, and nearly fully assembled. The included instructions were easy to follow, and there were only a few steps. Mostly, putting it together involves tightening screws with an allen wrench. No allen wrenches? No problem. Included in the package with the bike was the allen wrenches needed, along with a pedal wrench needed for attaching the pedals.

Woombike_02

All in, it took only 30 to 45 minutes start to finish to assemble the bike and Cara was pretty excited when we pulled the bike out from behind the Airstream:

Woombike_04

2. Handbrakes designed for small hands

Neither of us felt comfortable taking Cara mountain biking with just a pedal coaster brake. After talking to a generic bike shop about putting a handbrake on a kid’s bike, he mentioned that most kids’ hands are too small to reach and lack the pulling power to actually stop themselves with a handbrake. WOOM has totally solved this problem with brakes specifically designed for little hands. Cara has no problems using the handbrakes to come to a standstill even from pretty fast speeds.

3. Steering dampener

There’s a small rubber ring that attaches the front wheel to a boss on the frame. This keeps the front wheel from turning all the way around, or a child from turning the wheel too far too fast and eating hard on the pavement. This might sound like a small thing, but really helps a child worry less and feel confidant learning to ride.

Woombike_23

4. Freewheel design

 USA laws are different in that we require a coaster brake for young kid bikes. This makes it incredibly difficult to get started on a bike because they can’t pedal backwards to line up the pedals for a good take off. Woom has figured a way to design the Woom so that it can have a freewheel and skip the whole coaster brake problem. It is awesome. We just had to make sure she could fully rely on the handbrakes, but since she hadn’t ever ridden a bike with any brakes, there were no bad habits to unlearn.

5. Lighter is Better

Have you ever hefted a generic bike from Wal-Mart or Target? They are HEAVY. Just think of your small child having to pedal that sucker up a hill. Its all work and no fun! The lighter the bike, the easier it is to ride, and the more fun your child will have! WOOM easily takes the prize for the lightest child’s bike I have ever lifted.

6. Great seat

This sounds petty, but when you want your child to stay on their bike for long periods of time, the seat just has to be comfortable. WOOM has done a great job with this, as the seat is comfy but not overly plush.

Woombike_07

In addition to the bikes, WOOM also sells accessories you can add on:

Water Bottle 

Definitely an essential for kids. Plus, its fun. Be warned that in order to install the water bottle holder onto at least the WOOM3, you have to remove the chain guard. This is not a big deal on a bike with no gears and the chain guard is useless anyway. It is just another USA law they have to comply with.

Gloves

They may not seem that important at first, but after watching Cara ride 5 miles on her strider bike and end with her hands all torn up and red they became essential. Longer distances = more stress on hands, and having your child wear gloves is an easy fix. WOOM’s gloves are great. They are full fingered, but have air vents up the sides of each finger so their little hands don’t get too hot. Plus, they are super cute and Cara loves the ice cream cones!

Woombike_24

**We had JUST bought Cara a pair of gloves before the bike arrived (wasn’t aware they were sending us gloves to review as well!!) so that’s what the pink ones are. She loves them equally and will wear them interchangeably depending on her mood.

In Conclusion

We absolutely love the WOOM3! Cara loves riding her bike, and for a family of people on bikes that is really important to us. Since our very first riding session on this bike (pictured here) we have had the bike out many more times in the weeks to follow, and Cara continues to grow in her strength and confidence. After the review period, we have the option to buy the review bike (with a discount) and we will be doing so. I only wish WOOM had been created a few years earlier,so we could’ve started our older kids on them!

Woombike_13


For those of you that are more visual here is our YouTube review of the WOOM3:

Categories
Solar & Power

Solar Power Upgrade Part 4 – The Wire Panel

With the solar mounted on top (part 1, part 2) and the wires run to the forward compartment (part 3), there was only one thing left to do. The next step in my project was to connect it all up!

Underneath Cara’s bed is the wiring panel where the battery is connected to the rest of the DC wiring. This is a prime location for the solar charge controller because of it’s proximity to the batteries. Later, I’ll install the inverter nearby for the same proximal reason. The existing wiring in this location was a positive bus bar, a negative bus bar, the ‘store’ mode disconnect relay, and a positive DC breakout box.

IMG_20150223_075750_labels

Also found in this location was the ends of the solar pre-wire placed by Airstream. I knew they were there, but the wire gauge was so small that I had to replace it anyway.

As I was adding plenty of components, I had to do a little rearranging of the existing components. They were just screwed into the plywood panel, and I was able to re-arrange them without too much difficulty.

IMG_20150223_144008_labels

In principle, the solar panels are wired to the solar charge controller, and the solar charge controller is wired to the positive and negative bus bars. In practice, there are a few additional details.

The first component I installed was the isolator switch on the positive wire leading from the solar panels. By switching this off, I was able to protect myself (and the equipment) from an accidental short during the rest of my wiring project. (A ‘short’ is when you accidentally connect two wires that are not meant to be connected. Ever accidentally touch the clamps of a jump start cable together? That is a short.) After installing the isolator switch, I left it off for the rest of my install.

I next wired up the solar charge controller. A short run from the just installed isolator switch on the positive side, and the negative side of the cable from the rooftop panels. The next step involved connecting the ‘out’ side of the controller to the existing DC system. The positive side of this connection is run through a switchable 30 amp DC breaker. This switch automatically flips off if the solar charge controller attempts to output more than 30 amps. With a maximum output of approximately 24 amps, I suspect this will never trip. It DOES serve as additional protection, and also as an extra isolator switch should I manually switch it off. The positive side is then wired to the positive bus bar.

The negative side of the charge controller ‘out’ connection can be wired directly to the DC bus bar, but I cheated slightly and attached it to our last new component: The battery monitoring shunt. This magical component can measure the flow of electricity from one side to the other. This enables both a real-time view of charge/drain activity on the battery, as well as keeping track of how many ‘amps’ or amp-hours are left in your battery. This measure is unaffected by load (like voltage) and gives a great indicator of battery charge state at a glance.

The monitoring shunt is installed between the negative terminal of the battery and the rest of the negative half of the DC system. I moved the negative battery cable from the DC bus bar and connected it to one side of the shunt, and added a new cable between the other side and the DC bus bar. Now, every use of DC power can be monitored. More on that later.

I connected the negative side of the charge controller DC ‘out’ to the shunt as well, on the non-battery side. (ONLY the battery should be connected on that side of the shunt. EVERYTHING else is connected on the other side.)

At this point, everything ‘major’ is in place. In part 3 of this series, I mentioned running remote cables from the kitchen cabinet down to the electrical panel and along the same run as the solar wire. At this point, I attached these remote wires to their various components. The IPN Pro Remote cable attached to the solar charge controller. The shunt monitoring cable attached to the shunt with little screw mounts.

The last step I’ll describe was really the hardest step of this last phase. The solar charge controller has a remote temperature sensor that allows it to adjust it’s charging based on the temperature of the battery. This cable attaches to a battery terminal in the battery box, and to the solar charge controller inside the Airstream. The existing battery cables are run through a heavily caulked hole in the floor. By poking carefully with a phillips screwdriver, I was able to poke a hole through the middle of the bundle without damaging any existing wire. After attaching it to the battery and threading it out of the battery box, I ran it alongside the battery wires, and protected it with some plastic wire wrap. I shoved it through the hole I poked, and then squooze a bunch of silicon sealant around the wire from the top and the bottom. The sensor attached easily to the charge controller, and then I attached the cover.

IMG_20150223_132519
The weak-sauce wires prewired for solar, my screwdriver hole making method for the temperature sensor, and how it all looked with the protective panel reinstalled.

At this point, everything was installed. I only needed a short length of wire and a few wire terminals from the store, and everything else was provided in the installation kit from AM Solar. Between their instructions and the inspection of Dave Zimmerman’s wiring, I was able to work out all the details and complete the self install.

The only thing left to do was to flip the system on. I started with the solar isolator switch, but nothing lit up upon flipping that on. Next was the 30 Amp breaker, and that did the trick. Things started blinking, the power in the Airstream worked again, and I immediately started my addictive ‘check the solar monitor’ habit.

10919134_454446811386230_1784970774_n

Really, I’m surprised that everything worked out as well as it did. I re-attached the plywood panel that covers the wiring, and the project was complete. Really, I had a few random things to do, like zip-tie wires in various places, but it all feels better when the darn thing works!