Many times over the years Sam and I have had conversations about family identity. Out of everything we do and are, what actually defines us as “Currens”? When our kids get asked about their family, I want them to know exactly what we are and what we do. For me, family identity is right up there in importance with our own personal identity.
For us, I think our family identity is a pretty good blend of Sam, mine, and our kids interests and abilities. Sure you could argue that full time travel definitively defines us, but so do “geek” things, outdoor recreation, our faith in Jesus Christ, and playing games.
The crazy part, is that full time travel doesn’t seem to be enough of a “thing” for me. Nuts, right? We spend tons of time planning, managing, and exploring, but that’s just turned into “life”. What else do I want to define us? We definitely hike (a lot) and have started the kids on mountain biking, rock climbing, road riding, and we even want to get into backpacking this summer. Maybe we’ll be the crazy full time travel hiking family? Or the totally intense mountain biking Airstream people? Or maybe its just not really important?
What do you guys think of when you hear about the Currens? And does your family have a “thing” that helps define you?
In one of my church meetings this past Sunday (Elders Quorum, for Mormon readers), everyone in the room introduced themselves by name and answered a question to help us get to know everybody. Last Sunday in the same group, they asked everybody what their favorite meal was. This time, we all shared our favorite alternative sport. The answers were entertainingly varied, including ping-pong, lacrosse, and curling. The mention of curling prompted many heads nodding in approval, because Minnesota. One guy claimed Settlers of Catan as his favorite sport. Game night in his family must be quite an event. I wonder if it is considered full-contact?
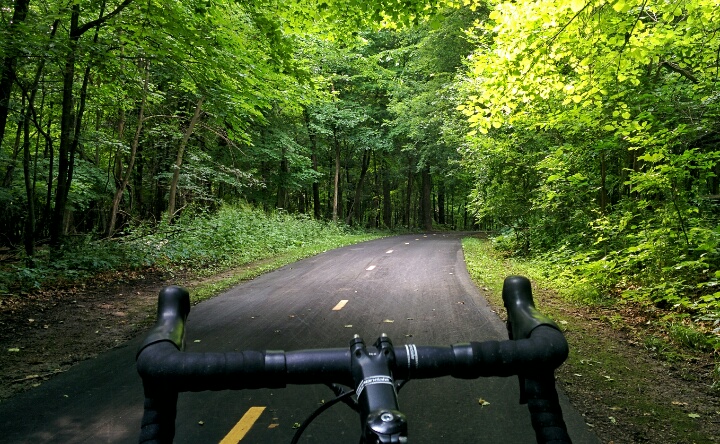
When my turn came, I claiming cycling as my favorite. I’ve ridden several centuries prior to full-time travel, so this was a reasonable answer. We do travel with bikes, and try to ride when we can. One of those opportunities came up today, and I rode a nice paved loop right off the state park we are staying in. I enjoyed my ride, but I began to rethink my answer given on Sunday.
I’ve decided that full-time travel is my favorite sport.
We regularly practice planning a route, finding places to stay, dodging ‘weekend warriors’, managing tanks, battery power and propane, and finding good signal, just to name a few. Sometimes luck and practice come together to place us in an amazing place. And sometimes we end up in a dumpy rv park. Really, I’m surprised at how many times things just work out, even when we are not on our A game.
Next time somebody asks me that question, I’m going to have a much better answer.
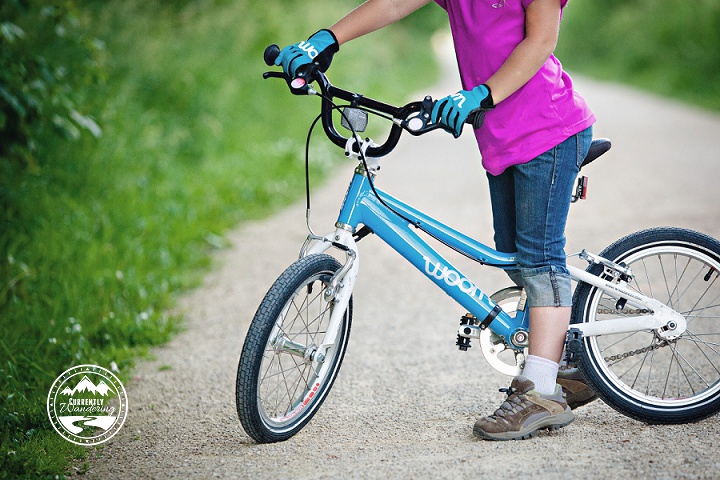
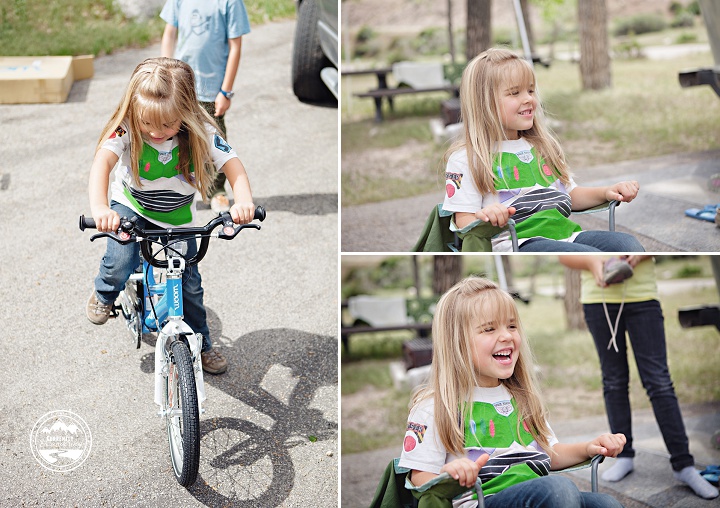
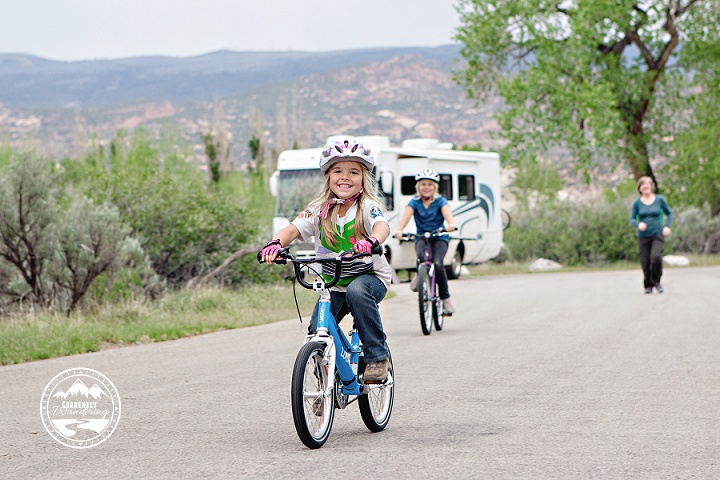
We knew Cara was in the market for a new bike, but we kept putting it off. With how much we ride bikes (including the crazy mountain biking she’s done on her strider- see our YouTube video here), we also knew that a cheap bike from Wal-Mart was just not going to cut it. Since we didn’t know what to do, we just did….nothing.
Then we found out about WOOM Bikes. These are seriously awesome. After learning about this company I knew we wanted one of their bikes for Cara, and after a short email conversation they were gracious enough to send us a WOOM3 bike for review.
Note: The company behind WOOM Bikes is German, so ‘woom’ is pronounced ‘voom.’ Makes sense, right?
The short story is that, as parents, we absolutely LOVE this bike. Cara loves it too and has totally taken off riding as we expected her too. Yes, they are pricey, but they also have a fantastic Upcycle program (if you don’t have younger children to pass the bike on to). With how much we ride and enjoy riding long distances having a great bike for our kids is super important.
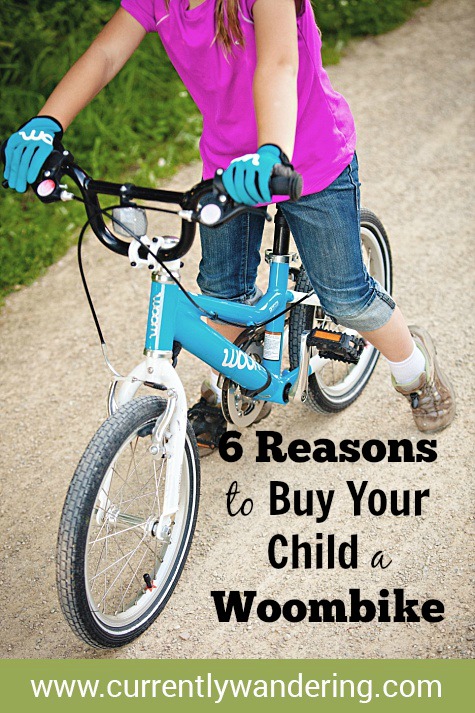
For the longer version, read on for our Our Top 6 Reasons WOOM Bikes Are the BEST:
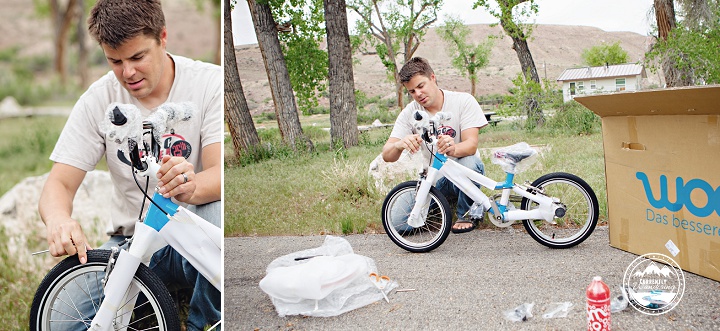
1. Ease of Assembly
I do have some experience adjusting and maintaining bikes, but none was necessary. The bike arrived packaged carefully, and nearly fully assembled. The included instructions were easy to follow, and there were only a few steps. Mostly, putting it together involves tightening screws with an allen wrench. No allen wrenches? No problem. Included in the package with the bike was the allen wrenches needed, along with a pedal wrench needed for attaching the pedals.
All in, it took only 30 to 45 minutes start to finish to assemble the bike and Cara was pretty excited when we pulled the bike out from behind the Airstream:
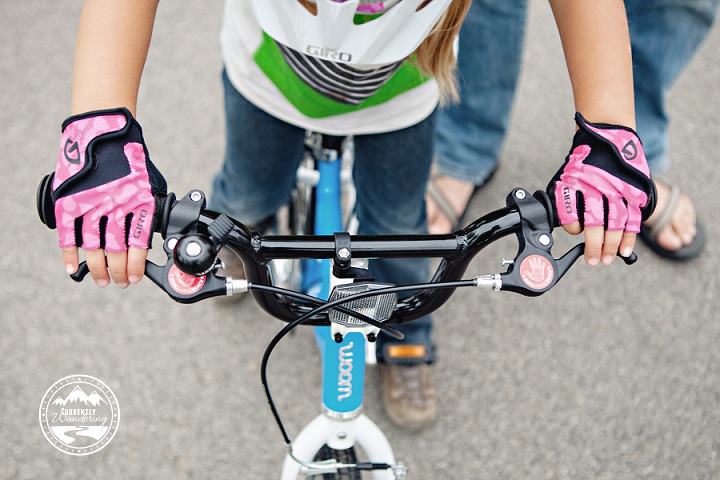
2. Handbrakes designed for small hands
Neither of us felt comfortable taking Cara mountain biking with just a pedal coaster brake. After talking to a generic bike shop about putting a handbrake on a kid’s bike, he mentioned that most kids’ hands are too small to reach and lack the pulling power to actually stop themselves with a handbrake. WOOM has totally solved this problem with brakes specifically designed for little hands. Cara has no problems using the handbrakes to come to a standstill even from pretty fast speeds.
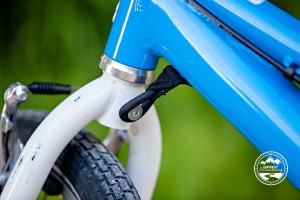
3. Steering dampener
There’s a small rubber ring that attaches the front wheel to a boss on the frame. This keeps the front wheel from turning all the way around, or a child from turning the wheel too far too fast and eating hard on the pavement. This might sound like a small thing, but really helps a child worry less and feel confidant learning to ride.
4. Freewheel design
USA laws are different in that we require a coaster brake for young kid bikes. This makes it incredibly difficult to get started on a bike because they can’t pedal backwards to line up the pedals for a good take off. Woom has figured a way to design the Woom so that it can have a freewheel and skip the whole coaster brake problem. It is awesome. We just had to make sure she could fully rely on the handbrakes, but since she hadn’t ever ridden a bike with any brakes, there were no bad habits to unlearn.
5. Lighter is Better
Have you ever hefted a generic bike from Wal-Mart or Target? They are HEAVY. Just think of your small child having to pedal that sucker up a hill. Its all work and no fun! The lighter the bike, the easier it is to ride, and the more fun your child will have! WOOM easily takes the prize for the lightest child’s bike I have ever lifted.
6. Great seat
This sounds petty, but when you want your child to stay on their bike for long periods of time, the seat just has to be comfortable. WOOM has done a great job with this, as the seat is comfy but not overly plush.
In addition to the bikes, WOOM also sells accessories you can add on:
Water Bottle
Definitely an essential for kids. Plus, its fun. Be warned that in order to install the water bottle holder onto at least the WOOM3, you have to remove the chain guard. This is not a big deal on a bike with no gears and the chain guard is useless anyway. It is just another USA law they have to comply with.
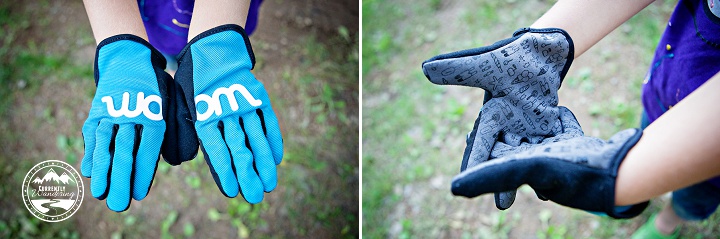
Gloves
They may not seem that important at first, but after watching Cara ride 5 miles on her strider bike and end with her hands all torn up and red they became essential. Longer distances = more stress on hands, and having your child wear gloves is an easy fix. WOOM’s gloves are great. They are full fingered, but have air vents up the sides of each finger so their little hands don’t get too hot. Plus, they are super cute and Cara loves the ice cream cones!
**We had JUST bought Cara a pair of gloves before the bike arrived (wasn’t aware they were sending us gloves to review as well!!) so that’s what the pink ones are. She loves them equally and will wear them interchangeably depending on her mood.
In Conclusion
We absolutely love the WOOM3! Cara loves riding her bike, and for a family of people on bikes that is really important to us. Since our very first riding session on this bike (pictured here) we have had the bike out many more times in the weeks to follow, and Cara continues to grow in her strength and confidence. After the review period, we have the option to buy the review bike (with a discount) and we will be doing so. I only wish WOOM had been created a few years earlier,so we could’ve started our older kids on them!
For those of you that are more visual here is our YouTube review of the WOOM3:
Tacos are a super easy staple in any kitchen, and when you don’t have a lot of room “easy” is pretty awesome.
I recently found a recipe that I LOVE that doesn’t use any store bought taco seasoning, so I know what’s it in and its all healthy. Plus, we’ve found we like ground turkey just as much as ground beef and A) its healthier and B) usually cheaper.
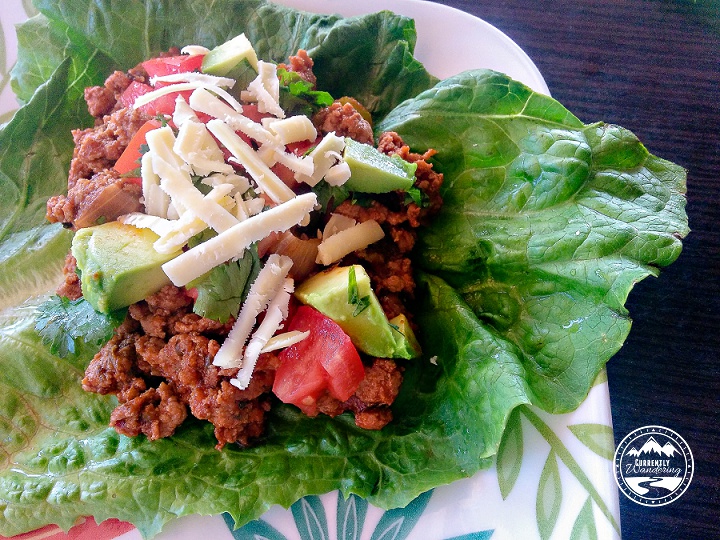
If I’ve already eaten my daily amount of carbs for the day (its pretty low), I’ll use a piece of romaine lettuce and make a wrap while everyone else has corn tortillas. Not a lot of extra prep and it tastes amazing.
Turkey Lettuce Wraps (works great with chicken too) serves: 6 wraps – (or enough for our family of 5) 21 Day Fix Breakdown: 1 wrap each is 1G, 1R, 1/2B
Ingredients
1 1/2 lbs raw 93% lean ground turkey
1 tsp garlic powder
1 tsp cumin
3/4 tsp sea salt
1 tsp chili powder
1 tsp paprika
1/2 tsp oregano
1/2 medium green bell pepper, finely chopped
1/2 medium onion, finely chopped
3/4 cup water
3/4 cup no salt tomato sauce (4 oz)
6 large romaine
lettuce leaves
1 medium tomato, chopped
1 cup fresh cilantro
avocado & cheese (optional)
Instructions:
Cook turkey (using a little bit of olive oil if needed). Add seasonings and stir to combine. Add onion and bell pepper and saute until onion is translucent.
Add the water and tomato sauce and bring to a boil
Reduce heat and simmer, covered, for 10-12 minutes.
Top each lettuce leave evenly with turkey mixture, tomato and cilantro.
Enjoy!
With the solar mounted on top (part 1, part 2) and the wires run to the forward compartment (part 3), there was only one thing left to do. The next step in my project was to connect it all up!
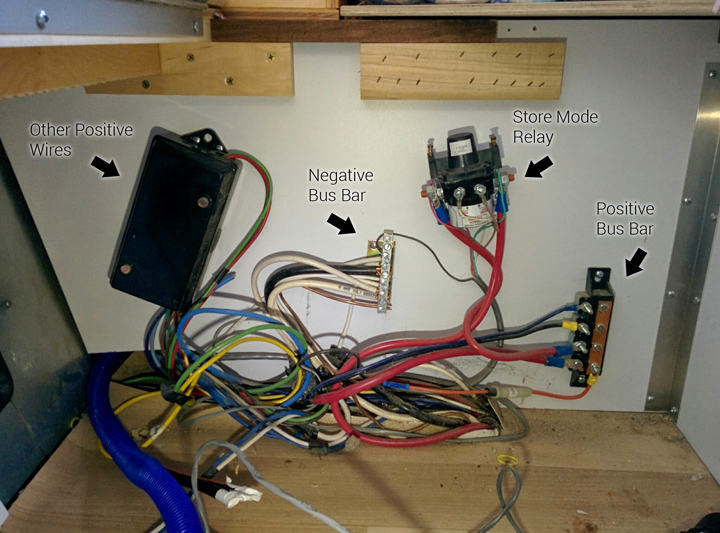
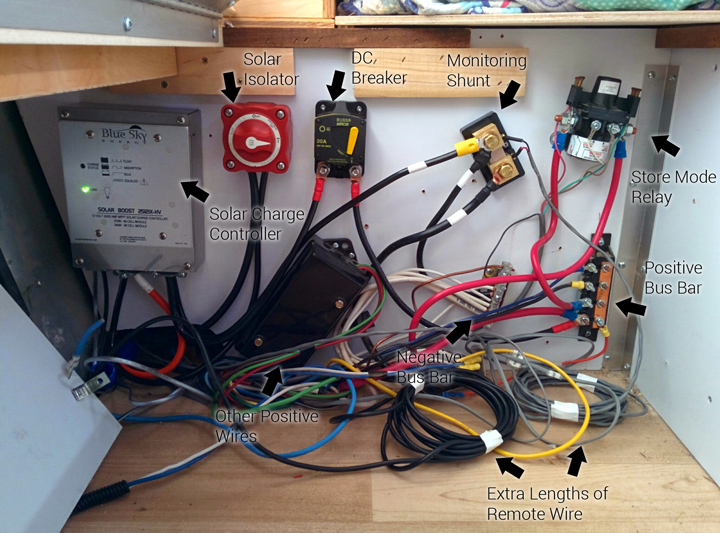
Underneath Cara’s bed is the wiring panel where the battery is connected to the rest of the DC wiring. This is a prime location for the solar charge controller because of it’s proximity to the batteries. Later, I’ll install the inverter nearby for the same proximal reason. The existing wiring in this location was a positive bus bar, a negative bus bar, the ‘store’ mode disconnect relay, and a positive DC breakout box.
Also found in this location was the ends of the solar pre-wire placed by Airstream. I knew they were there, but the wire gauge was so small that I had to replace it anyway.
As I was adding plenty of components, I had to do a little rearranging of the existing components. They were just screwed into the plywood panel, and I was able to re-arrange them without too much difficulty.
In principle, the solar panels are wired to the solar charge controller, and the solar charge controller is wired to the positive and negative bus bars. In practice, there are a few additional details.
The first component I installed was the isolator switch on the positive wire leading from the solar panels. By switching this off, I was able to protect myself (and the equipment) from an accidental short during the rest of my wiring project. (A ‘short’ is when you accidentally connect two wires that are not meant to be connected. Ever accidentally touch the clamps of a jump start cable together? That is a short.) After installing the isolator switch, I left it off for the rest of my install.
I next wired up the solar charge controller. A short run from the just installed isolator switch on the positive side, and the negative side of the cable from the rooftop panels. The next step involved connecting the ‘out’ side of the controller to the existing DC system. The positive side of this connection is run through a switchable 30 amp DC breaker. This switch automatically flips off if the solar charge controller attempts to output more than 30 amps. With a maximum output of approximately 24 amps, I suspect this will never trip. It DOES serve as additional protection, and also as an extra isolator switch should I manually switch it off. The positive side is then wired to the positive bus bar.
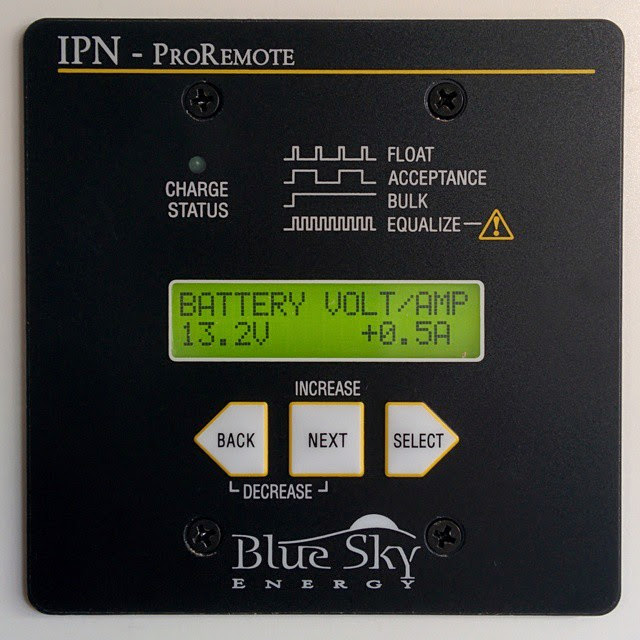
The negative side of the charge controller ‘out’ connection can be wired directly to the DC bus bar, but I cheated slightly and attached it to our last new component: The battery monitoring shunt. This magical component can measure the flow of electricity from one side to the other. This enables both a real-time view of charge/drain activity on the battery, as well as keeping track of how many ‘amps’ or amp-hours are left in your battery. This measure is unaffected by load (like voltage) and gives a great indicator of battery charge state at a glance.
The monitoring shunt is installed between the negative terminal of the battery and the rest of the negative half of the DC system. I moved the negative battery cable from the DC bus bar and connected it to one side of the shunt, and added a new cable between the other side and the DC bus bar. Now, every use of DC power can be monitored. More on that later.
I connected the negative side of the charge controller DC ‘out’ to the shunt as well, on the non-battery side. (ONLY the battery should be connected on that side of the shunt. EVERYTHING else is connected on the other side.)
At this point, everything ‘major’ is in place. In part 3 of this series, I mentioned running remote cables from the kitchen cabinet down to the electrical panel and along the same run as the solar wire. At this point, I attached these remote wires to their various components. The IPN Pro Remote cable attached to the solar charge controller. The shunt monitoring cable attached to the shunt with little screw mounts.
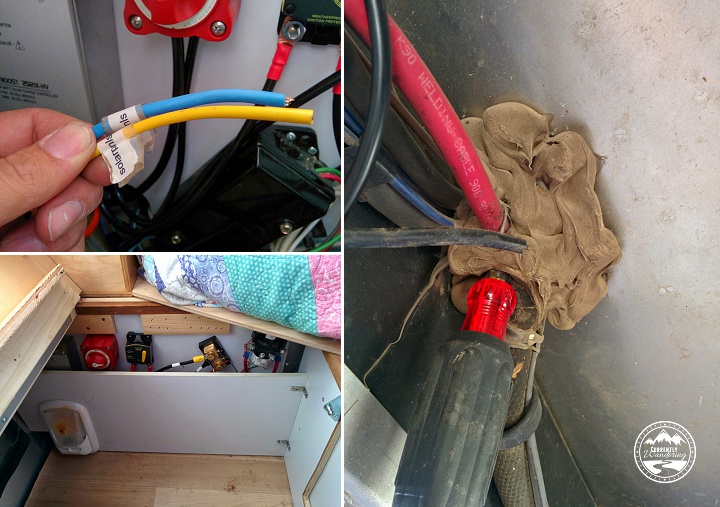
The last step I’ll describe was really the hardest step of this last phase. The solar charge controller has a remote temperature sensor that allows it to adjust it’s charging based on the temperature of the battery. This cable attaches to a battery terminal in the battery box, and to the solar charge controller inside the Airstream. The existing battery cables are run through a heavily caulked hole in the floor. By poking carefully with a phillips screwdriver, I was able to poke a hole through the middle of the bundle without damaging any existing wire. After attaching it to the battery and threading it out of the battery box, I ran it alongside the battery wires, and protected it with some plastic wire wrap. I shoved it through the hole I poked, and then squooze a bunch of silicon sealant around the wire from the top and the bottom. The sensor attached easily to the charge controller, and then I attached the cover.
The weak-sauce wires prewired for solar, my screwdriver hole making method for the temperature sensor, and how it all looked with the protective panel reinstalled.
At this point, everything was installed. I only needed a short length of wire and a few wire terminals from the store, and everything else was provided in the installation kit from AM Solar. Between their instructions and the inspection of Dave Zimmerman’s wiring, I was able to work out all the details and complete the self install.
The only thing left to do was to flip the system on. I started with the solar isolator switch, but nothing lit up upon flipping that on. Next was the 30 Amp breaker, and that did the trick. Things started blinking, the power in the Airstream worked again, and I immediately started my addictive ‘check the solar monitor’ habit.
Really, I’m surprised that everything worked out as well as it did. I re-attached the plywood panel that covers the wiring, and the project was complete. Really, I had a few random things to do, like zip-tie wires in various places, but it all feels better when the darn thing works!