Categories
Solar & Power

Power Upgrade: My Plan for Self-installing Solar

IMG_2362-Edit copyAfter evaluating our needs, and figuring out what I don’t know about installing solar, we sought for recommendations for a professional installer. We began conversations that started good, and gradually got worse and worse. This happened while I was camping just next door to Dave Zimmerman in the middle of the Mojave Desert. Dave happens to have nearly the exact setup I was considering, so took a peek under his couch to study the wiring a bit.

After a bit of reading and conversation, I’ve determined to try and install this all myself. It will save some cash, allow us to control our own schedule, and I can be sure it is done in a way that I’m pleased with. I’ve mailed the panels to a willing friend in Arizona, and we’ll do the install at his house. The install seems to fit in 3 distinct phases, with the ability to ‘pause’ in between each.

Phase 1: Rooftop work

In this phase, I’ll attempt to do all the roof-top work. I’m going to mount the panels using the crazy sticky 3M tape that AM Solar ships with the kits. After mounting, I’ll use some lap sealant around the mounting point to protect the adhesive from the elements. I’m installing 3 135 watt panels, one in each corner of the Airstream, skipping the corner with all the antennas.

I’m going to use a fridge vent combiner box, and run the wires down behind the fridge and into the under closet space. Each panel will need to be wired to the combiner box, and there is some wire work on each panel as well that involves crimping and some heat-shrink tubing. I’ll need to pull the fridge to run the wire down from the fridge vent, but I’ve done that twice before, and the last time I didn’t even empty it!

At the end of this phase, I’ll have panels on the roof, and wire down inside the house. Taking care to keep the end of the wire wrapped and insulated, I can pause here, leaving the coil of water under the wardrobe.

Phase 2: Wire run

Nearly all of the wiring needs to be joined together at the front of the Airstream, as close to the batteries as possible. The main wiring panel is under Cara’s bed, so I’ll need to get the wire from the panels run forward to that space. From under the wardrobe, I’ll use an existing wire chase that runs under the floor to thread the wire across the hall and up behind the wiring panel. I’ll then run the wire past the hot water heater, behind the bathroom lower cupboards, along the wall underneath one of the front kids beds, and into the wiring space.

In addition to the wire from the panels, I’ll need to add the remote wires that connect to the BlueSky control panel. I’m mounting this in the kitchen cabinet, located conveniently above the wiring panel. I’ll cut a hole in the cabinet, and run the two control wires down to the floor to join the wire bundle before it heads back past the hot water heater. There are two small wires to run: one is the control wire from the solar charge controller, and the other is the sensor wire from the battery monitoring shunt that will allow accurate measurement of battery use and charging. I’ll install the controller into that hole as well, though it won’t be connected to anything till the next phase.

While I’m doing this run, I’m going to run a length of romex AC wiring cable from behind the electrical panel to the forward space as well. While I’m not going to use this wire now, it will come in handy if I add an inverter and wire it to the house outlets.

That bundle will be secured and wrapped when exposed to protect it during it’s run. At the end of this phase, I can leave the still carefully isolated wires wrapped underneath the forward bed.

Phase 3: Wire it up!

This is the most interesting phase of it all, as it contains the most unknown issues. I’ll need to rewire the house wiring in a few specific ways to connect the solar and monitors.

First, I’ll need to re-arrange all the electric pieces placed by Airstream. This will allow some more room for the additional components I’ll be installing. I’ll mount the BlueSky charge controller in the newly available space. The solar wires will be wired first to a cutoff switch, and then to the charge controller. I’ll connect one remote cable from the control panel there as well, and add the battery temperature monitor cable as well.

I’ll be rewiring the house wiring so that the negative battery connection is run through the monitoring shunt. I’m going to attempt to do a clean, full install there, including rewiring the electric jack behind the shunt as well. This will allow for a full system monitor to capture and understand ALL of my power use and charging activity. This job might be the most time consuming, as there are lots of wires to adjust and reroute. The final bundle will need to be re-protected on it’s route from the battery box into the wiring panel. That shunt will be connected to the monitoring cable that was placed in phase 2.

The difficulty of this task is aided some by the wiring diagrams that I’ll receive with my solar kit from AM Solar. I’ve seen the diagrams already, and they are clear and easy to follow. If this part of the installation goes south, I’ll locate an automotive electrician to help me clean it up and get it working properly.

Am I crazy?

Possibly, but I’ll learn plenty during the process, and I’ll surely end up with some interesting stories to tell. I’m planning to do one phase each day, with some (paid) work in between. I’ll need to do almost everything during the day, so the kids have a place to sleep at night. If needed, I can pause for a few days between phases to normalize and take care of stuff.

Categories
Airstream Accessories Solar & Power

Power Upgrade: Drop-in Multi-stage Converter Upgrade for the Airstream

IMG_20150128_113838
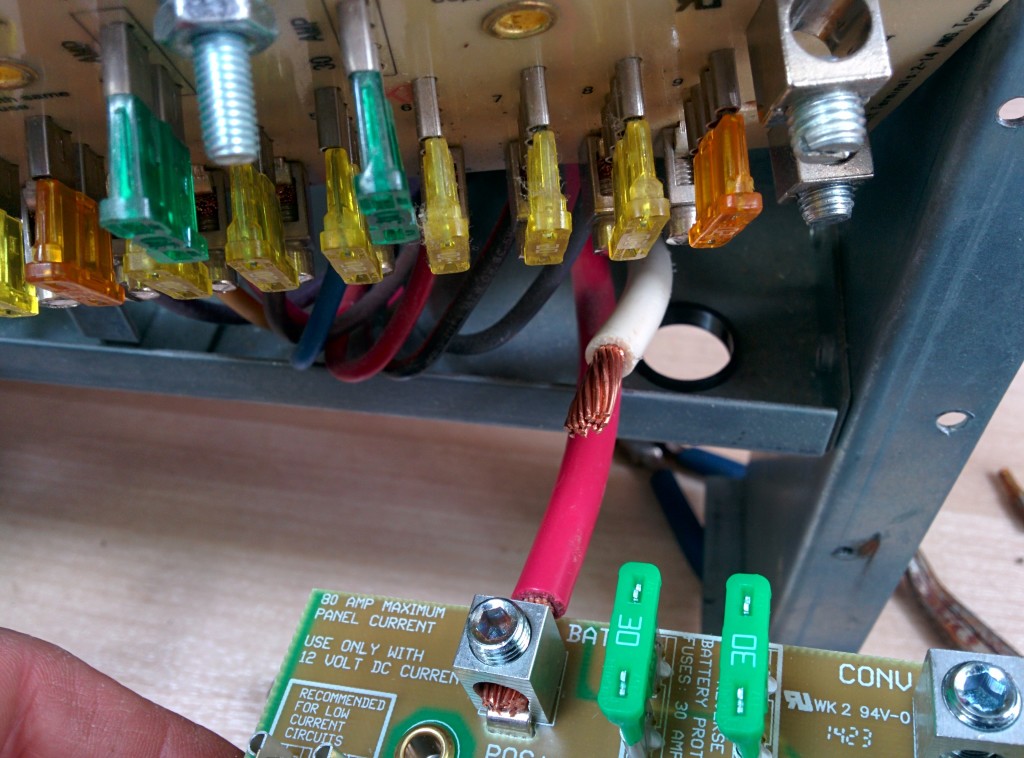
For some insane reason, our Airstream came from the factory with a single-stage charger. When connected to shore power (or a generator), the converter provides both 12V DC power to the Airstream, and also charges the house batteries. As a single-stage converter, it has only one mode: charge.

This single charge mode is neither fast nor smart. It takes a few days to charge the house batteries fully, and then will continue applying the charge, causing the flooded cells to boil and the electrolyte liquid to evaporate.

A bit over a year ago, I had replaced our two Group 24 flooded batteries, and in the following year, our lovely single-stage converter had boiled enough liquid out of the batteries to cause a significant decrease in capacity. I set out to resolve the issue, first with a new set of batteries, and then a converter upgrade.

Our Airstream came with a Parallax 7355 power center. The unit has both a converter in the lower section, and AC and DC distribution panels in the upper section. I found a new converter designed to be a drop-in upgrade to the converter portion of the power center. The Progressive Dynamics 55 amp (PD4655V) unit was the right drop in replacement. I found it first over at bestconverter.com, but I couldn’t get them on the phone to ask about shipping time. I ended up ordering the unit from Amazon (Prime Shipable!) and had it shipped to Heather and Jeff (AudreyAirstream) who lived nearby. (Thanks again!)

Installation

I didn’t install the unit till we were in Death Valley, where I pulled out my tools to do the drop in replacement. In hindsight, this was a bad plan. If anything went pear-shaped, the nearest hardware store was quite a drive. Nothing bad happened during the install, and it worked fine.

The back side of the power panel, with screws to loosen to allow slack in the wires.

I used only a screwdriver (with a few assorted tips) and a pair of pliers for the install. The instructions included with the new converter were pretty clear. I removed the old converter, and then moved all the wires from the old DC distribution board to the new DC distribution board. This was the most difficult part, because the old board had the connections on the bottom of the front panel, and the new board had the connections on the top of the distribution panel. Wrangling the huge-gauge wire was a little hard, but manageable.

The only thing I did different from the instructions was pull out the whole power center unit (only a couple of screws) so that I could loosen the clamp around the wires to the battery. With loose wires, I could manipulate them into their new routing path around the top of the board. Getting the new distribution board screwed back into place took some finagling, as I needed to get the wires positioned just right, and the large-gauge wire was difficult to bend.

Done

After finishing the wire connections, I reconnected the battery and started up the generator. It worked! The new converter board has a LED light on it which indicates it’s status. Constant means bulk charging mode, fast blink means trickle charge (last 90%), and a slow blink means float mode.

It is worth noting that the LED is on all the time, even if no AC is connected and no charging is occurring. For the past few weeks, the light has operated as my poor-man’s battery monitor, at least in the higher stages of charging.

So that’s all there is to it! For only $200ish, I have can reduce my generator time and avoid cooking my batteries.

Categories
Arizona Nevada

Hoover Dam & the Cranky Security Guard

Hoover Dam and the Cranky Security Guard

We are huge Percy Jackson fans, and ever since reading The Titan’s Curse (where Percy & Annabeth end up in the bowels of the dam being chased by monsters) the kids have been anxious to visit Hoover Dam.

After returning to our Airstream in Las Vegas from Christmas break, we planned a solid two weeks of exploring the area, with Lake Mead & Hoover Dam near the top of the list.

When We Visited: January 26, 2015
Ages of Kids: 9, 7, 4
Where We Stayed: Boulder Beach Campground, Lake Mead National Recreation Area

We learned from the Lake Mead visitor center, that we could ride the Historic Rail Trail from the visitor center parking lot all the way to Hoover Dam. With a roundtrip distance of only 6 miles we figured we’d get some exercise, learn a little history, and avoid paying the $10 parking fee.

Genius.

Hoover Dam_04

Hoover Dam_06

The bike ride itself went great! The trail is a mix of gravel and dirt so not the easiest to ride on, but our kids are veterans. The path was fairly flat, with only a large downhill section near the end. The only thought I had (which Rachel also voiced as well) was that we were going to have to climb back UP this on the way out. Awesome. Something to look forward to. We also switched the Ride-aLong to the mountain bike instead of the cyclo-cross as it has more traction and there was less possibility of us totally eating dirt.

Along the path we ran into the Hoover Dam “graveyard” of old parts, as well as one of the power relay stations. I suppose all that hydroelectric power has to get out somehow, right?

Hoover Dam_09

Hoover Dam_08

We made it to the Hoover Dam property boundary where, conveniently, a bike rack was located for us to lock up before heading in for our tour. We took this as a sign that quite a few people actually ride their bikes in to tour the dam and we were doing something fairly common. Turns out that’s not really the case. Notice in the photos, we ALL have backpacks.

Hoover Dam_10

As it was lunch time we grabbed an outdoor table and set about munching down our tuna, crackers, hummus, and veggies while looking at the surroundings. One of the first things we noticed were bright yellow signs advising that large bags (and there was a black square photo to demonstrate the size which was not very large) were not permitted. Uhhh… we had 5 such bags. What were we going to do with those? We decided to just head in anyway and see what the deal was.  The signs also said “no food allowed” which we thought meant, “no open food” or “no eating” on the tour. No problem. We’ll just keep it all packed up as all we had left after lunch were sealed up snacks for the ride home.

We followed the “tours this way” signs and headed down of set of escalators to the main building. As we walked inside we instantly noticed the TSA-like bank of metal detectors and x-ray machines. Okay, no big deal. We start to load up the gray trays when a super helpful lady looks at us, and says “There’s no food allowed inside.”

“It’s all sealed,” Sam replies.
“Sorry, you can’t take it in with you.” She gives us a sympathetic look but doesn’t back down. “You could send your bags through the scanner just to see what’s in it,” she suggested.
“We know what’s in it. Wow, you guys don’t make this easy on families, do you?” Sam mutters half under his breath. I don’t think his remark was said belligerently, but suddenly the young, male security guard at the other end of the machine looks up at us, and says, “What did you say?”
“Just that you don’t make this very easy on families who bike in, that’s all,” said Sam.
“We don’t make the rules,” he responds getting testier by the second.

Then I swear this guy went nuts on us. Everything we said, or tried to say just made him more angry. Sam and I started talking quietly about a plan to stash all the food in one bag and take it back by the bikes. The security guy told us that if we left a bag somewhere it would be considered “abandoned” and we couldn’t do that because it was illegal.

Say, what? How is leaving a bag locked up by our bikes suddenly abandoned? Is that different than leaving it in the car?

At one point I looked at him and said, “You need to stop talking to us,” to which he replied that we needed to leave “right now.” Ummm… no. Not going to happen.

Sam and I are still quietly talking, while a bit of a line starts building up behind us, and the original, generally nice female security guard is looking a little embarrassed. We let people go in front of us while we continue packing all of the food into one of our smaller bags, leaving the kids some water, binoculars, and other randomness in theirs, while I still have my camera bag.

“If you come back without that bag, I’ll know you left it somewhere and I won’t let you in.” He was still watching us.

We wouldn’t tell him where our bikes were parked (I seriously had visions of him calling a squad to search the area and confiscate all our bikes), and after we got everything put in one bag, Sam waited while I took the kids through the metal detector and the scanner.

We also had to pull out our First Aid Kit (it had scissors in it) and a pocketknife the x-ray machine picked up. I seriously just tossed them back to Sam and he put them in the bag we were leaving behind anyway, even though the grumpy guard said he just had to see the scissors and then we could take them in since it was a First Aid Kit. Now he was trying to be helpful?

Once we were through we had to sit on a bench and wait for the rest of our “party”. The kids and I talked quietly, and I was so mad I warned them that if they wouldn’t let dad back in we would demand a refund and we’d leave. They weren’t too happy about it, but understood.

Luckily, it didn’t come to that. Whether he decided to take a break, or was forced to, the security guard wasn’t on duty when Sam returned for his trip through the metal detector.

Hallelujah.

Hoover Dam_11

Despite our less-than-ideal experience entering the tour, we somehow managed to time things just right to get a private tour of the power plant. As we passed groups of 40 or more people inside the building, we were a little shocked we got that lucky. Our tour guide, Rebekah, was fantastic. She was patient with the kids, answered questions, asked questions, and generally was just laid back and easy going. It was perfect.

Hoover Dam_12

After our 30 minute tour, we headed outside to walk on the dam (which you can do for free). It’s pretty crazy how tall it is!

Hoover Dam_19

Hoover Dam_21

Half the dam is on the Arizona side, and half on Nevada so they have a clock on both sides to show the local time. My kids loved crossing the line and suddenly being and hour different, and then turning around and walking right back to Pacific Time. It’s the little things.

Hoover Dam_27

We didn’t stay too long because we knew we still had to ride back. It was a little tiring, but our kids pulled through and managed to make it all the way back to the truck. The view of Lake Meade from the trail was just amazing, especially as it was getting close to sunset. To top off the ride, Sam drove the car down the hill to the campground while the kids and I coasted (Faster Mommy! Faster!) down the paved trail between the trail head and the campground.

Hoover Dam_30

Hoover Dam_31

Although it was a very long day we had a great time. Even with our bad security experience, we enjoyed the tour and the experience of seeing such a great piece of architecture! We’d just recommend driving in, or planning ahead in advance what you bring with you!

Categories
Tow Vehicle

Take Your Garage With You – Retrax One Truck Bed Cover

IMG_20150213_102942
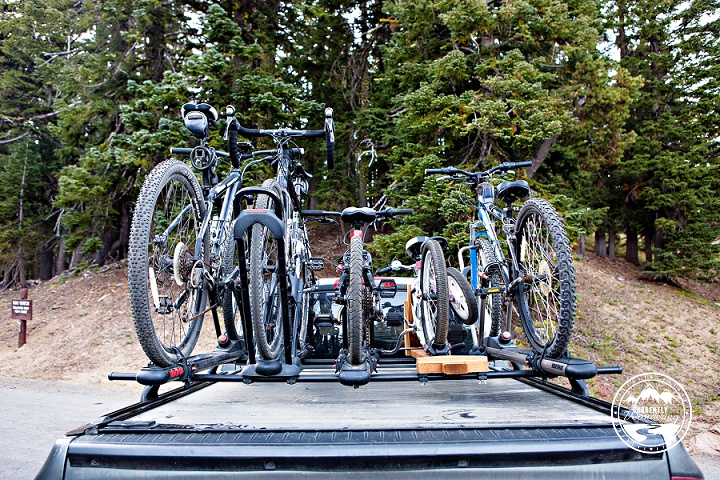
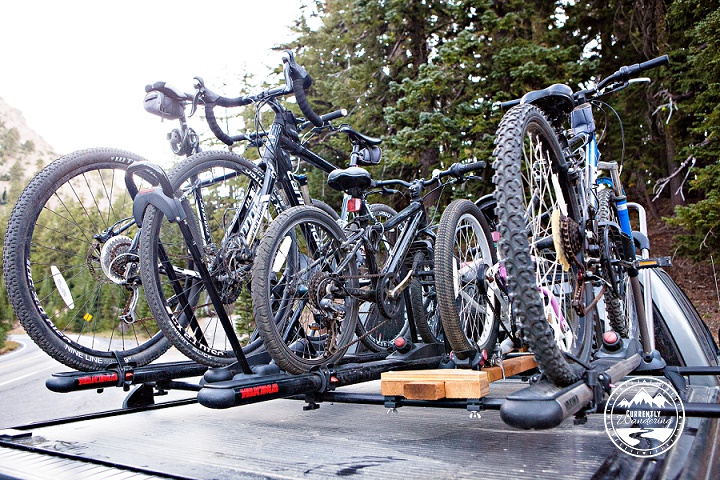
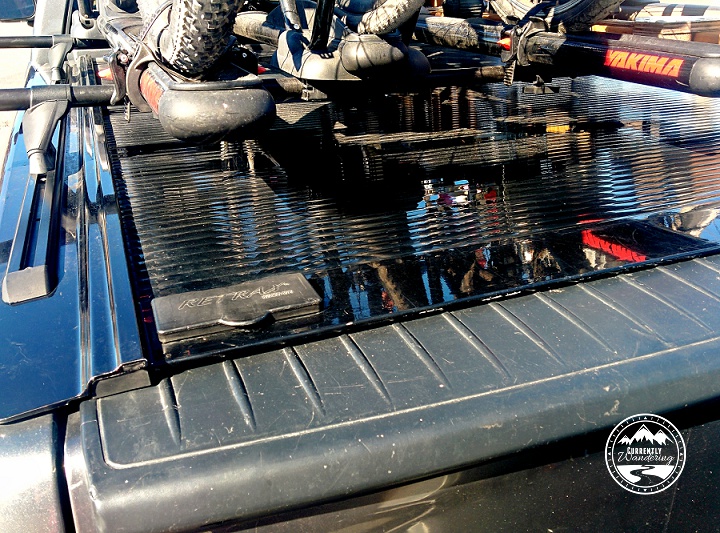
After purchasing our truck, I began searching for a great way to keep items in the bed of the truck secure and out of the weather. The market is full of various truck bed covers, which turn out to be called Tonneau Covers.

They mostly fall into the categories of roll-up vinyl, hard top, folding, and roll-up. Vinyl, often secured with velcro around the edges, is the cheapest option. Hard top has the best weather protection and folding has the most durability, but I chose a roll-up cover because it would fit and operate with a low profile.

The cover locks in any position, and rolls up easily into a canister at the front of the bed. It blocks water about as well as any of the non-hardtop truck bed covers. I was able to mount Yakima tracks on the edges of the bed cover, providing us a way to mount and carry our bikes and tow our Airstream at the same time.

I usually do hardware installs myself, but I had this done for me by the folk at American Truck and Trailer Supply in Manassas, VA.

In addition to the enhanced storage area, I immediately noticed the increased gas mileage. I have not done a fully scientific test, but it appears that the addition of the bed cover increased my fuel efficiency by 10 to 15 percent. Even if you are not going to be traveling full-time, you would easily recover the cost of a cheaper bed cover in the cost of gas alone.

In addition to the cover, we also added a lock to our tailgate to keep everything secure- see that post here.

If you want to see how we load the back of the truck and what we put in it – check our YouTube video here.

Over a year later, we are still happy with our Retrax One Truck Bed Cover and would choose this one again if for some reason we needed a replacement!

Categories
Biking Outdoor Gear Tow Vehicle

Gear Review: Bike Racks for 5 on a Dodge Ram 1500

IMG_9620-Edit

We started this journey over a year ago with our bikes on a rack attached to the back of our mini van. Biking is one of our favorite family activities and we knew they would be important to have with in the Airstream as well, but that required a significant re-arrangement of our current system.

For starters, we sold the mini van and bought a truck.

Sam wrestled long and hard with the dilemma of where to put the bikes. We went back and forth on a few different systems, and there were some key deciding factors. We knew that we would want a cover over the bed of our truck and that would have an impact on which rack system we used. We also knew we’d be upgrading and changing bikes as the kids got older, so the system needed to be flexible. Lastly, we didn’t have crazy amounts of money to sink into this since we had just bought the Airstream and truck. Anything we could put off until later would be great.

Many of our Airstream friends have the Airstream Carry-Bikes by Fiamma, which is a great option for them. Designed specifically for the Airstream, it mounts to the aluminium bumper and can hold two bikes. Our problem would then be, where do we put the other 3? Plus, our bikes for the kids are not full sized and would most likely not fit in a rack like this one. The other down side is that we specifically picked our model of Airstream for the rear panorama windows and didn’t exactly want bikes blocking the view.

We loved our Yakima system on the mini van, but we sold our previous Yakima system with the vehicle since the bars and towers wouldn’t work on the truck anyway. That left us starting from scratch.

Eventually we decided to add the Yakima rails to our Tonneau cover, even if it wasn’t the cheapest option availabe.  We bought a set of Yakima 60 inch tracks from Amazon and took them to the guys over at American Truck and Trailer Supply in Manassas, VA and had them install the tracks along with the truck cover.

Once the tracks were in, we could add the towers & bars. For our Dodge Ram 1500 specifically we bought:

2 sets of Yakima Landing Pads
Yakima Control Tower Roof Rack Tower (set of 4)
2 – 78″ Yakima Roof Rack Round Crossbars

Landing pads go in the tracks, Towers go in the landing pads and crossbars go through the towers. Its a great set up, and has worked pretty flawlessly over the last year.

Once the infrastructure was in place, we just needed the racks for the bikes. We already owned two Yakima Boa Fork Mounts, so to keep costs down, we decided to start with two of those for the biggest bikes. We found a Yakima High Roller Rooftop Bike Rack on Craigslist for Rachel’s bike, and Andrew’s bike, the boot scoot, and the Co-pilot were all piled in the older model Yakima Basket case we had brought out with us from Utah.

This set up worked great for 6 momths until we got back to Utah in the spring of 2014 and upgraded Andrew to a larger bike. We also wanted to reclaim the truck bed space taken up by our bike tires due to the fork mount of the Boa racks, so we upgraded all of the racks to the High Rollers, and Sam built a wooden rack for Cara’s new Ride-aLong bike we had purchased while in San Diego last February. We strap Cara’s boot scoot to the Ride aLong with some bungee cords and it rides just fine.

So far, so good! We’ll have to do some more rework when Cara graduates to a regular bike (or one with training wheels), but we are putting that off as long as possible!

IMG_9621-Edit